2 - Update tool in Neurodesk
Step-by-step instructions on how to update an existing neurodesk tool container.
Updating an existing container is quite easy with this new build system.
Here is a step-by-step on how to procede by modifying the .yaml file. It is also possible to edit the containers by using our web browser UI: https://neurodesk.org/neurocontainers-ui/
There’s a detailled version below including screenshots and an example.
Condensed version
- Access the Neurodesk Containers repository
- Fork the repository
- Set up Neurocontainers in your preferred development environment, such as VS Code locally or GitHub Codespaces, then make changes to the desired container.
Each tool has its own folder inside the recipes/ directory, and inside that folder, you will find the corresponding build.yaml file.
Editing the build.yaml
Open the build.yaml file. Make the necessary updates to:
- Software version numbers
- Dependencies
- Download links
- Build instructions (if needed)
- Validate your changes
Make sure your changes are valid.
In the terminal, run:
builder generate <toolname> --recreate

# This second step requires Docker and can take some time
builder test <toolname> --recreate --build
- Commit and push your changes
- Create a pull request
Detailled version
1. Access the Neurodesk Containers
Navigate to the Neurocontainers repository:
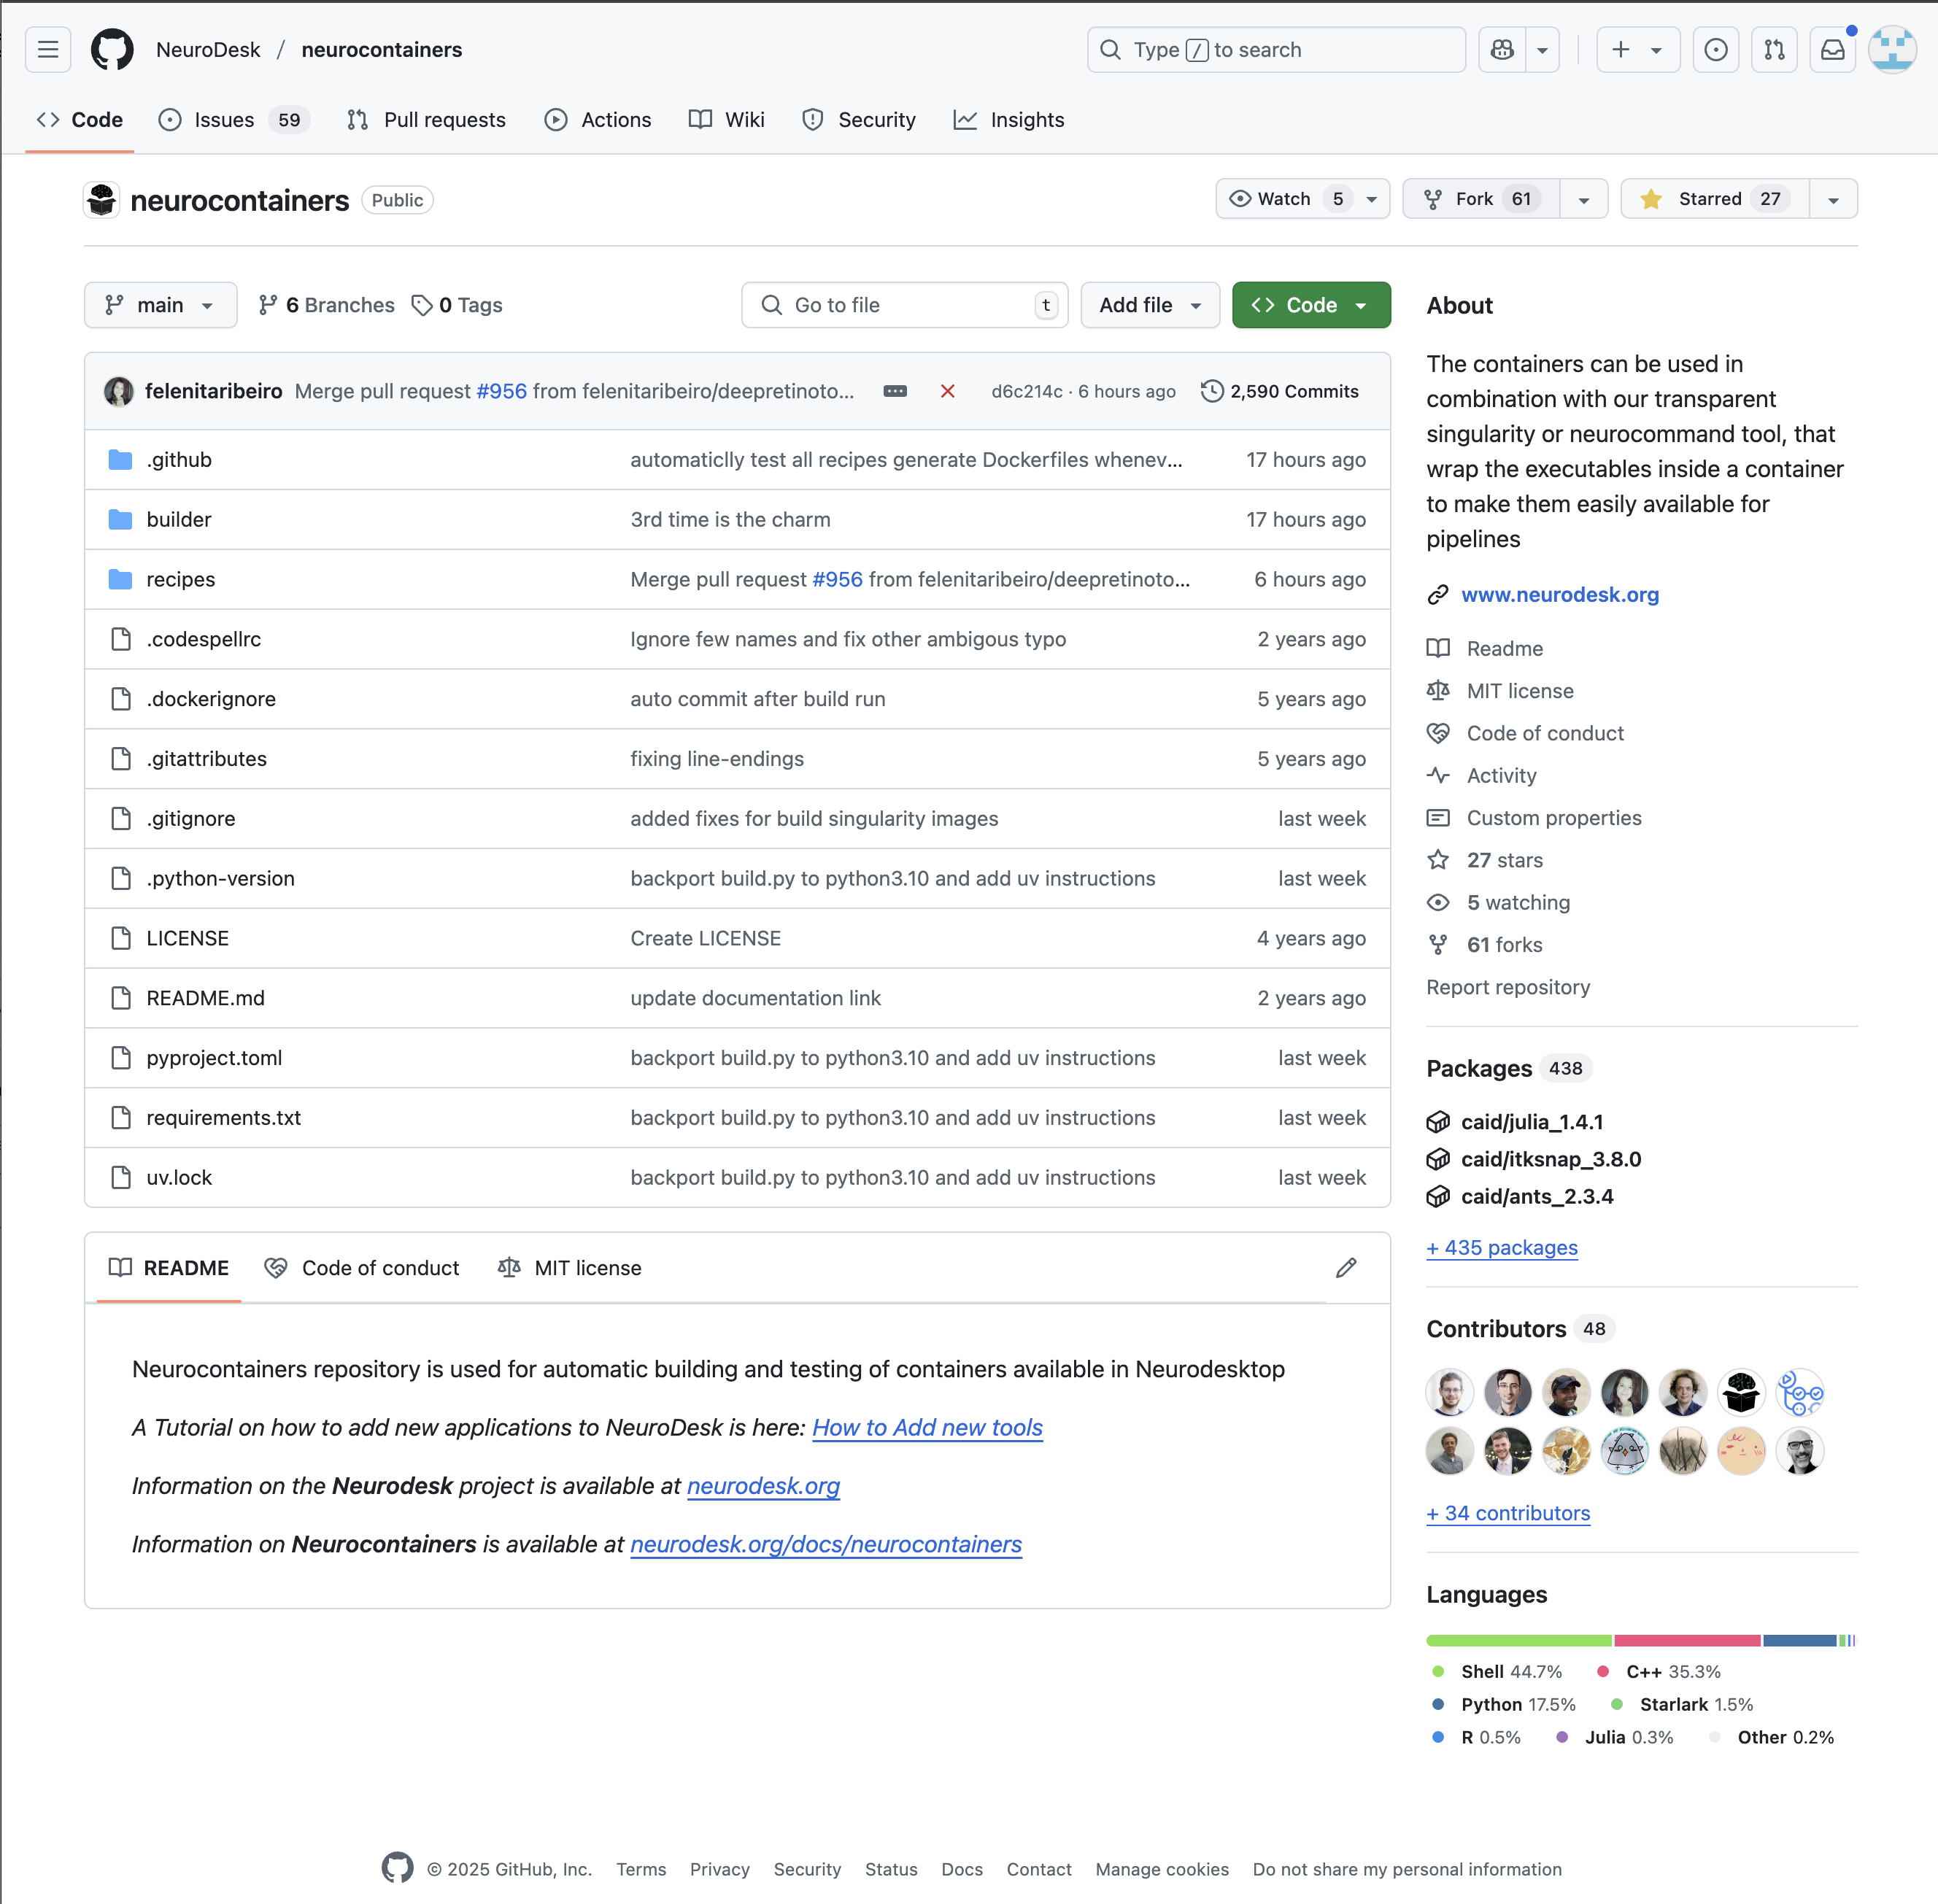
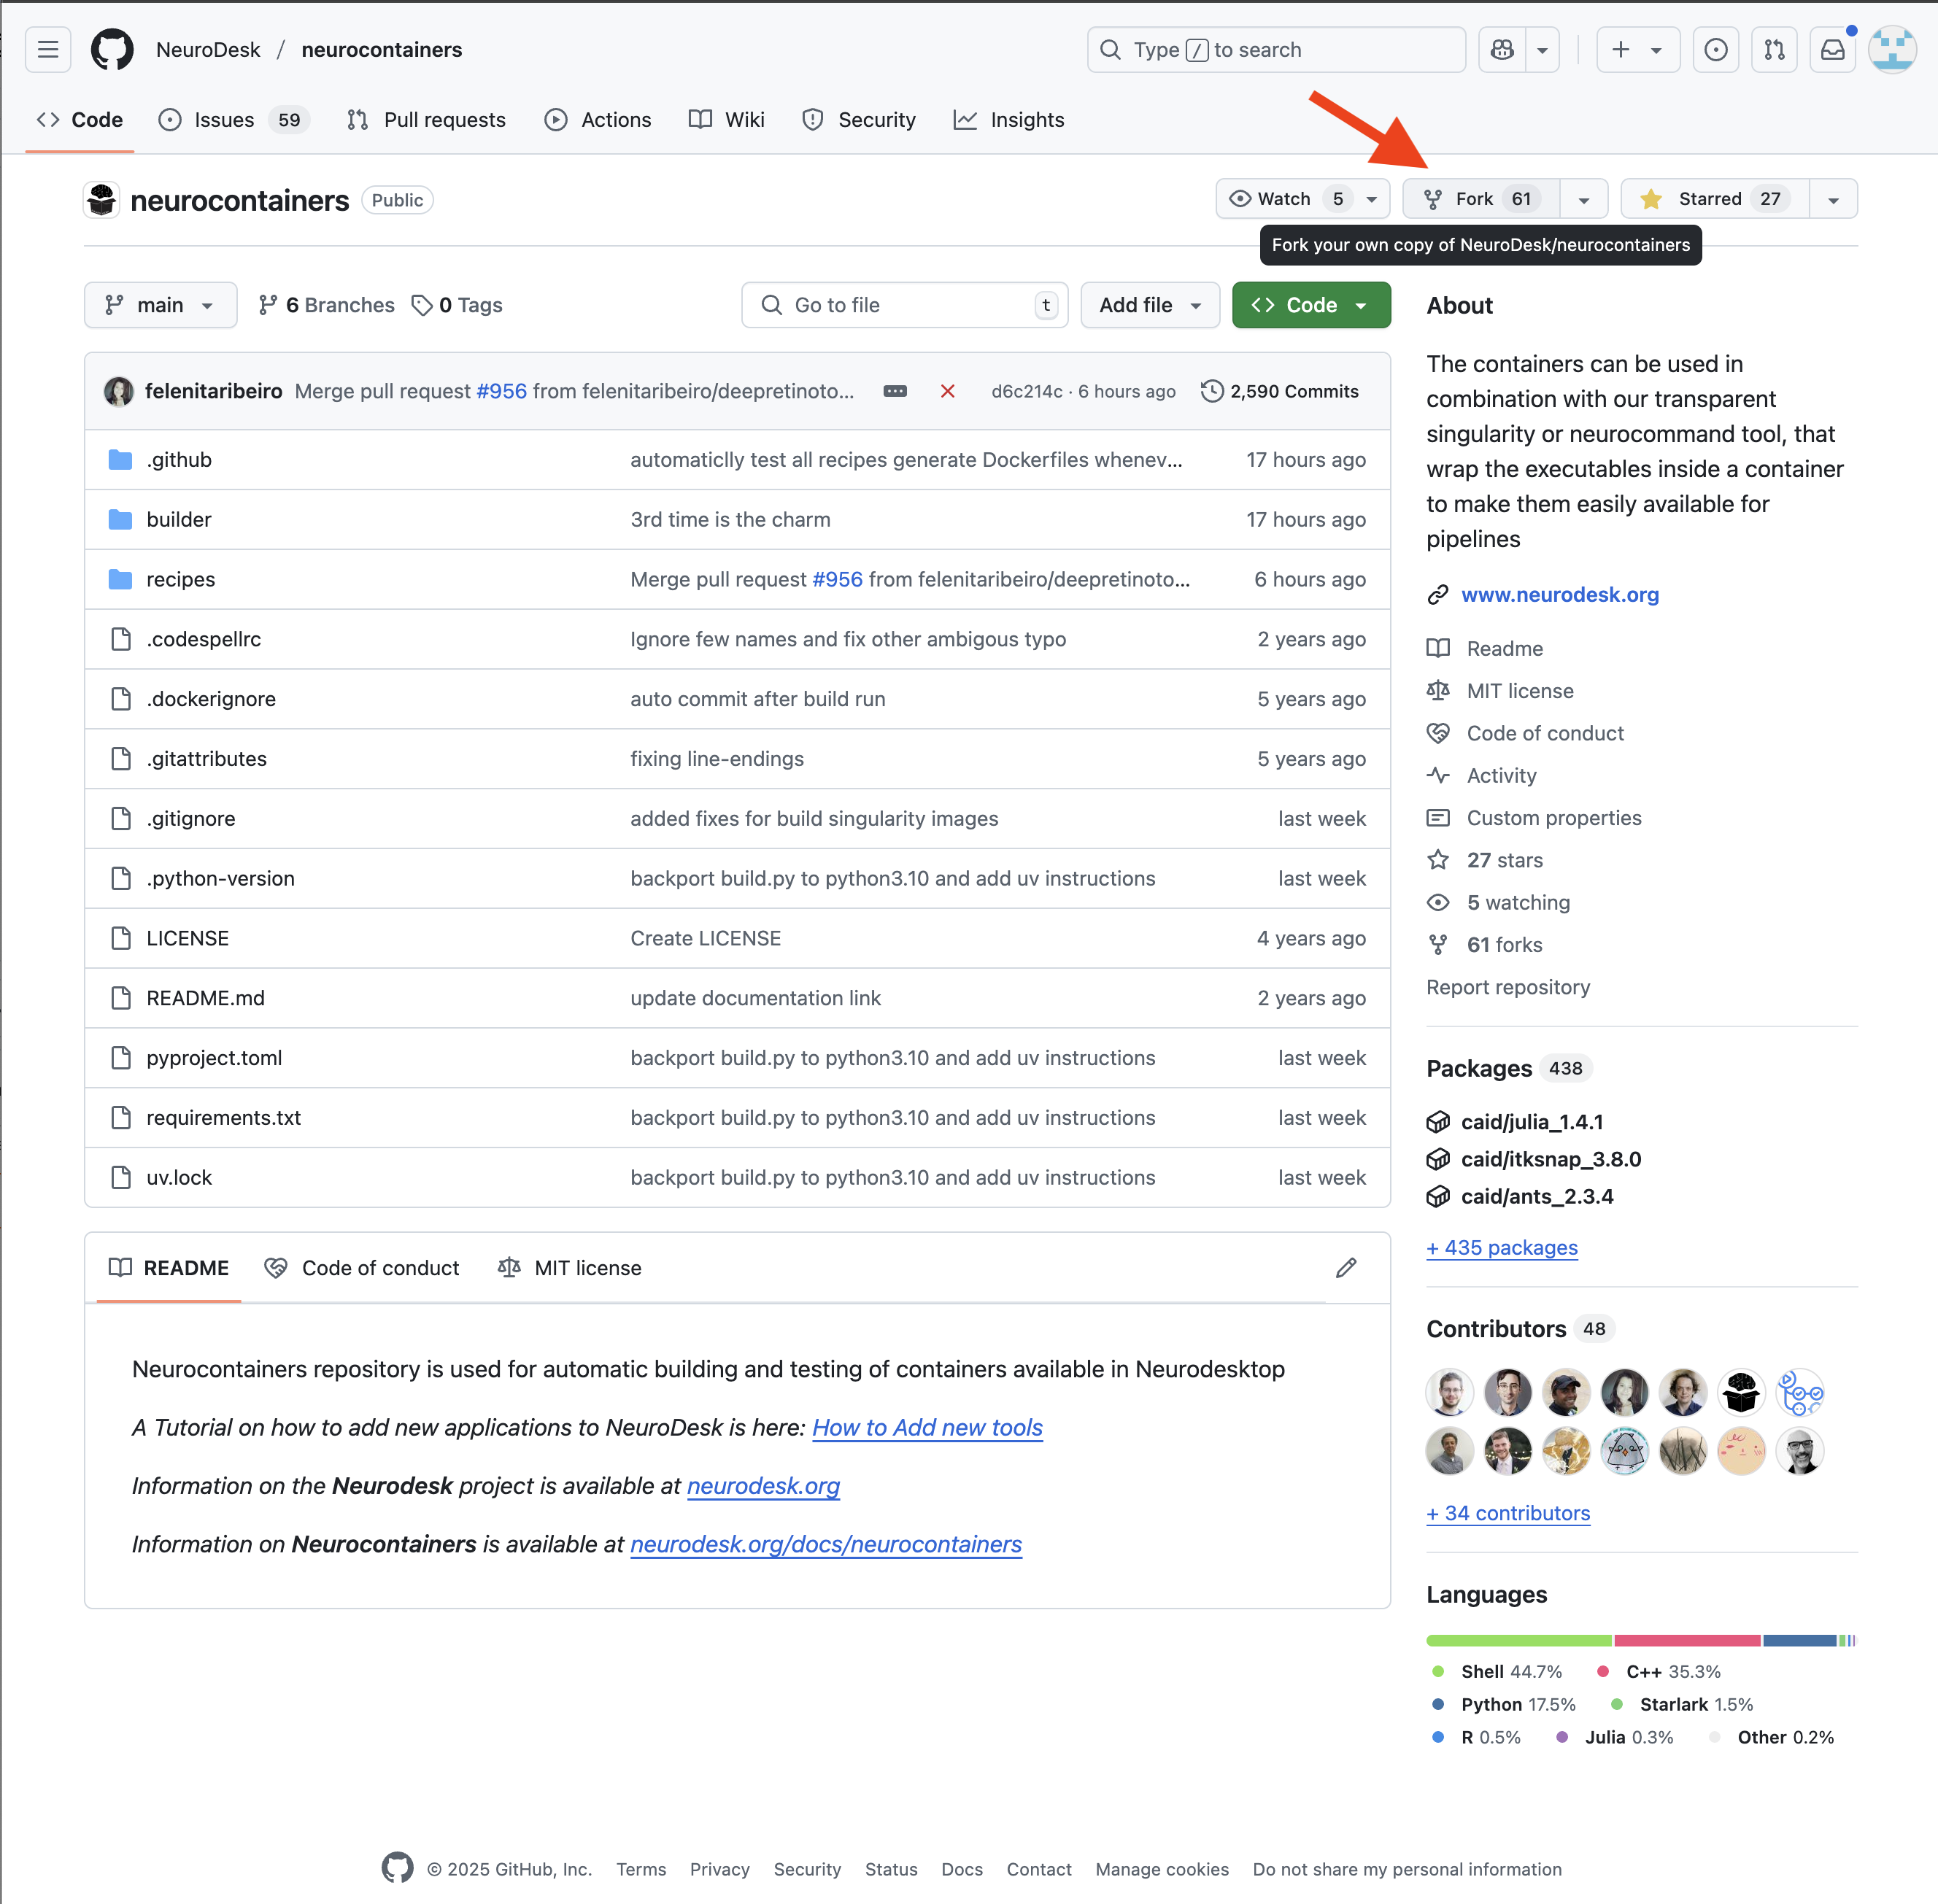
2. Fork the repository
You will then need to fork the Neurodesk repository to your own repositories. This allows you to make changes independently and propose updates.
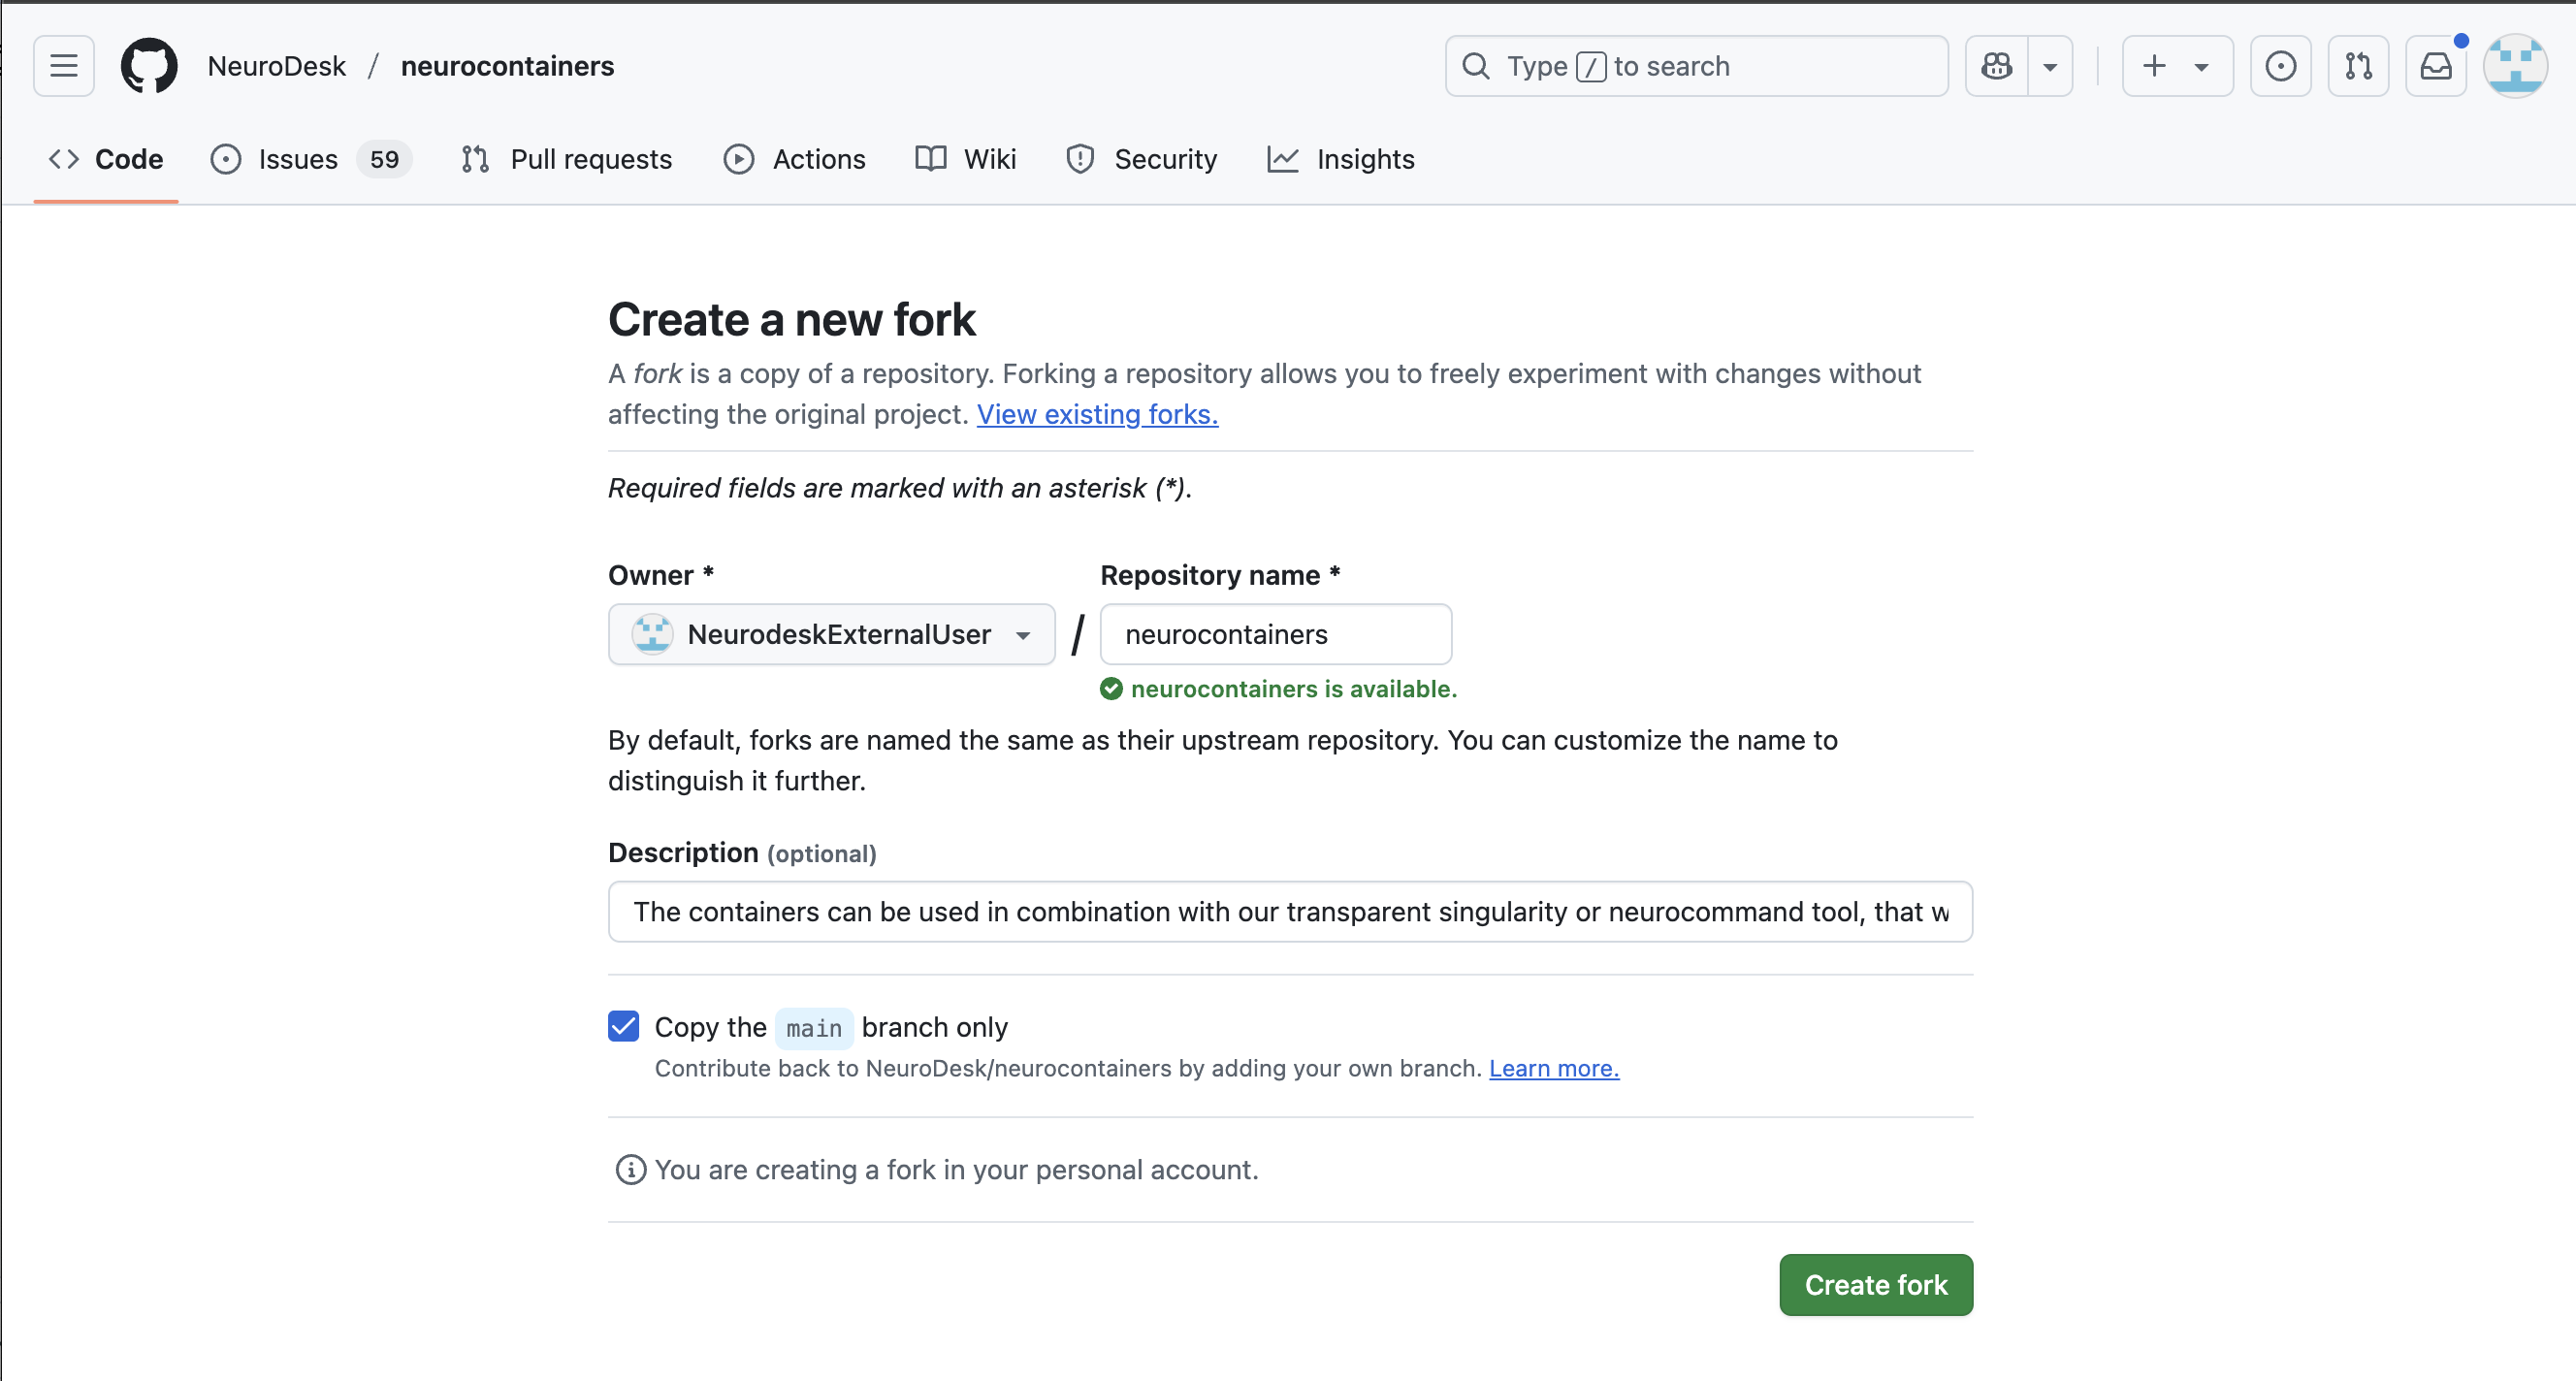
Naming your repository
You may decide to keep the same name for your new reposoitory, or you may rename it.
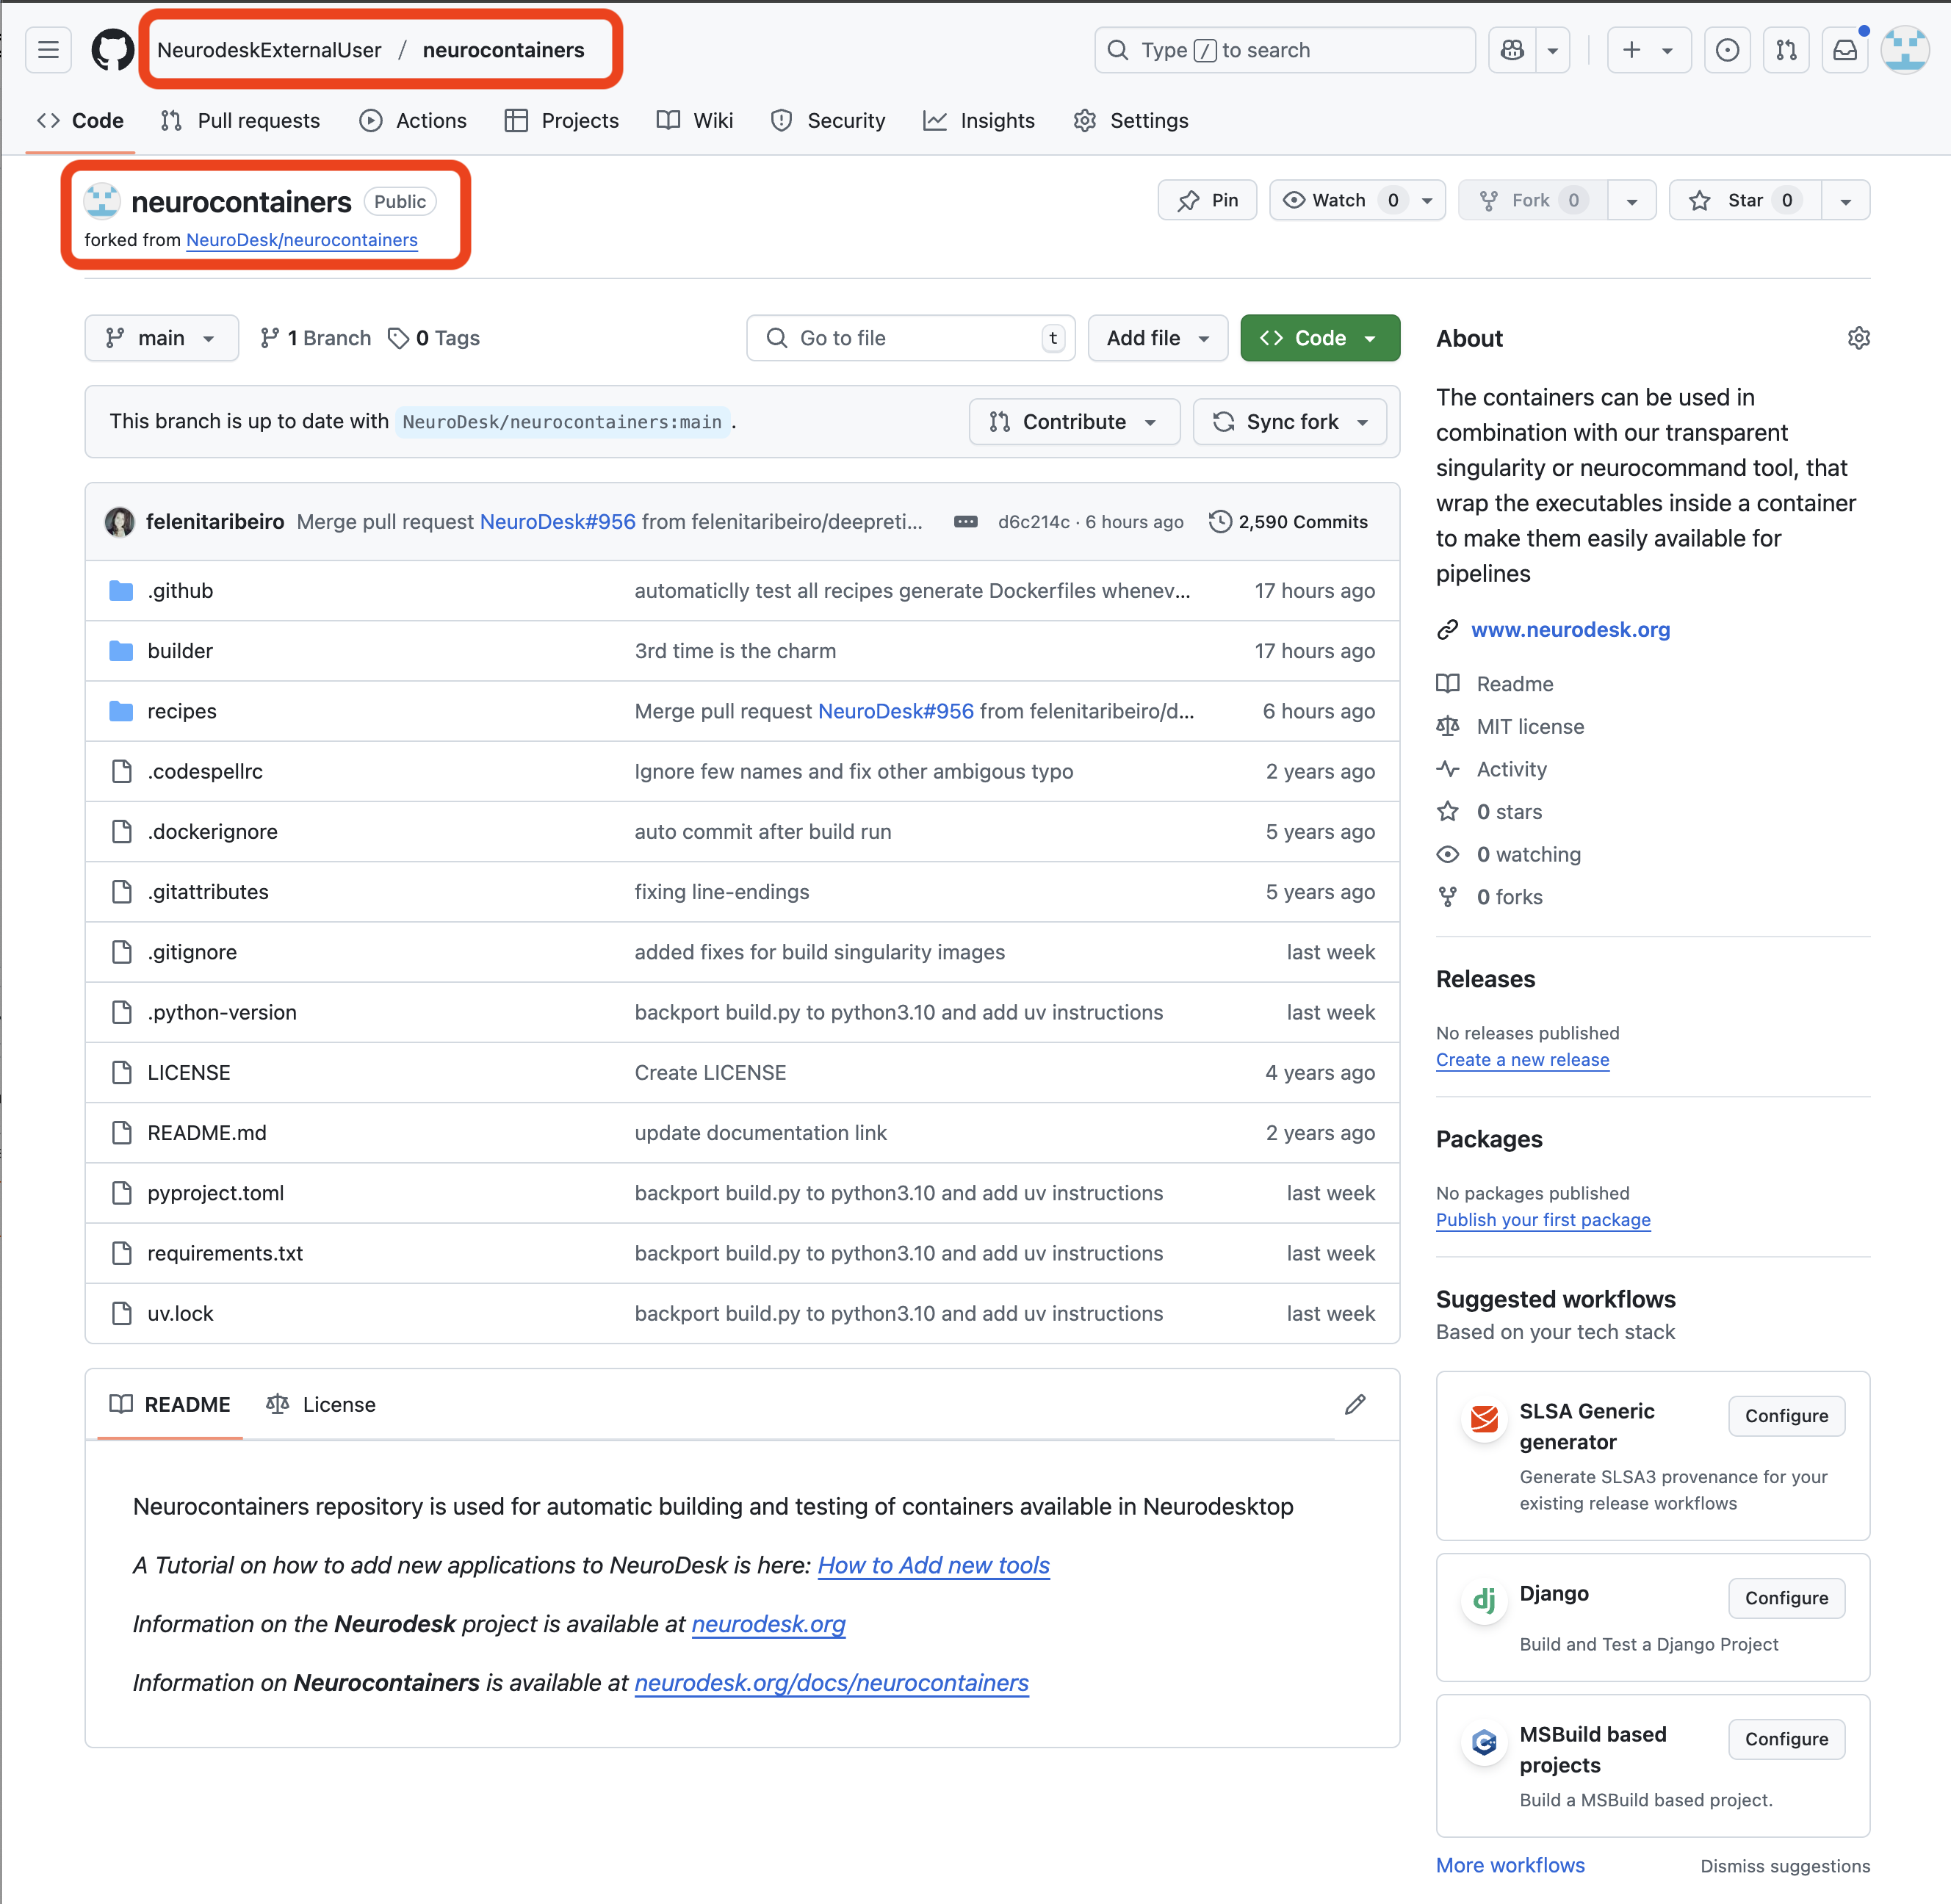
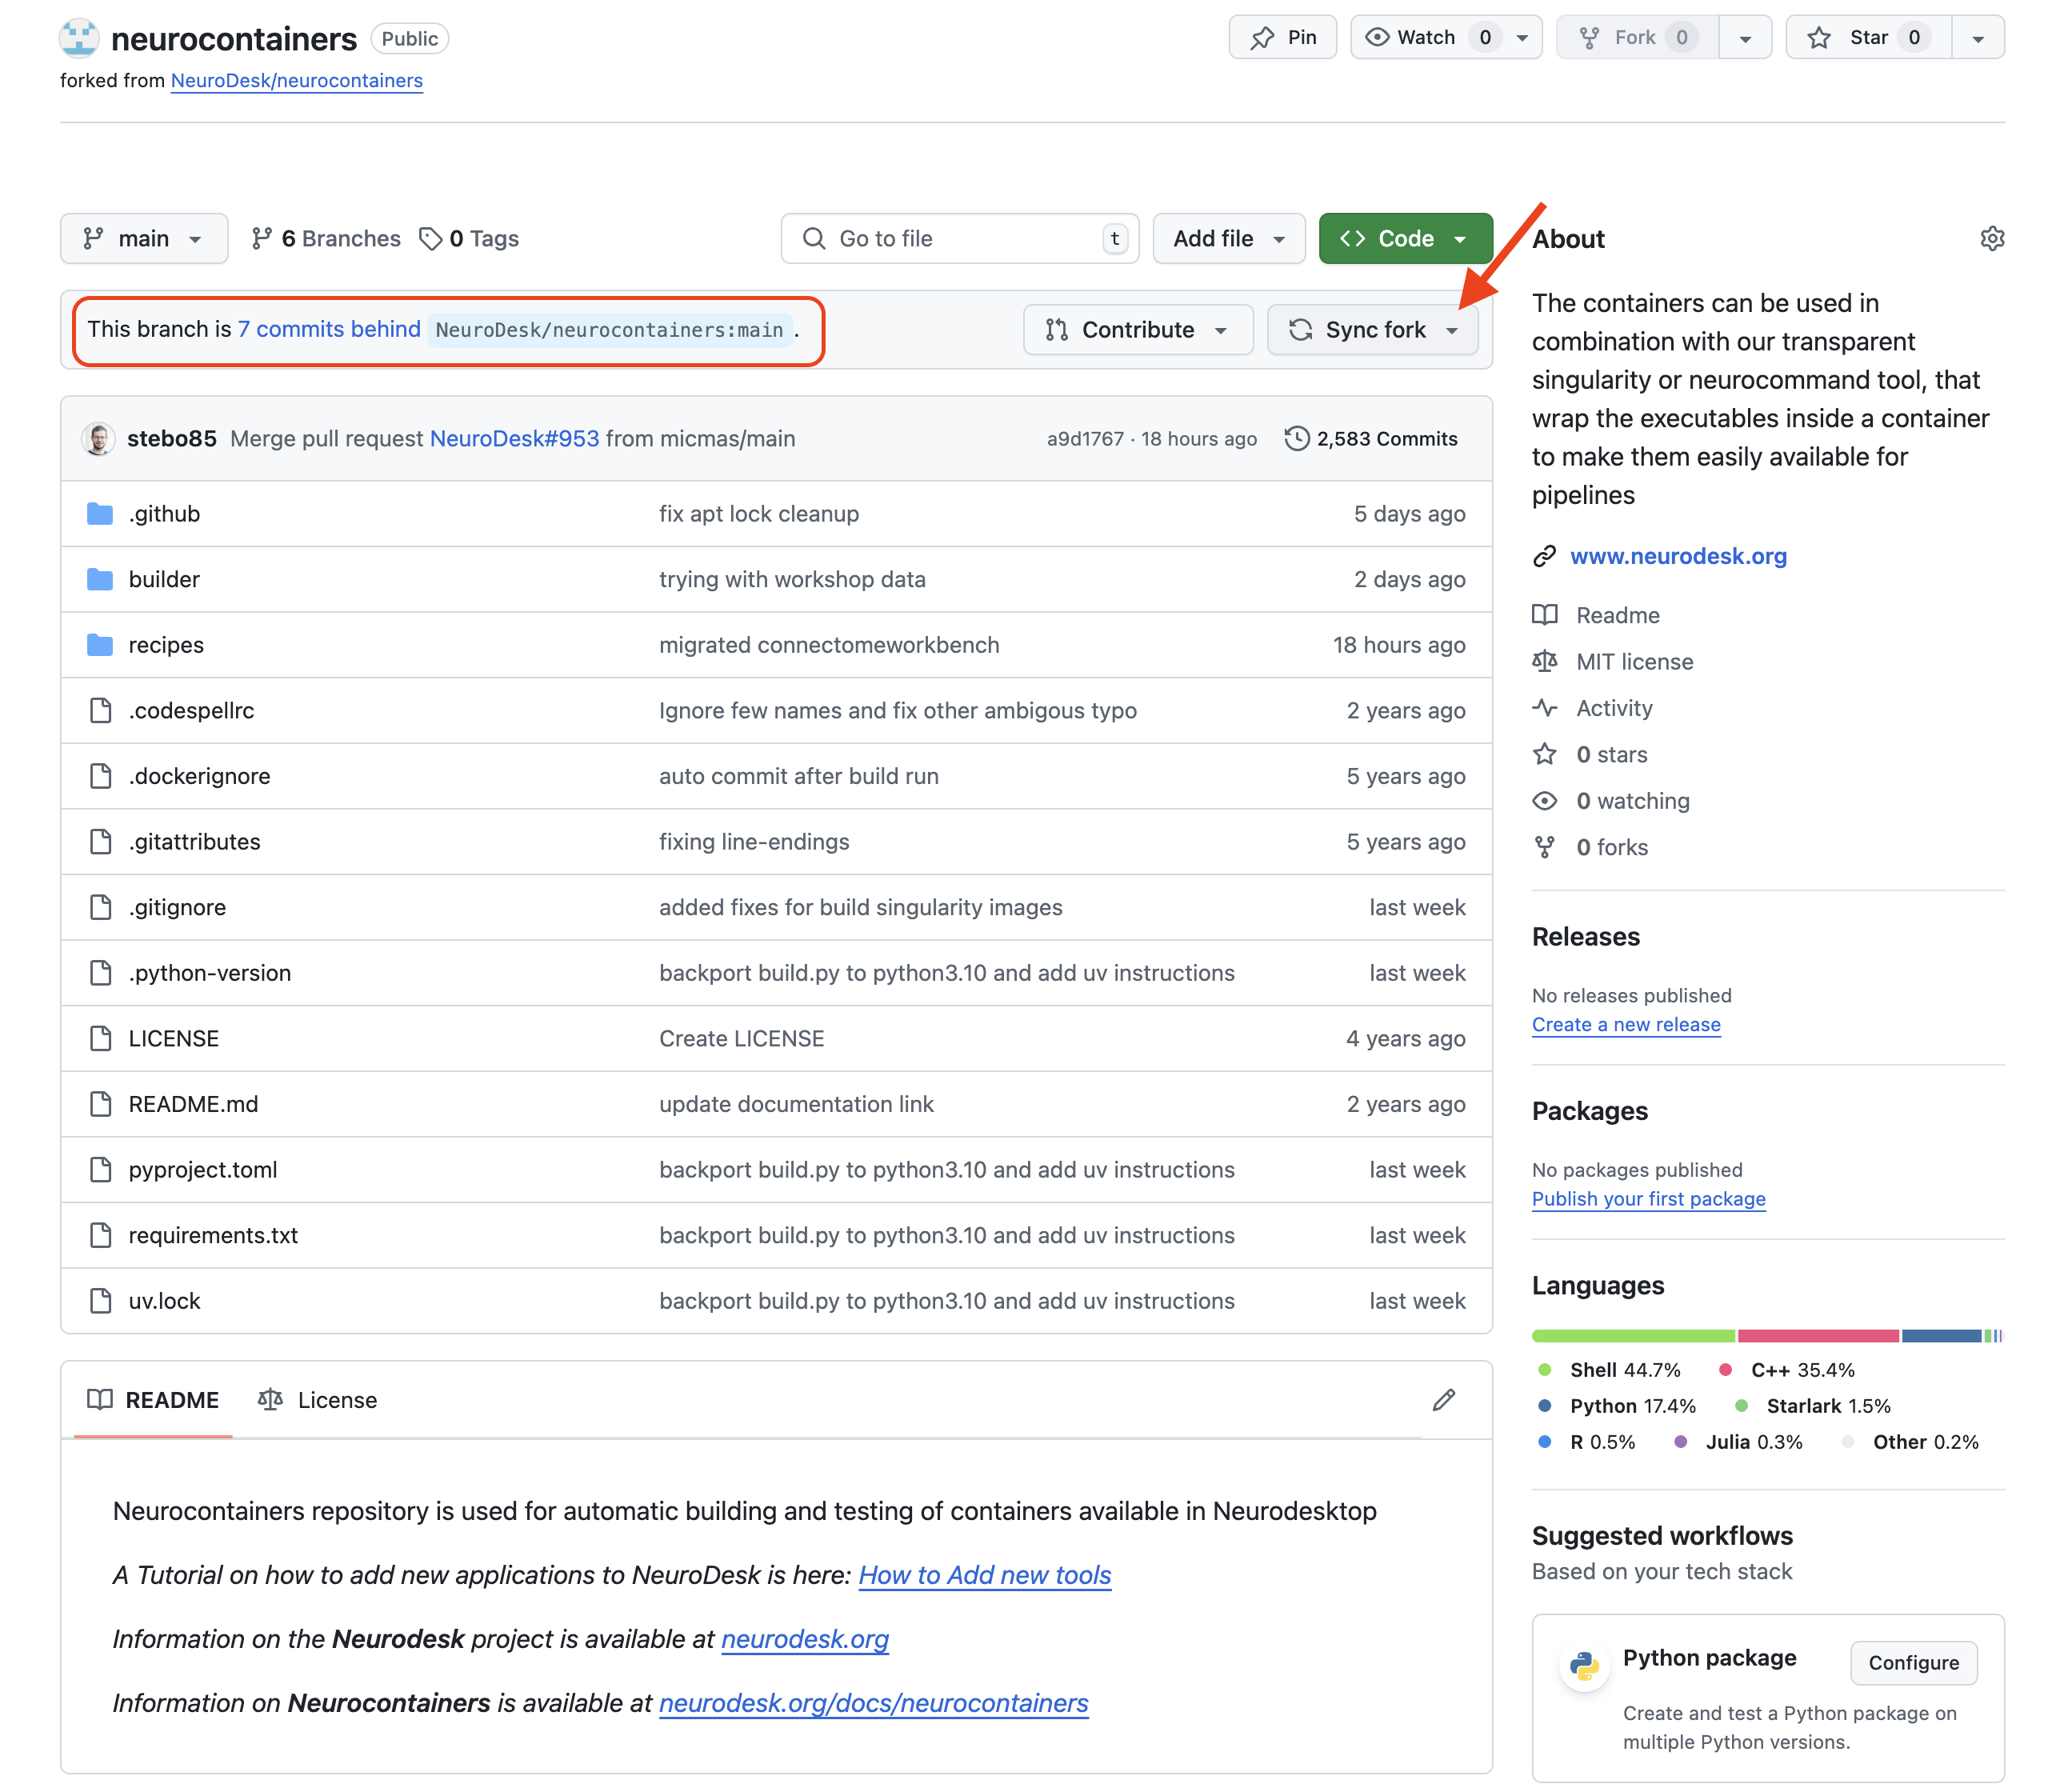
Confirming you are on the forked version
In the top left corner, you can see that you are in your forked repository of the neurocontainers repository.
Keeping your forked repository up-to-date
If changes are commited to the Neurodesk/neurocontainers repository, you will see a banner saying you are N commits behind. You may decide to Sync fork, which will update your repository, allowing you to have the most up-to-date files.
3. Set Up Your Development Environment
Choose either a local setup or GitHub Codespaces. Both options install Neurocontainers so that the builder command is available.
Option A: Set Up Neurocontainers Locally
Install Git, Python 3.13, and Docker before continuing. Confirm that they are available:
git --version
python3.13 --version
docker version
docker buildx version
Clone your fork, add the Neurodesk repository as the upstream remote, and create a branch for your update. Replace YOUR_GITHUB_USERNAME and TOOLNAME below:
git clone https://github.com/YOUR_GITHUB_USERNAME/neurocontainers.git
cd neurocontainers
git remote add upstream https://github.com/neurodesk/neurocontainers.git
git switch -c update-TOOLNAME
Create an isolated Python environment and install Neurocontainers, including the builder command:
python3.13 -m venv .venv
source .venv/bin/activate
python --version # Must report Python 3.13.x
python -m pip install --upgrade pip
python -m pip install -r requirements.txt
python -m pip install -e .

builder --help
docker info
docker run --rm hello-world
Activate the environment with source .venv/bin/activate whenever you open a new terminal.
Option B: Create and Edit a Codespace
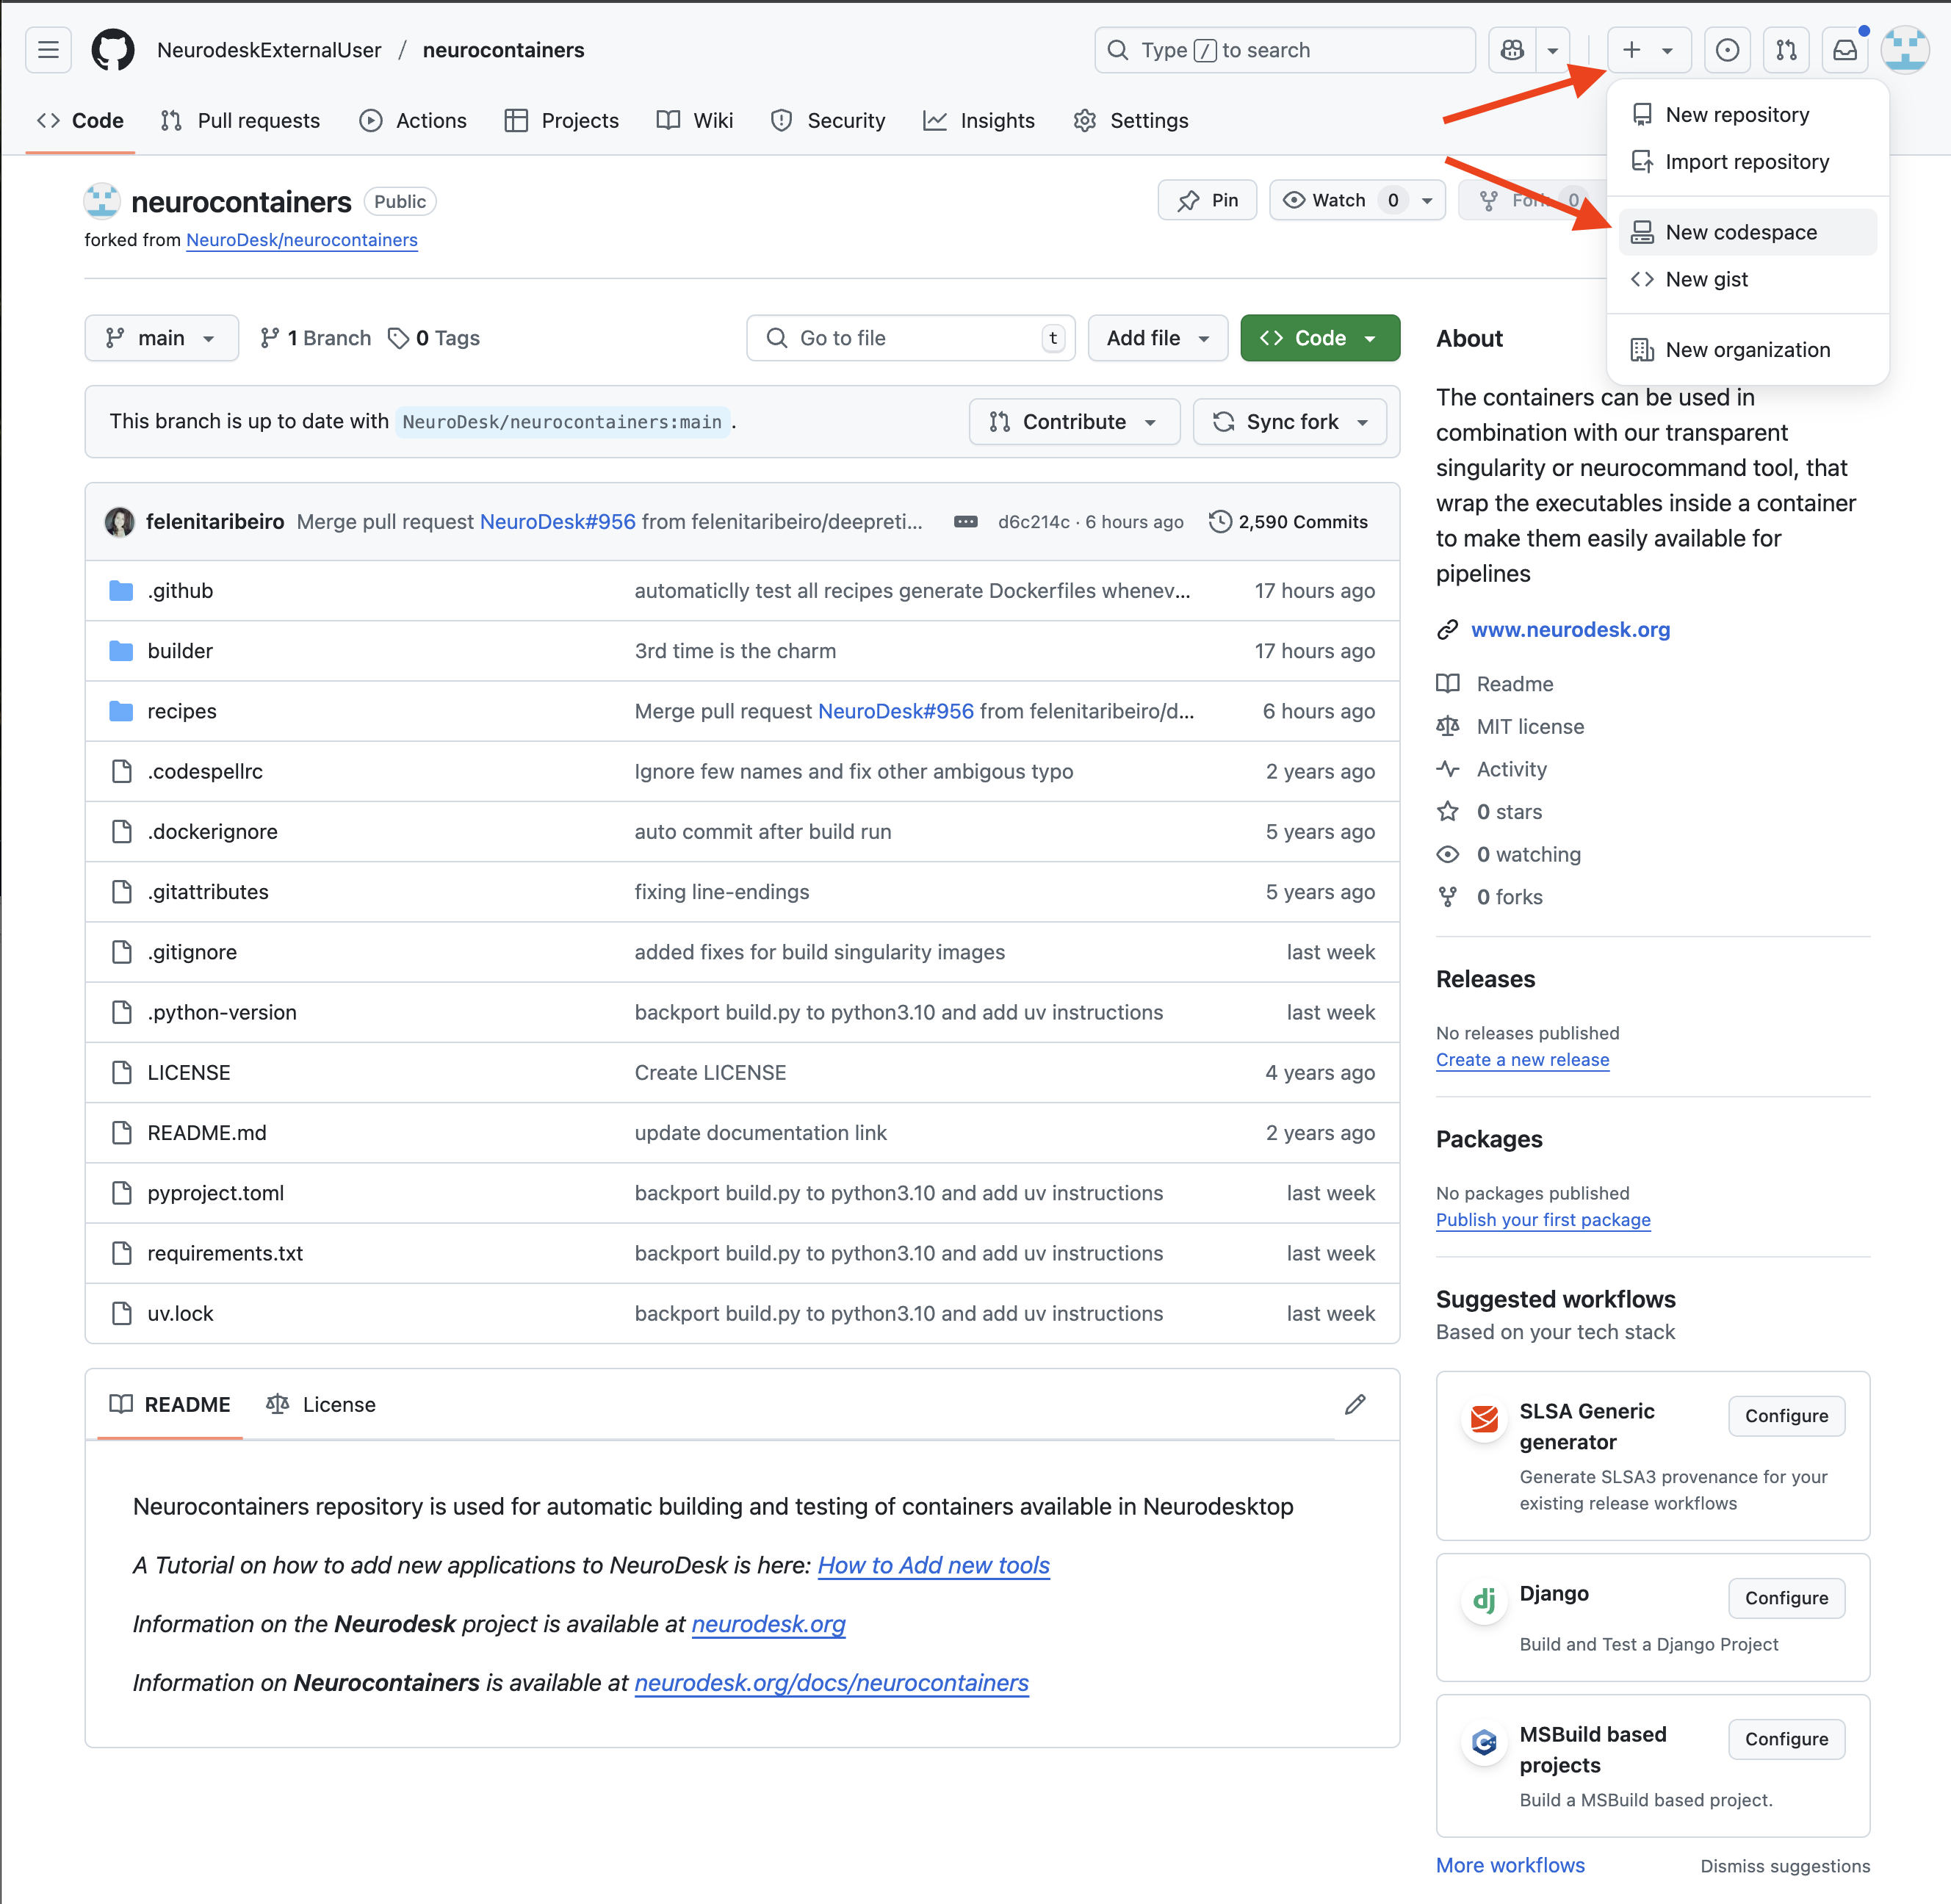
Use Codespaces when Docker or Python is unavailable on your local computer. Make sure your fork’s main branch is up to date, then create a Codespace:
- Clicking the + (Create new…) button in the top right corner. (it’s a + sign button)
- Selecting Codespaces > New codespace.
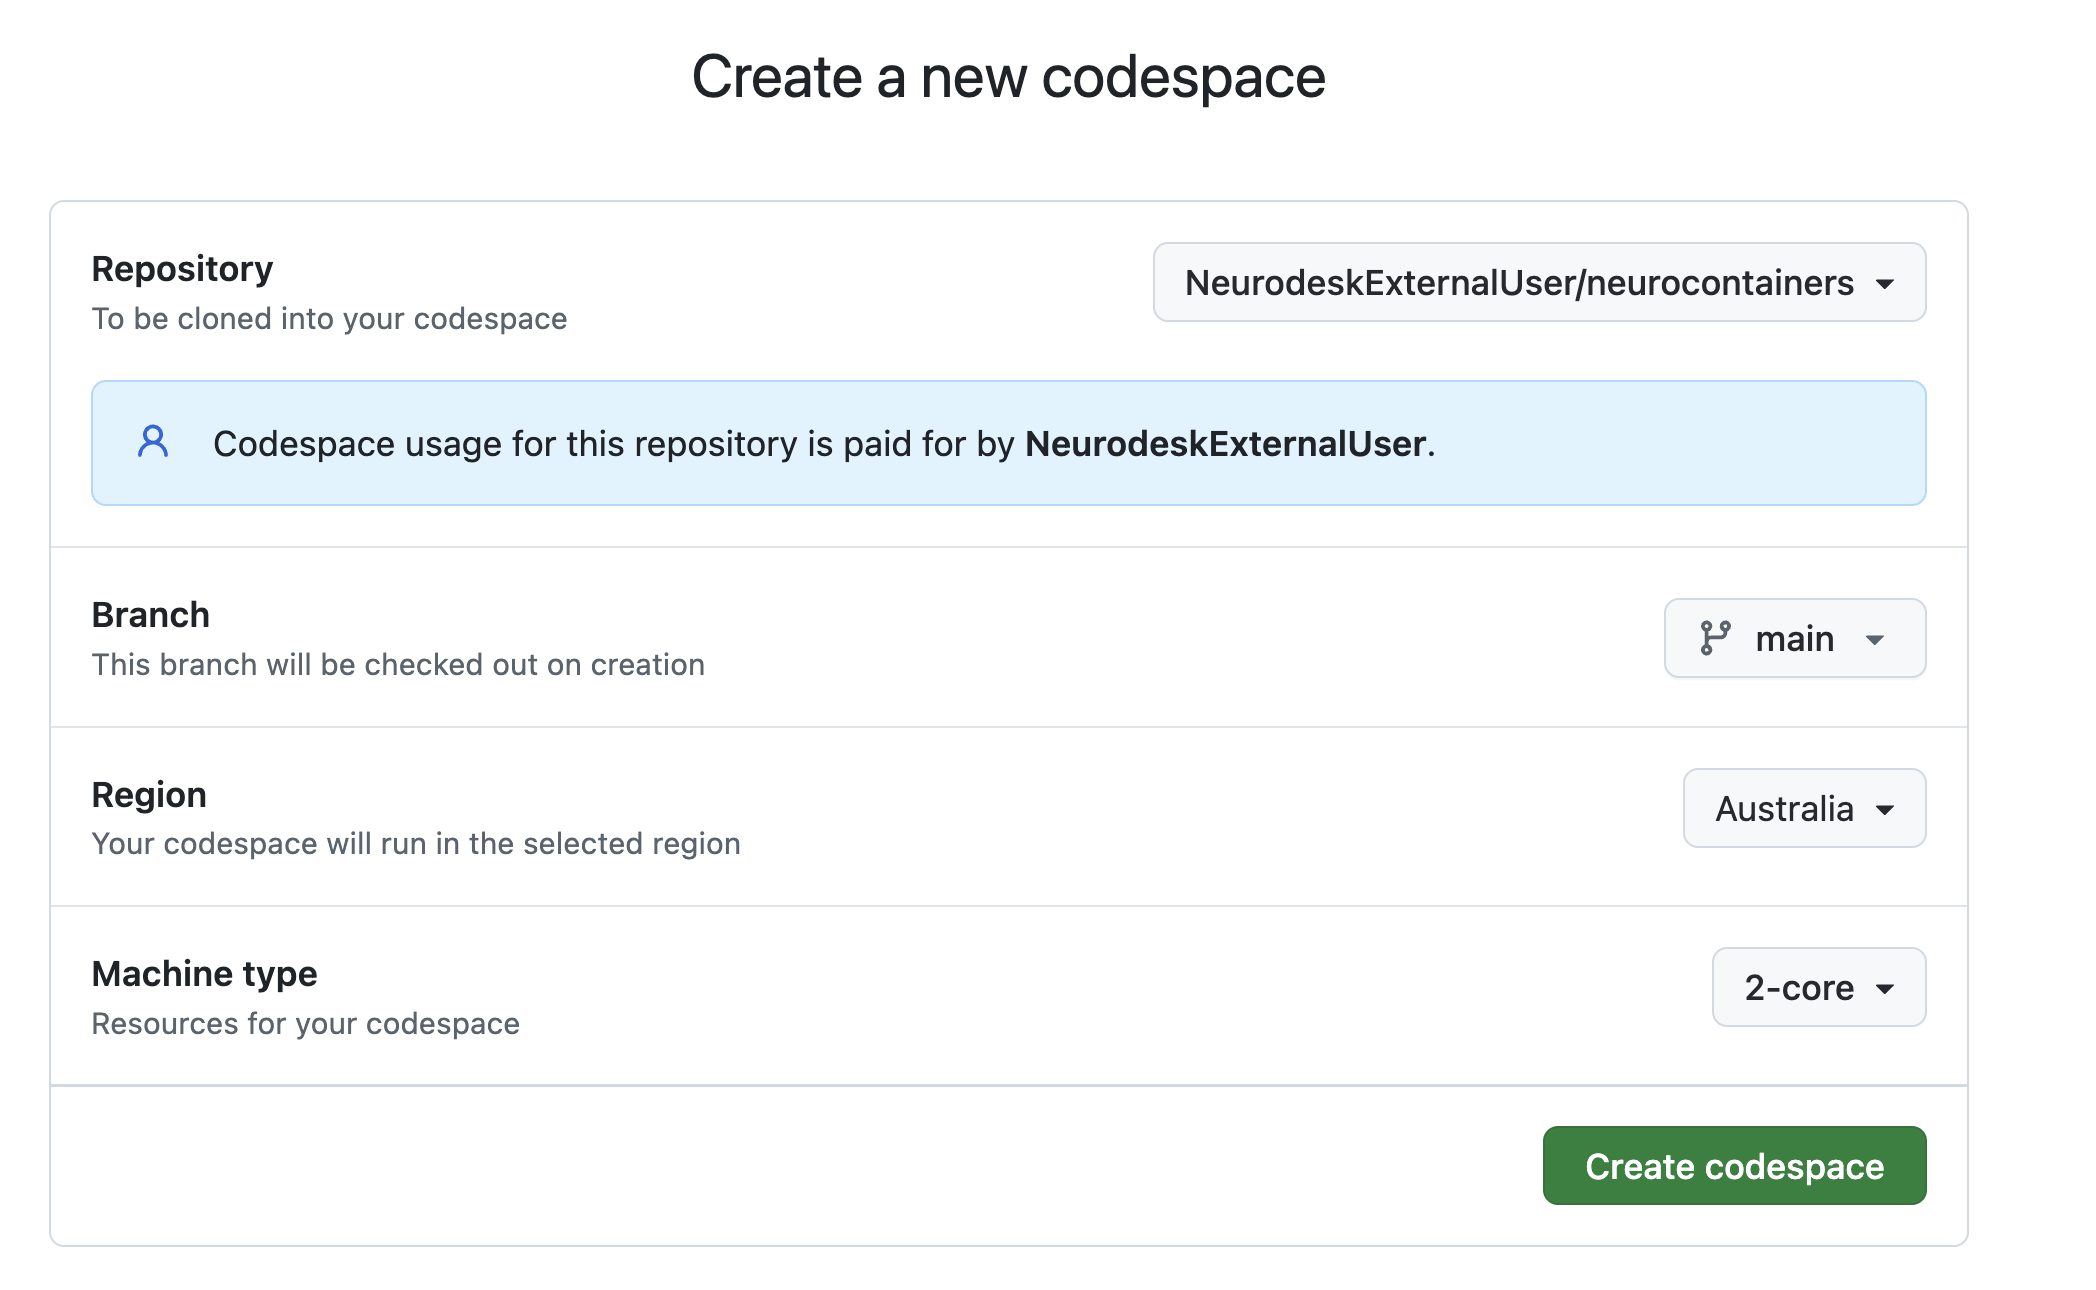
Configure your Codespace.
**Resource recommendation**:
Most neurocontainers run smoothly on a **2-core** machine. For containers with heavier computational demands, consider using a **4-core** machine.
This opens an editable environment directly in your browser.
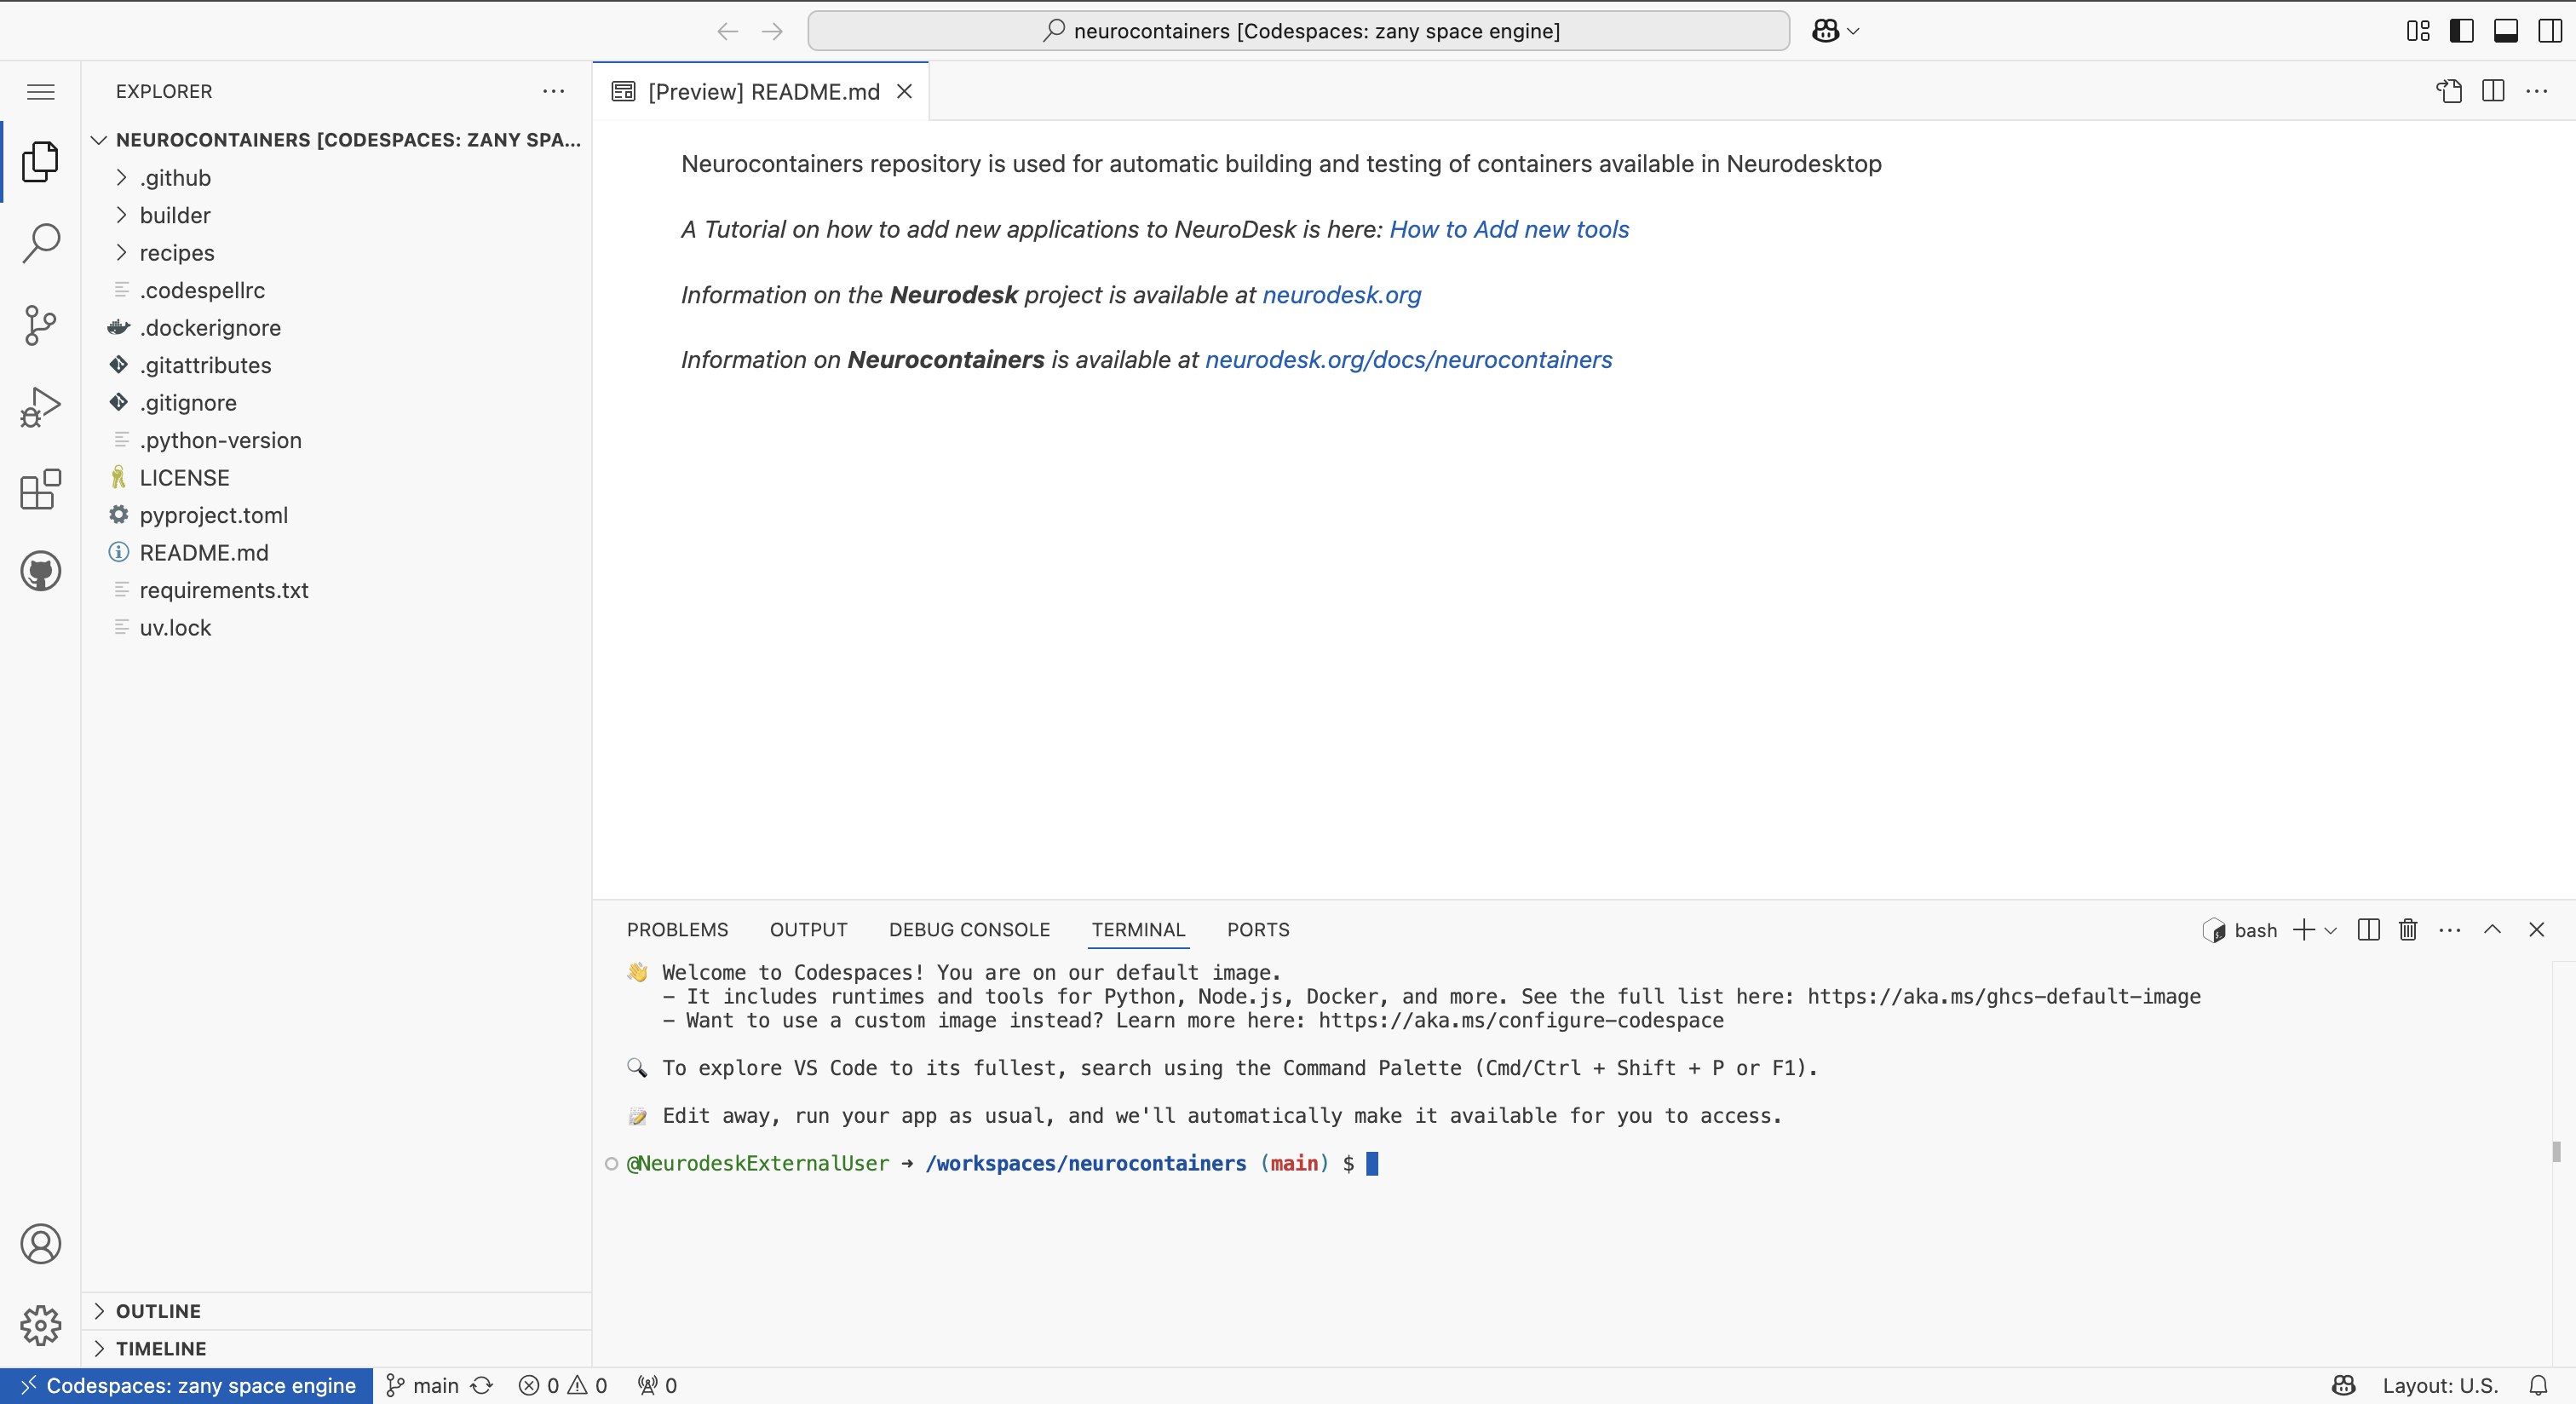
The repository’s development-container configuration creates the env virtual environment and installs Neurocontainers automatically. In the terminal, activate the environment and verify the setup:
git switch -c update-TOOLNAME
source env/bin/activate
python --version # Must report Python 3.13.x
builder --help
docker info
docker run --rm hello-world
If Codespaces setup fails, first make sure your fork’s main branch is up to date. Then fully rebuild the container or create a new codespace; restarting a failed codespace does not apply updated development-container configuration.
YAML extension
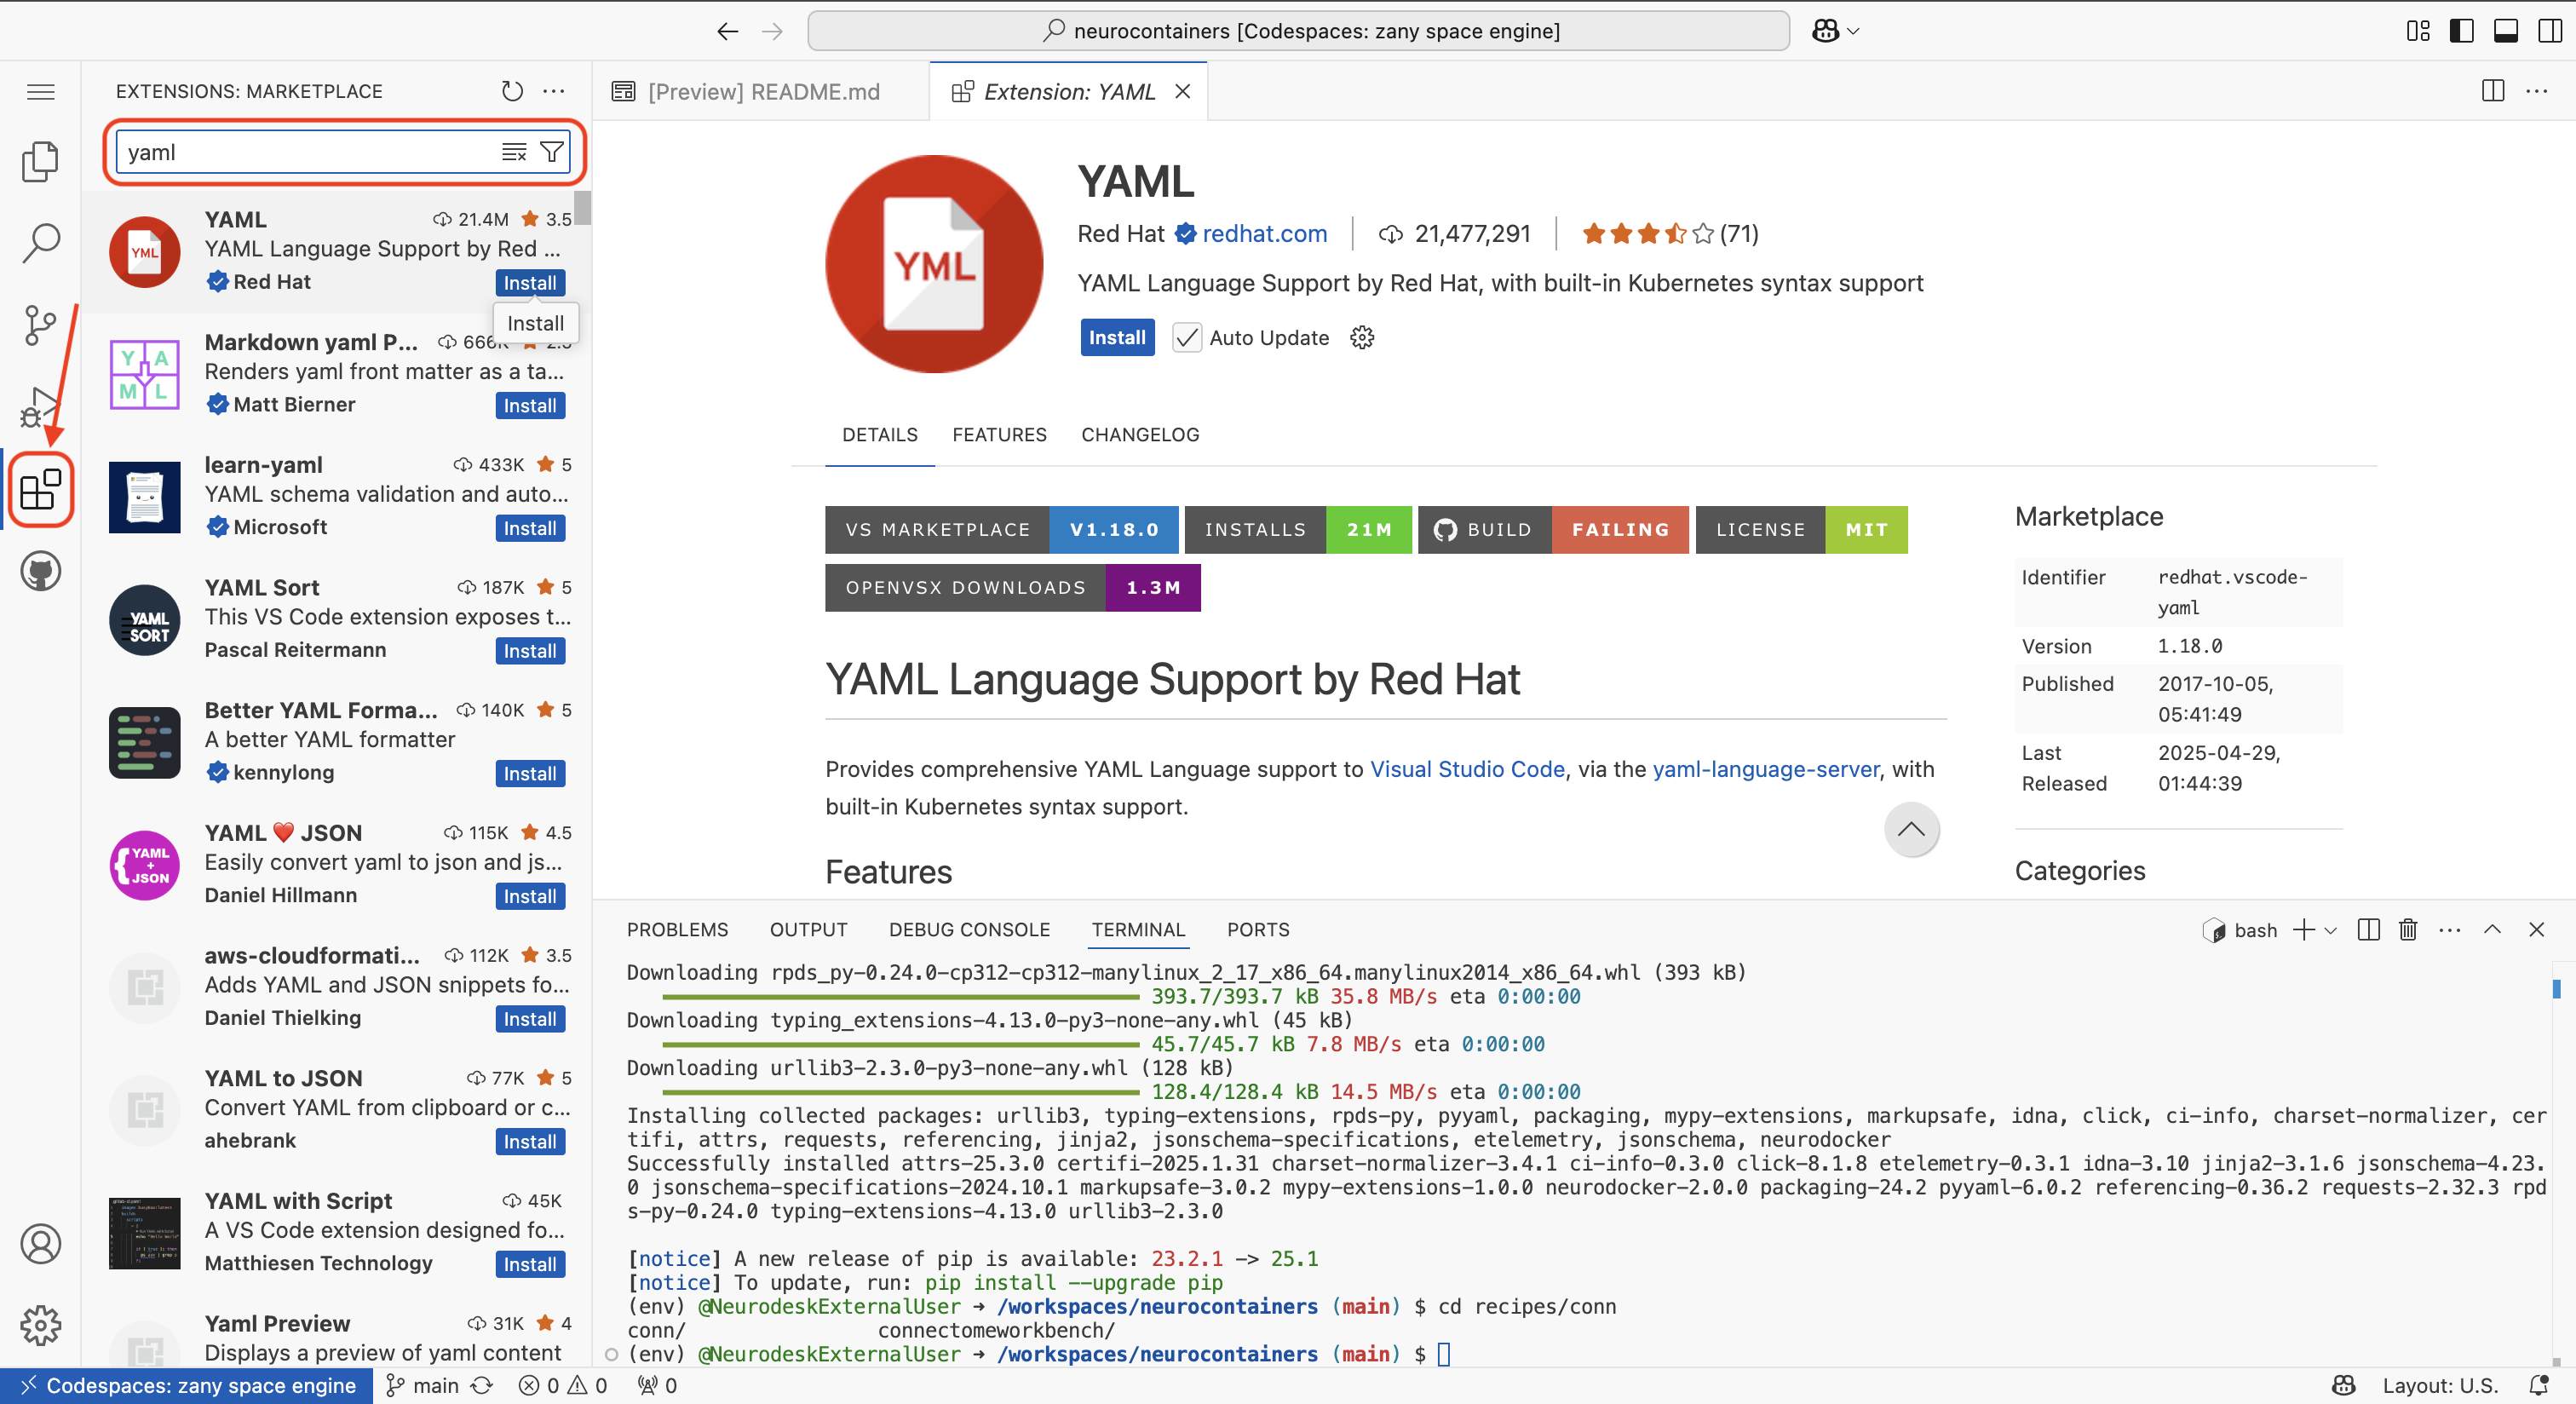
The first time you use a codespace, you will also need to download the YAML extension by navigating to the Extensions tab using icon on the left of your screen and searching for YAML. Click the install button.
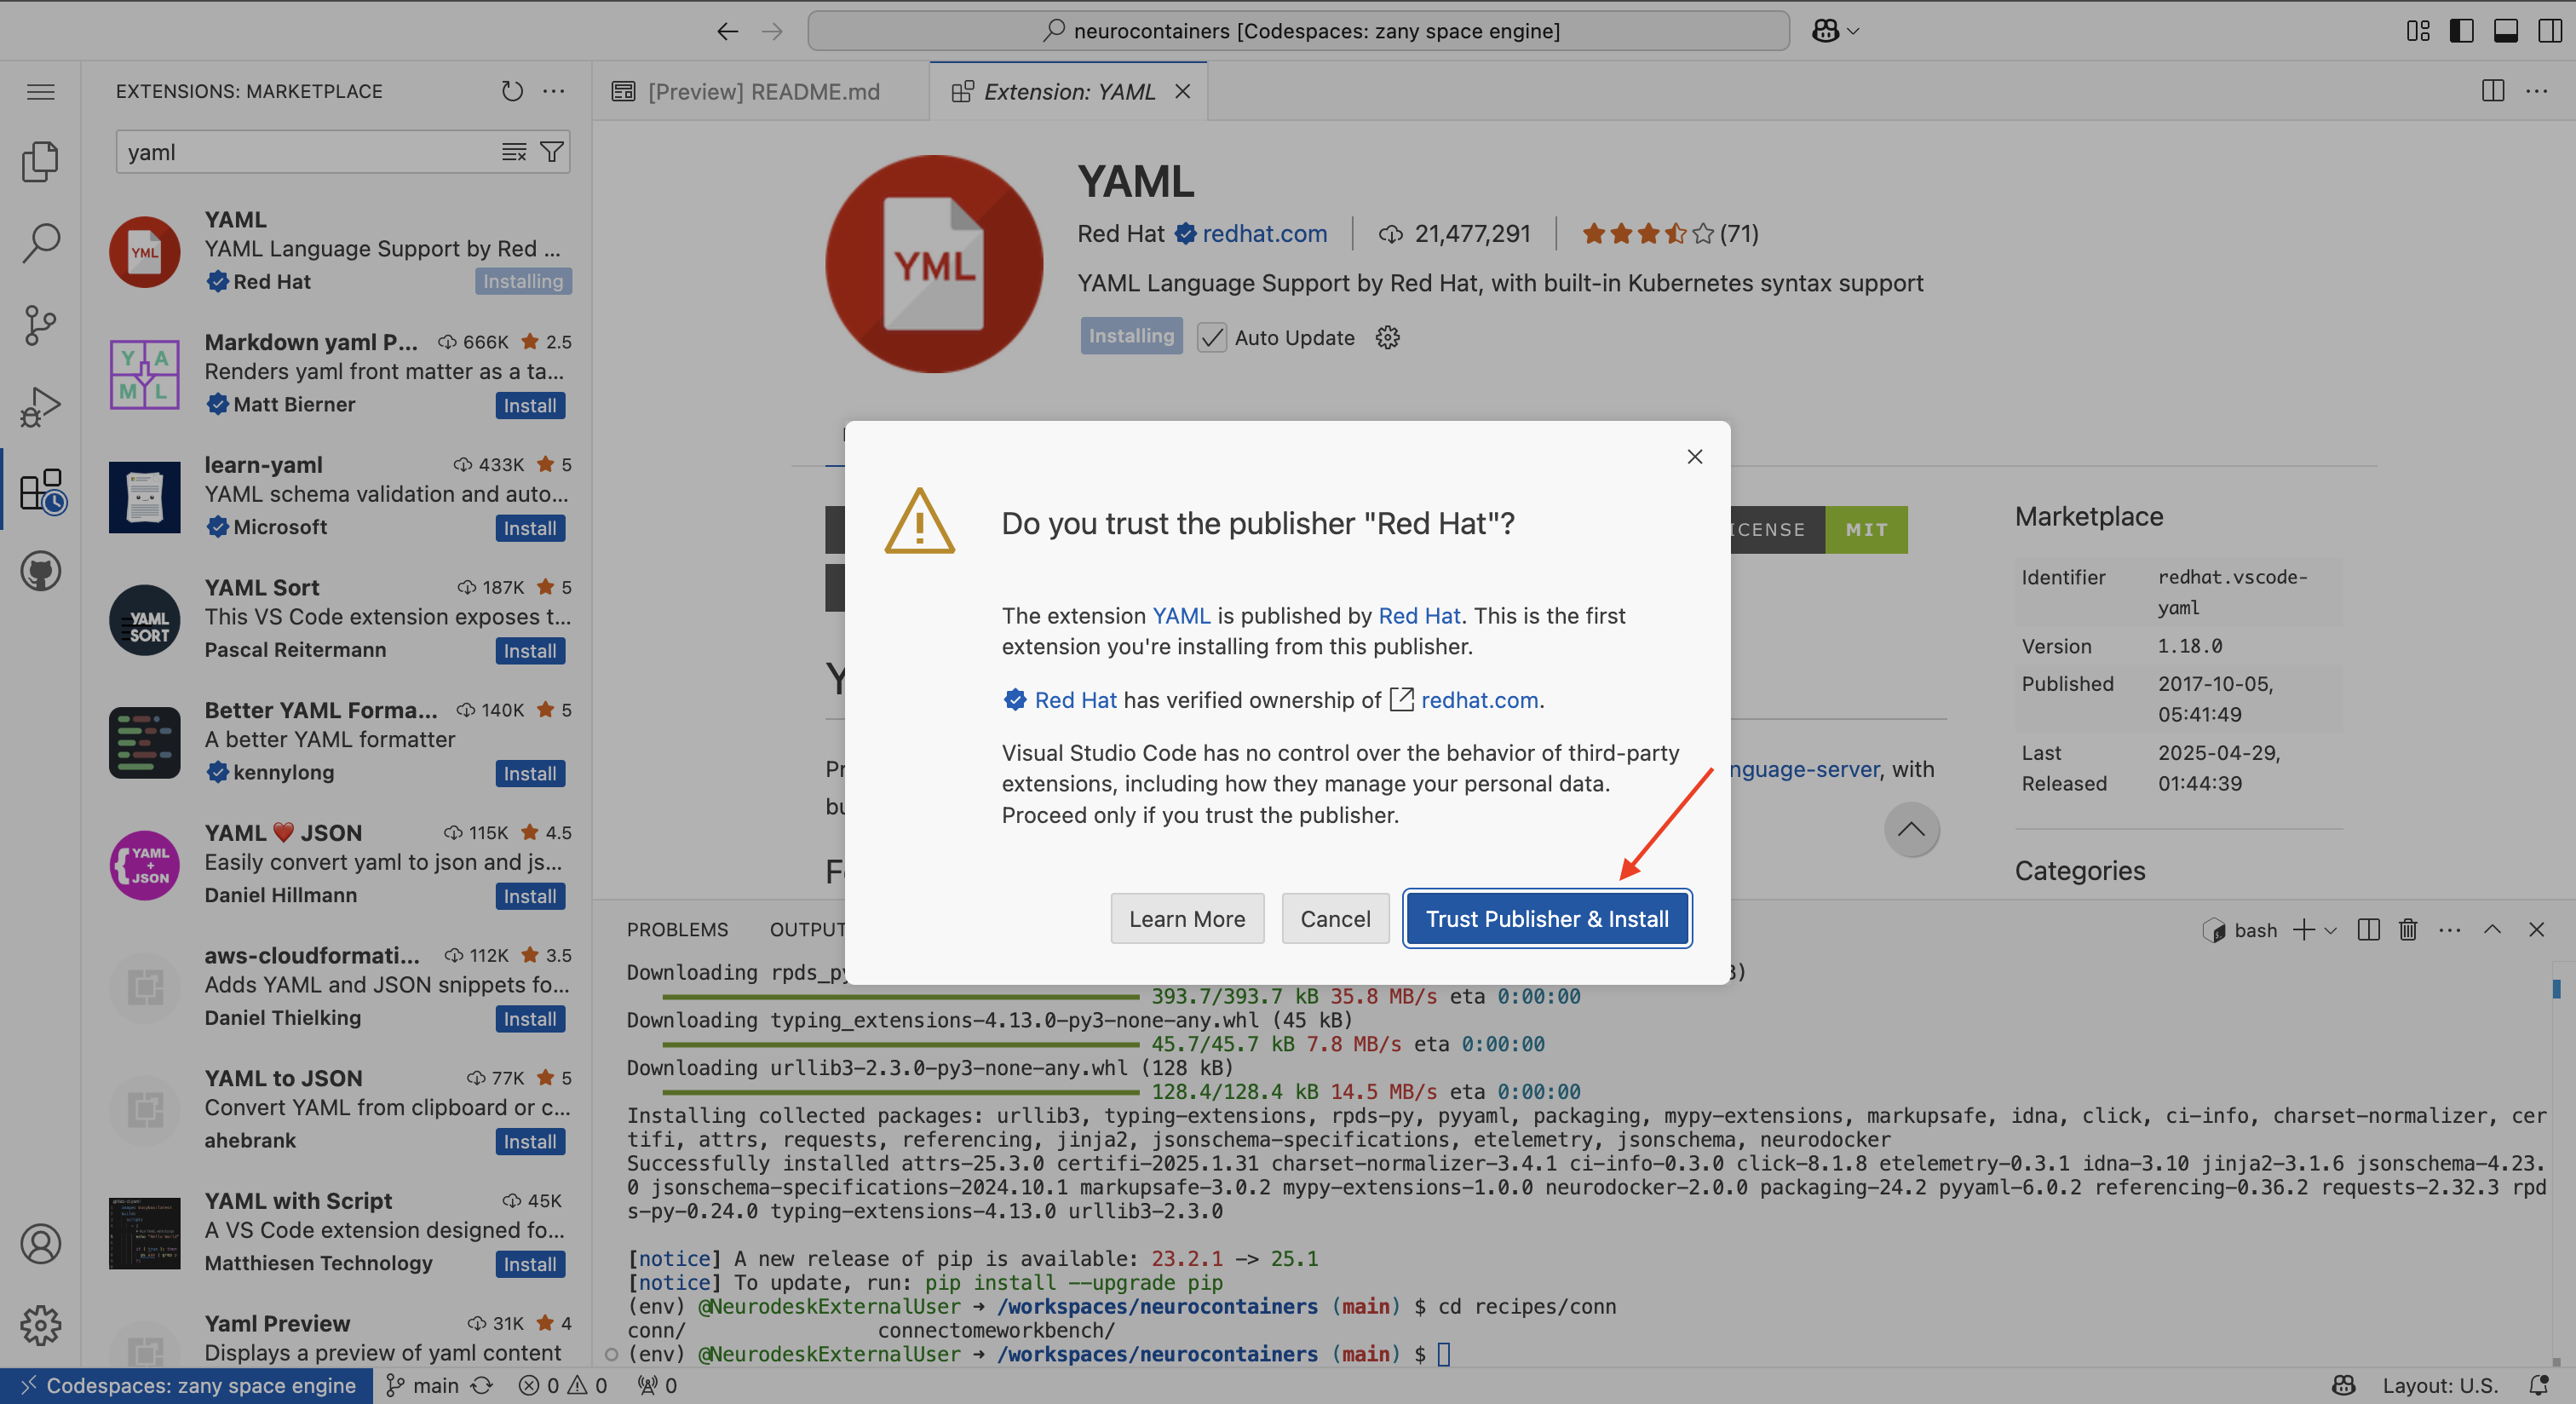
There will be a security pop-up where you will need to click “Trust Publisher & Install”
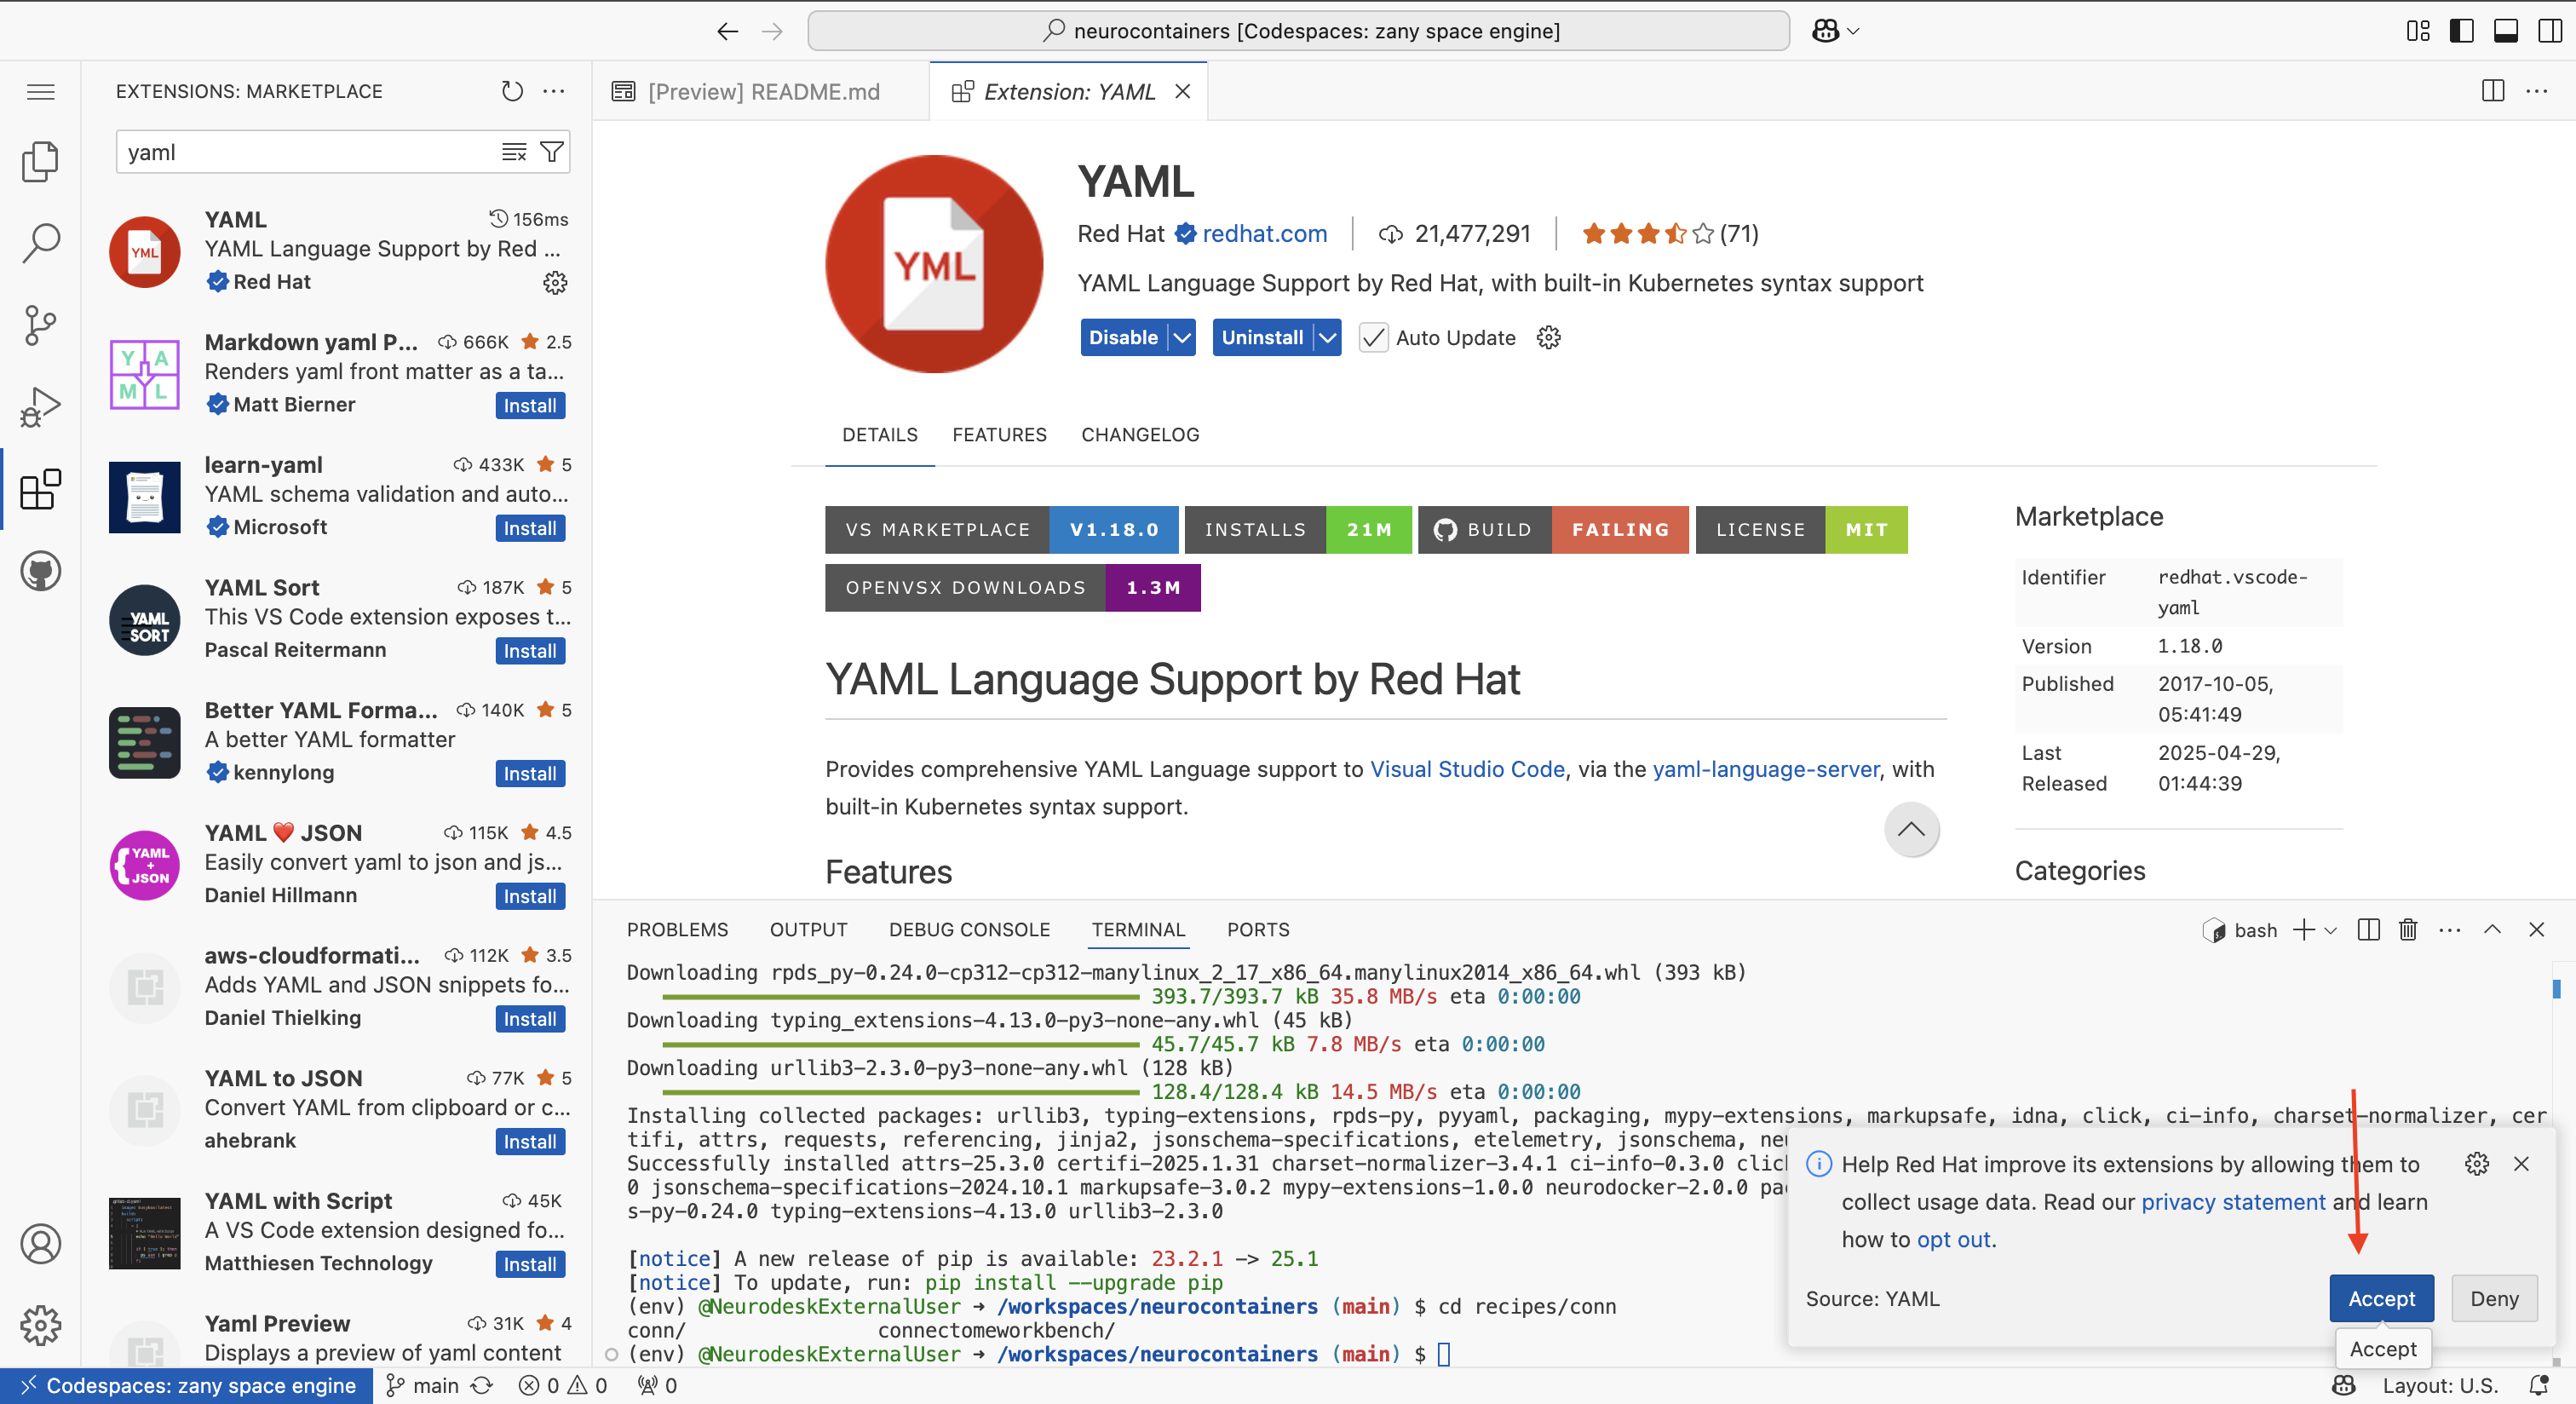
There will be another pop-up asking whether you allow the developers to collect data. You may click “Agree” or “Deny”
4. Make Changes to the desired Container
Navigate back to the Explorer tab using the icon on the left of your screen.
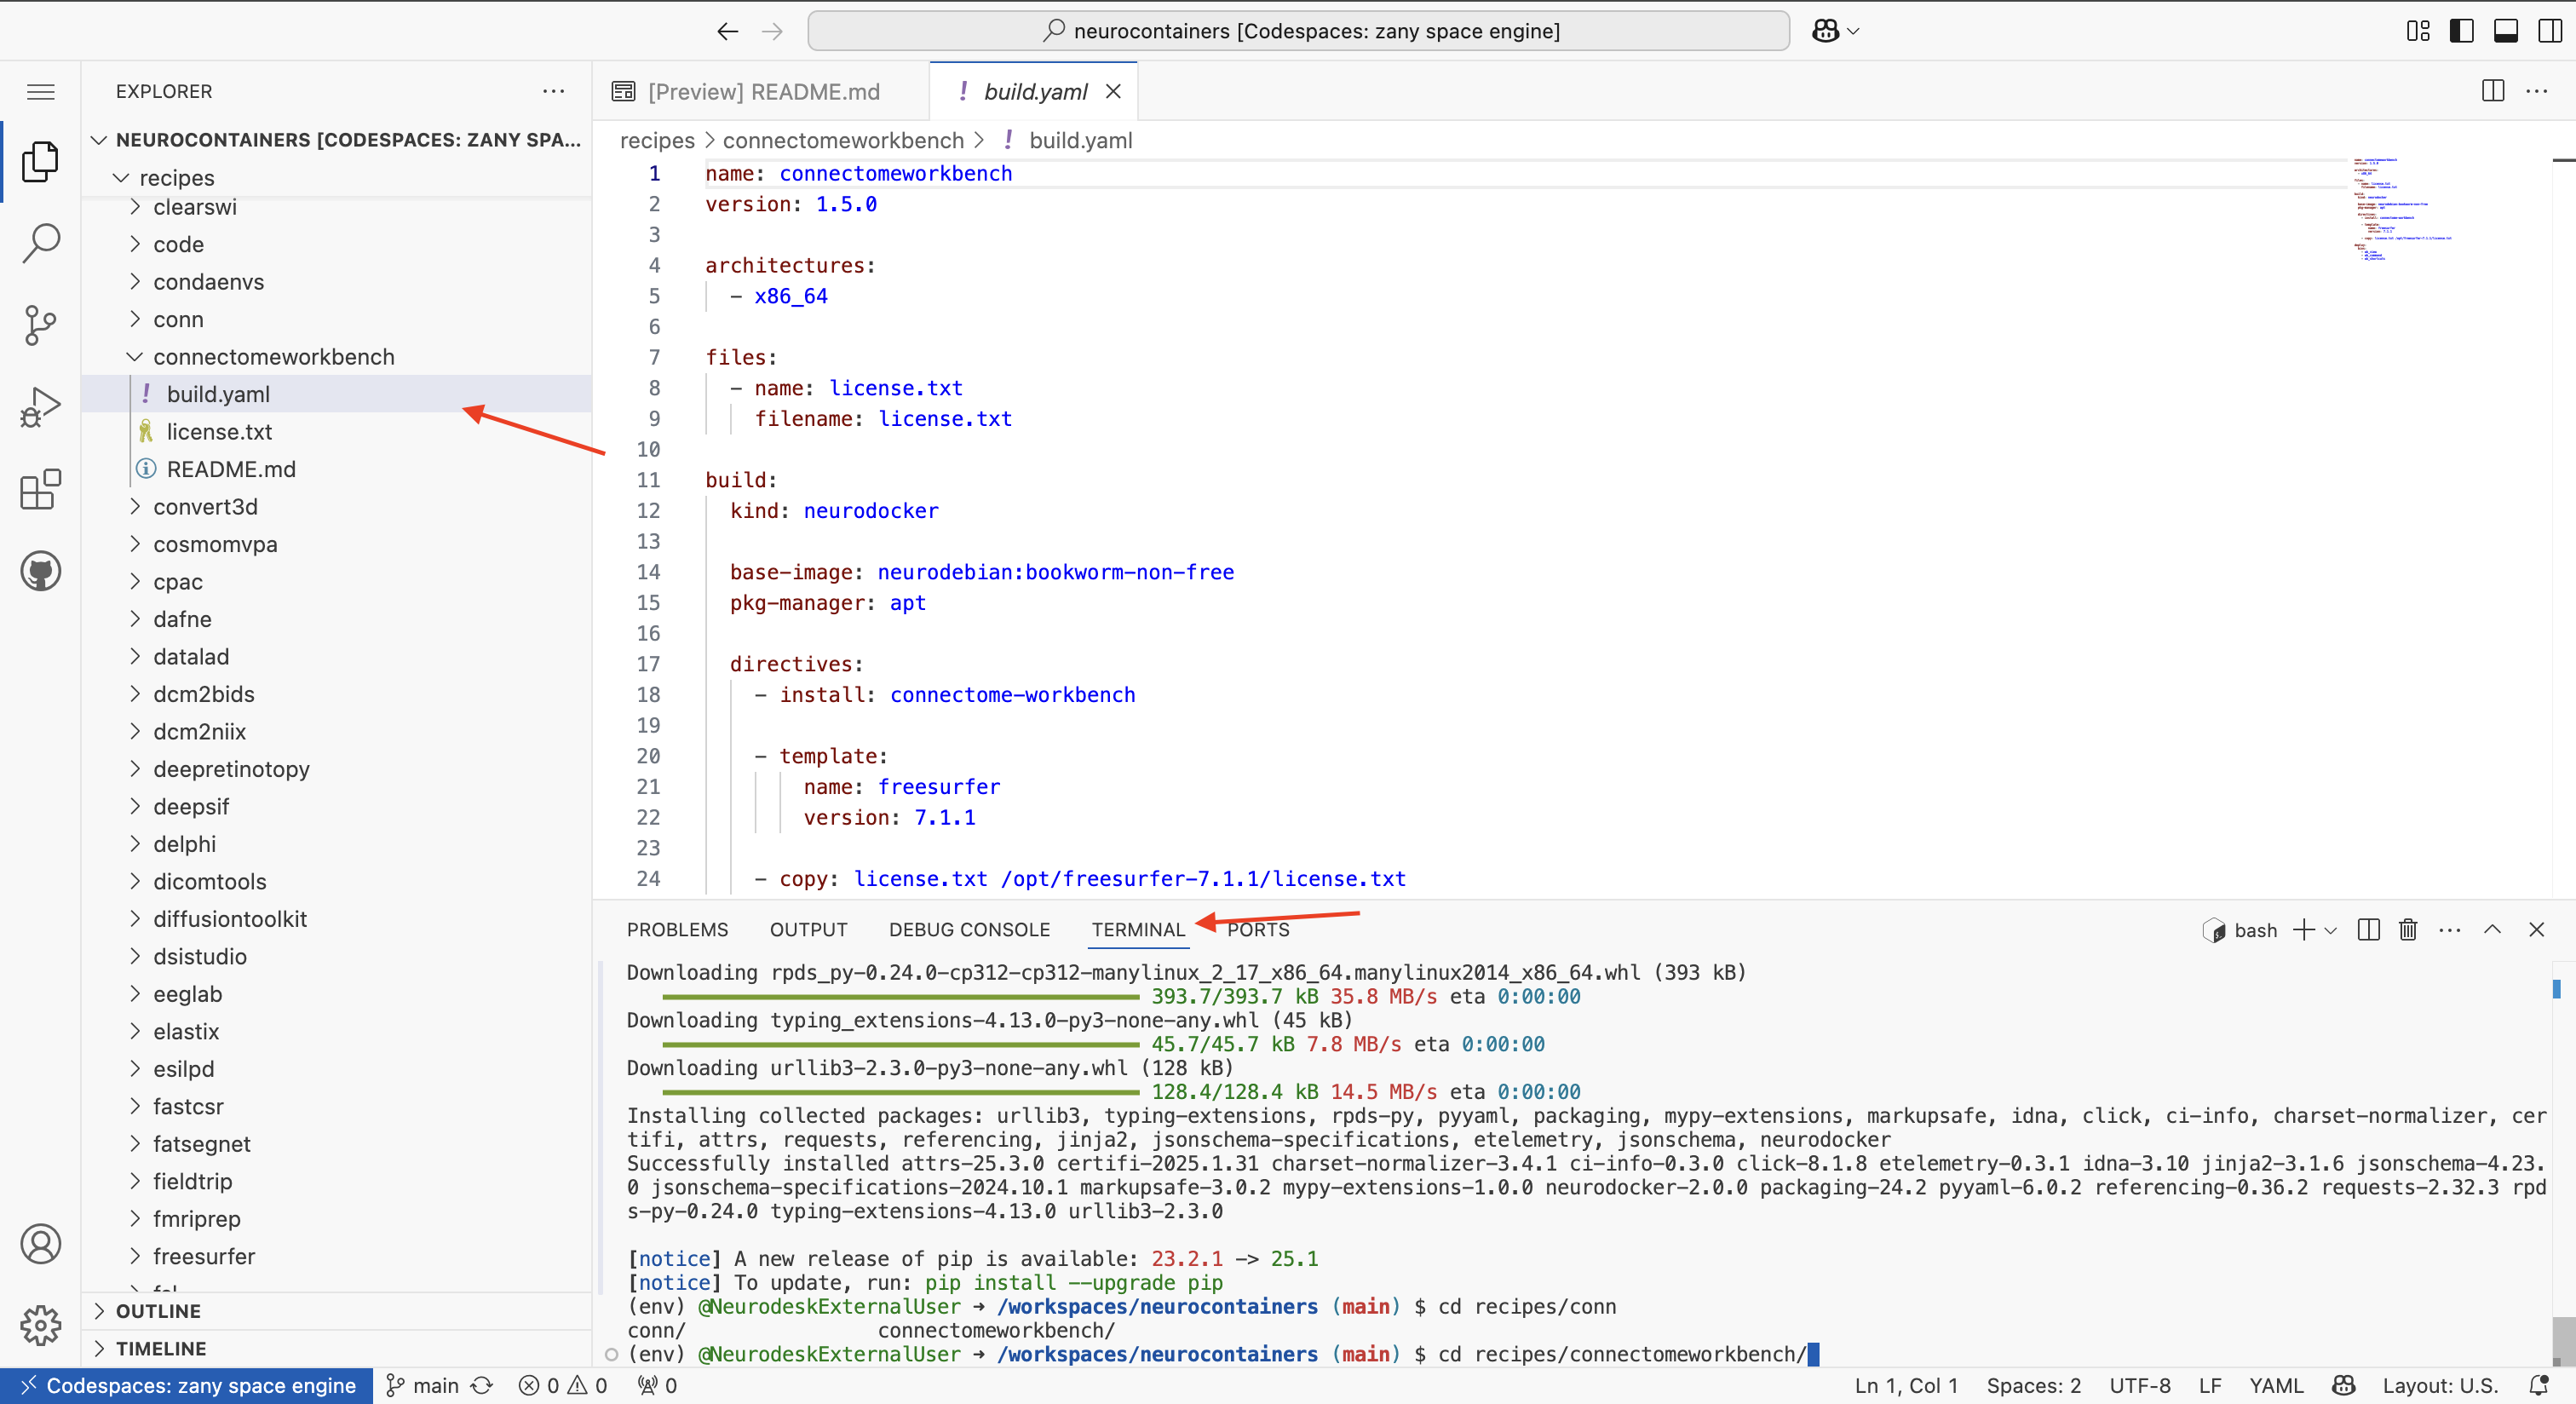
Using either the terminal at the bottom of your Codespace or the file browser on the left, navigate to the build.yaml file of the tool you wish to update.
In this example, we are updating the [**Connectome Workbench**](https://neuro.debian.net/pkgs/connectome-workbench.html) tool.
Each tool has its own folder inside the recipes/ directory, and inside that folder, you will find the corresponding build.yaml file.
- Using the GUI (file browser): Navigate manually to
recipes/connectomeworkbench/. - Using the terminal, you can use:
cd recipes/connectomeworkbench/ #or whichever other neurocontainer you want to update
Editing the build.yaml
Open the build.yaml file. Make the necessary updates to:
- Software version numbers
- Dependencies
- Download links
- Build instructions (if needed)
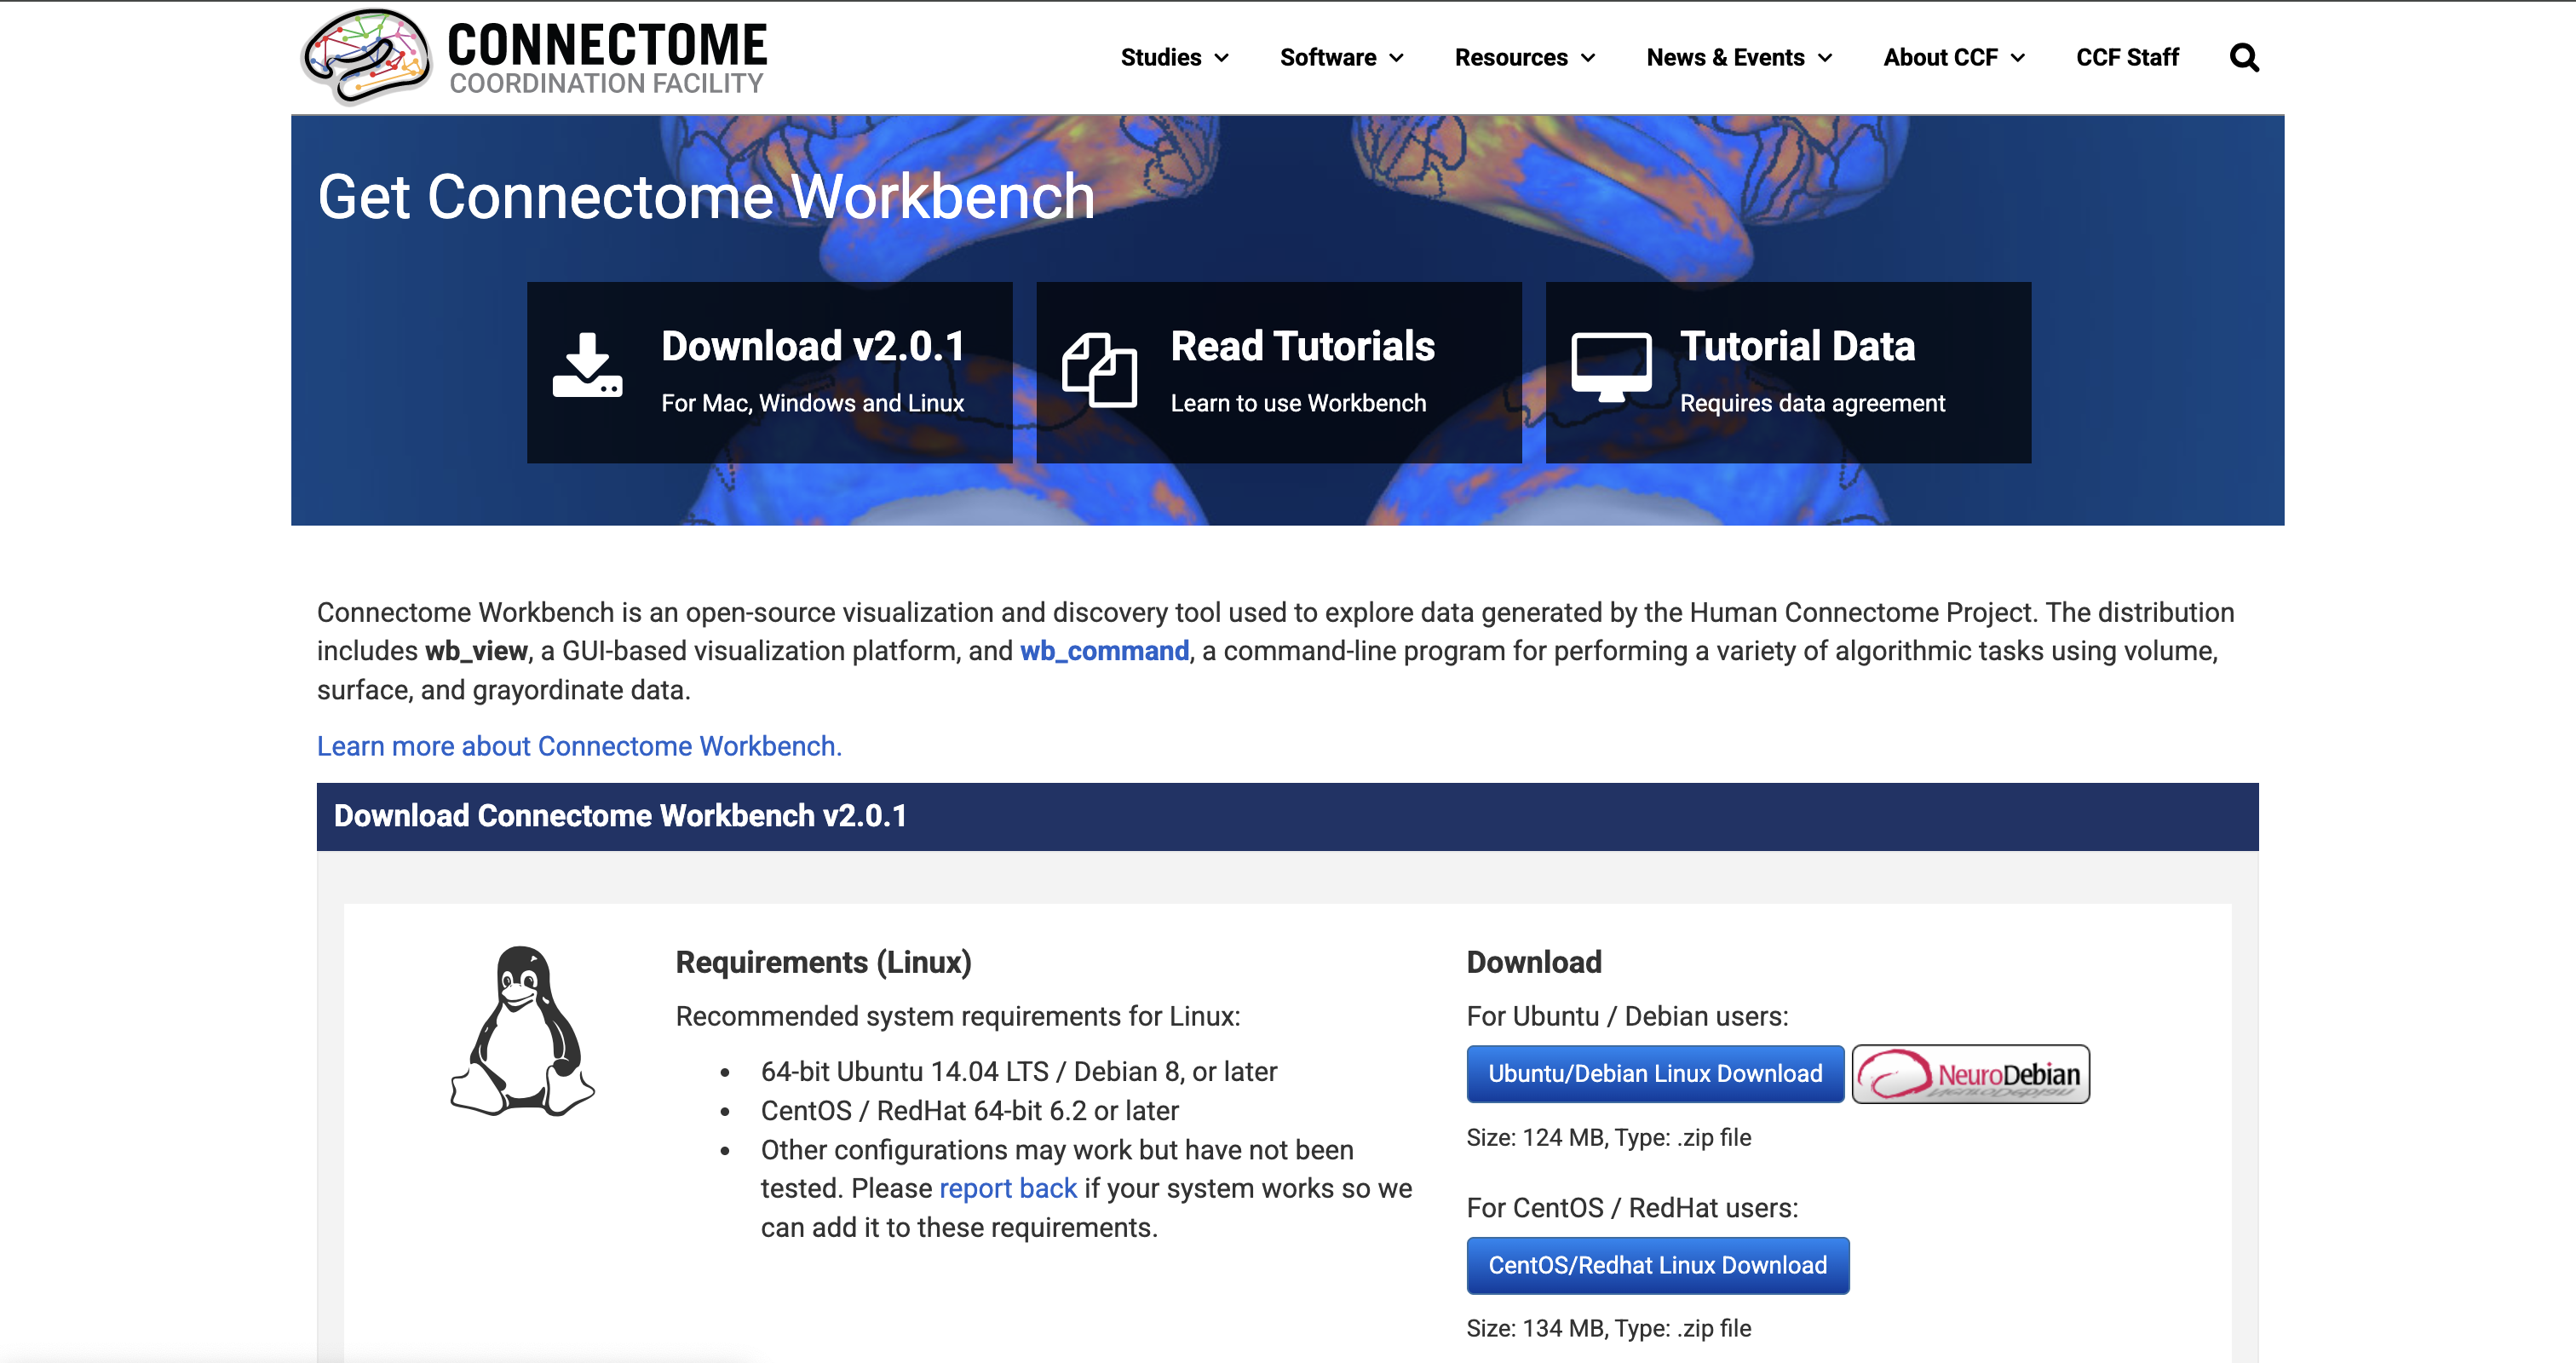
In this example, when we go to the Connectome Workbench website, we can see that the latest version available is Connectome Workbench v2.0.1.
To update Neurocontainer version, simply change the version: to 2.0.1
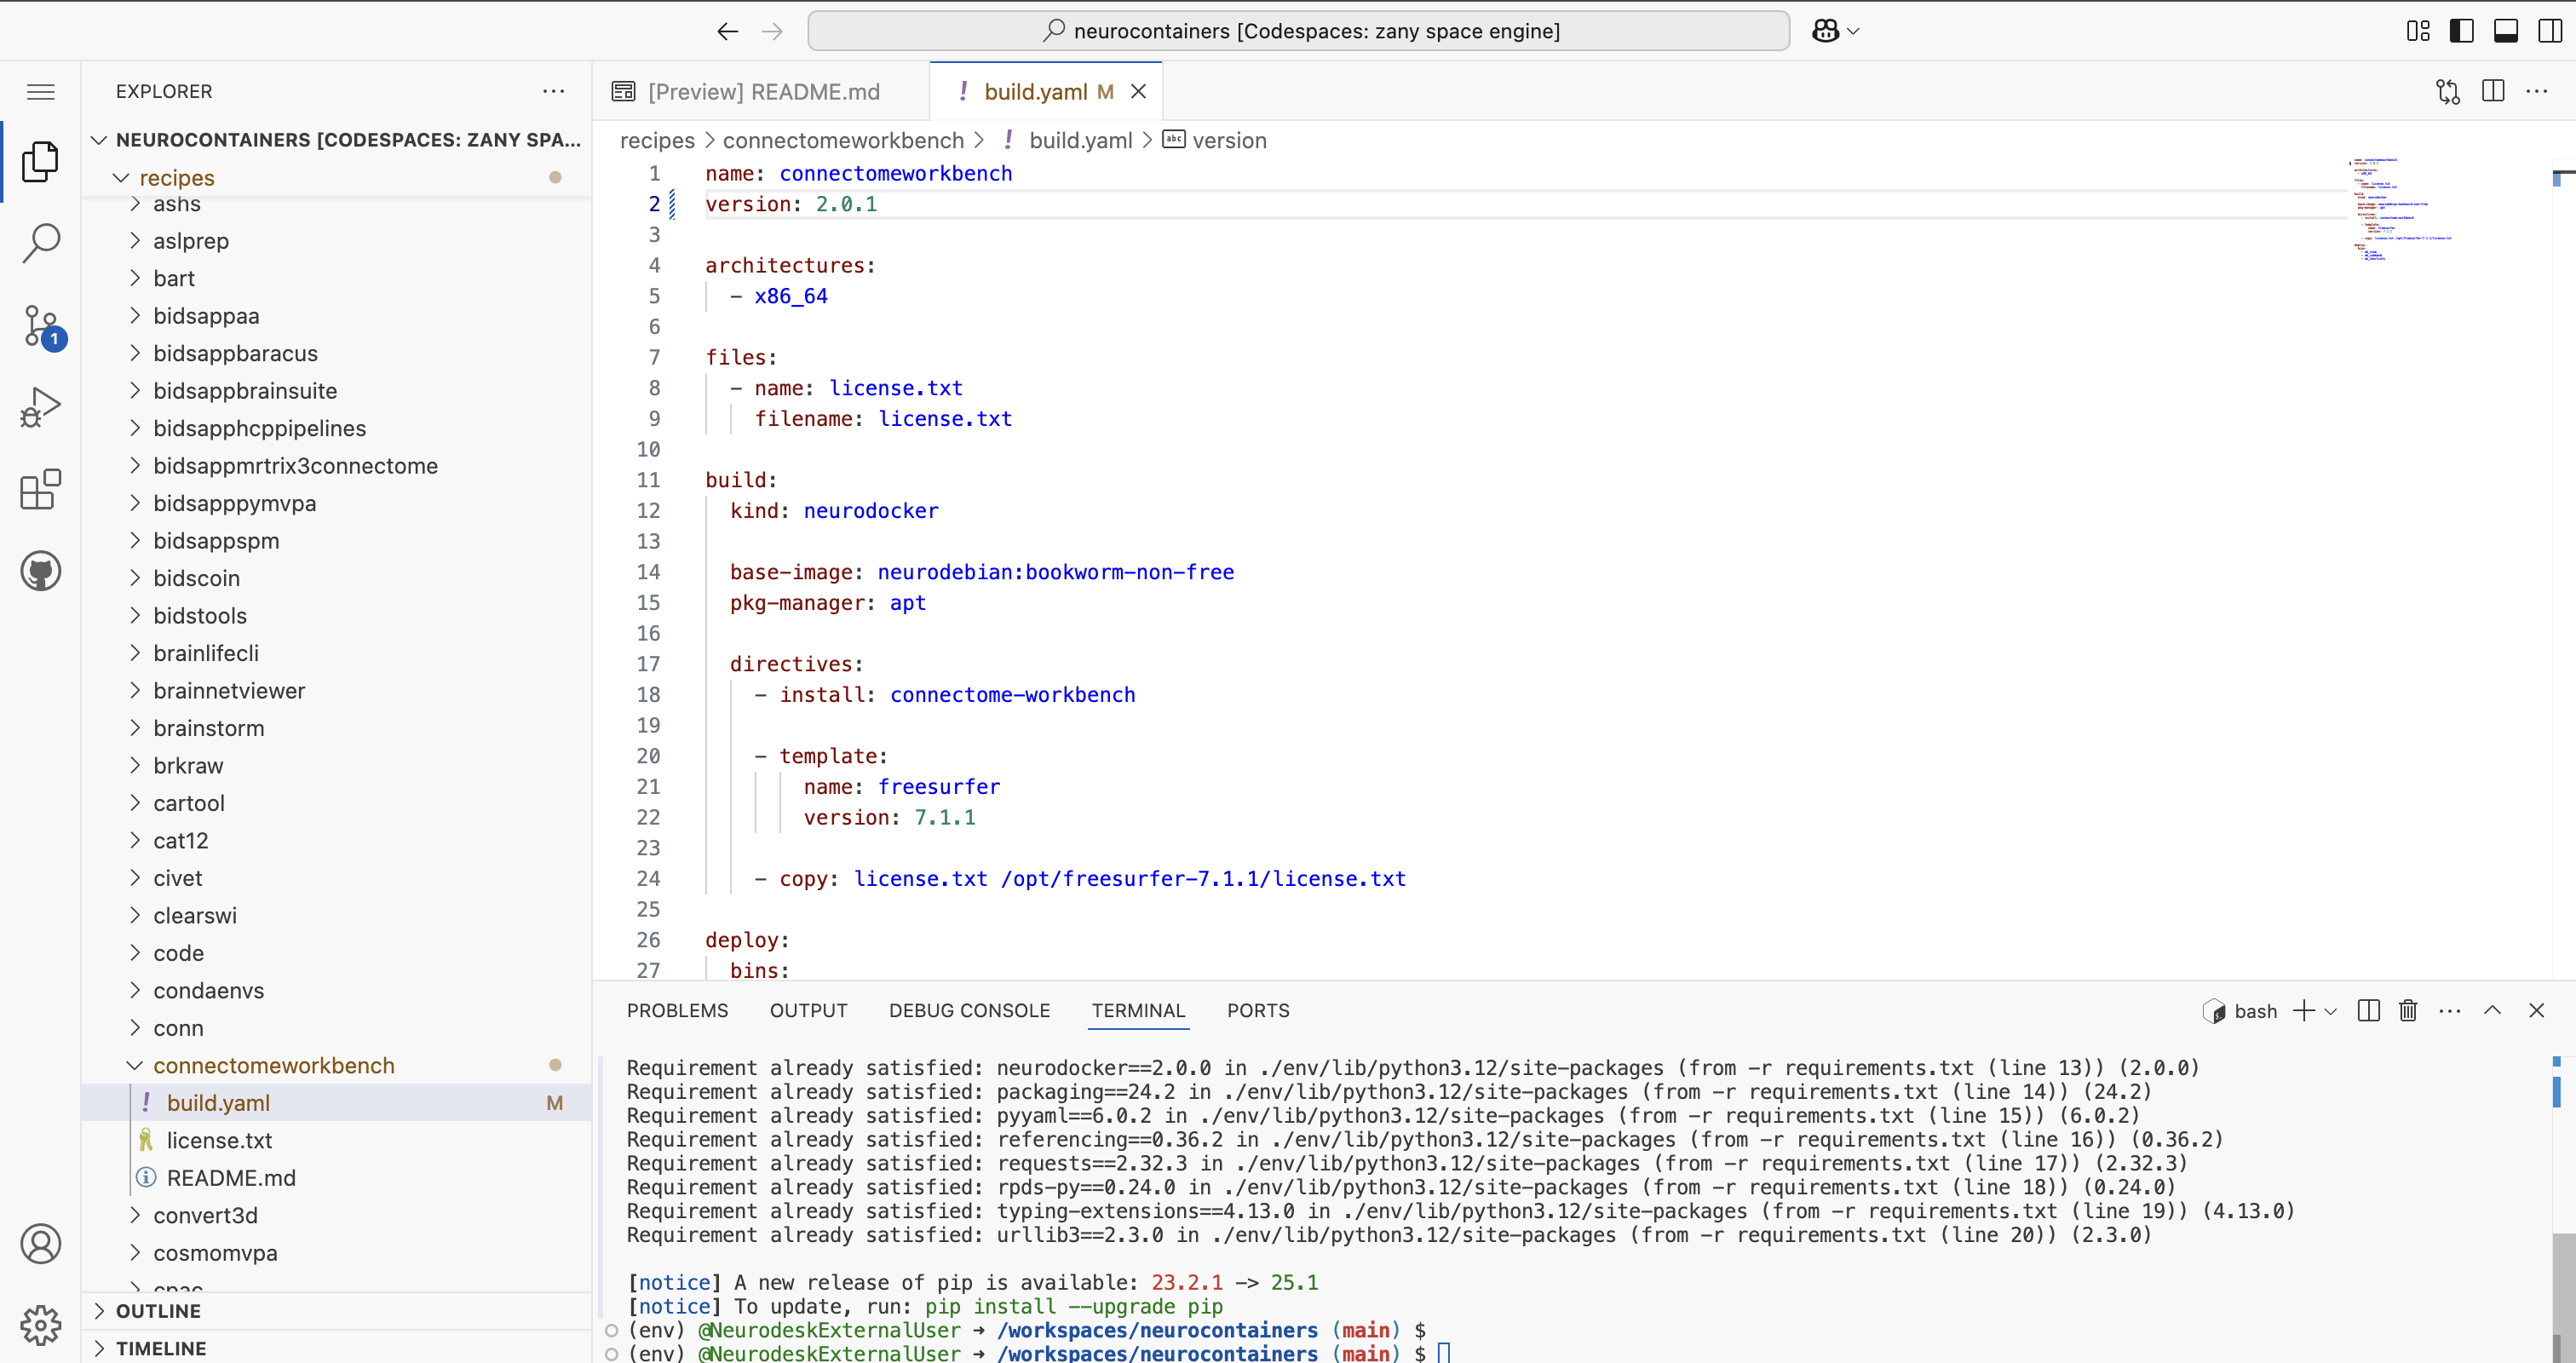
If you are unsure how to structure the build.yaml, please refer to the examples provided in the Neurocontainers builder documentation.
Important:
Keep your formatting strict! YAML files are indentation-sensitive. Use spaces, not tabs.
Once you have made your changes, save the file.
5. Validate Your Changes
Before committing, make sure your changes are valid.
In the terminal, run:
builder generate connectomeworkbench --recreate # Replace connectomeworkbench with the name of the folder you updated

# This second step requires Docker and can take some time
builder test connectomeworkbench --recreate --build # Replace connectomeworkbench with the name of the folder you updated
The first command will:
- Parse your
build.yaml - Check for syntax errors
- Generate the Dockerfile without building the container
The second command builds the Docker image and runs the recipe’s tests. If Docker is unavailable, successful generation is still useful validation, but it does not prove that the image builds or that its tests pass.
You will be able to see the progress for each of the building steps.
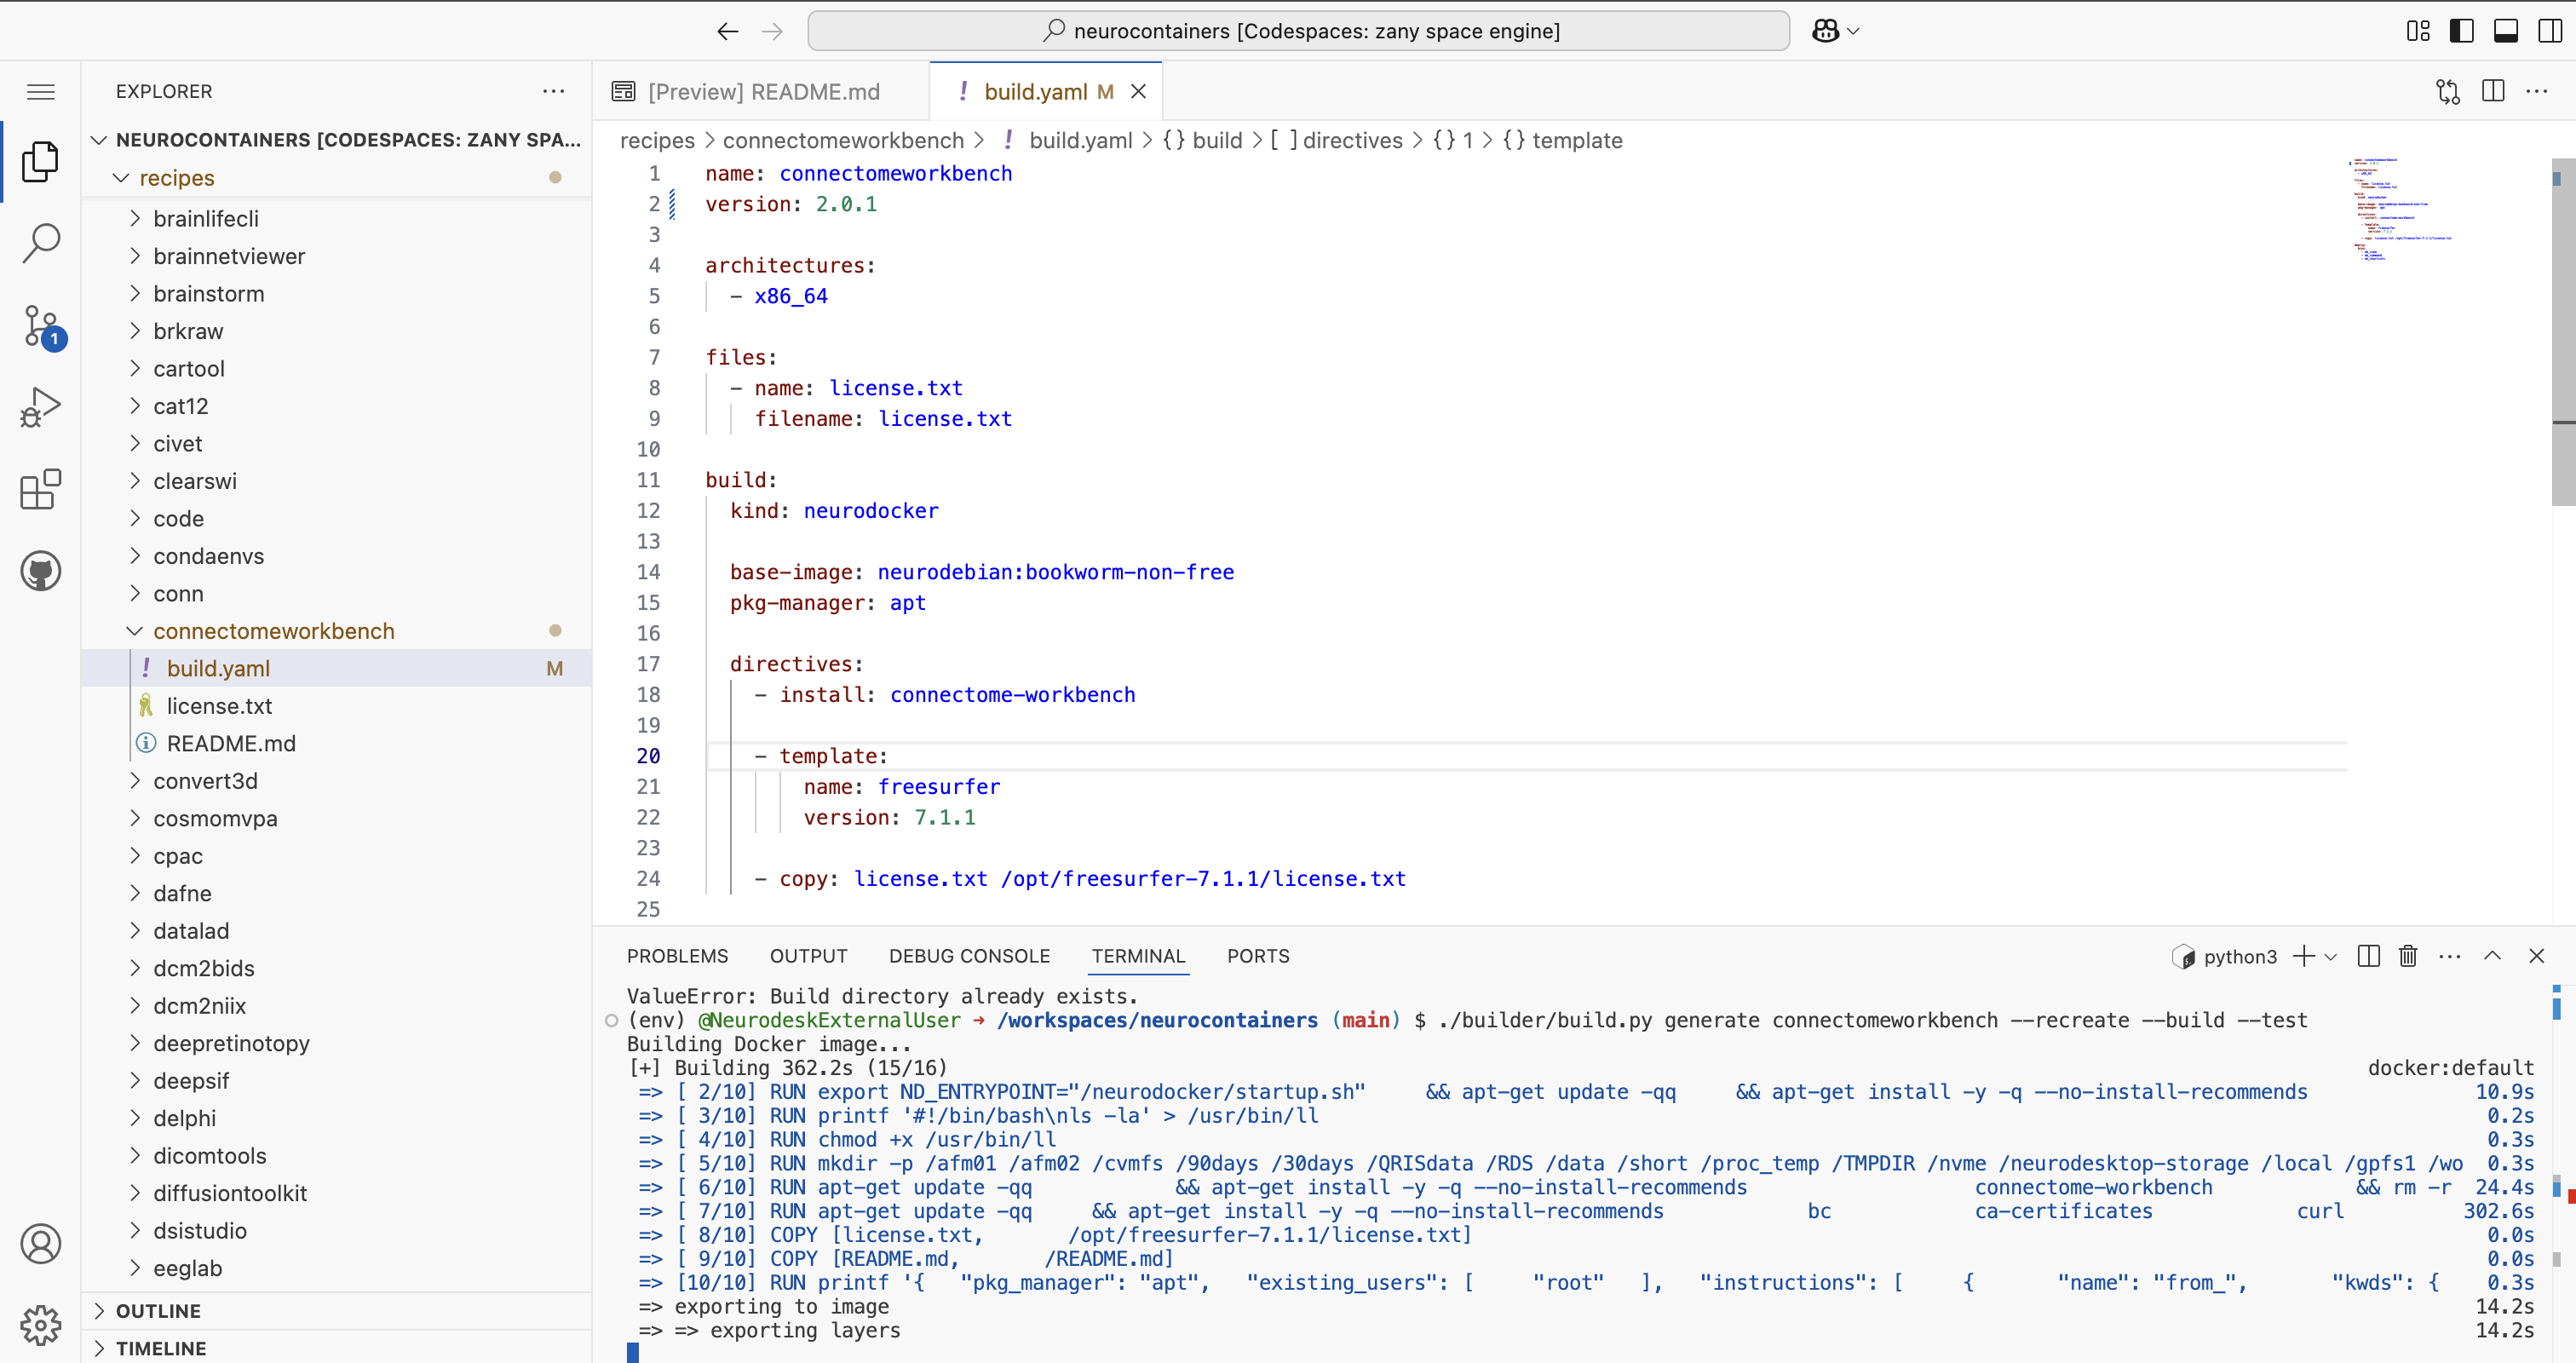
If there are errors, correct them before proceeding.
Once the build and tests finish successfully, you are ready to commit and push your changes.
6. Commit and Push Your Changes
Once you have validated your build.yaml, it’s time to save and upload your work.
In the terminal:
to check which files were changed.
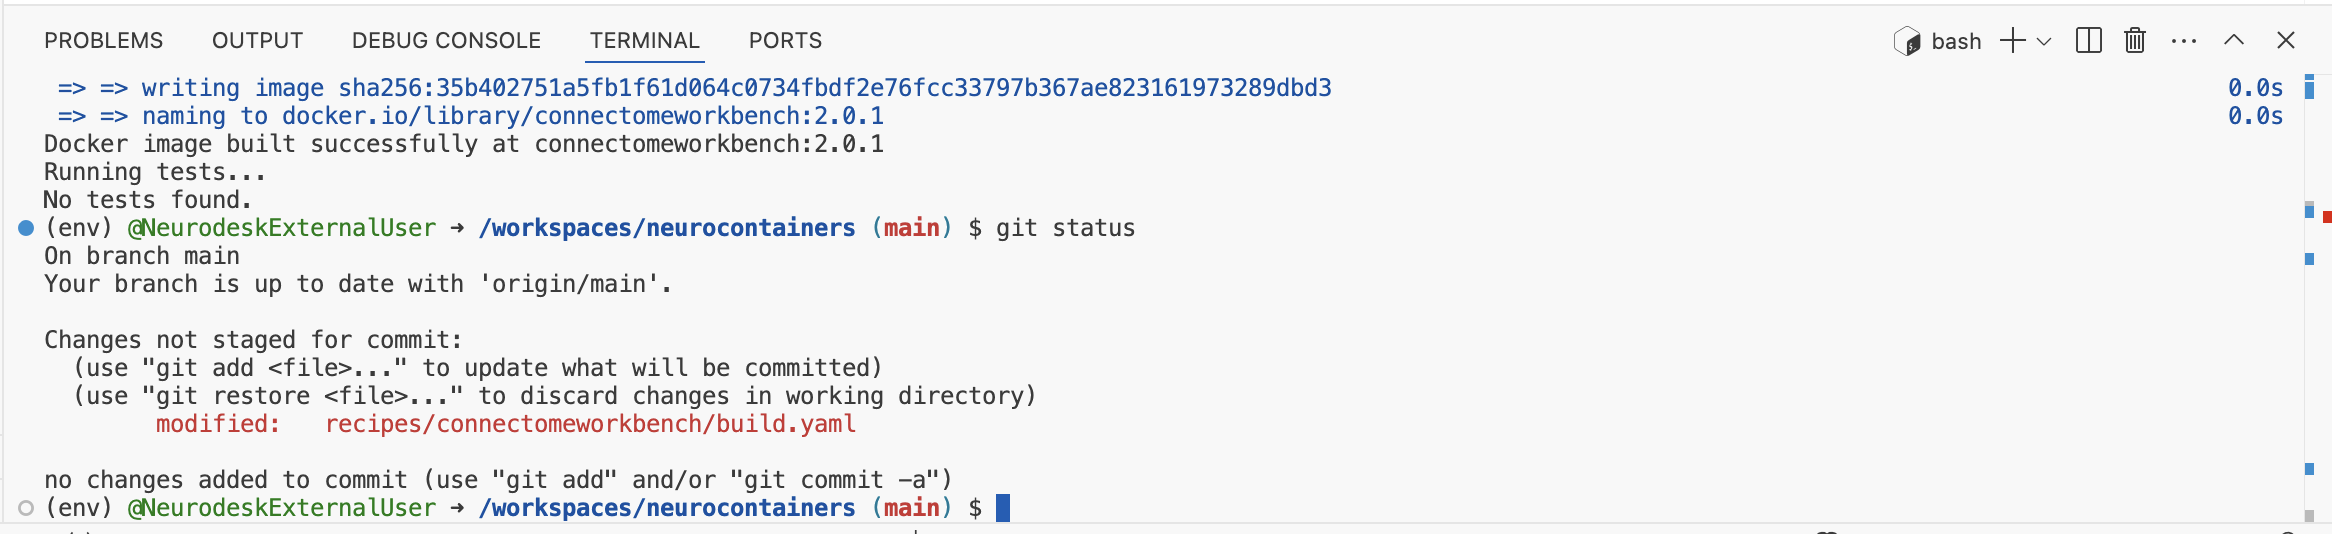
If only this reflects the changes you’ve made, then stage, commit, and push your changes:
git add recipes/connectomeworkbench/build.yaml #Replace connectomeworkbench with the name of the folder you updated
git commit -m "Update connectomeworkbench container: updated version 2.0.1" #Adapt commit message
git push
Make sure your commit message is clear and descriptive, for example:
Update Connectome Workbench container to version 1.5.0 Adjust the commit message based on the updates you made to the neurocontainer.
7. Create a Pull Request
After pushing your changes:
- Go back to your forked repository on GitHub.
- You should see a banner saying “This branch is X commits ahead of
neurodesk/neurocontainers:main”.
You can either click on **X commit ahead of** to view the differences between your repository and the Neurodesk repository and then **Create pull request**
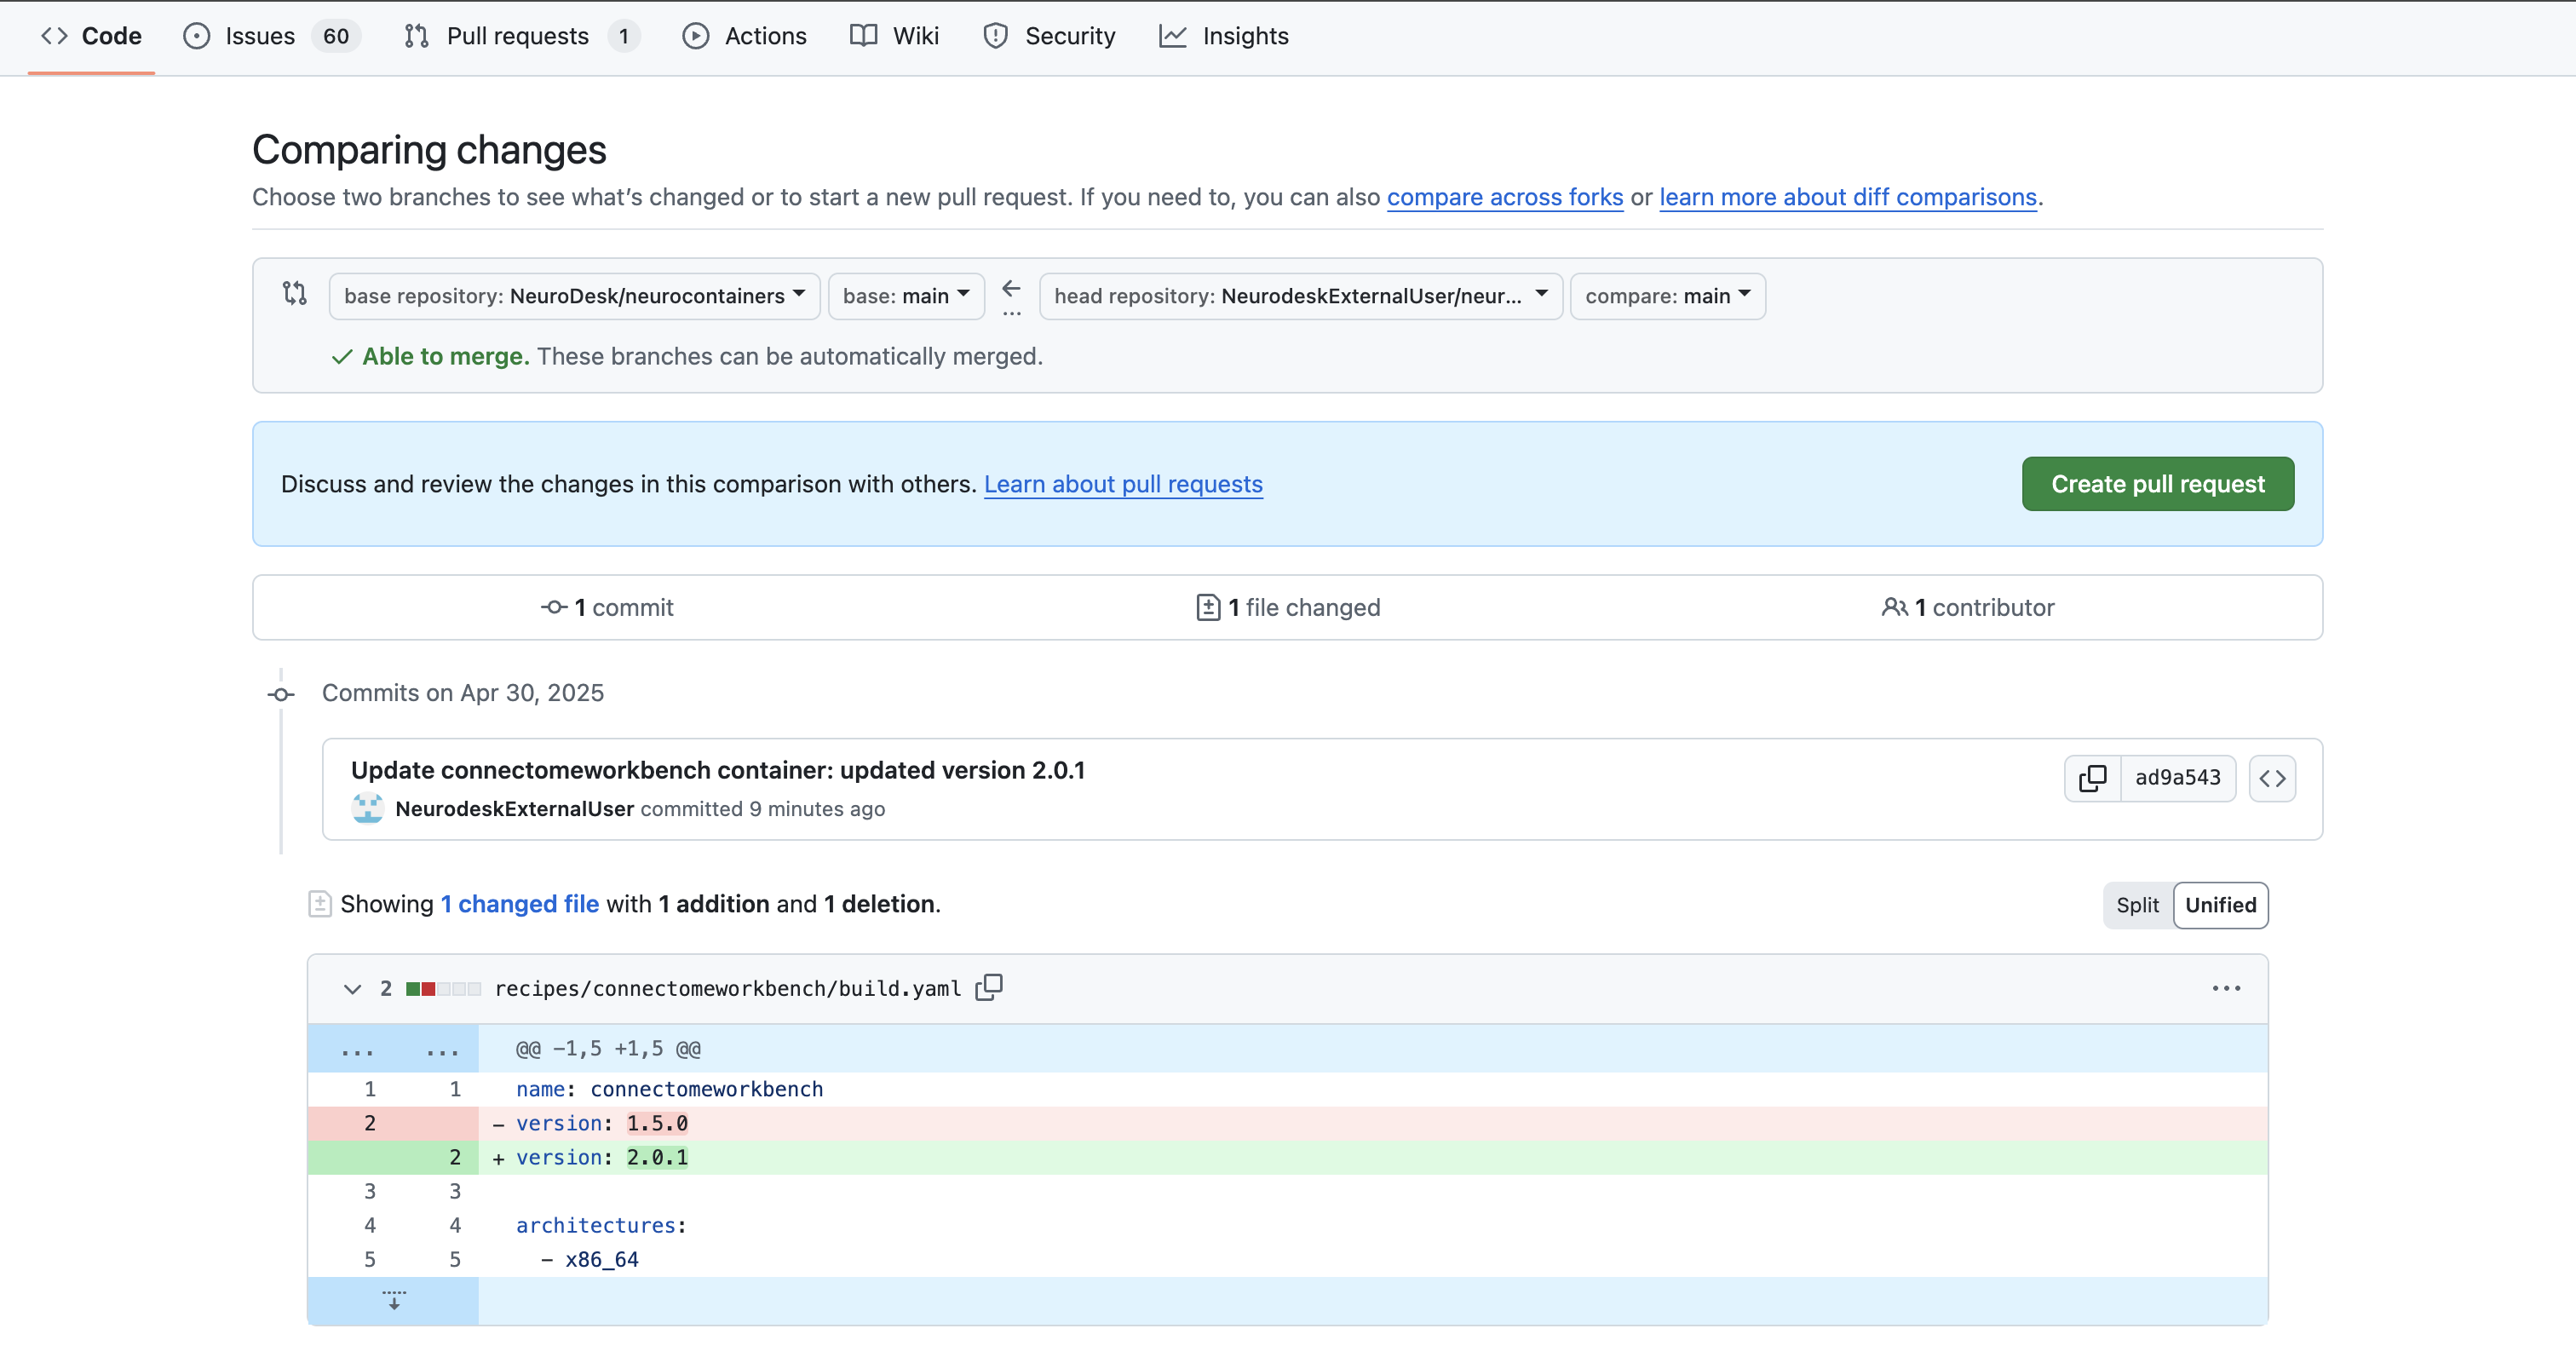
or
click on Contribute > Open pull request.
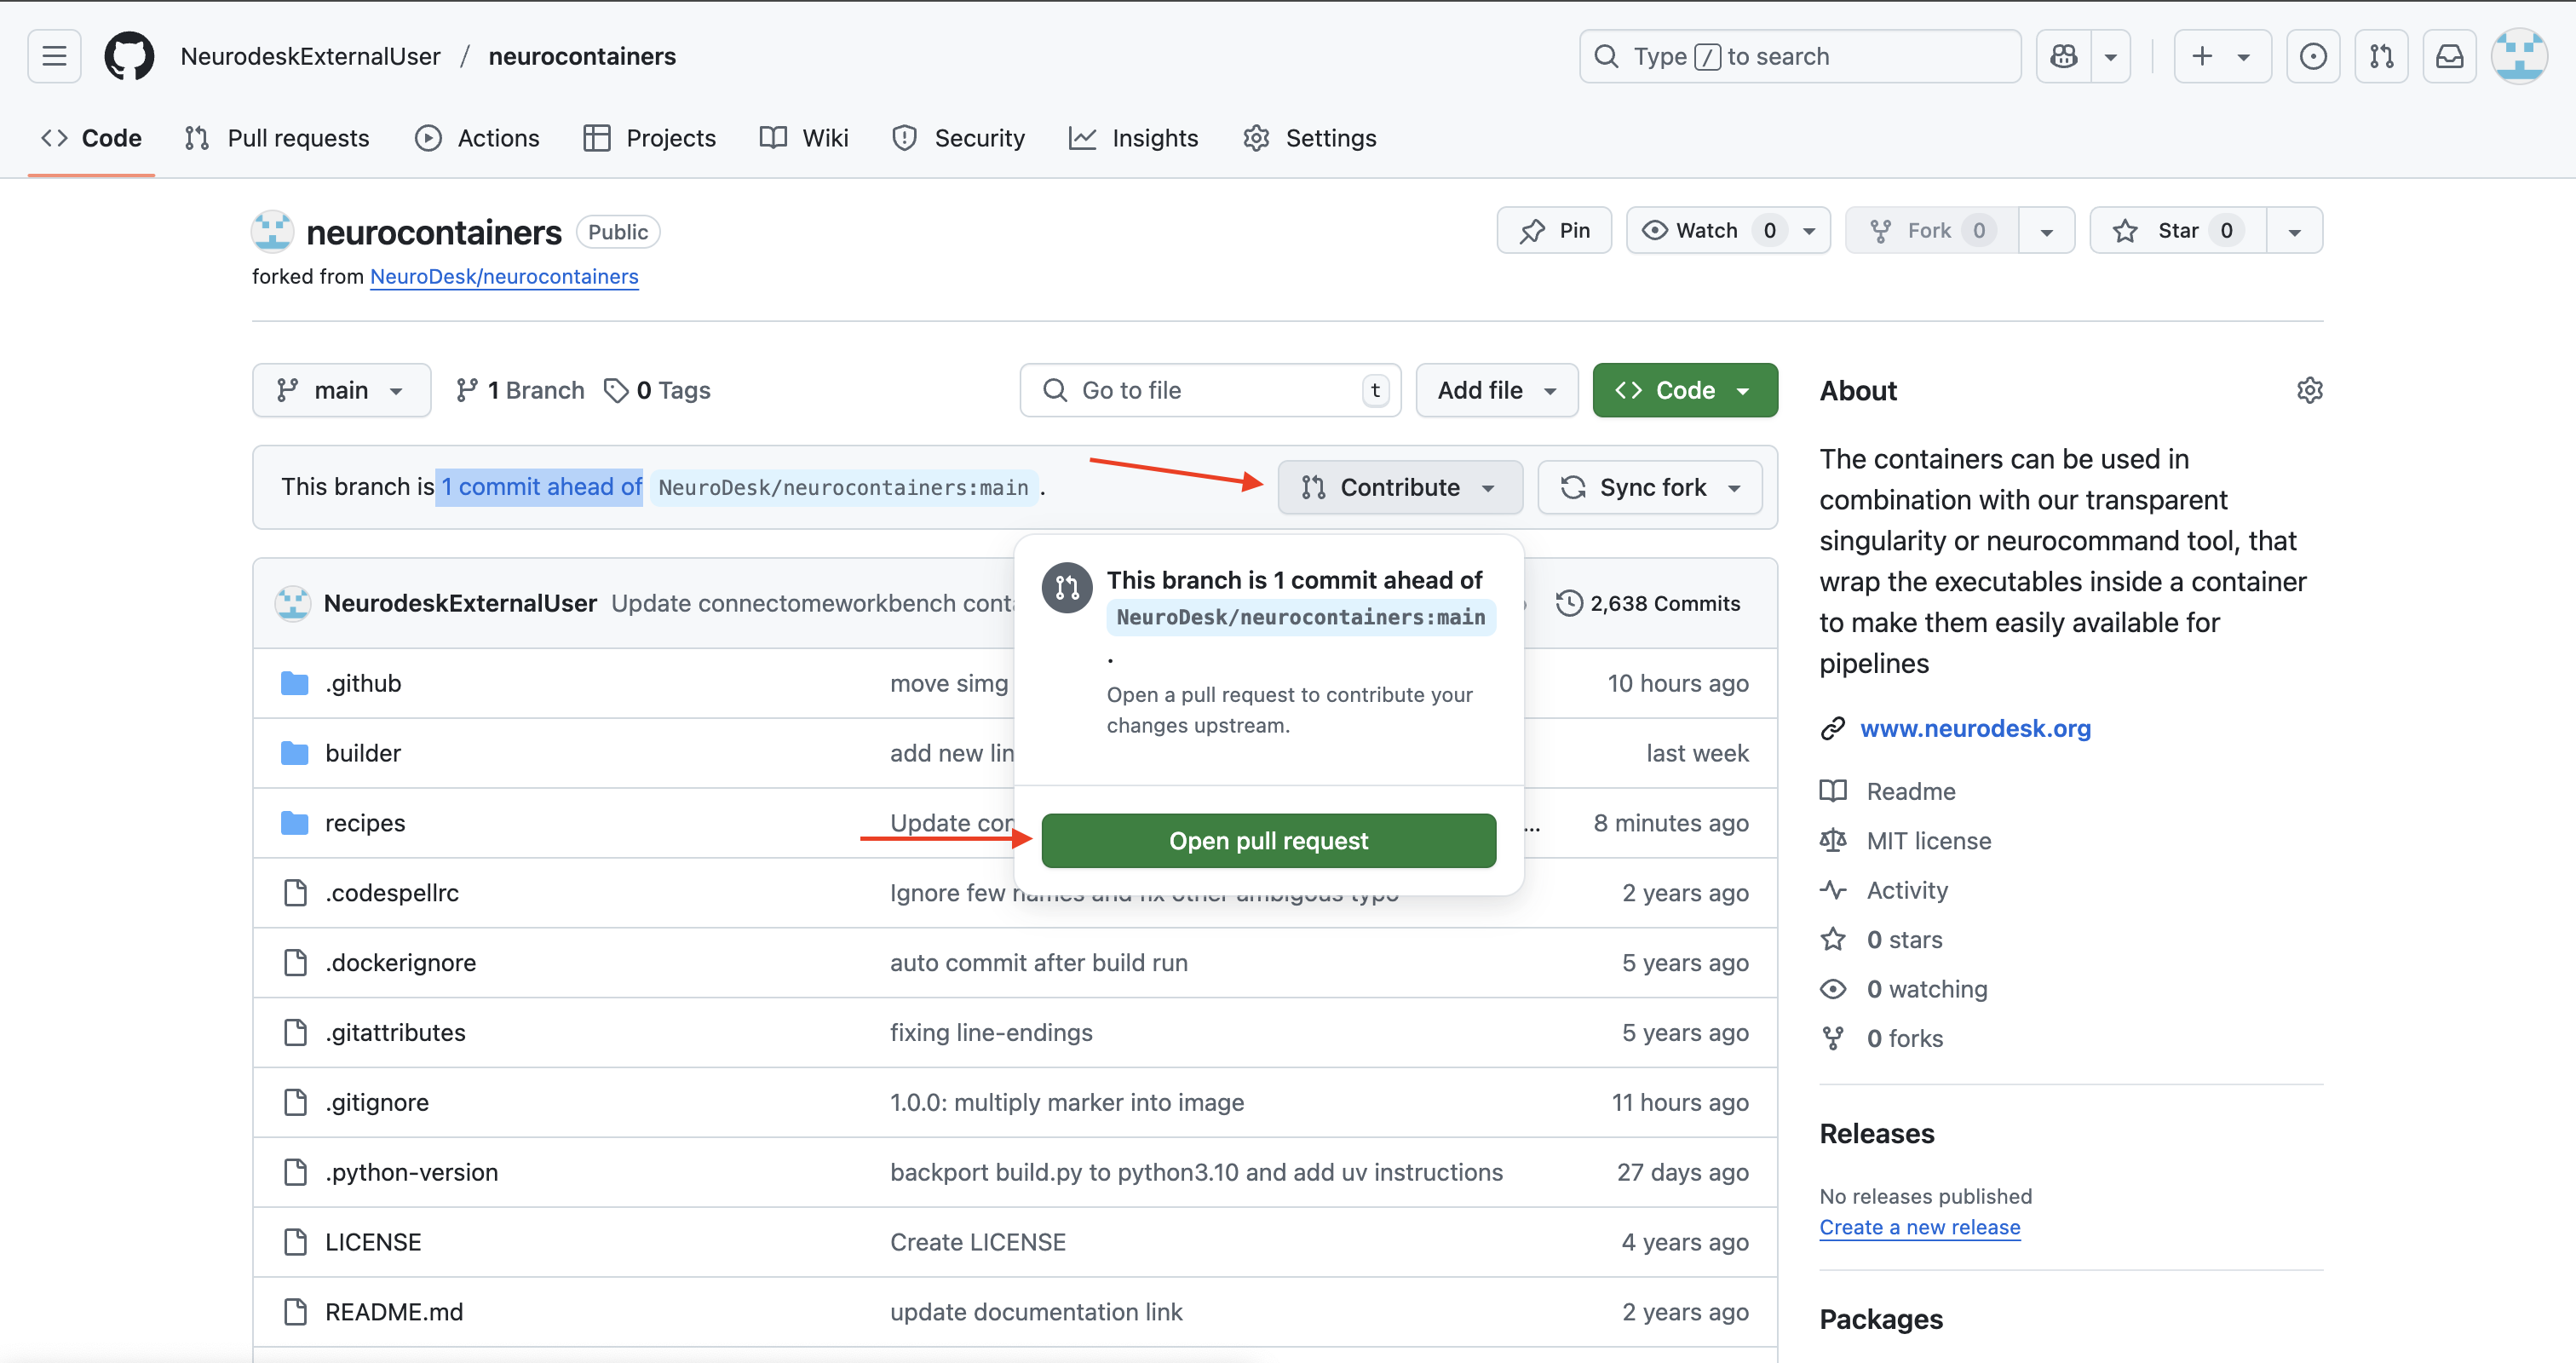
- In the Pull Request:
- Provide a clear title (e.g., Update Connectome Workbench to v1.5.0)
- Write a brief description of what you changed (version bump, new dependencies, etc.)
- Create the pull request.
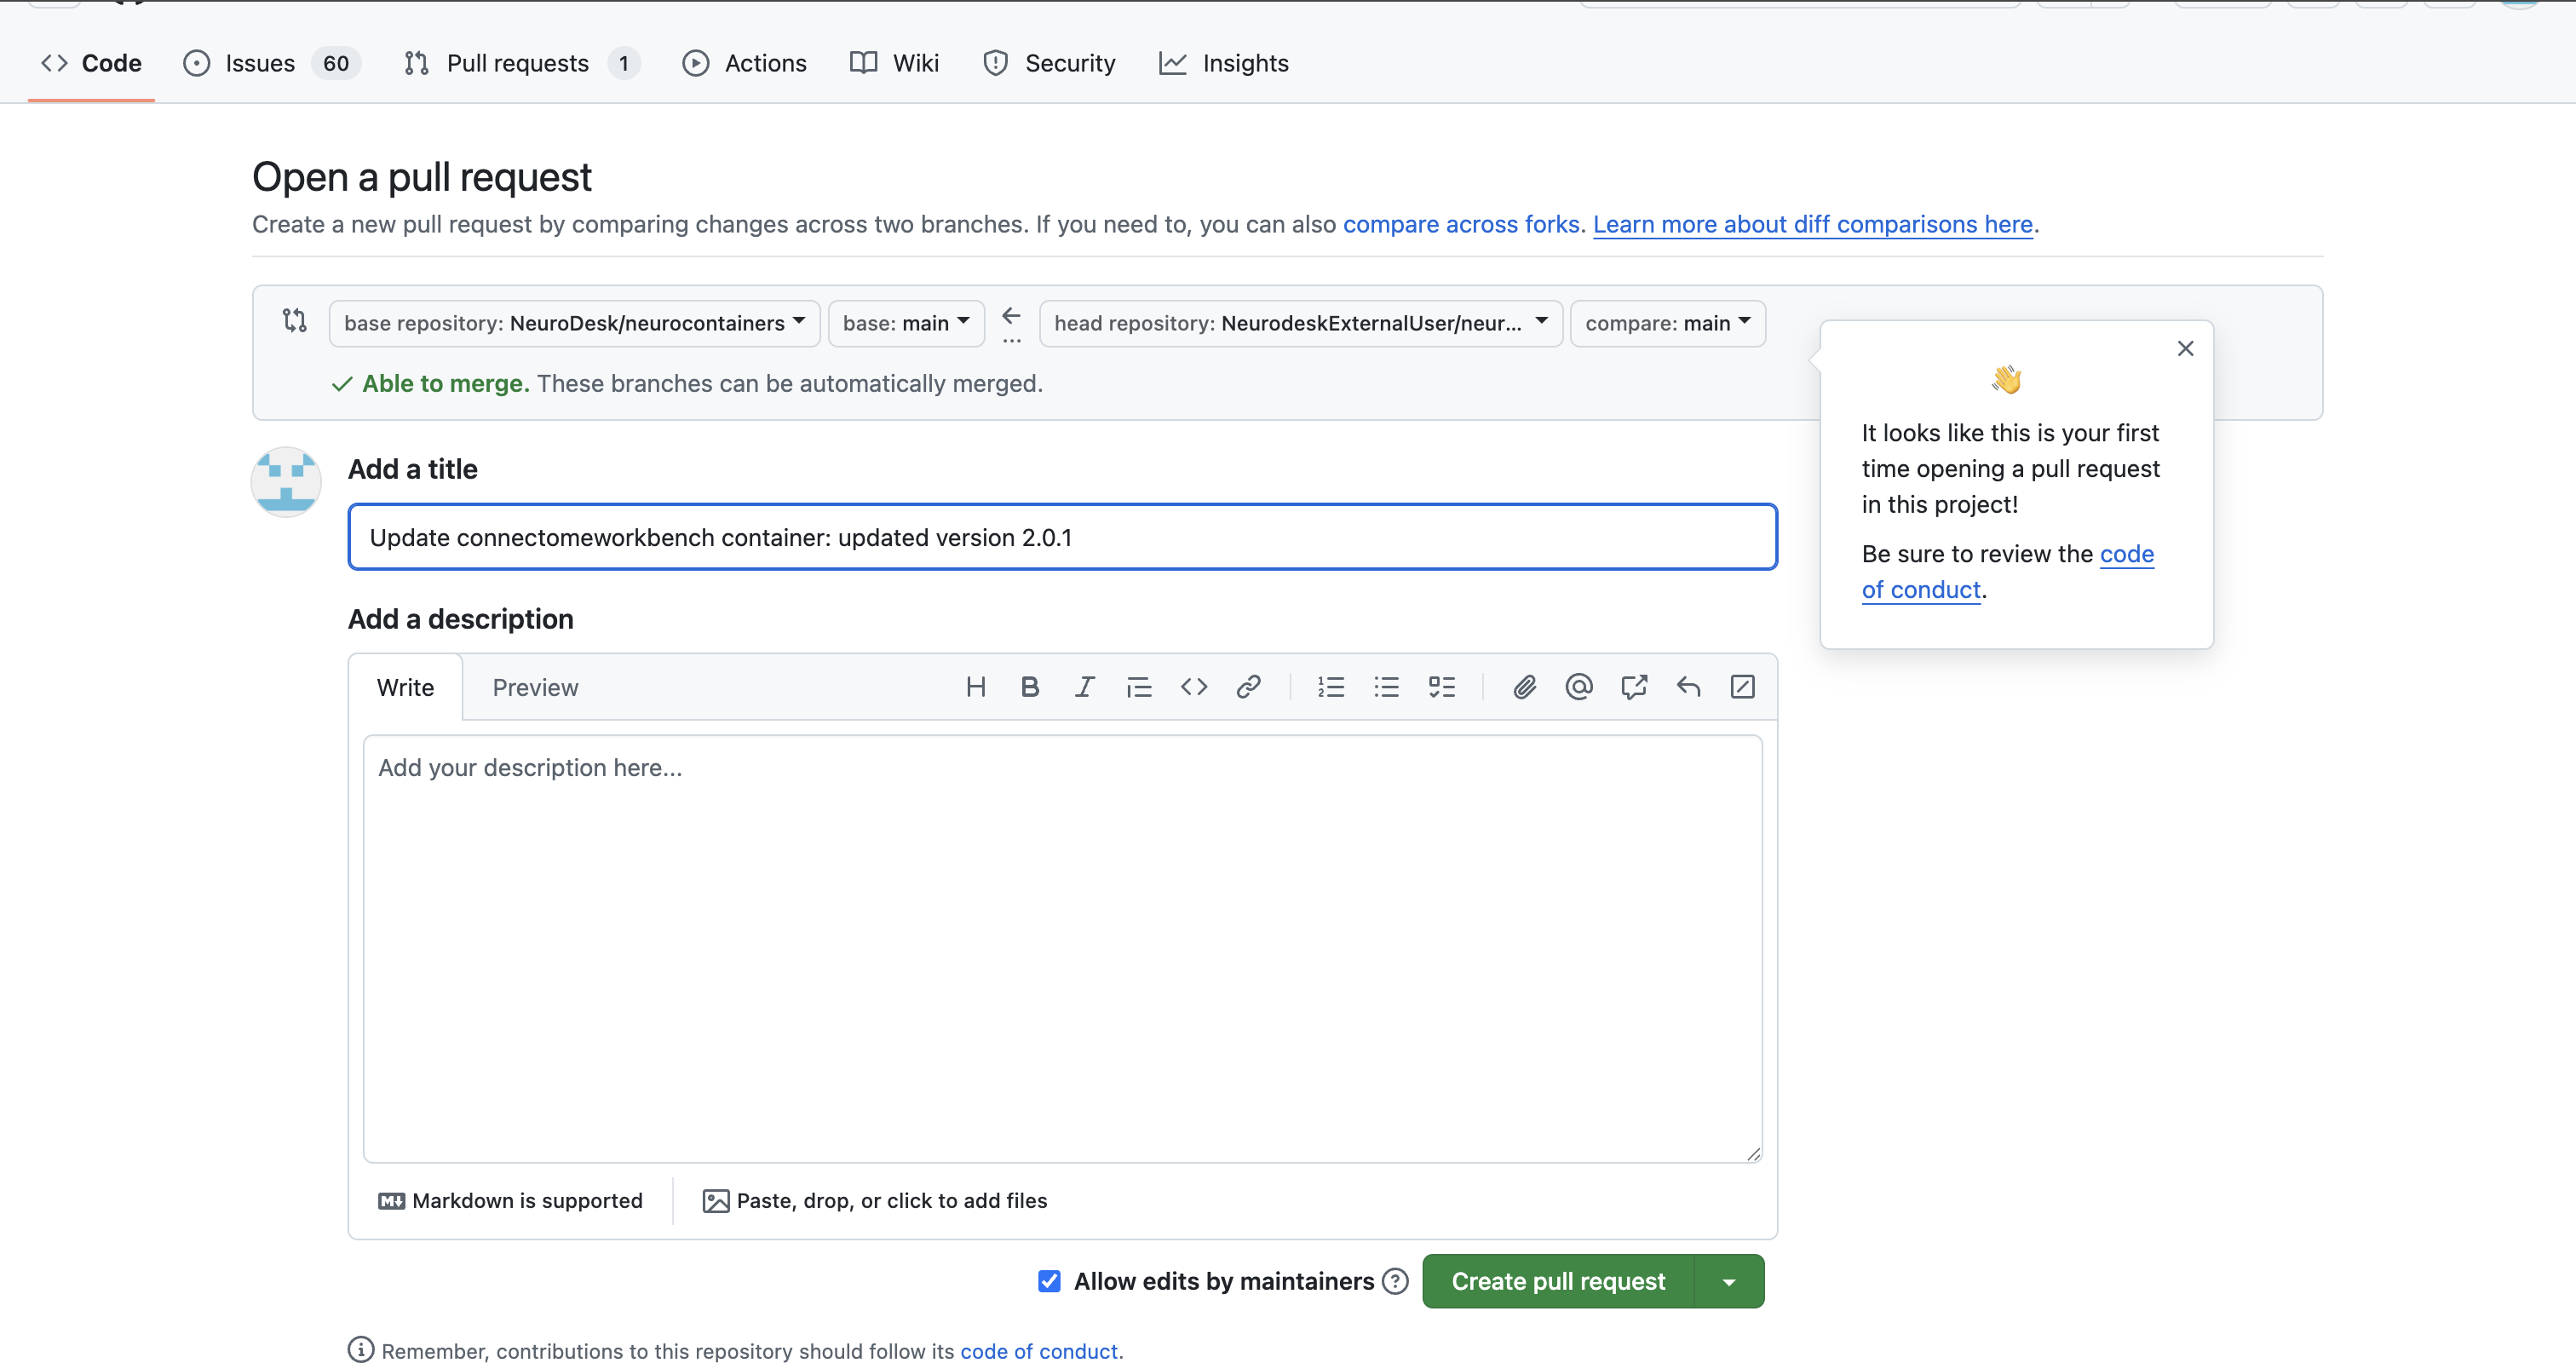
Our Neurodesk team will review your proposed update, test the updated container to make sure it work and merge your changes to Neurodesk if everything works correctly, allowing all users to benefit.
More detailed documentation can be found here: https://github.com/neurodesk/neurocontainers/tree/main/builder
Need Help?
If you have questions or would like feedback before submitting:
We appreciate your contribution to the Neurodesk community and reproducible science.