Select your setups and follow further instructions in the provided link.
Compute Platform
Your OS
Interface
Processor
Instructions:
Compute Platform
Local PC
HPC
Cloud
Google Colab
Operating System
Linux
Mac
Windows
Interface
Desktop
Command Line
Container
VSCode
Processor
x86
ARM
GPU
Instructions:
Installation Examples
We show a couple of specific examples on how Neurodesk can be installed on various systems here.
Release
Ensure you note the release date of the Neurodesktop container image during installation, as it is indicated in the docker run command, e.g.
We regularly update Neurodesktop for optimal performance and updated software. Check the Release History for past releases. To upgrade your container, replace the release number with your desired version. For replicable analysis pipelines, share the stable release number you used, enabling others to recreate your work environment anywhere.
Video tutorial
See below for a 14 minute tutorial on getting started.
Install:
Double-click the downloaded .dmg file and drag NeurodeskApp into your Applications folder. To open: right-click NeurodeskApp.app and select “Open”.
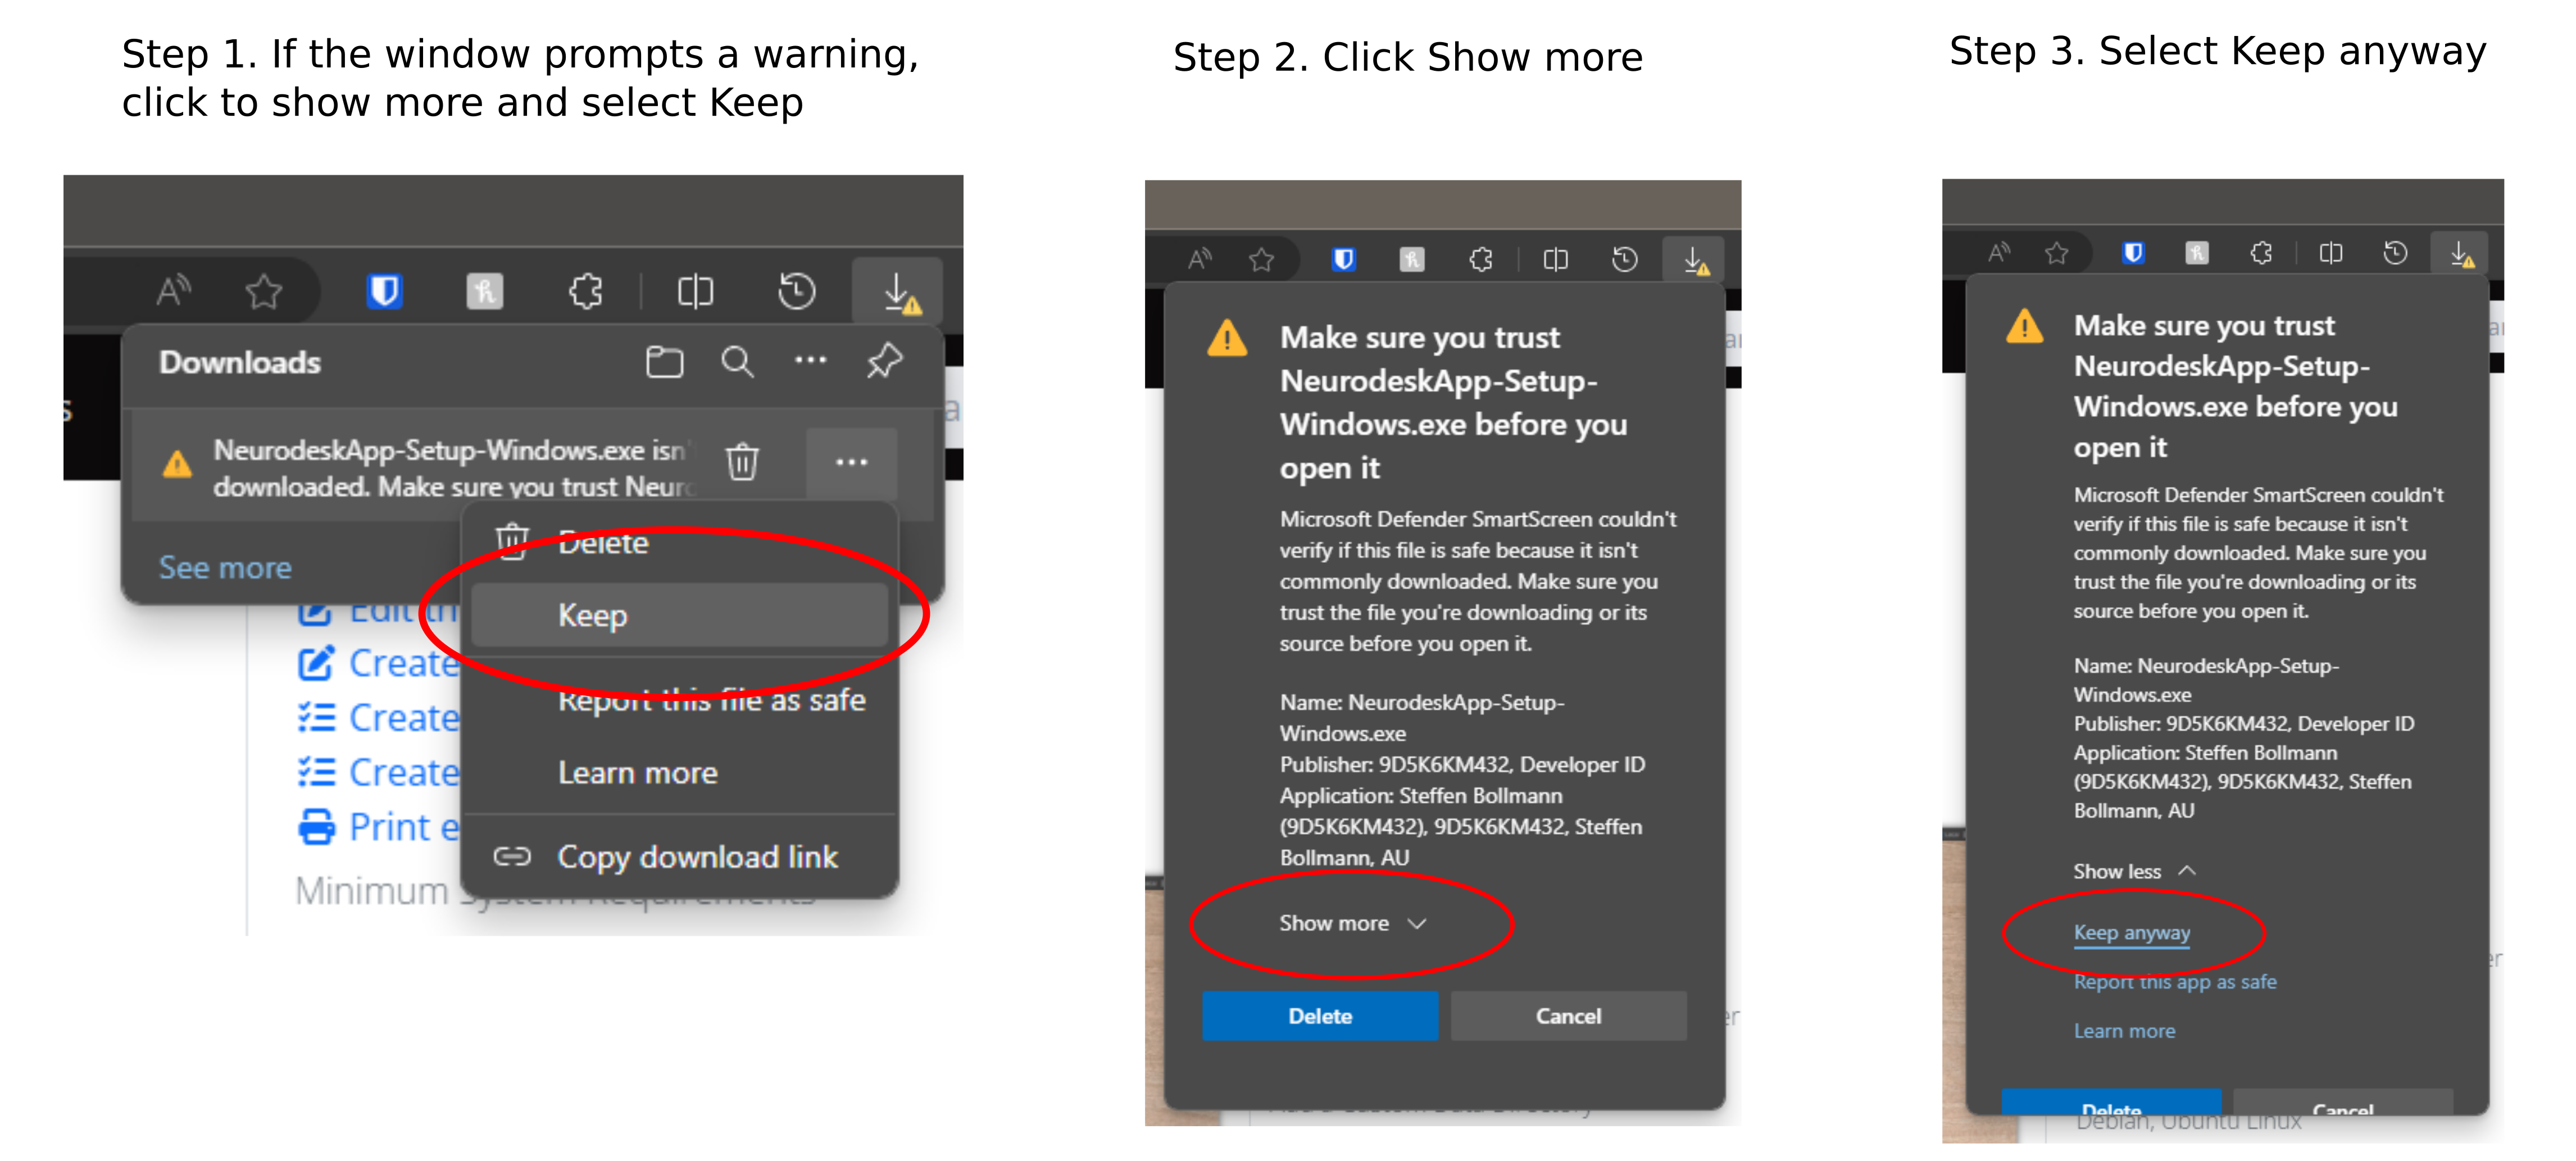
On Microsoft Edge, follow these steps to download the executable file:
Install:
Double-click the downloaded .exe file. Windows will show an “Unknown publisher” warning because the installer is not code-signed. This is expected — the installer is an official release from the neurodesk-app GitHub repository. Click “Yes” to proceed, then accept the license agreement and click “Finish”.
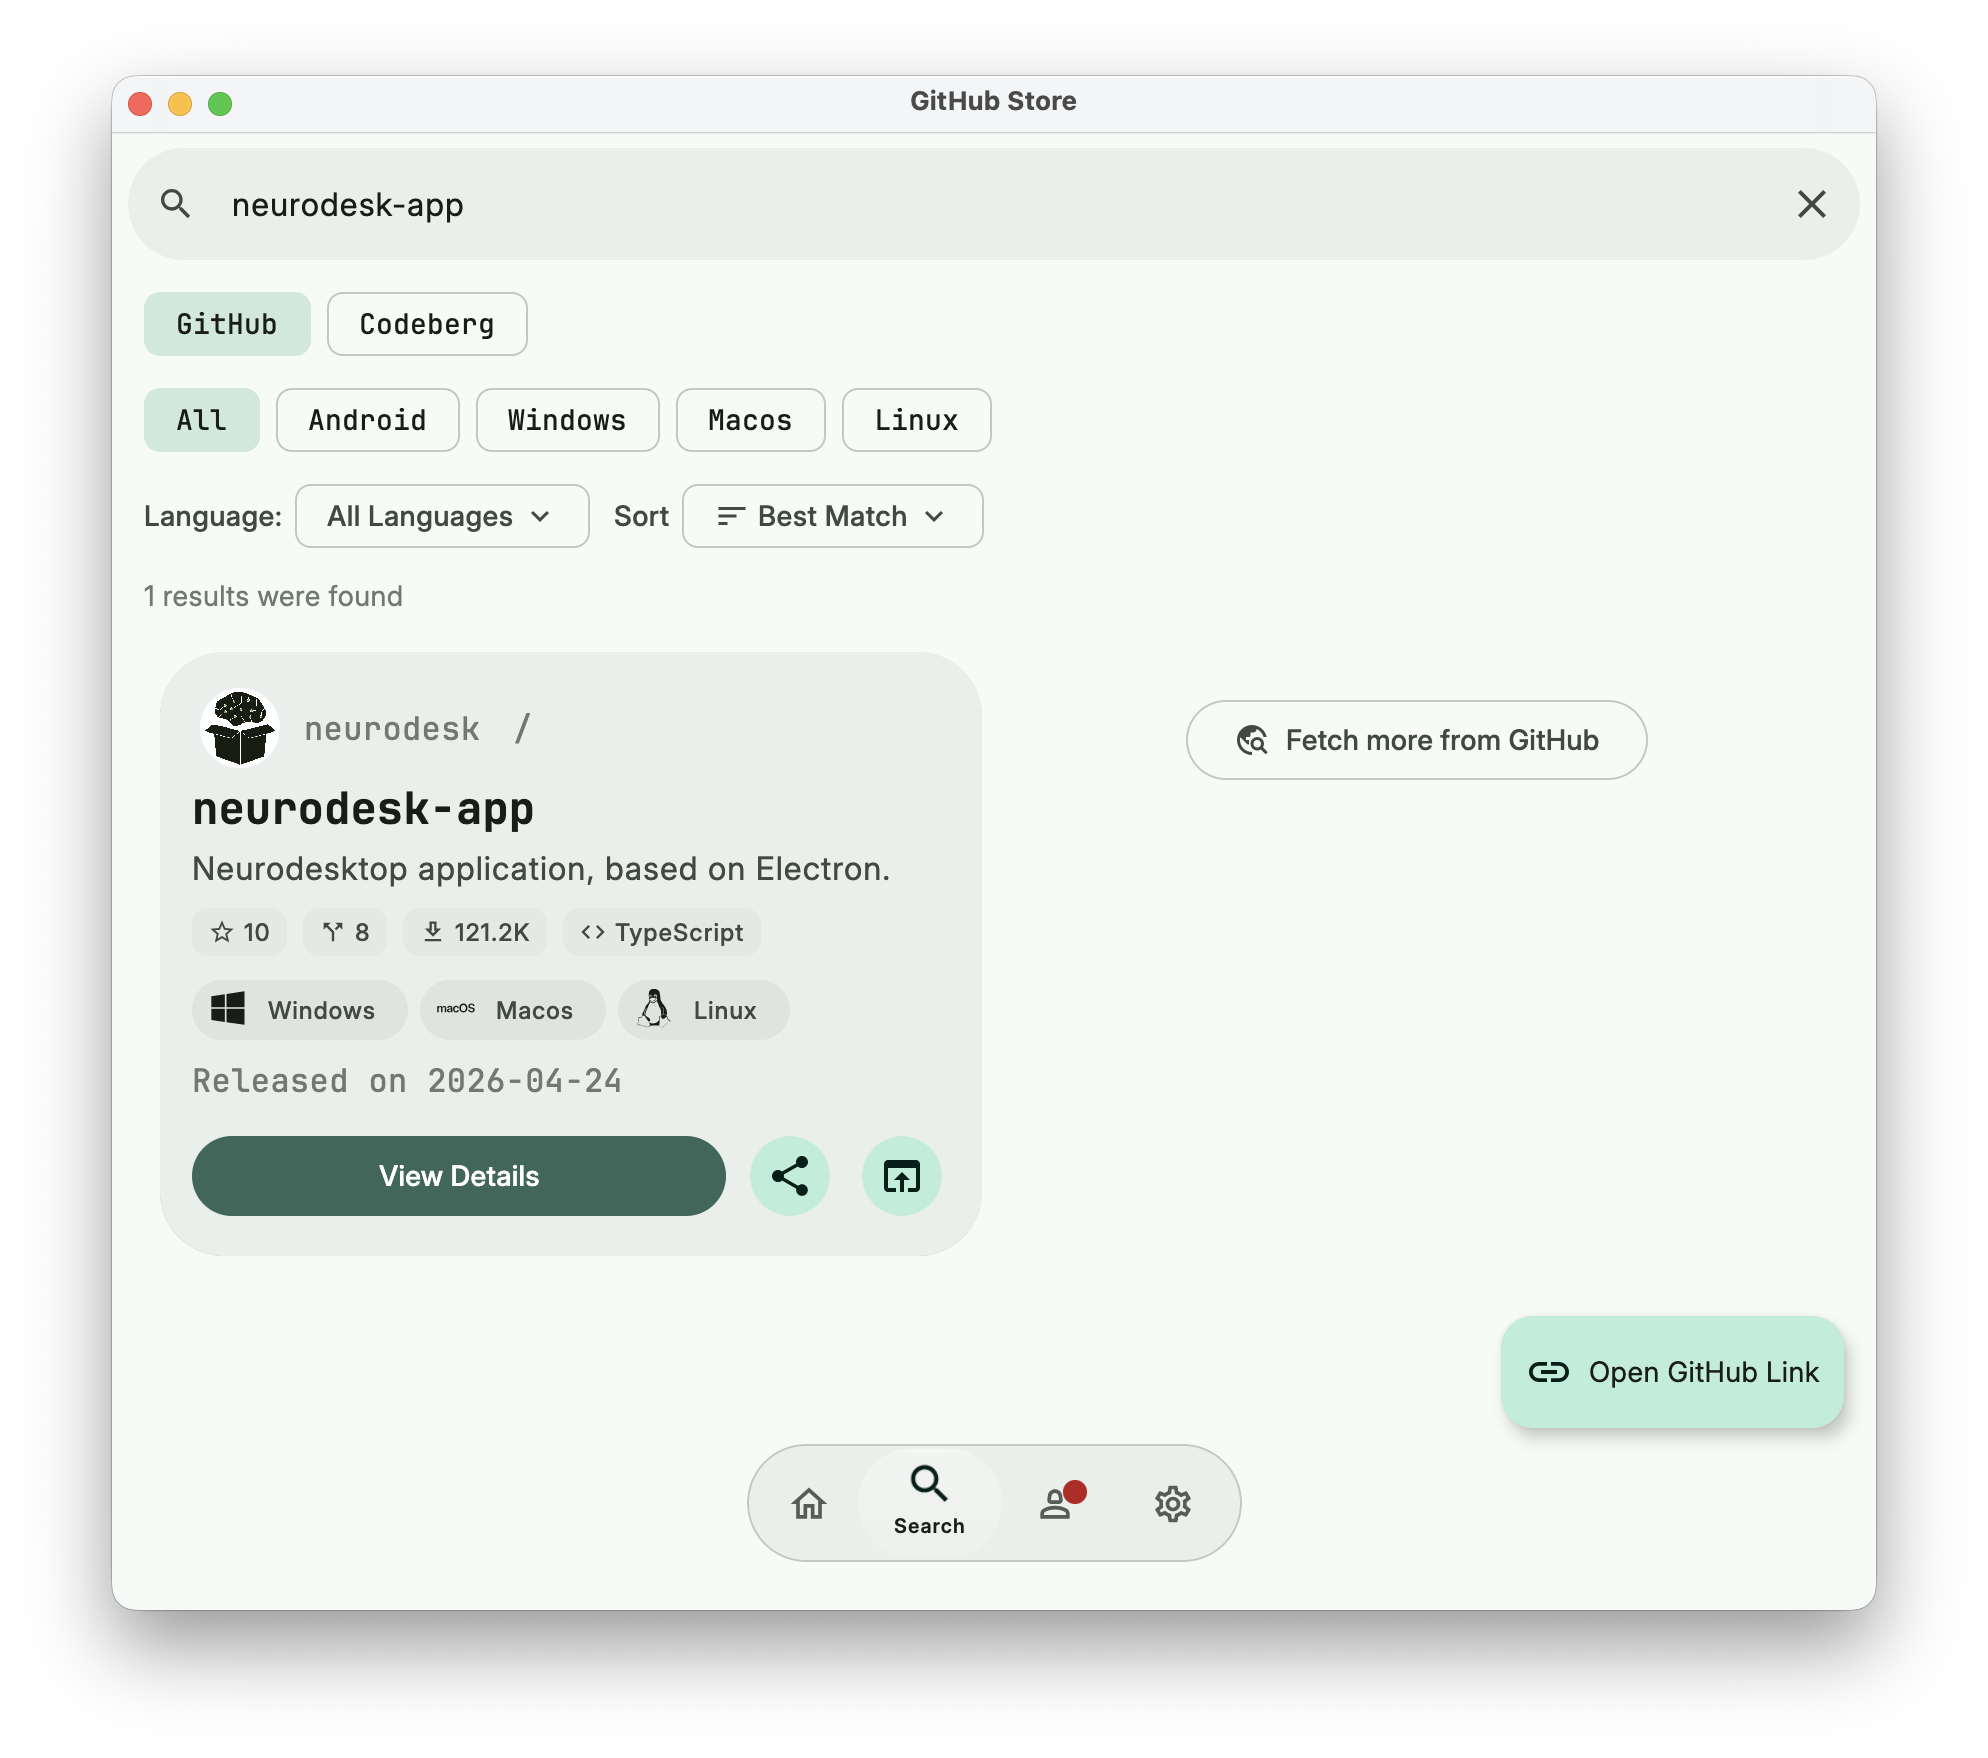
Search for Neurodesk-app to install directly – works on all operating systems.
Minimum system requirements
At least 8 GB free disk space for the Neurodesktop base image
A container engine (see Step 2 below)
Step 2: Set up a container engine
The Neurodesk App needs a container engine to run neuroimaging tools. Which engine you use depends on whether you have admin (root) privileges on your system.
Requires: Admin/root access on your machine.
If you already have Docker installed, skip to Step 3. Otherwise, install Docker:
Apple Silicon users: Enable Rosetta support in Docker Desktop settings for best performance.
Requires: Admin/root access on your machine.
Podman is a drop-in replacement for Docker. Install it using your system’s package manager or from podman.io.
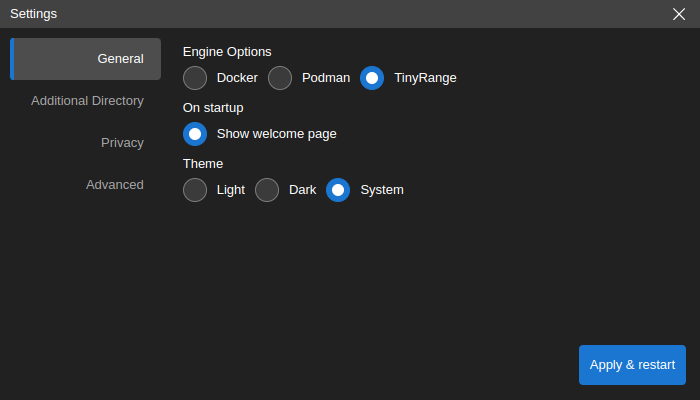
Use this if you do NOT have admin/root access.
TinyRange is included with the Neurodesk App – no separate install is needed on Windows and Linux.
macOS only: You also need to install QEMU:
brew install qemu
Verify with:
qemu-system-aarch64 --version
Step 3: Launch the app
Open the Neurodesk App from your operating system’s application menu, or run neurodeskapp from the command line.
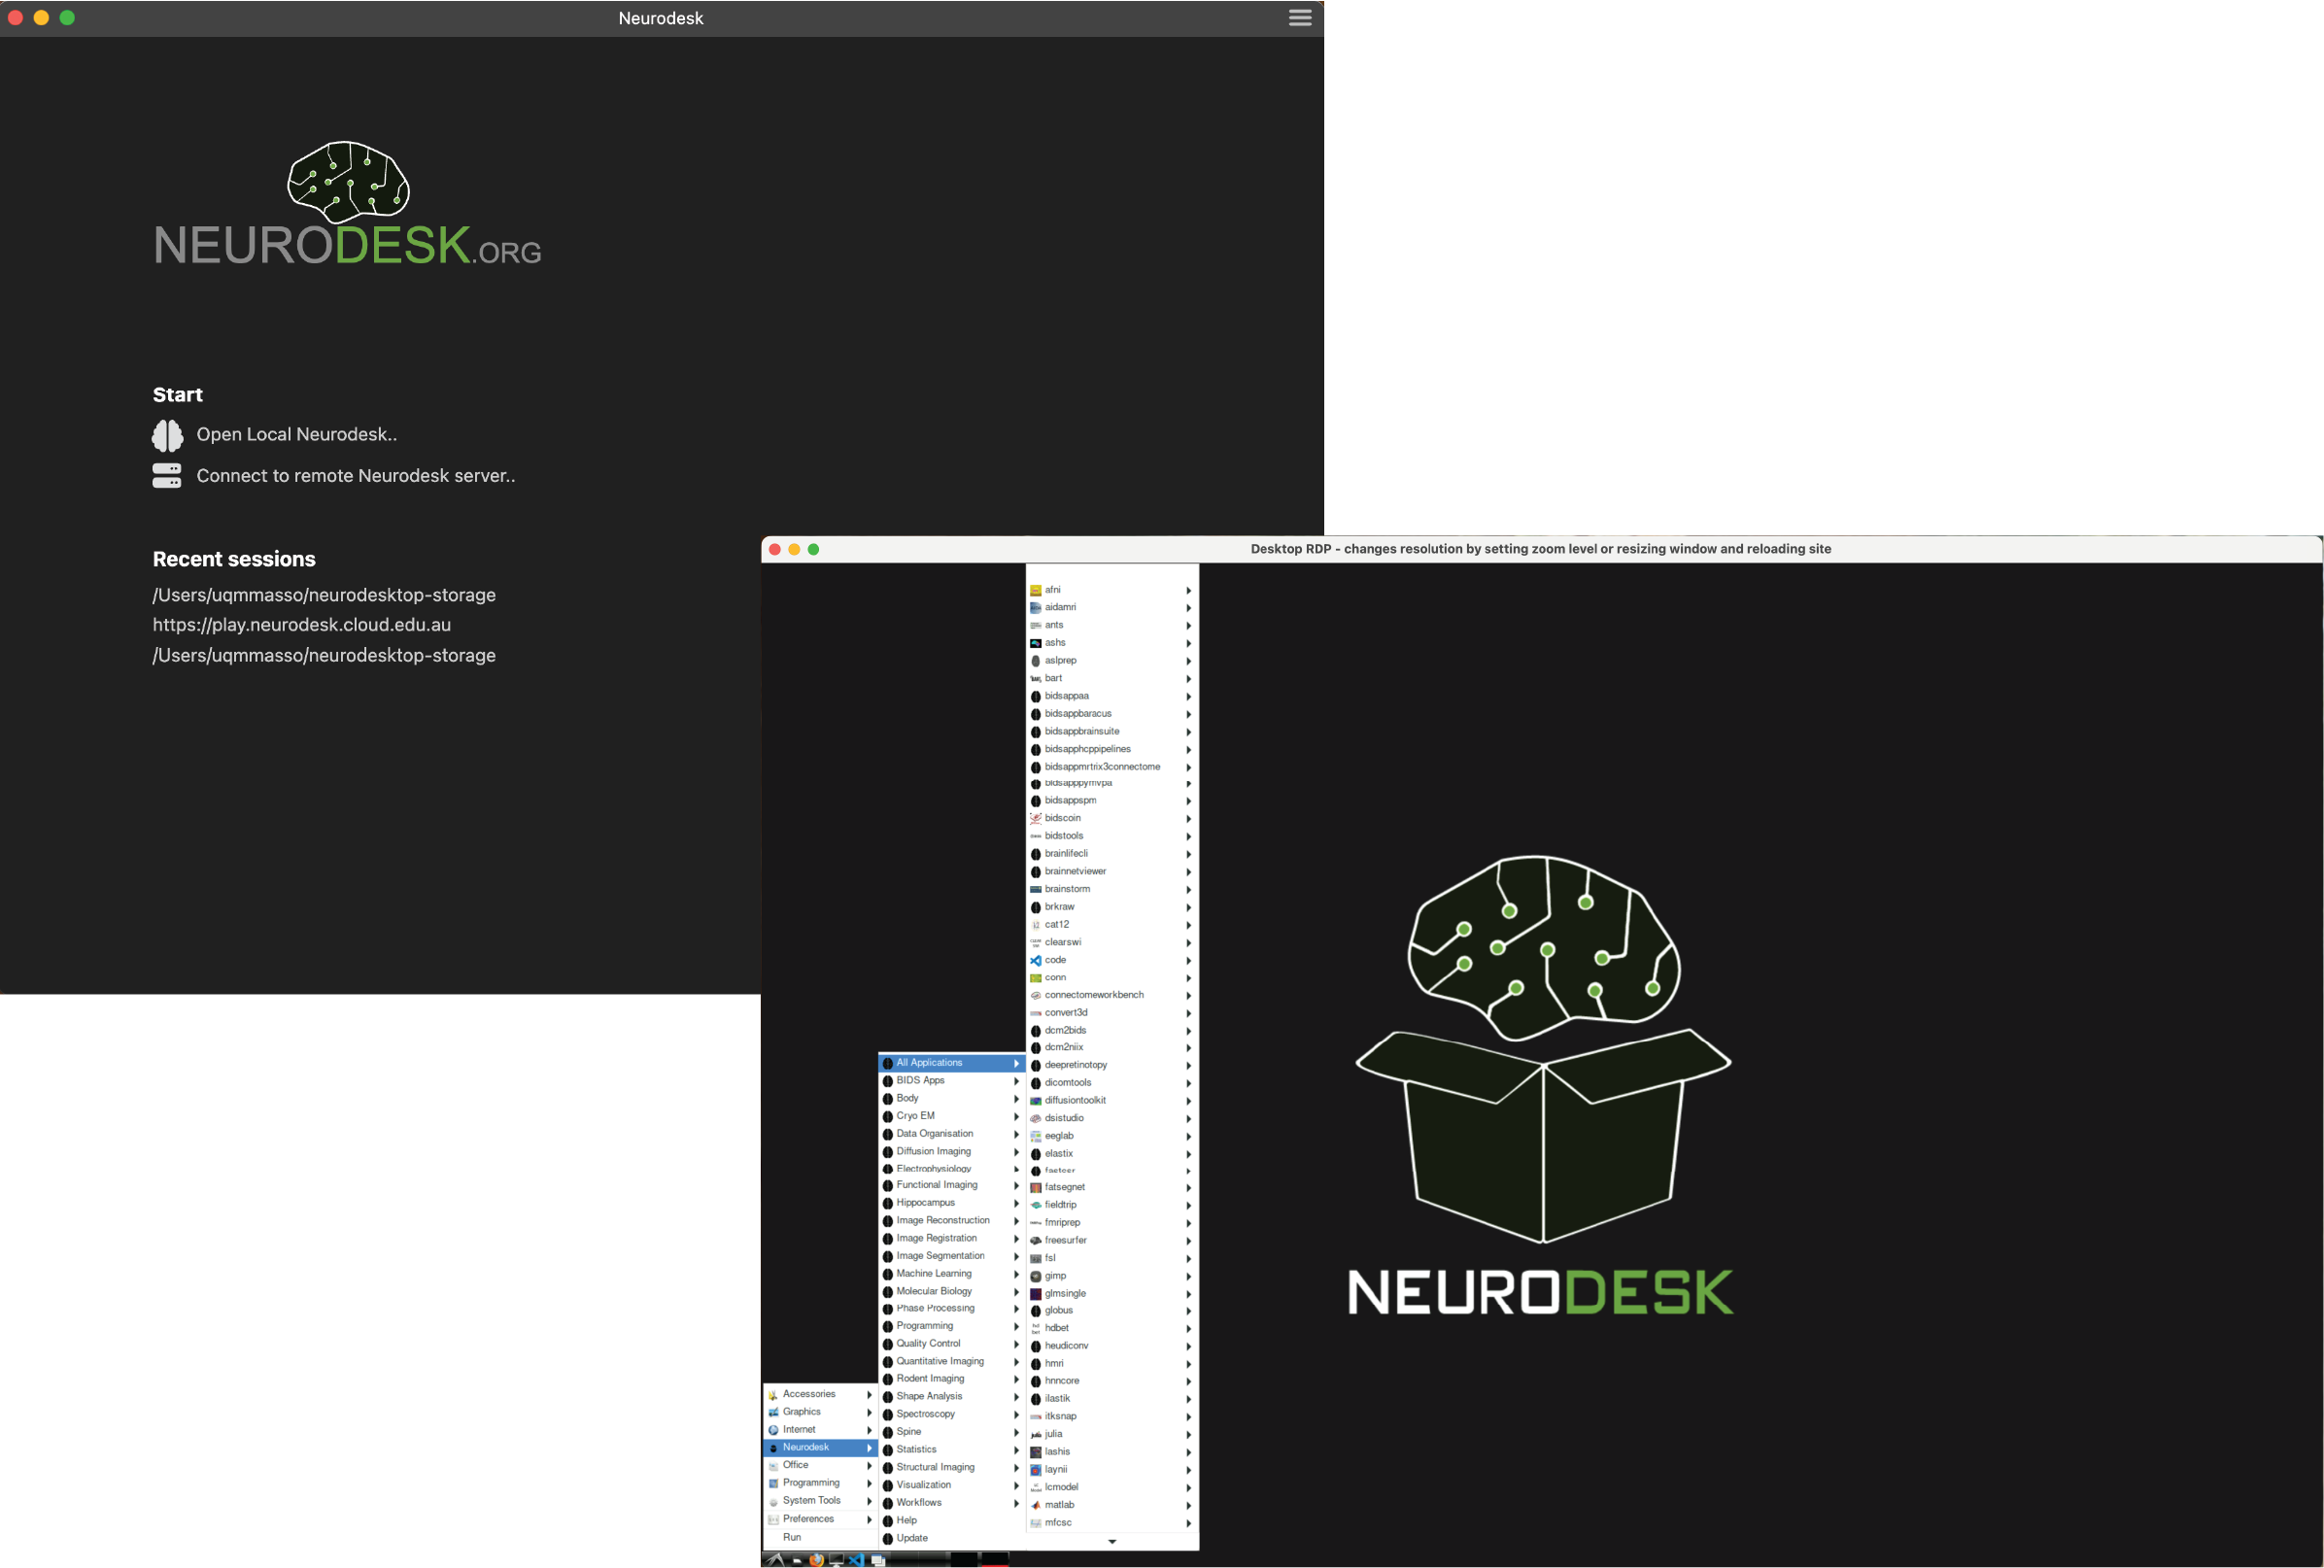
On the Welcome Page you have two options:
Open Local Neurodesk – starts a Neurodesk session on your machine.
Connect to remote Neurodesk server – connects to an existing Neurodesk server running elsewhere.
Local sessions
Click “Open Local Neurodesk” to launch a local session. This opens a JupyterLab interface with two ways to use Neurodesk:
Click the NeurodeskApp icon to launch the full desktop interface in a new window.
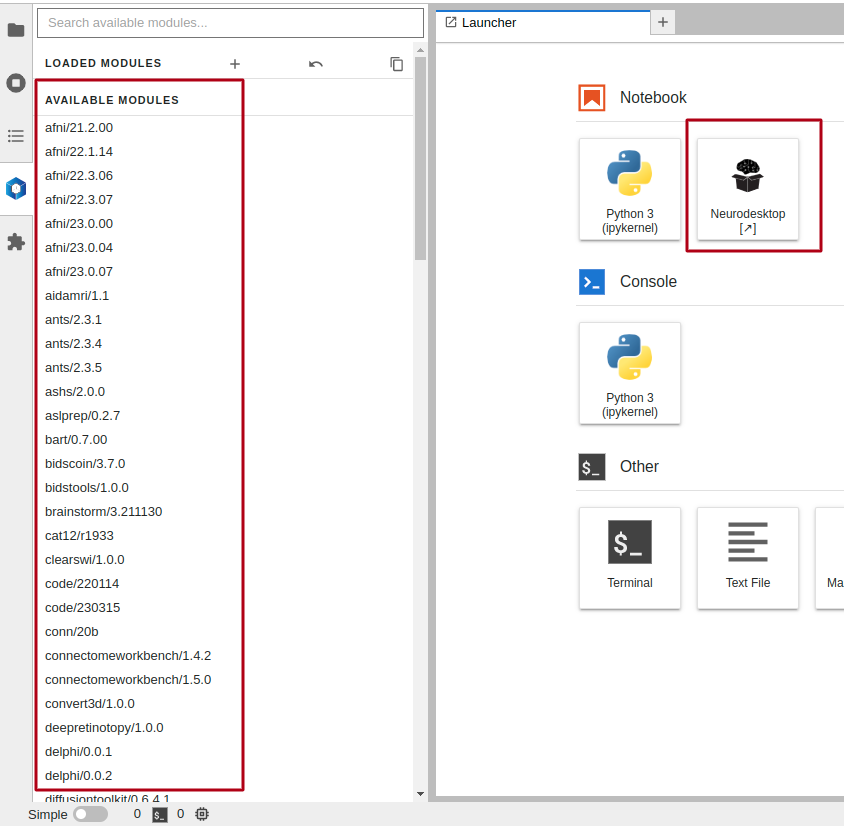
Use the command line in JupyterLab and load tools via the module system in the left sidebar.
Remote sessions
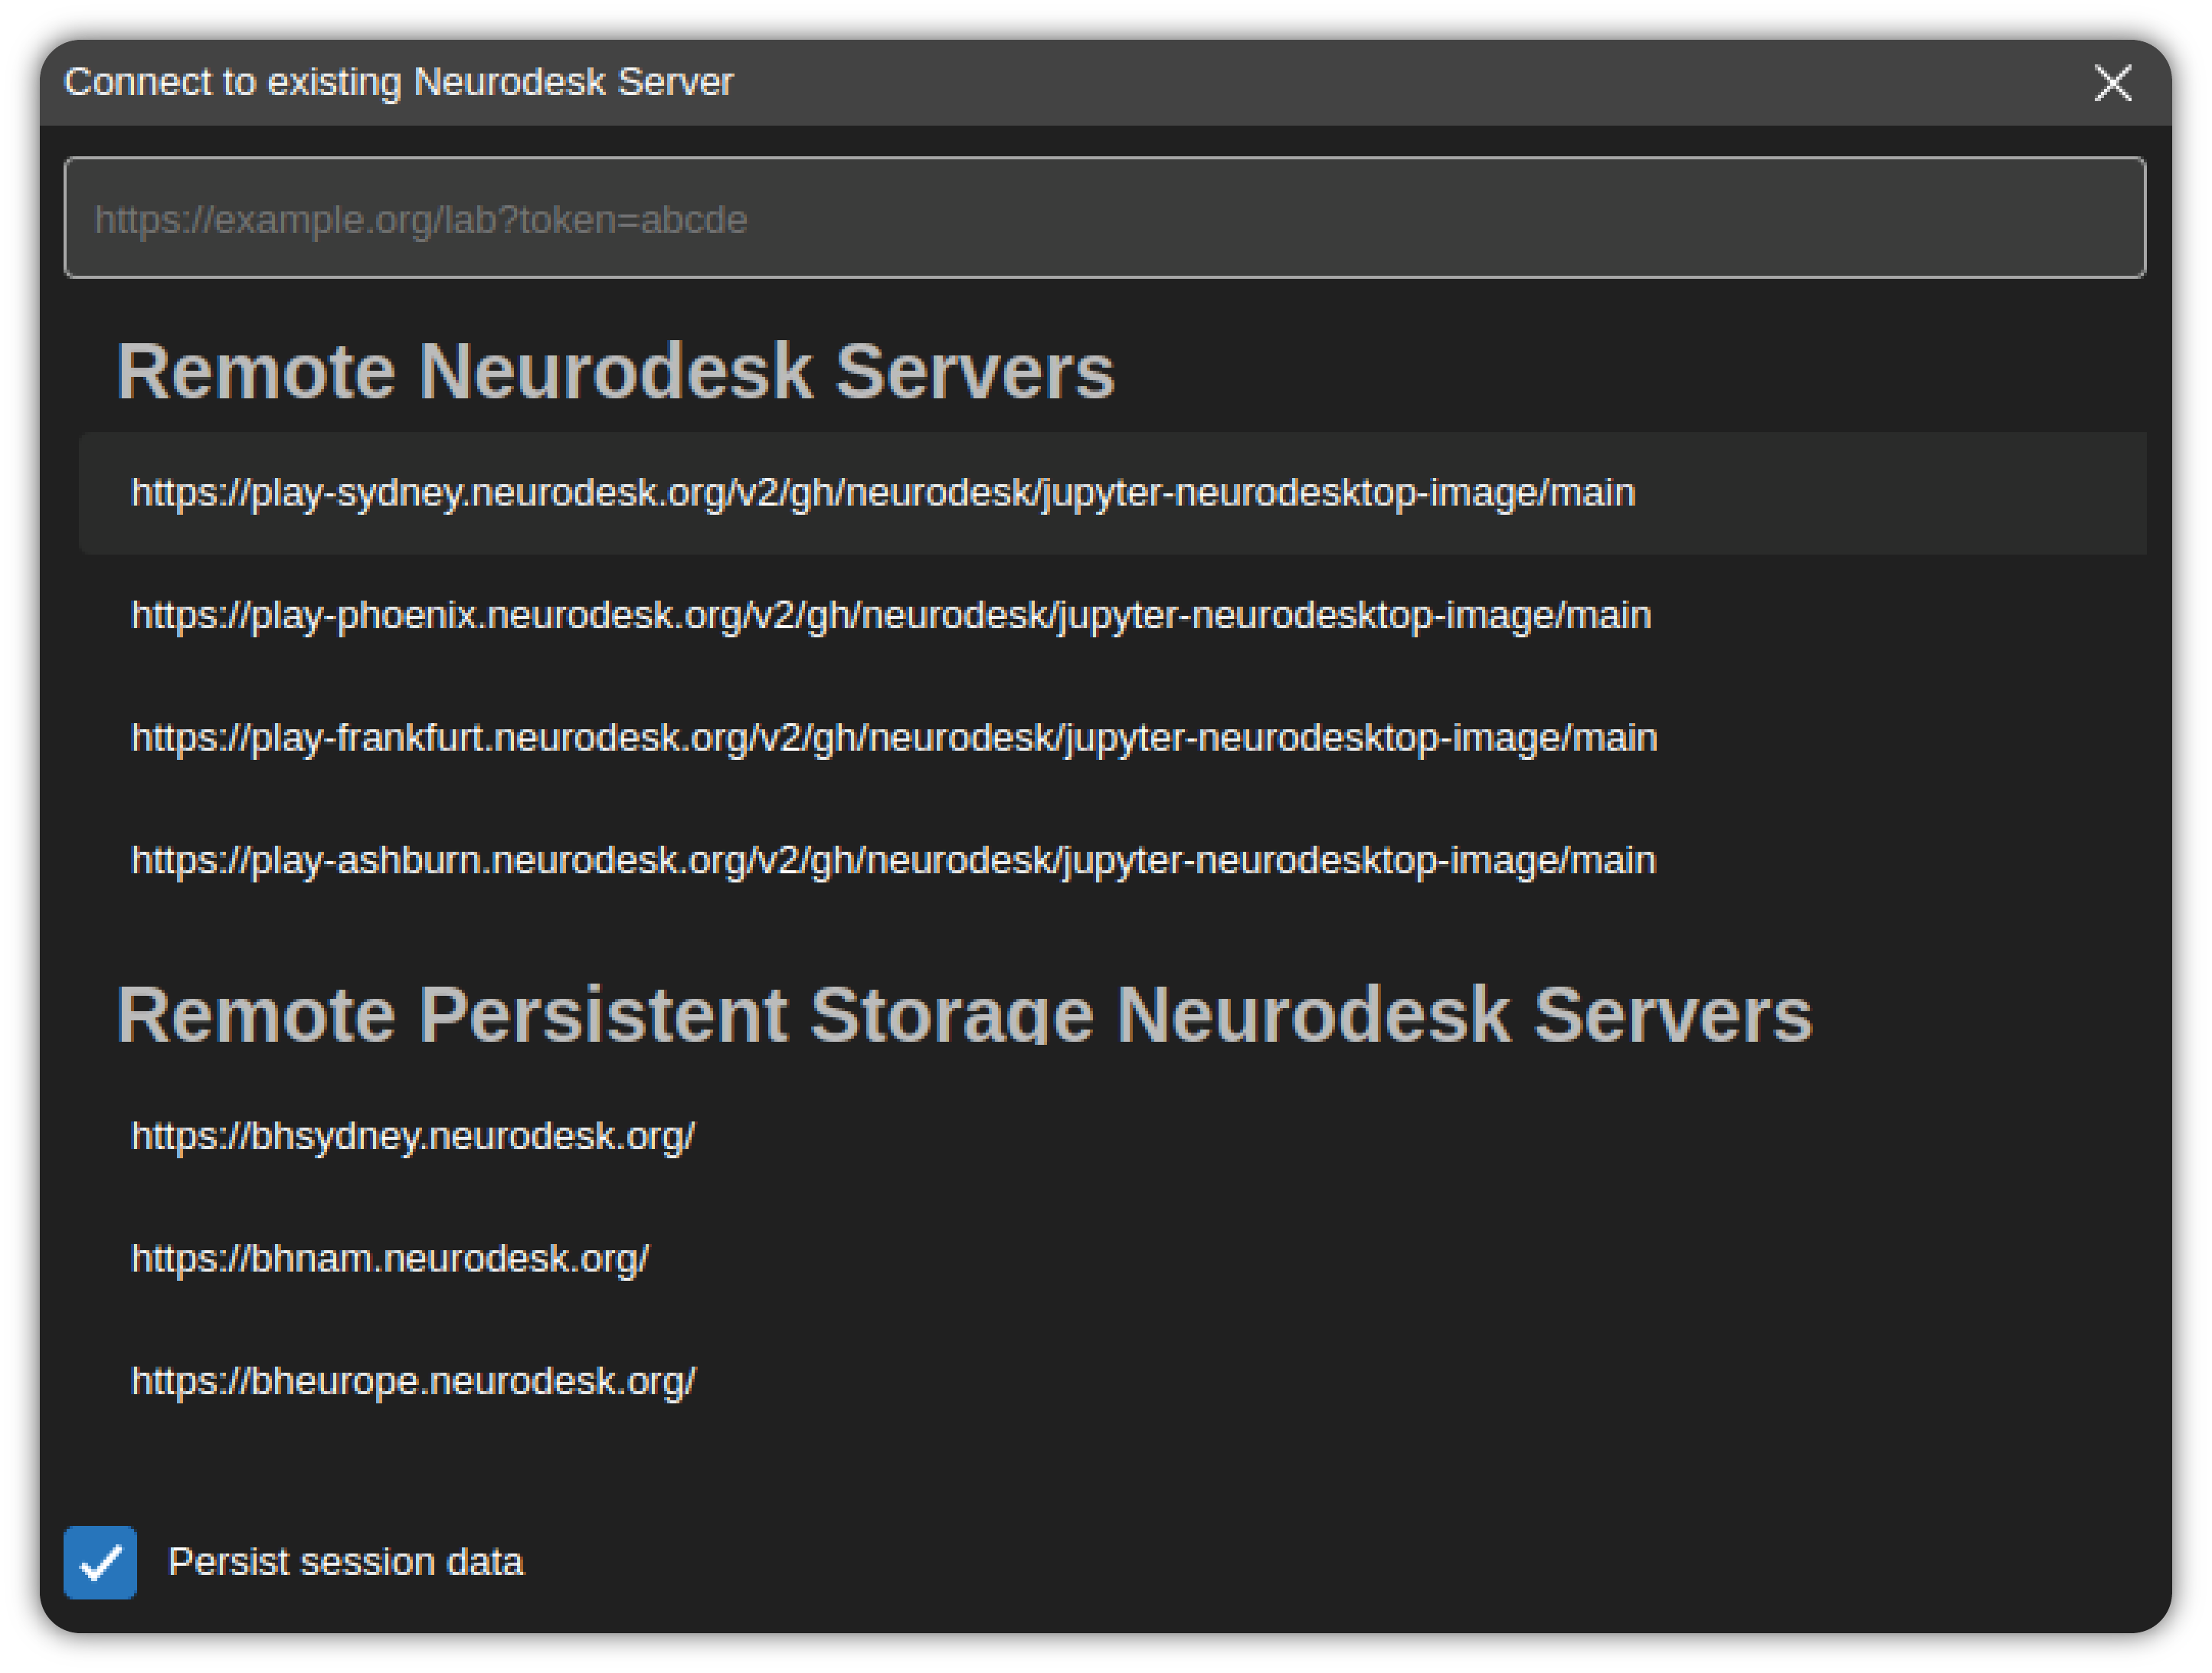
Click “Connect to remote Neurodesk server” to connect to a server running elsewhere.
Select the provided servers in the list or Enter the URL of the server and press Enter to connect.
Data storage
For a full overview of how data storage works in Neurodesk (default paths, cloud storage, transferring files), see Data Storage.
Adding a custom data directory
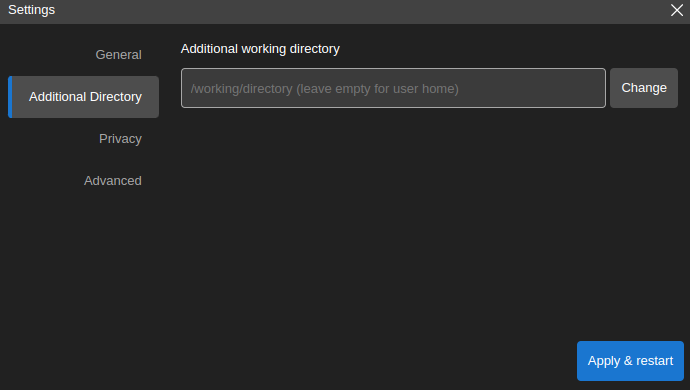
In Settings, select “Additional Directory” in the sidebar, click “Change” to choose a local directory, then click “Apply & restart”. The directory will appear at /home/jovyan/data inside the app.
macOS with Podman: To mount an external drive, run these commands once:
Warning:podman machine reset -f will delete all existing Podman machines, containers, and their data. Back up any important data stored inside Podman containers before running this command.
Then set the path in the Neurodesk App settings.
If you use conda environments to install packages or kernels, see the conda tutorial.
1.2 - Troubleshooting
Solutions for common Neurodesk App issues
Docker permission denied
If you see /var/run/docker.sock: connect: permission denied:
Add your user to the docker group (creates the group first if it doesn’t exist):
This sets the socket to rw-rw----, removing access for all other users. You must be in the docker group (step 1) for this to work.
Log out and back in (or reboot) for the group change to take full effect. The newgrp command above applies it to the current shell only.
AppArmor sandbox error (Ubuntu 24.04)
If you see FATAL:setuid_sandbox_host.cc(158)] The SUID sandbox helper binary was found, but is not configured correctly, create the file /etc/apparmor.d/neurodeskapp with this content:
# This profile allows everything and only exists to give the
# application a name instead of having the label "unconfined"

abi <abi/4.0>,
include <tunables/global>

profile neurodeskapp "/opt/NeurodeskApp/neurodeskapp" flags=(unconfined) {
  userns,

  # Site-specific additions and overrides. See local/README for details.
  include if exists <local/neurodeskapp>
}
Then restart your computer and launch the app again.
Running with Podman on restricted Linux systems
This is an advanced guide for getting the Neurodesk App working with Podman (instead of Docker) on locked-down Linux machines – for example, hosts that use Active Directory (AD) accounts, an NFS-mounted home or data directory, and where image pulls through the App tend to time out. On a standard desktop with Docker or rootful Podman you should not need any of this.
The steps below were validated with Podman 3.4.4 on Ubuntu 22. Replace every <placeholder> with your own values.
1. Install the Podman shim script
Some environments need a wrapper around podman to fix an NFS volume-mount bug and to sanitize the UID/GID that the App passes to the container.
Create the directory if it doesn’t already exist:
mkdir -p ~/.local/bin
Then create a file named ~/.local/bin/podman with the following content. This shim will be found on PATH before the real podman binary:
#!/bin/bash
CURRENT_UID=$(id -u)CURRENT_GID=$(id -g)NEW_ARGS=()for arg in "$@";do# 1. Fix the NFS volume-mount bug by appending the overlay override option (:O)if[["$arg"== *"/nfs/<mount>"* ]];thenarg="${arg//\/nfs\/<mount>:\/data/\/nfs\/<mount>:\/data:O}"fi# 2. Sanitize the network IDsif[["$arg"== *"NB_UID=${CURRENT_UID}"* ]];thenarg="${arg//NB_UID=${CURRENT_UID}/NB_UID=1000}"fiif[["$arg"== *"NB_GID=${CURRENT_GID}"* ]];thenarg="${arg//NB_GID=${CURRENT_GID}/NB_GID=100}"fiNEW_ARGS+=("$arg")doneexec /usr/bin/podman "${NEW_ARGS[@]}"
Then make it executable:
chmod +x ~/.local/bin/podman
Replace <mount> with your NFS mount point. If you are not using an NFS mount, you can omit the overlay (:O) fix entirely.
The UID/GID sanitizing is only needed for non-person AD accounts that are not assigned a UID/GID. If your organization uses AD with a normal person account that has an assigned UID and GID, you most likely do not need this and can skip the shim.
If you do need the UID workaround, add your account to /etc/subuid and /etc/subgid (this is why the shim above uses 1000):
Because pulls through the App can time out, pull and re-tag the image from a terminal first (run this as the user who will launch the App):
podman pull ghcr.io/neurodesk/neurodesktop/neurodesktop:<version>
podman tag ghcr.io/neurodesk/neurodesktop/neurodesktop:<version> docker.io/vnmd/neurodesktop:<version>
Then stop any lingering Podman processes (e.g. a hung pull) and Neurodesk containers, and migrate Podman. The App creates containers named neurodeskapp or neurodeskapp-<port>:
# Stop any running Neurodesk containerspodman stop neurodeskapp 2>/dev/null
podman rm -f neurodeskapp 2>/dev/null
# Force-kill any hung podman or neurodeskapp processespkill -9 -u <USERNAME> -f "podman|neurodeskapp"podman system migrate
3. Point the launcher at the shim
Edit the application shortcut so it uses your ~/.local/binPATH:
Type this line out by hand rather than copy-pasting – invisible characters and whitespace from a copy can break the launcher.
Then launch the App from the application menu (the shortcut), not from the CLI.
4. Recovering from a broken volume or incompatible storage
If a session fails to start, delete the broken home volume and try again:
# Stop any running Neurodesk containerspodman stop neurodeskapp 2>/dev/null
podman rm -f neurodeskapp 2>/dev/null
# Force-kill any hung processespkill -9 -u $USER -f "podman|neurodeskapp"# Delete the broken home volumepodman volume rm neurodesk-home
If Podman’s storage database is incompatible (for example after a Podman upgrade), reset it:
podman system reset -f
Warning:podman machine reset -f will delete all existing Podman machines, containers, and their data. Back up any important data stored inside Podman containers before running this command.
Then set the path in the Neurodesk App settings.
If that still doesn’t work, remove the stale storage config:
Go to Start Menu > Settings > Apps and uninstall Neurodesk App.
To remove application cache, delete C:\Users\<username>\AppData\Roaming\neurodeskapp. The AppData directory is hidden – enable hidden items in Windows Explorer under View > Show > Hidden Items.
For quick access to Neurodesk on the cloud or HPC systems
Neurodesk offers several hosted options to suit different needs and computing environments. Whether you’re looking for a quick start or need high-performance computing capabilities, there’s a solution for you.
Available Hosted Options
1. Neurodesk Play
Best for: Quick testing, workshops, and light analysis
When using these services for research, please include the appropriate acknowledgment:
🇺🇸 US (Jetstream2 / NSF)
“This research was supported by Jetstream2 (NSF award #2005506), which is supported by the National Science Foundation. Jetstream2 is a cloud computing resource managed by the Indiana University Pervasive Technology Institute and part of the ACCESS project.”
🇪🇺 Europe (EGI / CESNET-MCC)
“Enabled through services and resources provided by the EGI Federation with the dedicated support of CESNET-MCC. Computational resources were provided by the e-INFRA CZ project (ID:90254), supported by the Ministry of Education, Youth and Sports of the Czech Republic.”
🇦🇺 Australia (ARDC / Nectar)
“This research was supported by use of the Nectar Research Cloud, a collaborative Australian research platform supported by the NCRIS-funded Australian Research Data Commons (ARDC).”
Data Transfer
We provide several methods to transfer your files in and out of Neurodesk Play, including drag-and-drop and cloud storage integration.
View Data Transfer Documentation →
Shared directories for courses and workshops
Neurodesk Play can provide shared directories for educational use. These directories are mounted inside Play sessions under /data/groups/<group-name> or /data/teaching/<educator-github-username> and can be configured for different teaching and project needs.
Educator-managed course material: educators can write to a directory under /data/teaching/<educator-github-username>, while all other users have read-only access.
Project groups: a defined group of users can share a directory where every group member has read+write access under /data/groups/<group-name>.
Teaching teams: multiple educators can have write access to a shared directory under /data/groups/<group-name>, while everyone else has read-only access.
This is useful for distributing workshop datasets, notebooks, examples, or course material without asking every participant to copy files into their own home directory. It also makes it very easy to provide the solutions of a previous session to all users to learners can catchup to the rest of the class.
If you need such a setup, please reach out to mail.neurodesk@gmail.com with information on when your course runs and how much storage you need.
SSH connection
It is possible to connect to Play instances using SSH, including from VS Code Remote SSH. Neurodesk Play uses jupyter-sshd-proxy to proxy SSH over the authenticated JupyterHub connection.
1. Install websocat on your local computer
The SSH client connects through a WebSocket proxy, so websocat must be available on the computer where you run ssh.
On macOS:
brew install websocat
For Linux and Windows, install websocat from your package manager or download a binary from the websocat releases.
2. Start your Neurodesk Play session
Launch one of the Play servers above and wait until JupyterLab has started. Keep this browser session running while you use SSH.
You will need three values:
Play domain: for example play-america.neurodesk.org, play-europe.neurodesk.org, or play.neurodesk.cloud.edu.au.
JupyterHub username: copy this from the browser URL. In a URL like https://play-america.neurodesk.org/user/myname/lab, the username is myname. If the URL contains encoded characters such as %40, use the URL value exactly as shown.
3. Create a JupyterHub token
In JupyterLab, open File > Hub Control Panel, then select Token and create a new token.
Treat this token like a password to your play instance. Set an expiry date for best practice and not the expiry date in your calendar.
4. Add your SSH public key inside Play
Open a terminal in JupyterLab and add the public key that matches the private key on your local computer. If your public keys are available from GitHub, you can use:
# My First fsl Tutorial in cloudshell

## Step 1: Say Hello
Run the following command to print a message:

```bash
module use /cvmfs/neurodesk.ardc.edu.au/neurodesk-modules/*
ml fsl
bet
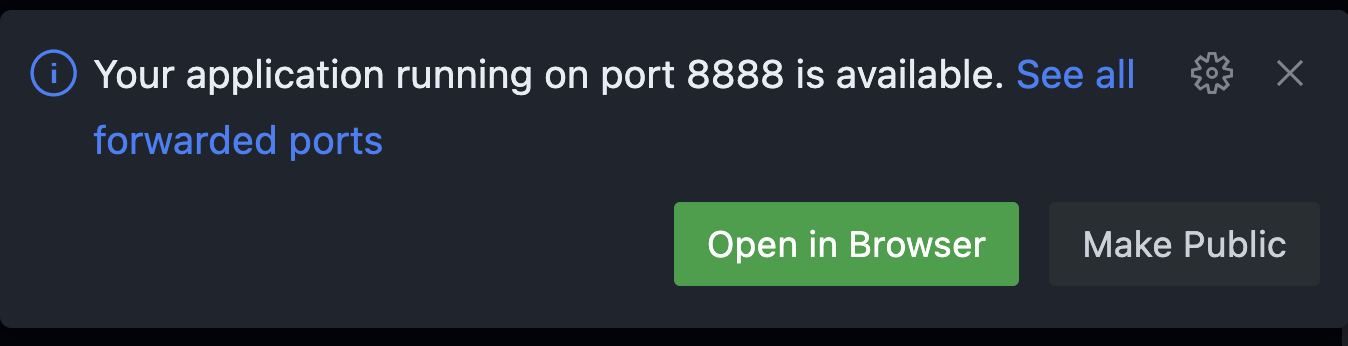
Then open Neurodesktop in the browser by clicking the “Open in Browser” Button displayed
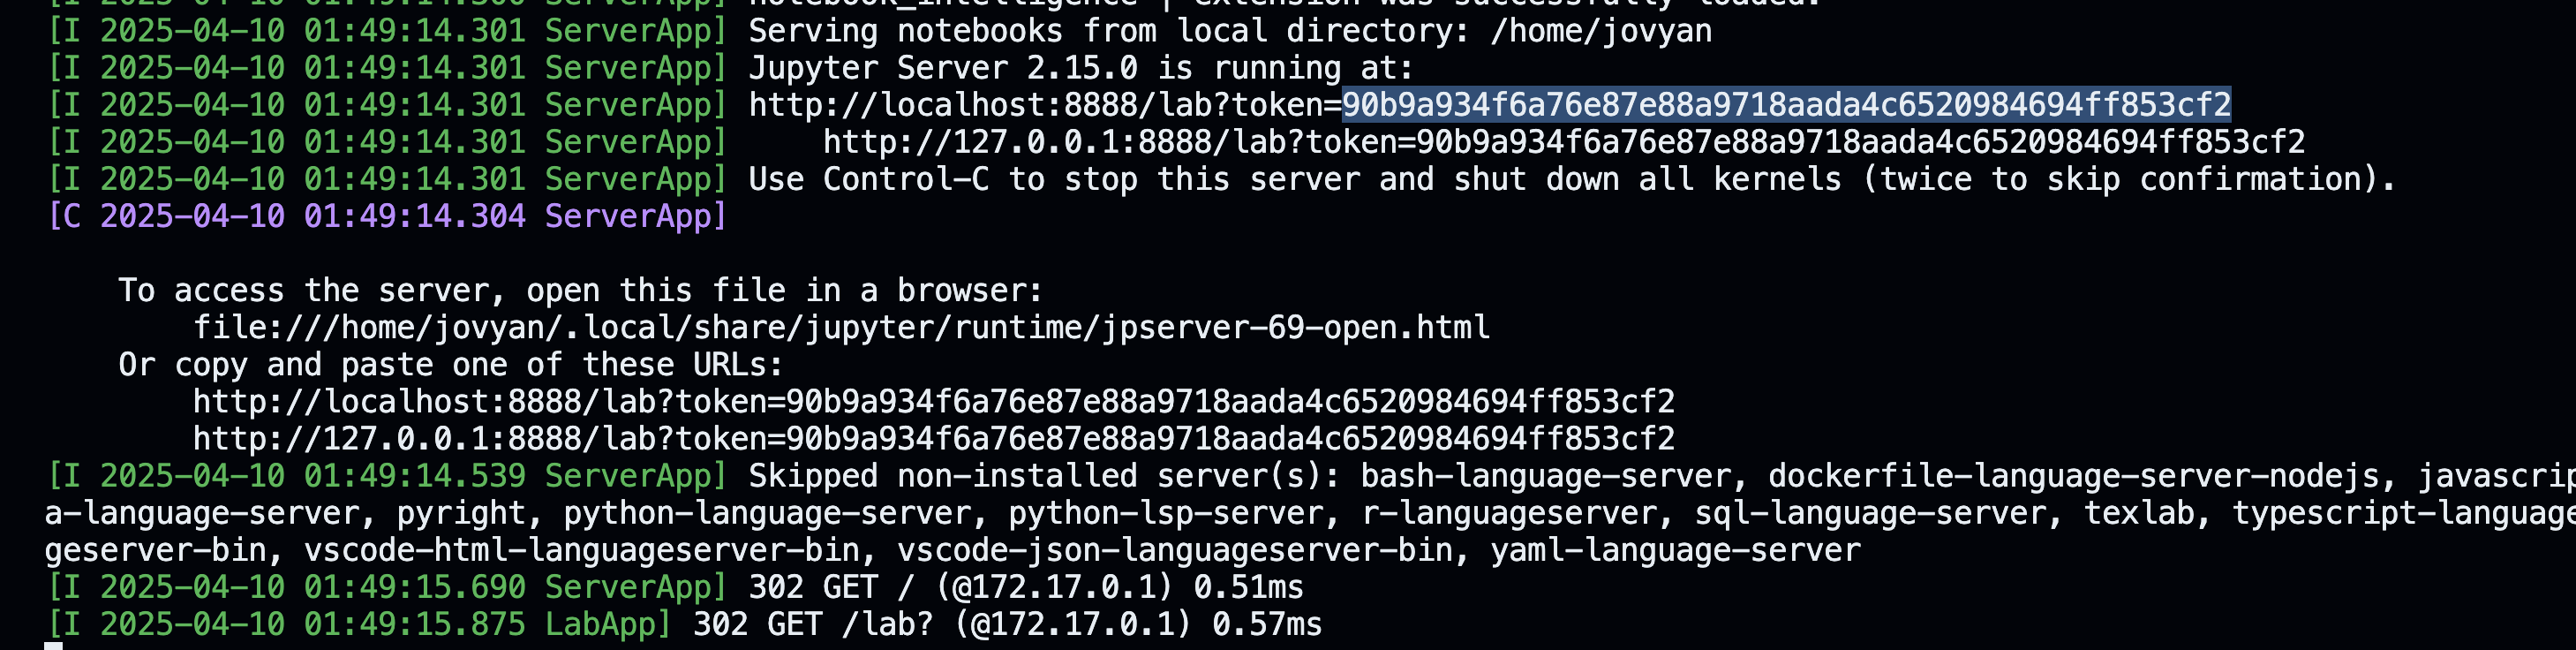
The token for authentication is displayed in the terminal:
2.4 - Webapps
Browser-based Neurodesk webapps
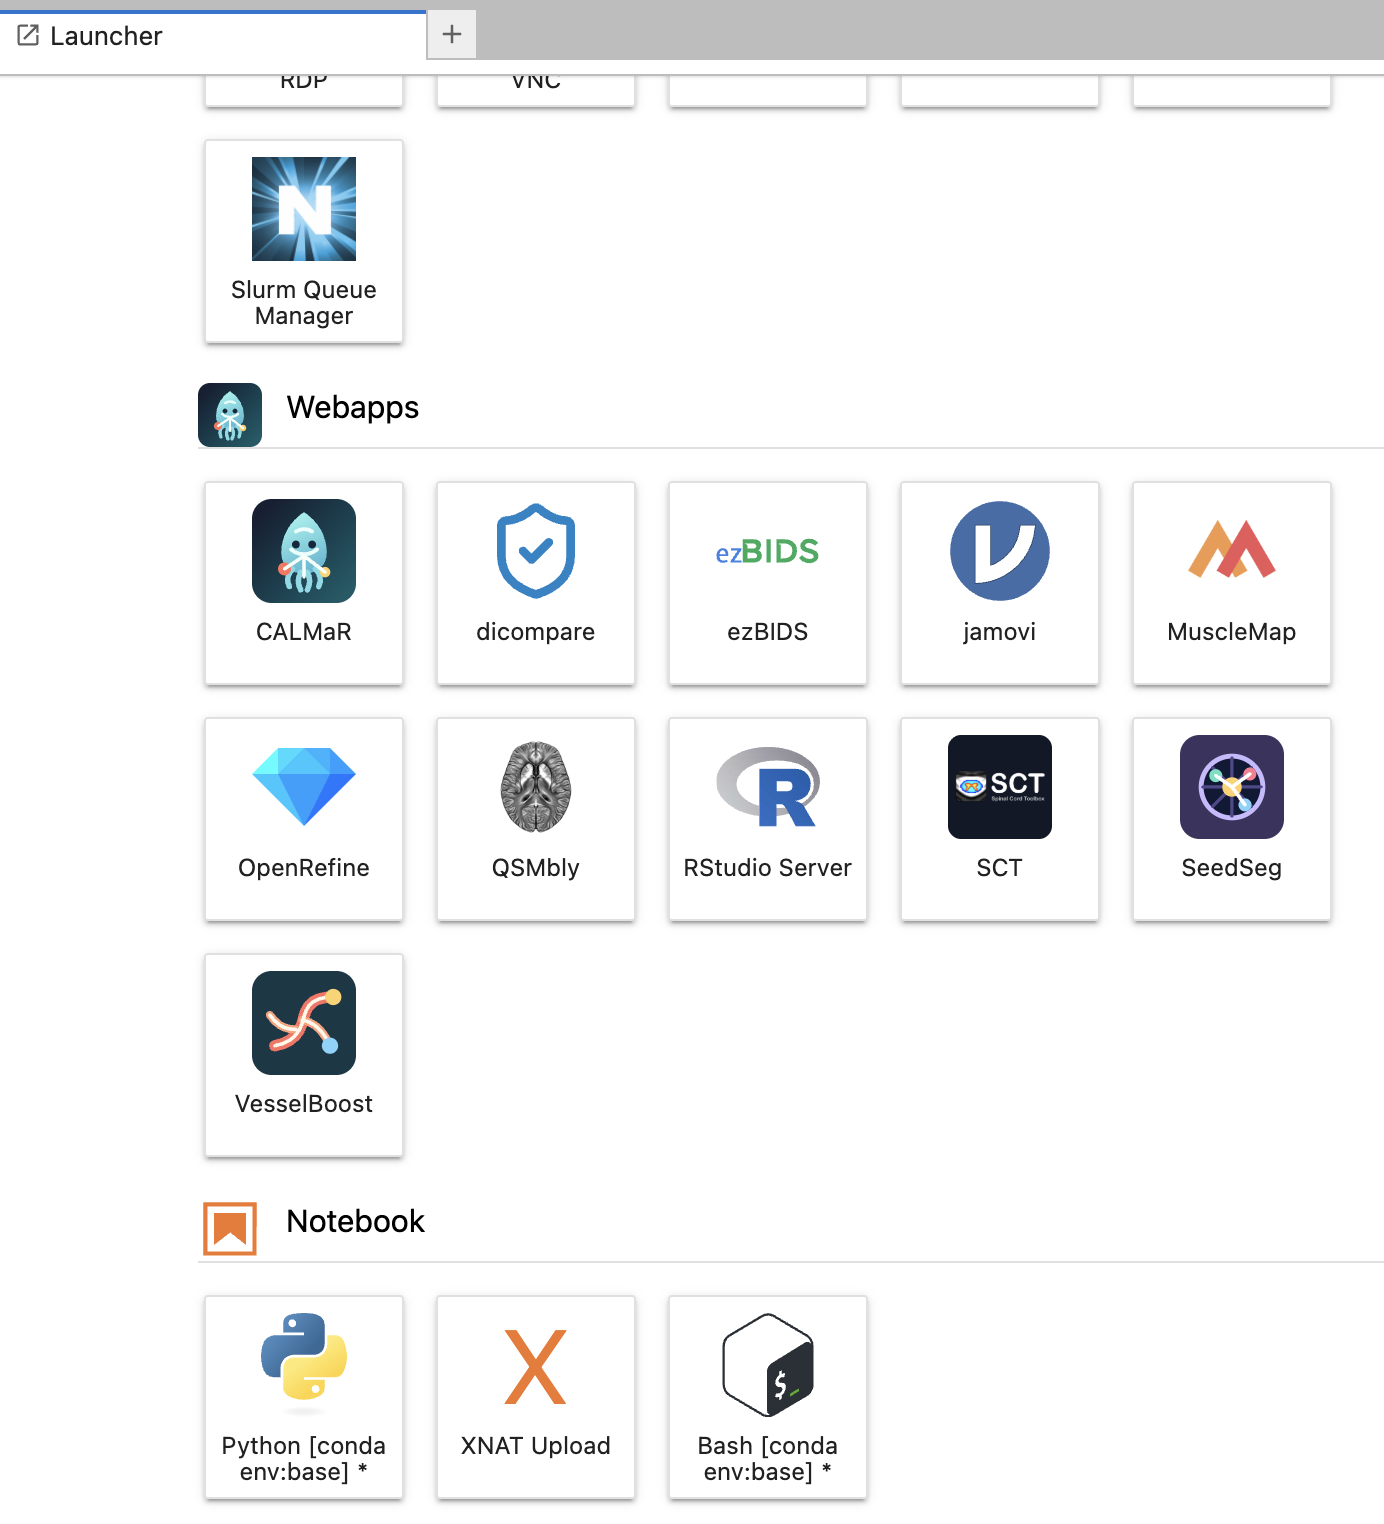
Neurodesk offers a set of browser-native webapps for protocol comparison, QSM processing, medical image segmentation and many more tasks. They run directly in the browser, so there is no desktop installation step before you can start working.
Privacy and sensitive data: Files are processed locally in the browser and are NOT uploaded to a server or cloud service. In practice, your data stays on your machine while the app is running, which makes these tools well suited to sensitive patient data workflows.
CALMaR Co-designed Automated Lesion Mapping and Reporting
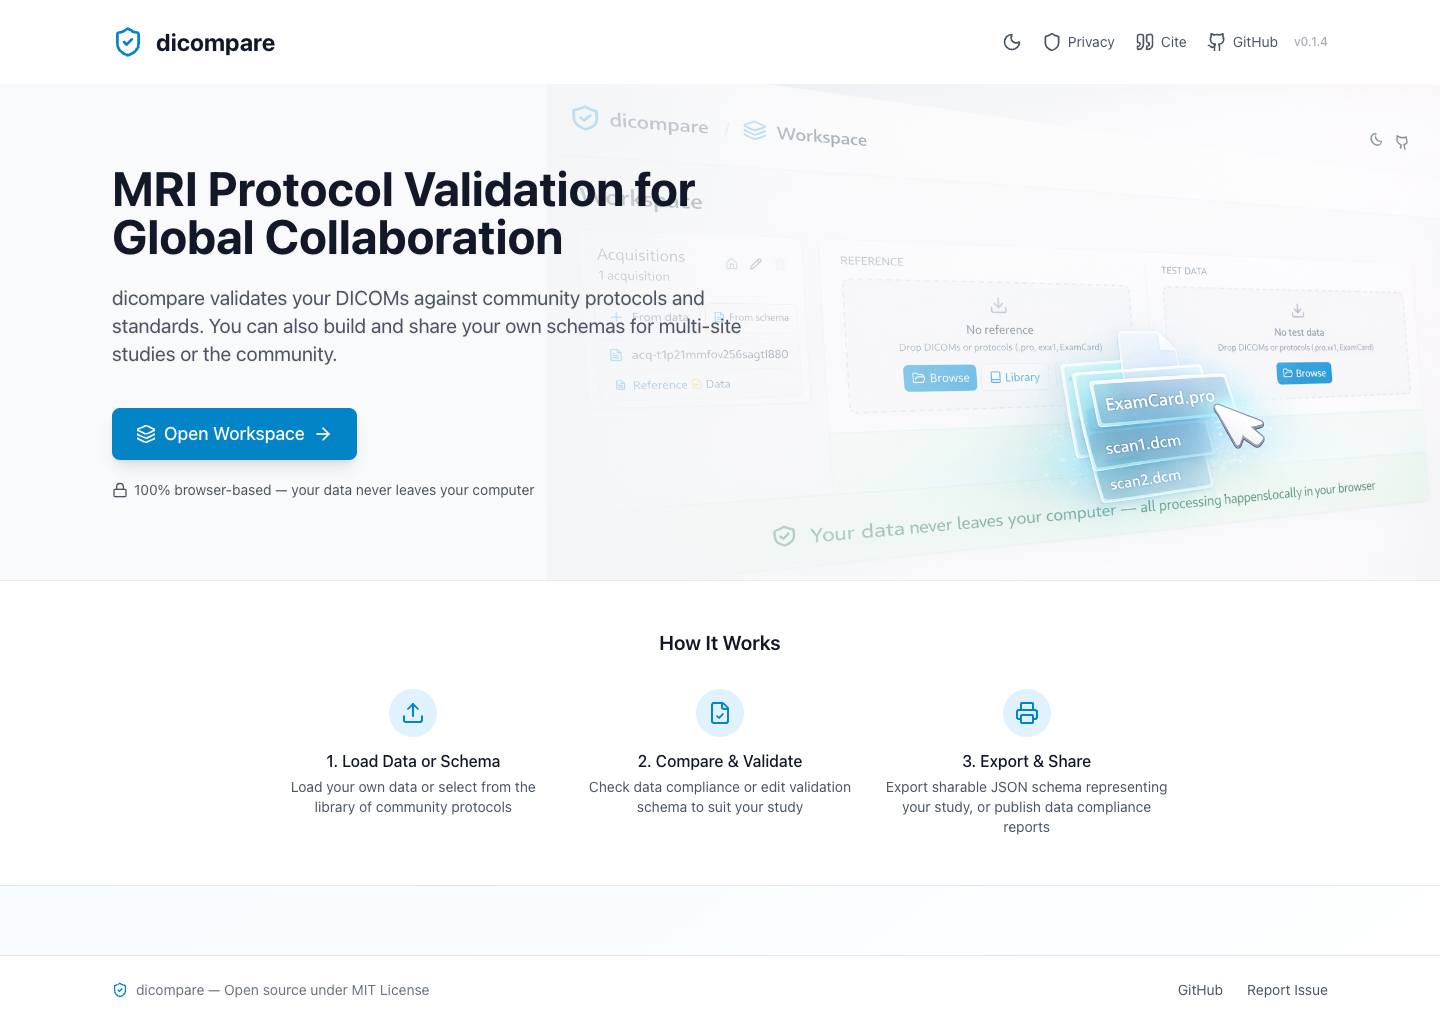
dicompare is a browser-based tool for sharing, comparing, and validating DICOM acquisition protocols. It is useful when teams want to standardize scanner protocols across sites, compare local scans against agreed standards, and generate shareable schemas and compliance reports.
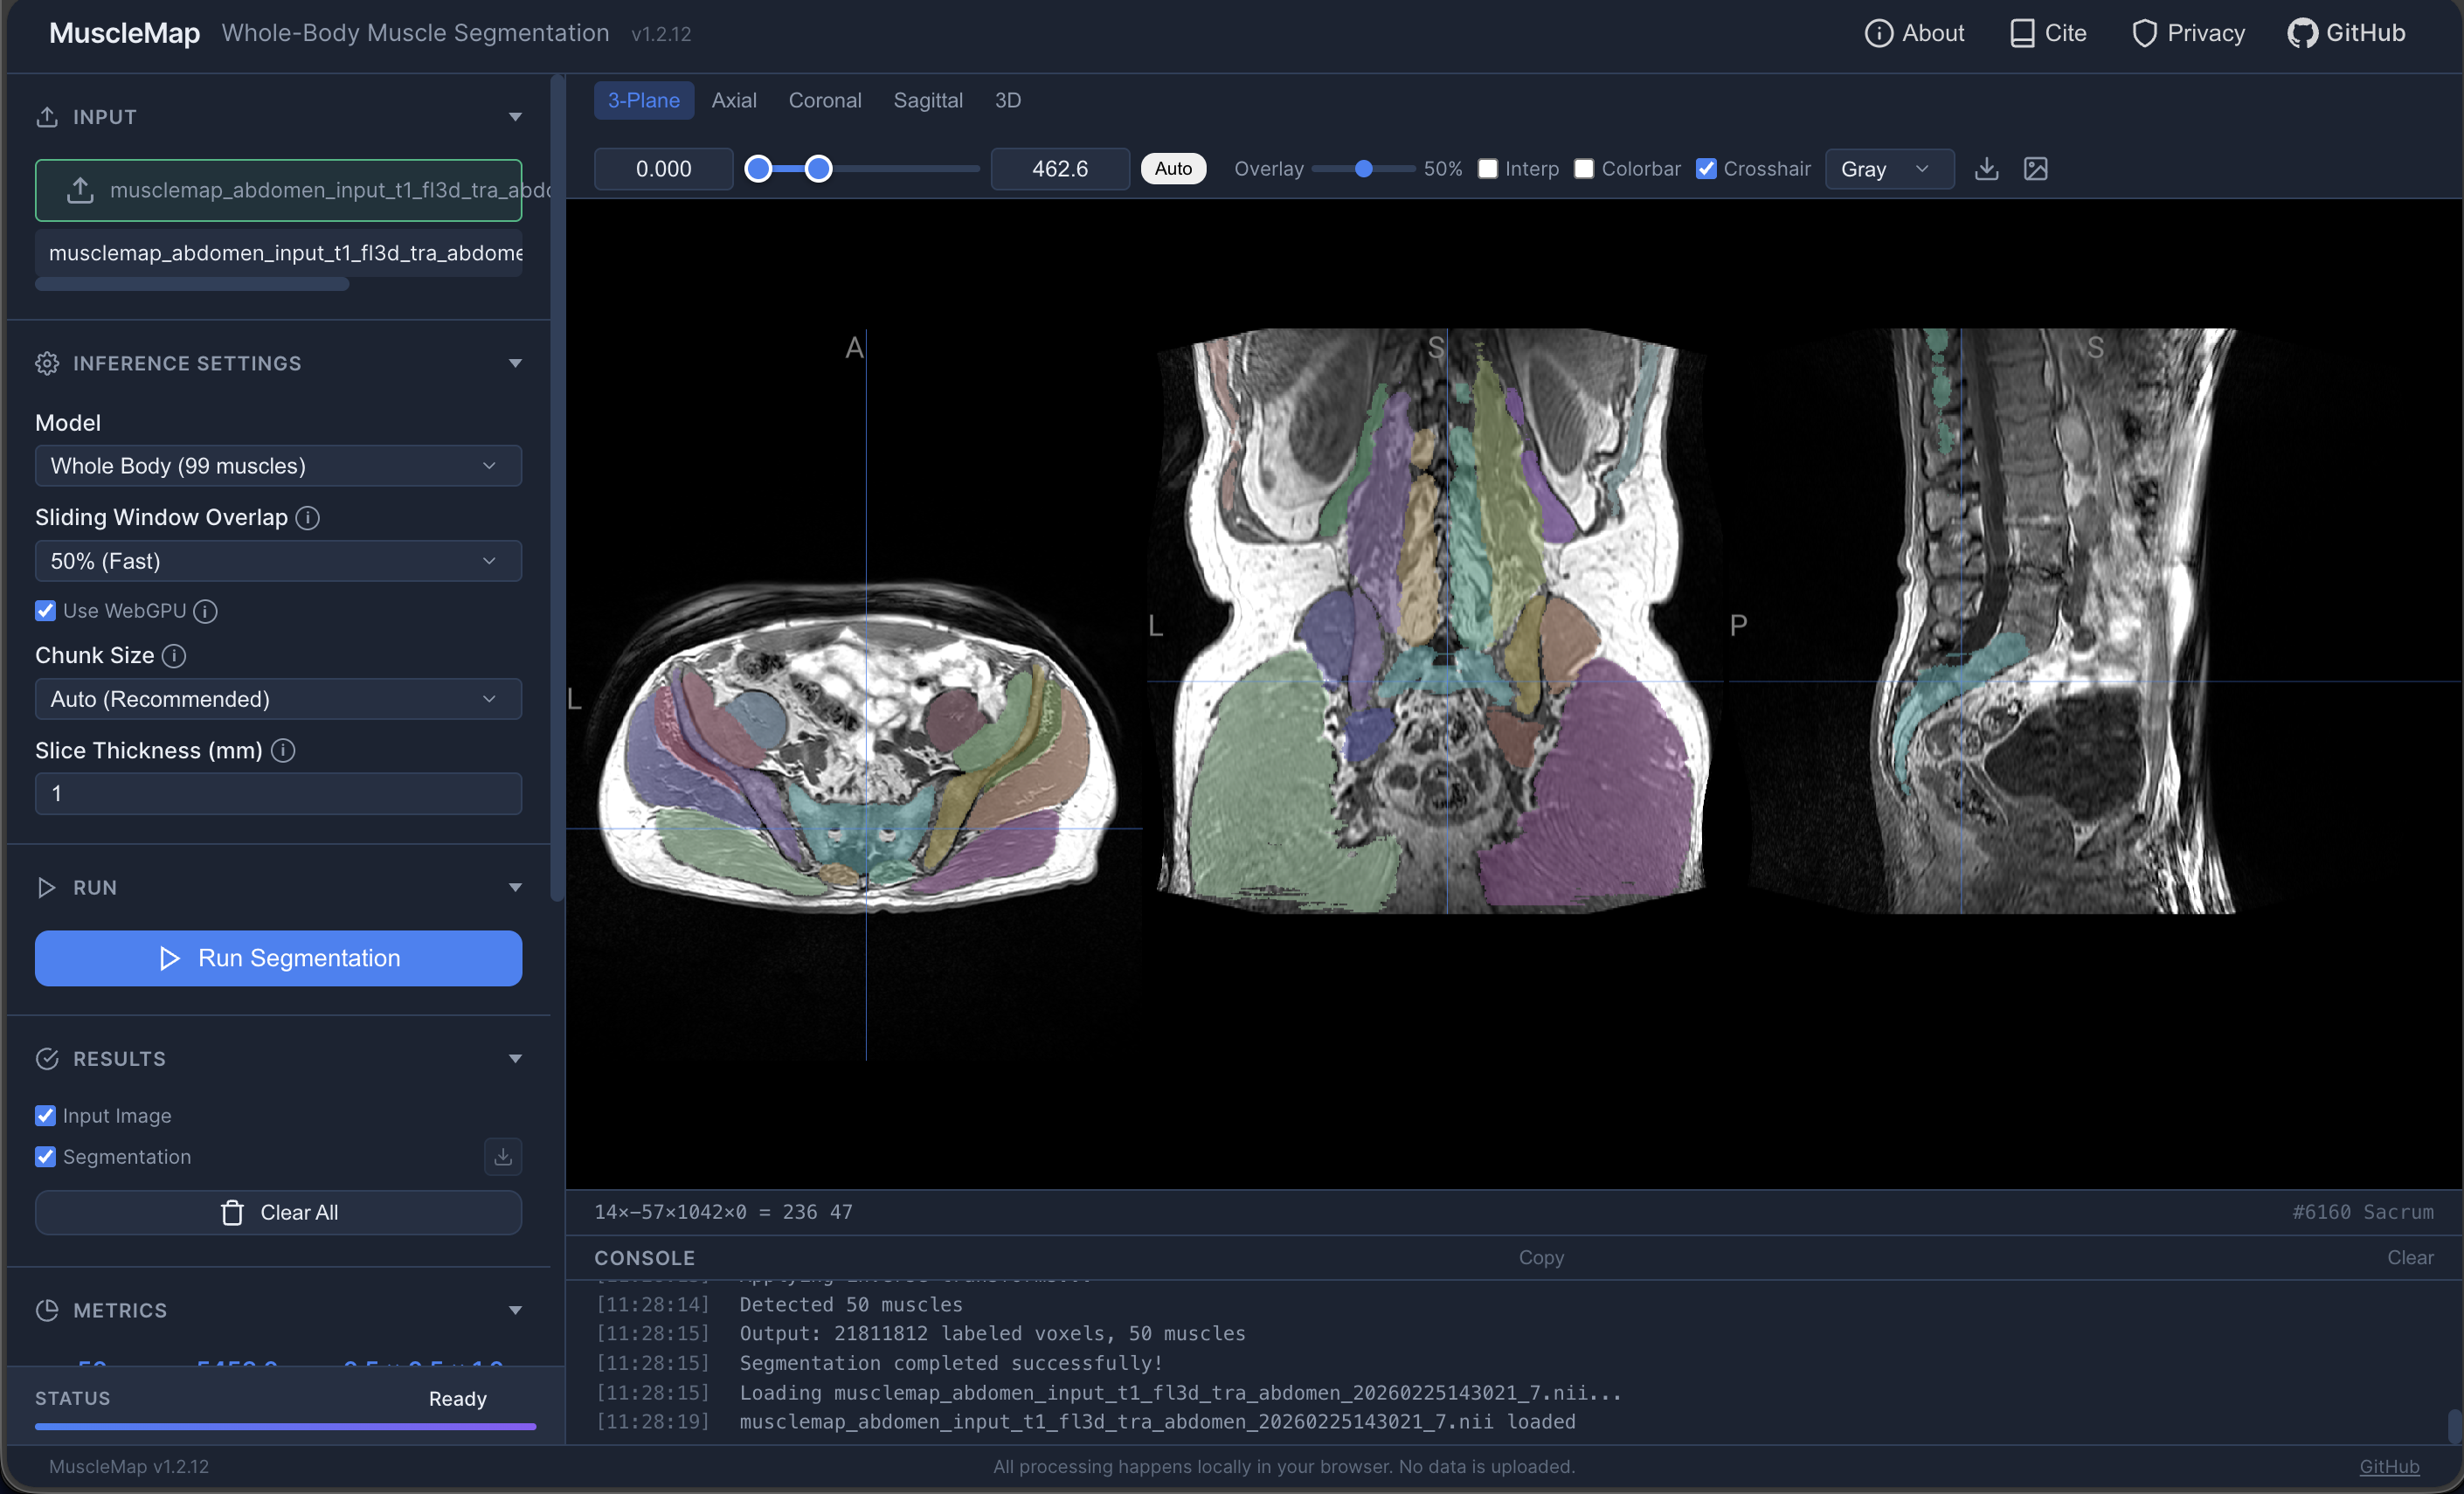
MuscleMap performs browser-based muscle segmentation from MRI data. It is designed for whole-body and regional muscle analysis and provides an interactive viewer for reviewing segmentation outputs.
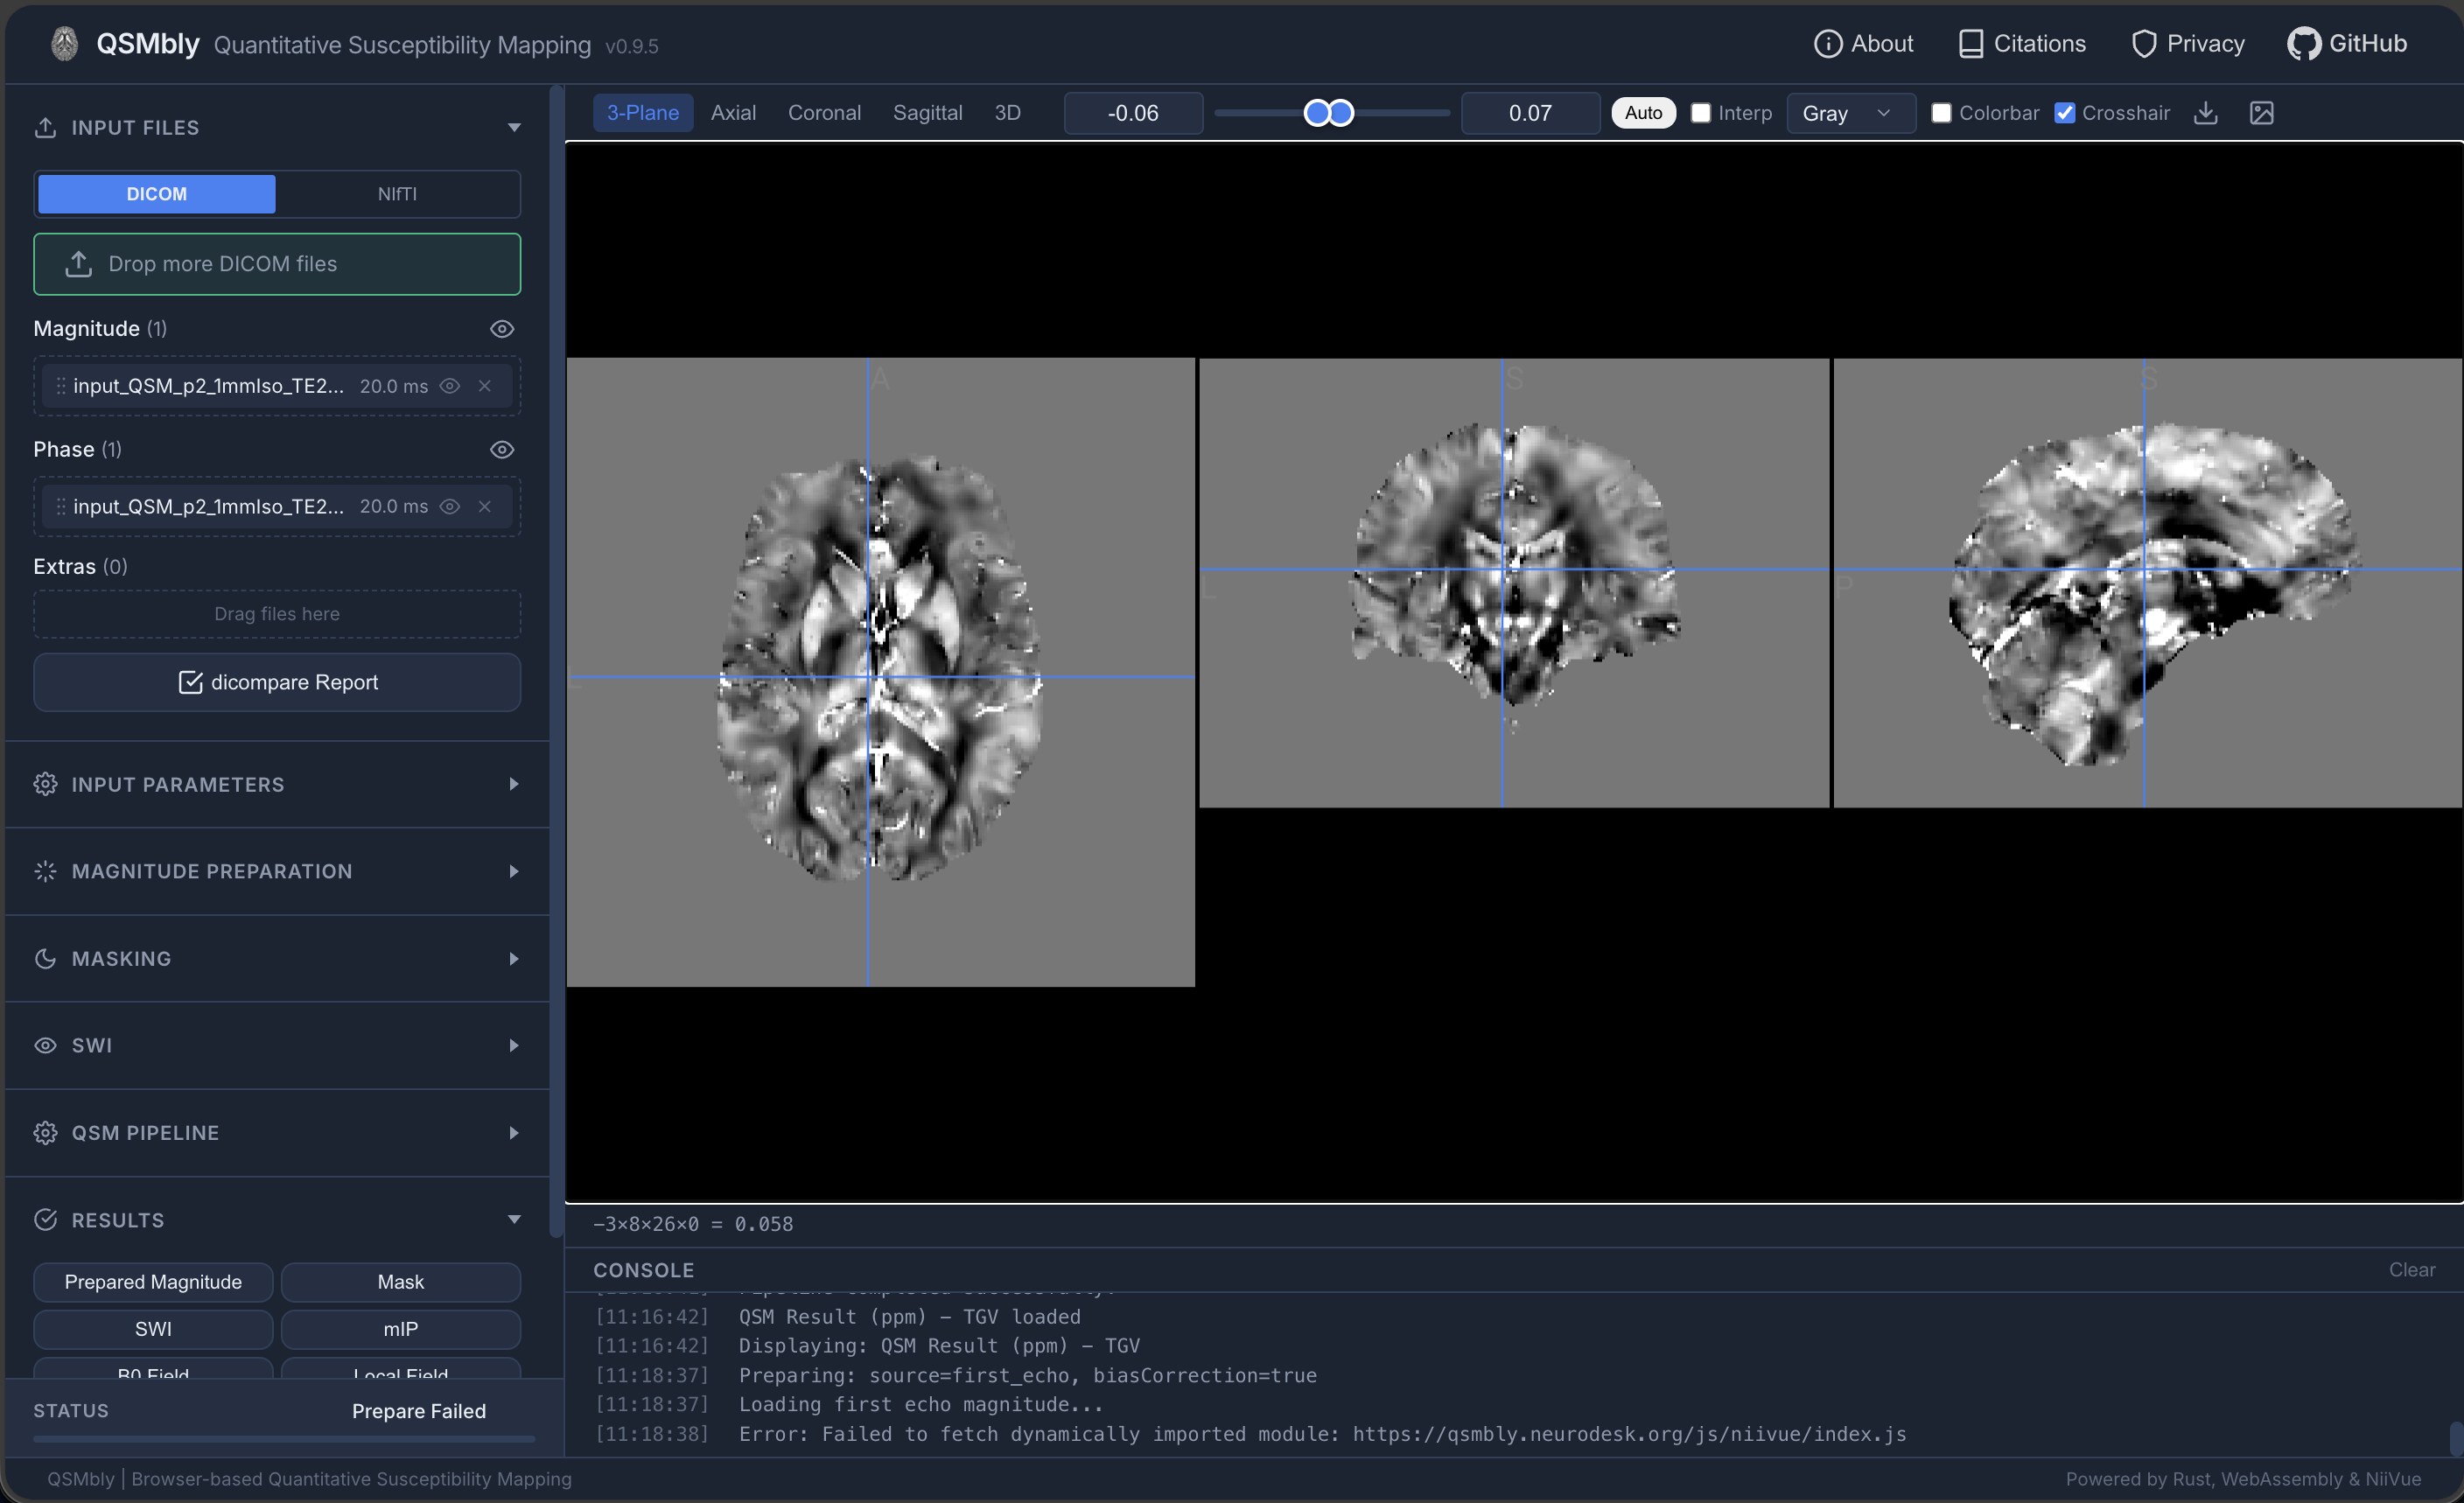
QSMbly provides a full Quantitative Susceptibility Mapping workflow in the browser. It supports DICOM and NIfTI input data and exposes the main preparation, masking, SWI, and QSM pipeline steps through a guided interface.
SeedSeg performs browser-based segmentation of intraprostatic gold fiducial markers in prostate MRI using a 3D U-Net model. It supports DICOM and NIfTI input data.
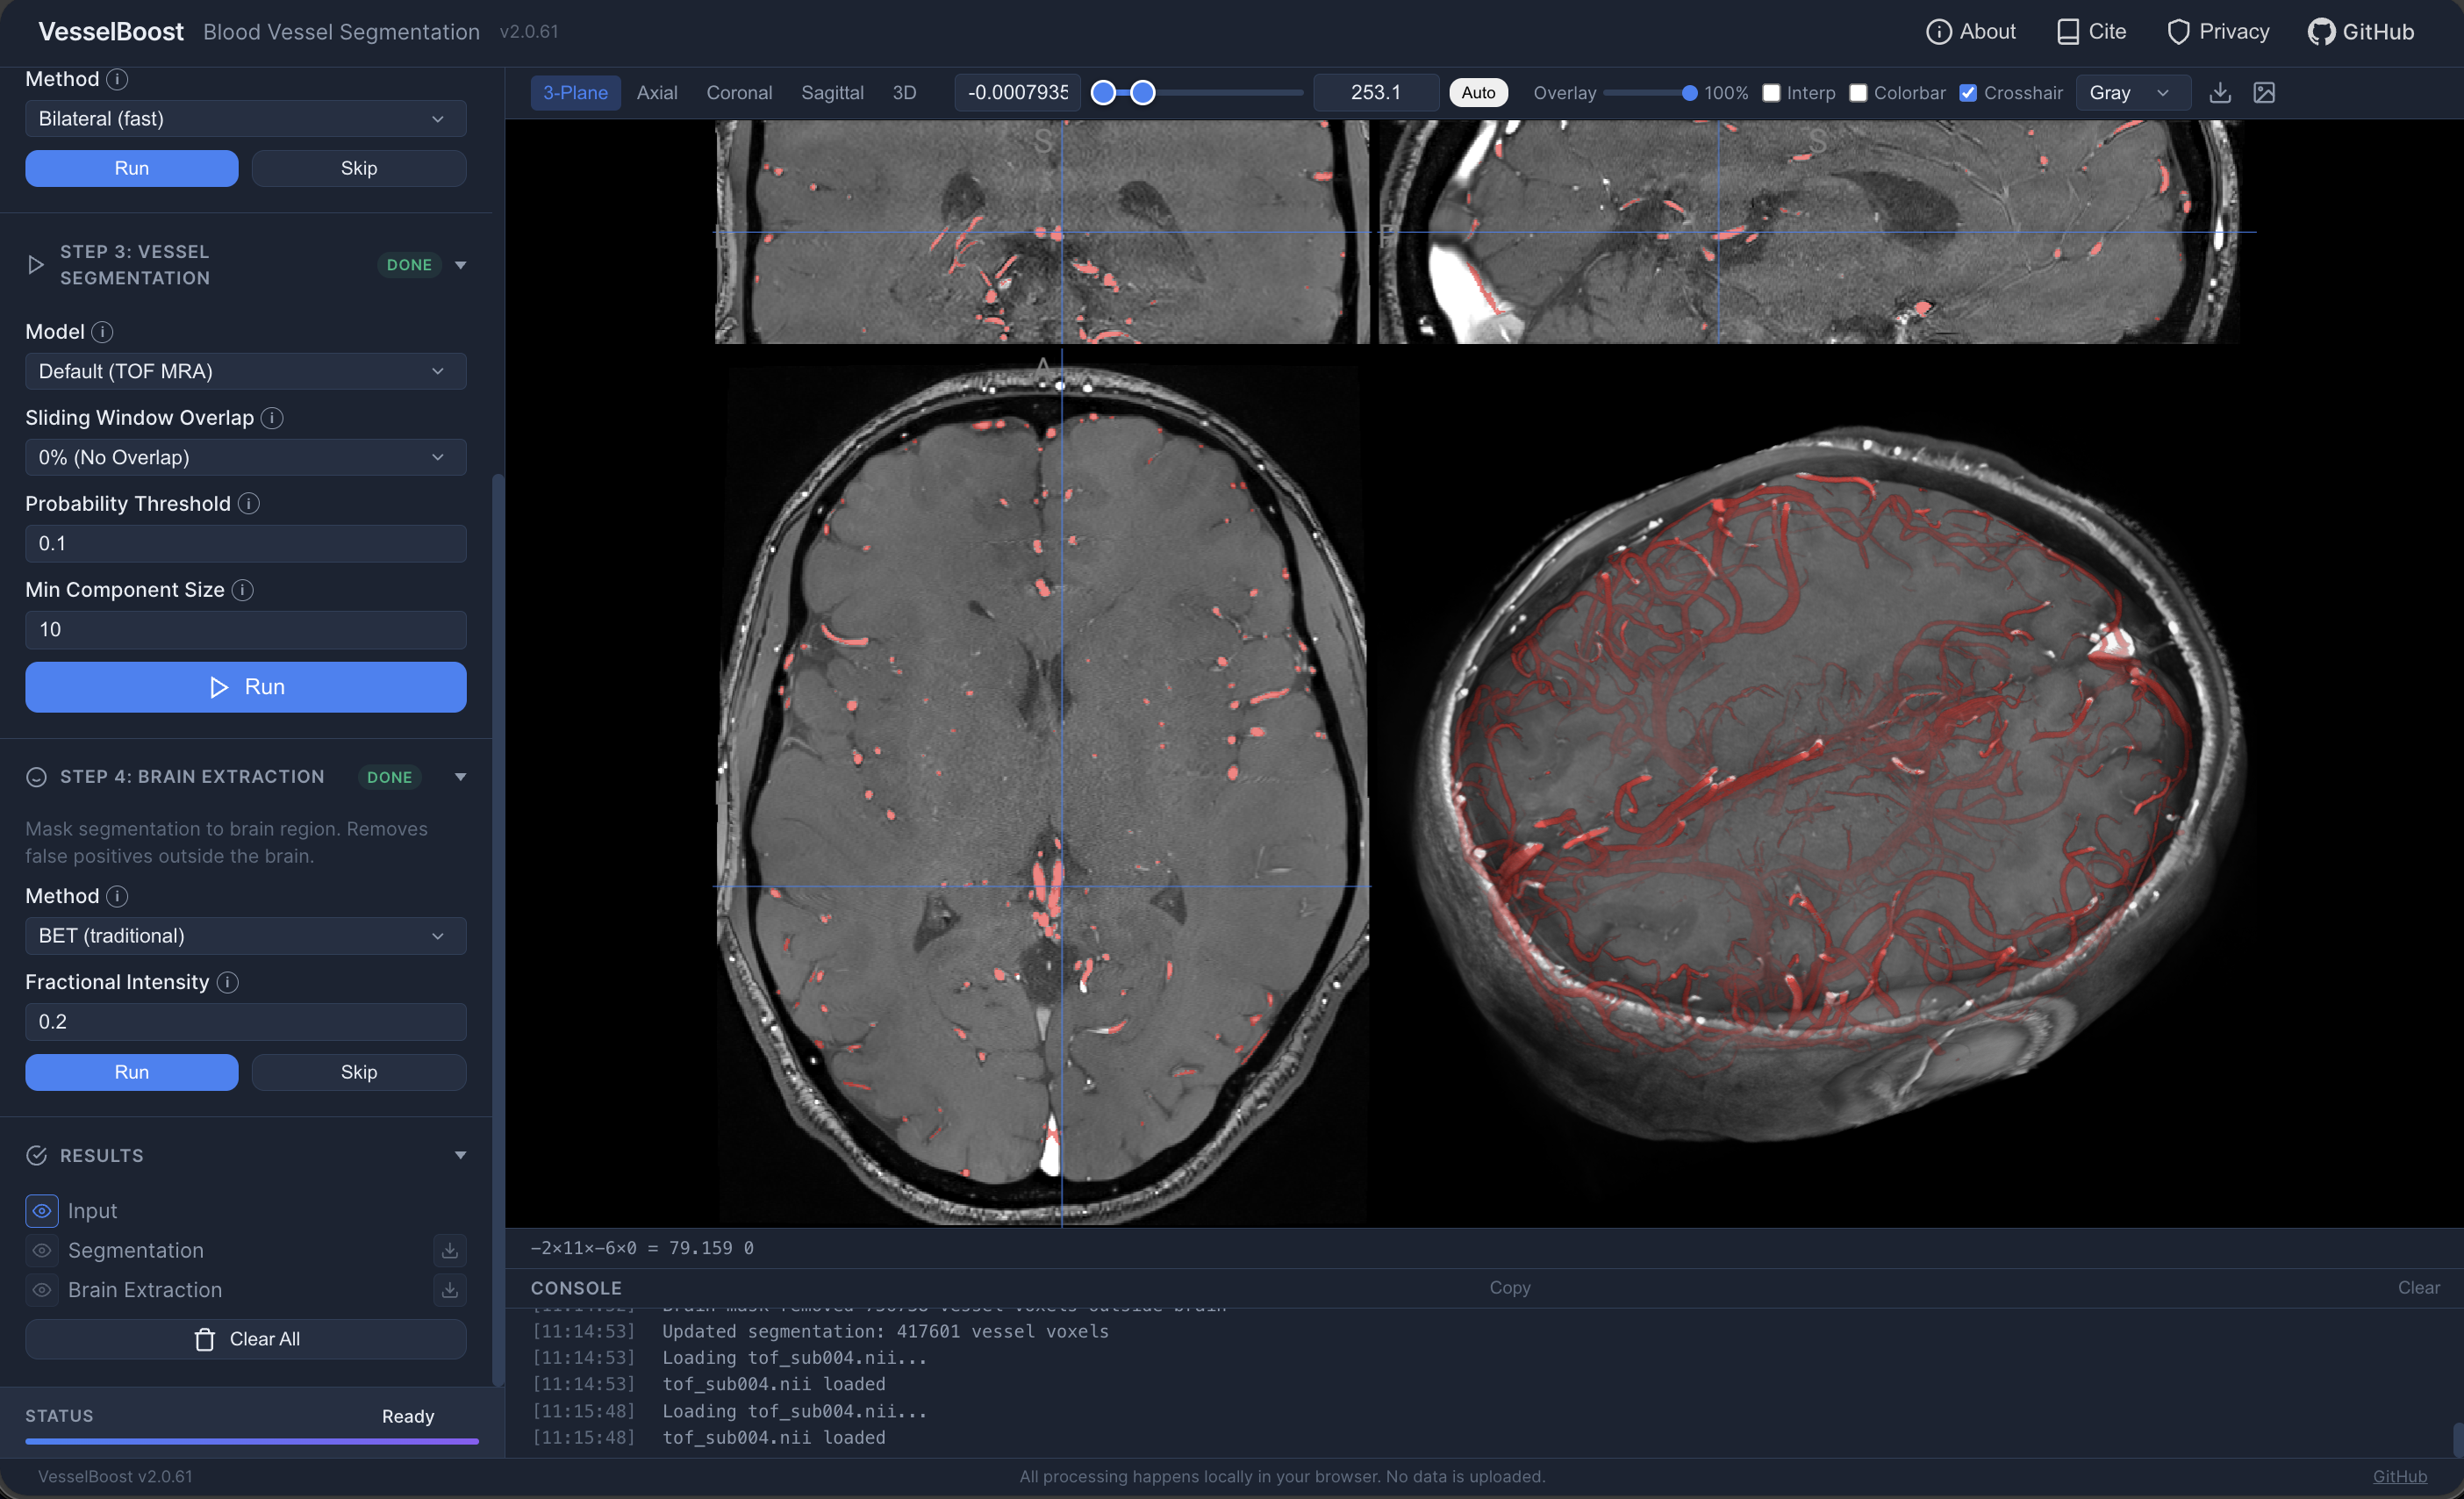
VesselBoost is a browser-based blood vessel segmentation tool. It combines preprocessing and inference steps in a guided workflow so users can segment vessel structures from MRI angiography data directly on their own machine.
Webapps from Neurodesk Friends and Family
These browser-based webapps are built and maintained by collaborators in the wider Neurodesk community and not maintained by us.
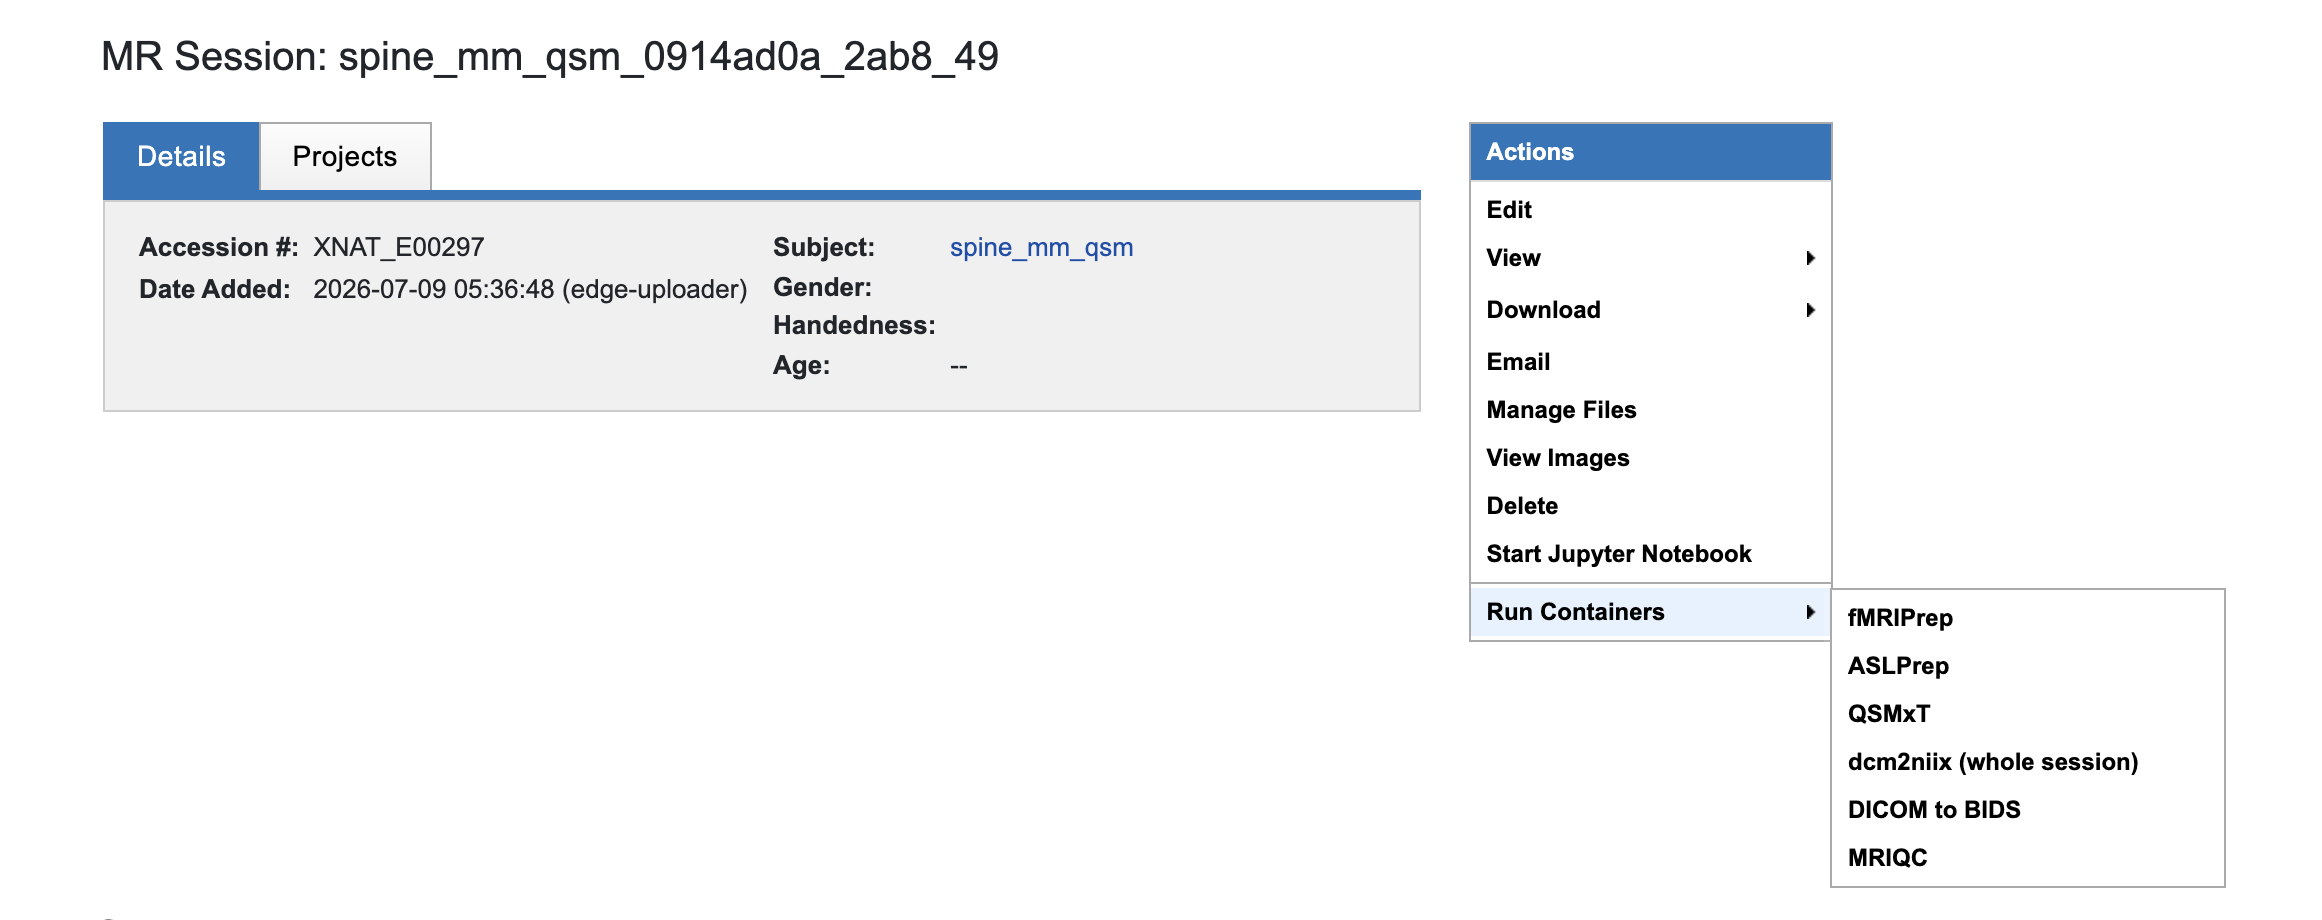
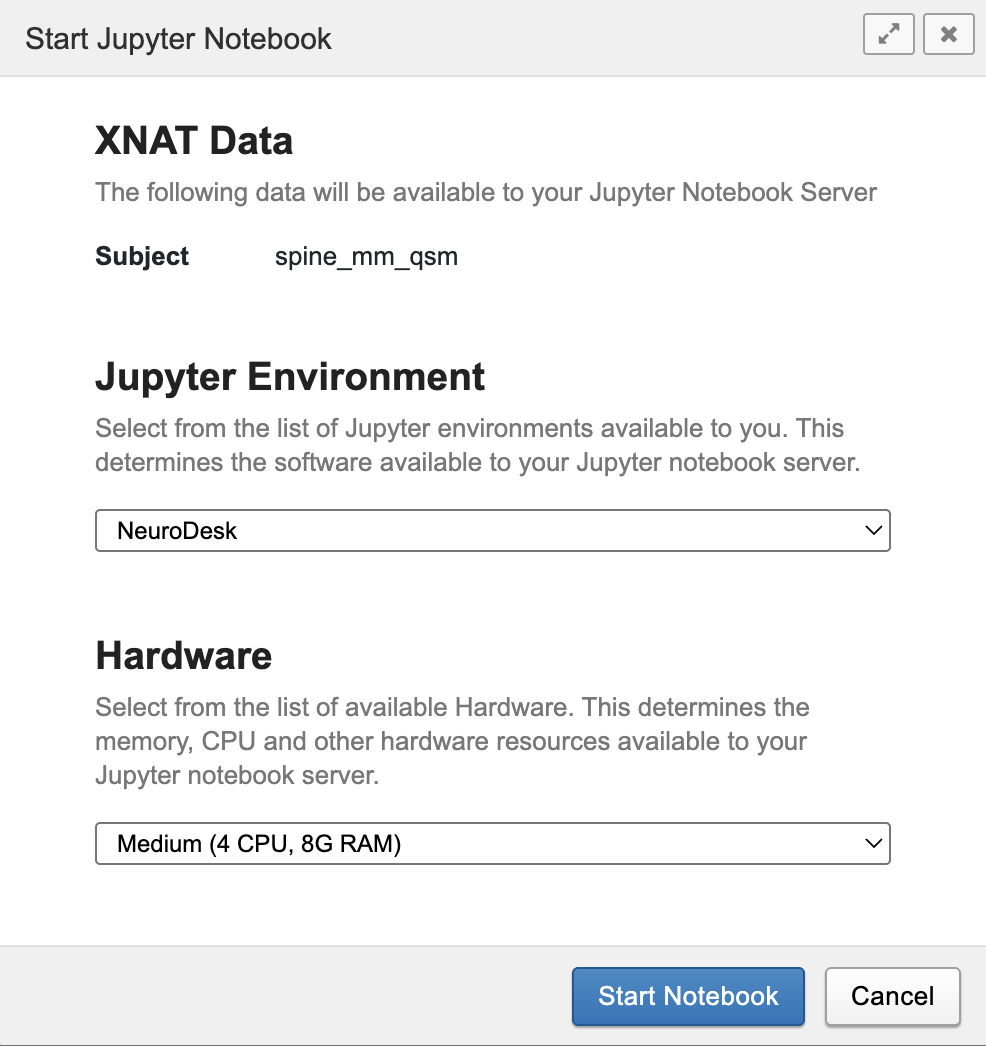
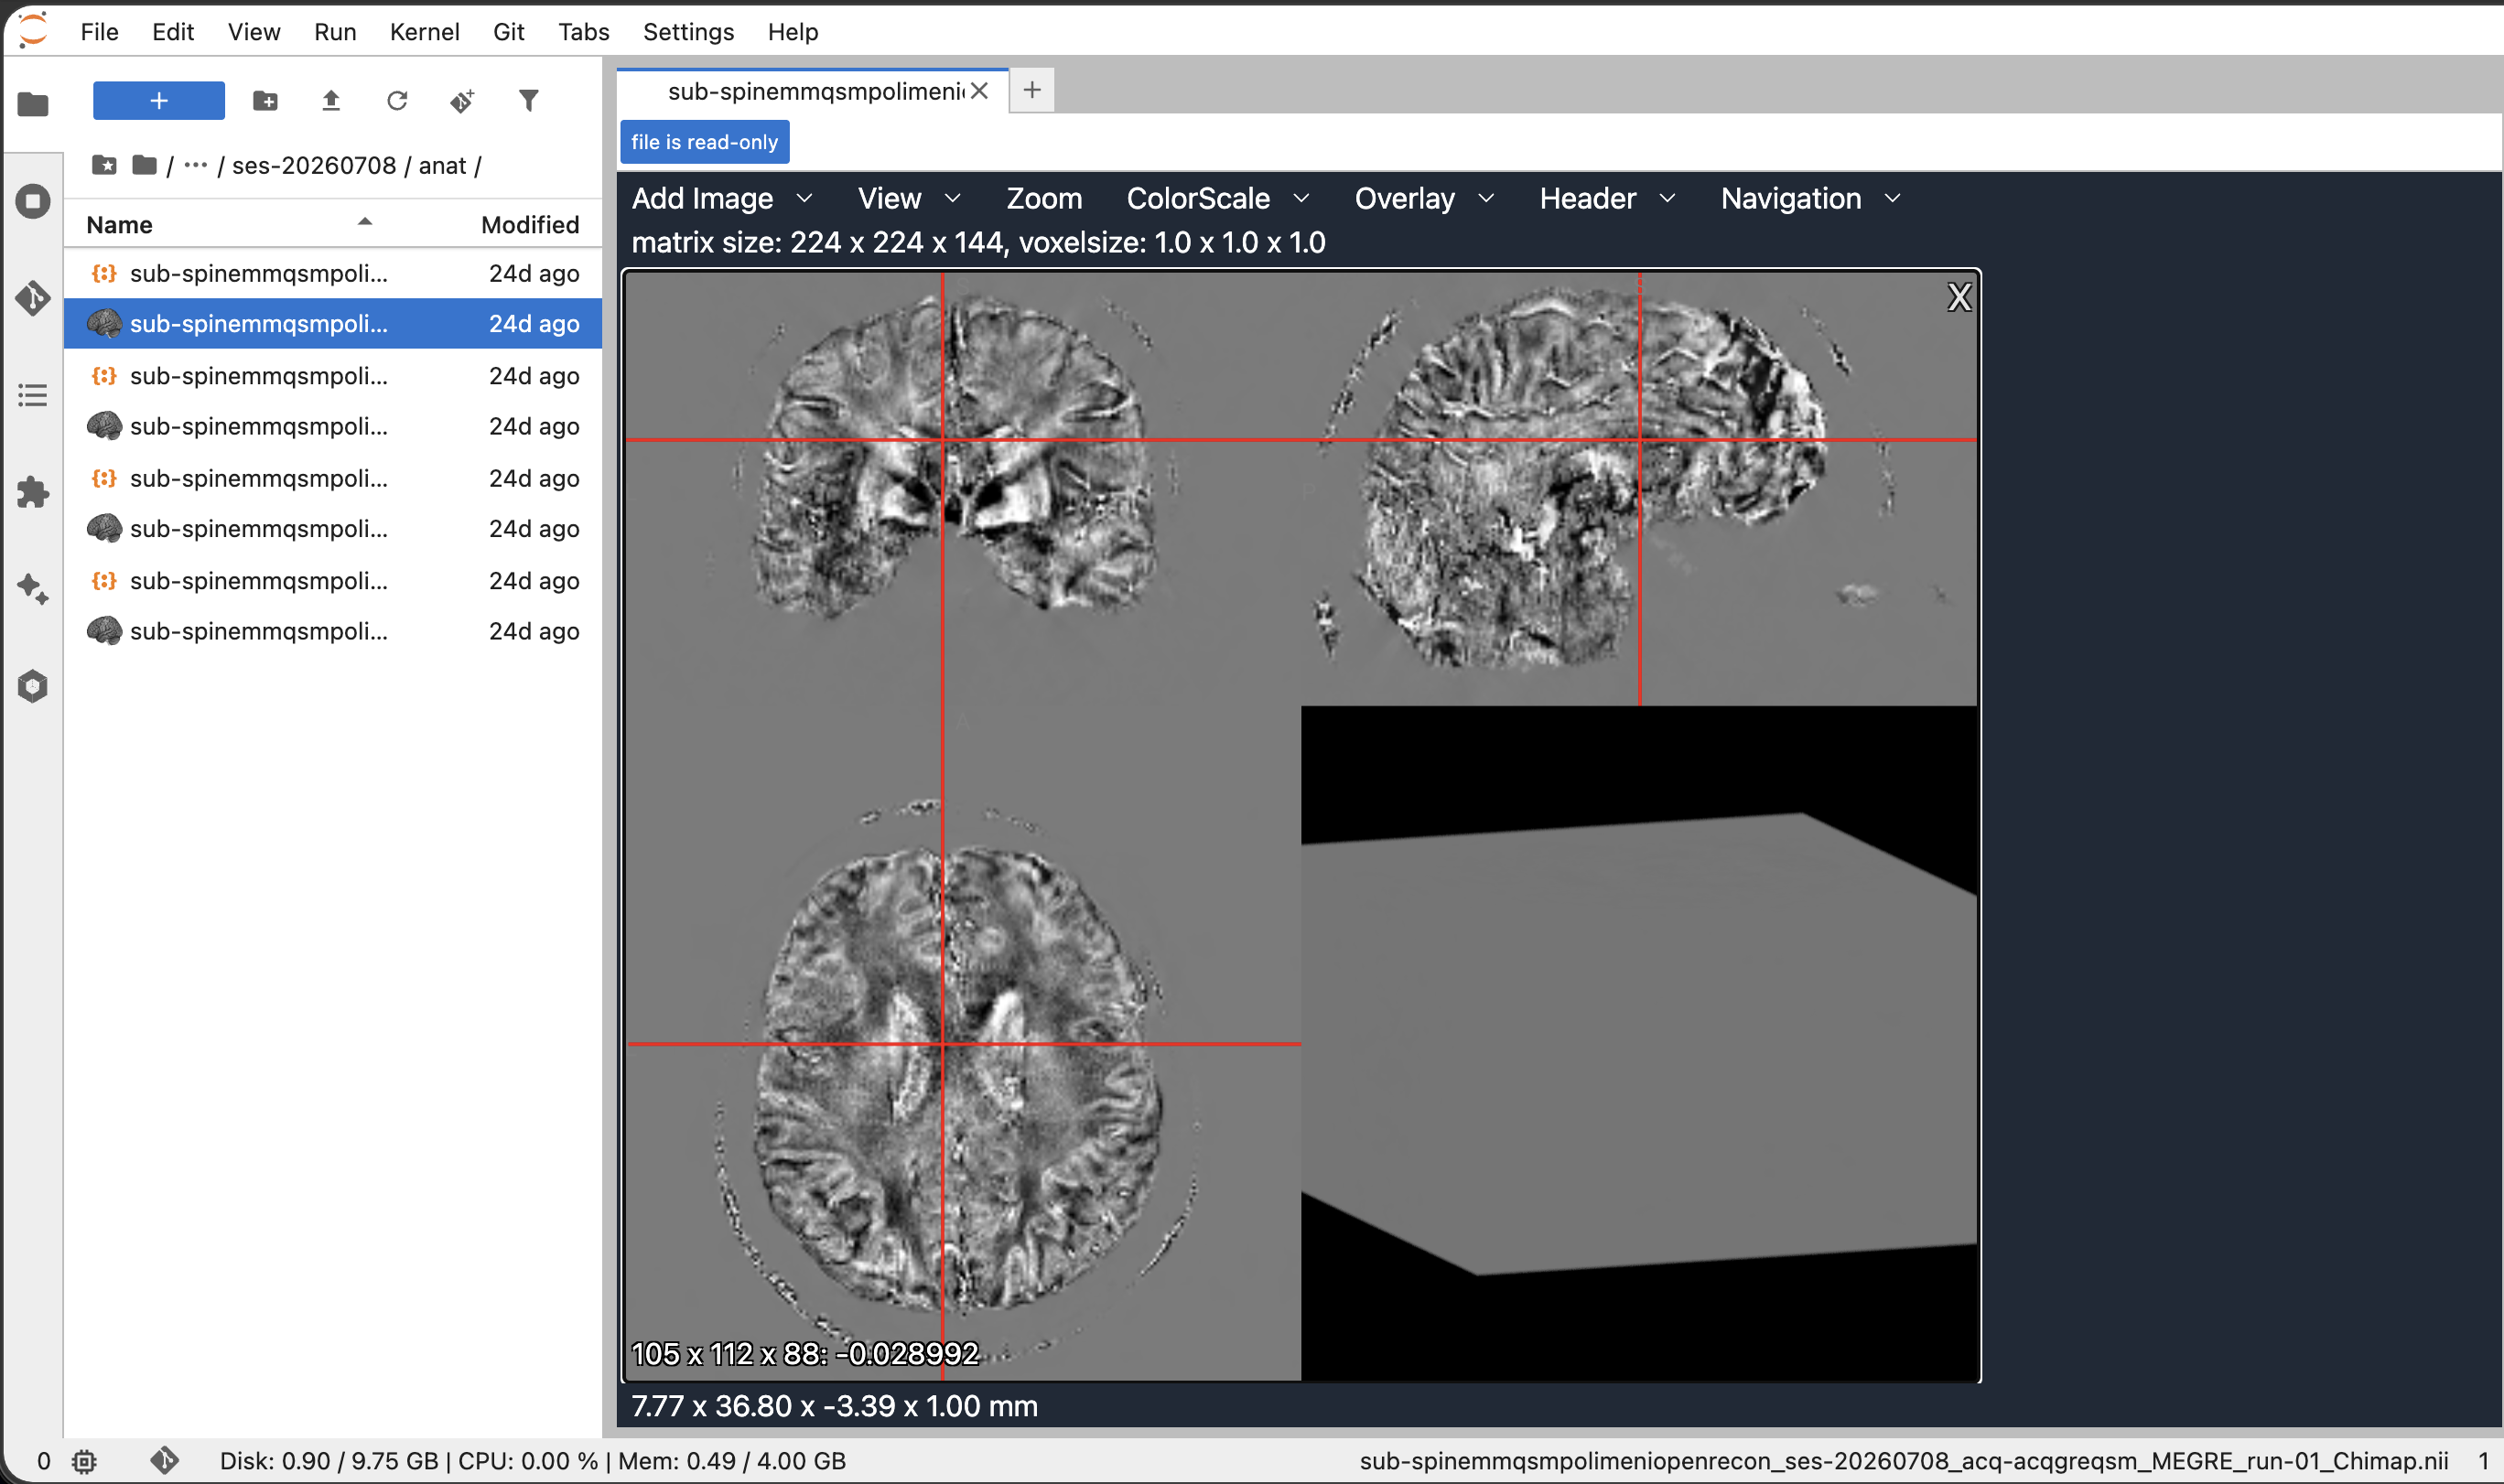
Neurodesk as an analysis environment in XNAT deployments
The Australian Imaging Service (AIS) has added Neurodesk to its XNAT deployment stack, making it possible to provide Neurodesk-powered analysis environments alongside managed imaging data.
AIS is a national platform for secure imaging management, analysis, informatics, and machine learning. Its XNAT deployment work combines XNAT for imaging data management with a JupyterHub layer that can launch Neurodesk environments for interactive analysis.
Who this is for
This option is most relevant for:
imaging facilities and research platforms using XNAT,
institutions that need governed access to imaging data and analysis environments.
The ais-devstack repository documents an XNAT deployment for Kubernetes and includes the JupyterHub/Neurodesk layer used to provide interactive analysis sessions.
Access
XNAT-hosted Neurodesk is not a single public Neurodesk service like Neurodesk Play. Access depends on the AIS node or institutional XNAT deployment that is hosting the environment.
If your project uses XNAT and you want to offer Neurodesk next to your imaging data, start with the AIS deployment repository and coordinate with your local infrastructure or AIS support team. For questions, reach out to mail.neurodesk@gmail.com.
3 - Neurodesktop
The plug-and-play, browser-accessible, containerised data analysis environment.
Video tutorial
See below for a 4 minute tutorial on Installation, Usage and Data Access with Neurodesktop
3.1 - Neurodesk App
Install and use the Neurodesk App.
3.2 - Linux
Install neurodesktop on Linux
Minimum System Requirements
At least 3GB free space for neurodesktop base image
To set up Neurodesk on Ubuntu, ensure both Podman client and server are installed. Follow the Podman installation instructions provided at https://podman.io/docs/installation for server setup.
In Ubuntu 20.10 or newer versions, the packages to install Podman are included to download in the standard repository of the system. However, for Ubuntu 20.04, we manually have to add the repository of Podman.
```bash
sudo apt update && sudo apt upgrade -y
sudo apt install curl
echo "deb https://download.opensuse.org/repositories/devel:/kubic:/libcontainers:/stable/xUbuntu_20.04/ /" | sudo tee /etc/apt/sources.list.d/devel:kubic:libcontainers:stable.list
curl -L "https://download.opensuse.org/repositories/devel:/kubic:/libcontainers:/stable/xUbuntu_20.04/Release.key" | sudo apt-key add -
sudo apt update
sudo apt-get -y install podman
```
1. Optional: only for ARM64 hardware
Neurodesk supports ARM64 hardware through binfmt
To enable Neurodesk on ARM64 hardware run this setup step:
sudo docker run --privileged --rm tonistiigi/binfmt --install all
2. Run Neurodesktop
Before the first run, create a local folder where the downloaded applications will be stored, e.g. mkdir ~/neurodesktop-storage
Then use one of the following options to run Neurodesktop:
Option 1 (Recommended for local installations): Neurodesk-App
Instructions on installing and using the app: Neurodesk App.
Option 2 (Advanced and for remote installations): Using Terminal
If the Linux machine is remote (e.g. in the cloud), connect to the machine with a port forwarding first:
If you run Ubuntu > 23.10 you need to create this apparmor profile under /etc/apparmor.d/neurodeskapp
```bash
# This profile allows everything and only exists to give the
# application a name instead of having the label "unconfined"
abi ,
include profile neurodeskapp "/opt/NeurodeskApp/neurodeskapp" flags=(unconfined) {
userns,
# Site-specific additions and overrides. See local/README for details.
include if exists }
```
If you get errors in neurodesktop then check if the ~/neurodesktop-storage directory is writable to all users. Otherwise run:
```bash
chmod a+rwx ~/neurodesktop-storage
```
If you get error that's not assessable on your network or causes problems then you can try to use the DNS server `8.8.8.8` (Google Public DNS) in the Docker command.
```bash
docker volume create neurodesk-home &&
sudo docker run \
--shm-size=1gb -it --privileged --user=root --name neurodesktop \
--dns 8.8.8.8 \
-v ~/neurodesktop-storage:/neurodesktop-storage \
--mount source=neurodesk-home,target=/home/jovyan \
--add-host=host.docker.internal:host-gateway \
-e OLLAMA_HOST="http://host.docker.internal:11434" \
-e NB_UID="$(id -u)" -e NB_GID="$(id -g)" \
-p 8888:8888 \
-e NEURODESKTOP_VERSION=2026-07-11 vnmd/neurodesktop:2026-07-11
```
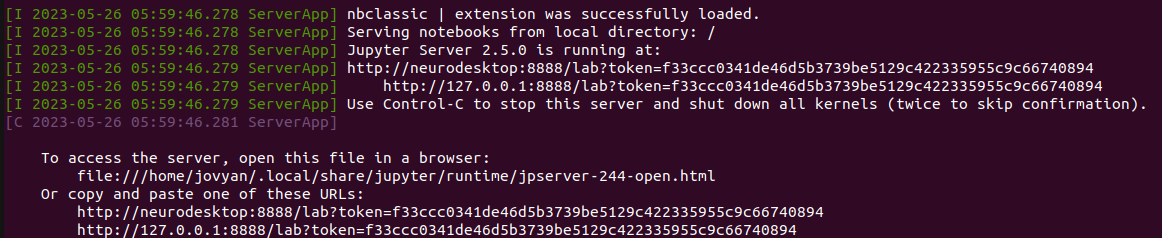
Once neurodesktop is downloaded, leave the terminal open and check which server neurodesktop is running on (Avoid pressing CTRL+C).
To access neurodesktop, open your web browser and type in one of the provided URLs in your terminal (e.g. http://127.0.0.1:8888/lab?token=your_unique_token).
If using Chrome, a pop-up may open with the text:
```none
"http://127.0.0.1:8888 wants to
See text and images copied to the clipboard".
```
Press "Allow" to access your clipboard from within Neurodesktop.
If using Firefox, you might not be able to paste clipboard content into the virtual desktop from the host computer. In that case, please follow [these instructions](/docs/support/faq/#copying-text-from-my-host-computer-and-pasting-it-inside-neurodesktop-doesnt-work-in-firefox)
Press on “Desktop Auto-Resolution” under “ALL CONNECTIONS”
If it is the first time you have used Neurodesktop, wait until the desktop appears (it may take a few seconds). Otherwise, it should appear instantaneously.
Neurodesk is now ready to use! See the tutorials page for advice on how to use Neurodesk.
The browser can be closed anytime, and Neurodesktop will continue running in the background. To reconnect to Neurodesktop, simply start over from step 3 above.
If you are using conda environments and you are installing packages or even new kernels, make sure to read this: https://neurodesk.org/edu/tutorials/programming/conda.html
If you want to use Neurodesk in combination with a reverse proxy, make sure to activate proxy_buffering off as described here: https://guacamole.apache.org/doc/gug/reverse-proxy.html
Deleting neurodesktop:
When done processing your data it is important to stop and remove the container - otherwise the next start or container update will give an error ("… The container name “/neurodesktop” is already in use…")
Note
Notice that any data that were saved outside of /neurodesktop-storage would be lost. Please make sure to move all your data to that folder before deleting neurodesktop.
Click on the terminal from which you ran neurodesktop
Docker for MacOS by default runs with 2GB Memory. For actual workloads, 4GB Memory minimum for docker is highly recommended. You need to adjust this:
1. Open the Docker Desktop and Navigate to the Settings. Then navigate to the "Resources" section.
2. Increase the Memory slider from 2.00 GB to 4.00 GB (or greater)
3. Increase Swap slider from 1GB to 2GB (or greater)
2. Run Neurodesktop
Use one of the following options to run Neurodesktop:
Option 1 (Recommended): Neurodesk-App
Instructions on installing and using the app: Neurodesk App.
Option 2 (Advanced): Using Terminal
Create a local folder where the downloaded applications will be stored, e.g. ~/neurodesktop-storage
Open a terminal, and type the following command to automatically download the neurodesktop container and run it
If you get errors in neurodesktop then check if the ~/neurodesktop-storage directory is writable for all users. If it is not, run chmod a+rwx ~/neurodesktop-storage
Once neurodesktop is downloaded, leave the terminal open and check which server neurodesktop running on (Avoid pressing CTRL+C).
To access neurodesktop, open your web browser and navigate to one of the URLs shown in your terminal (e.g. http://127.0.0.1:8888/lab?token=your_unique_token).
We recommend using Chrome over Firefox as it has an option to hide the Toolbar in full screen mode (go to the menu bar, click on View, and uncheck "Always Show Toolbar in Full Screen"). This allows for Neurodesktop to fully utilise the whole of your screen.
If prompted, press on “Desktop RDP - changes resolution by resizing window and waiting for refresh” or “Desktop VNC - changes resolution by running lxrandr on a terminal” under “ALL CONNECTIONS”
If it is the first time you use Neurodesktop, wait until the desktop appears (it may take a few seconds). Otherwise, it should appear instantaneously.
Neurodesk is ready to use! See the tutorials page for advice on how to use Neurodesk.
The browser can be closed anytime, and Neurodesktop will continue to run in the background. To reconnect to Neurodesktop, simply start over from step 3 above.
If you are using conda environments and you are installing packages or even new kernels, make sure to read this: https://neurodesk.org/edu/tutorials/programming/conda.html
Deleting neurodesktop:
When done processing your data it is important to stop and remove the container - otherwise the next start or container update will give an error ("… The container name “/neurodesktop” is already in use…")
Note
Note that any data that were saved outside of /neurodesktop-storage would be lost. Please make sure to move all your data to that folder before deleting neurodesktop.
Click on the terminal from which you ran neurodesktop
Press control-C
Type:
docker stop neurodesktop
Type:
docker rm neurodesktop
3.4 - Windows
Install neurodesktop on Windows
Minimum System Requirements
At least 3GB free space for neurodesktop base image
The docker installation will reboot your computer a few times. There might be warnings regarding WSL2 and this also might require a few more installation steps that unfortunately differ for every system. Please get in touch if you are stuck and have a look at our troubleshooting page. Here is a detailed instruction on how Neurodesk was installed on Windows VMs from the team at Technion: [Detailed Docker & Neurodesk installation instruction Windows
](https://github.com/neurodesk/neurodesk.github.io/blob/main/static/docs/getting-started/neurodesktop/Neurodesk_Windows_Technion.pdf)
Alternatively, Neurodesk also works with Podman, follow the Podman installation instructions provided at https://podman.io/docs/installation.
2. Run Neurodesktop
Use one of the following options to run Neurodesktop:
Option 1 (Recommended): Neurodesk-App
Instructions for installing and using the app: Neurodesk App.
Option 2 (Advanced): Using Terminal
Open a terminal (e.g. Powershell), and type the following command to automatically download the neurodesktop container and run it
docker volume create neurodesk-home
# This creates a docker volume to store your /home/jovyan data inside a docker volume
Once neurodesktop is downloaded, leave the terminal open and check which server neurodesktop running on (Avoid pressing CTRL+C). ]
To access neurodesktop, open your web browser and type in one of the URLs provided in your terminal (e.g. http://127.0.0.1:8888/lab?token=your_unique_token).
Note
We do not recommend the use of the Firefox browser for accessing Neurodesktop on Windows 10, as firefox is not able to access localhost where neurodesk is running.
Press on “Desktop Auto-Resolution” under “ALL CONNECTIONS”
If it is the first time you use Neurodesktop, wait until the desktop appears (it may take a few seconds). Otherwise, it should appear instantaneously.
Neurodesk is ready to use! See the tutorials page for advice on how to use Neurodesk.
The browser can be closed anytime, and Neurodesktop will continue running in the background. To reconnect to Neurodesktop, simply start over from step 3 above.
If you are using conda environments and you are installing packages or even new kernels, make sure to read this: https://neurodesk.org/edu/tutorials/programming/conda.html
Deleting neurodesktop:
When done processing your data it is important to stop and remove the container - otherwise the next start or container update will give an error ("… The container name “/neurodesktop” is already in use…")
Note
Note that any data that were saved outside of /neurodesktop-storage would be lost. Please make sure to move all your data to that folder before deleting neurodesktop.
Click on the terminal from which you ran neurodesktop
Press control-C
Type:
docker stop neurodesktop
Type:
docker rm neurodesktop
3.5 - Cloud
Run neurodesktop on cloud computing resources
Options for Running Neurodesk on cloud computing resources
There are a couple of ways how Neurodesktop can be run on cloud computing resources:
The most scalable solution is to run Neurodesk via Kubernetes. This setup is a bit more complex, but can handle many simultaneous users and is ideal for research groups and workshops. The easiest way to deploy Neurodesk on Kubernetes is to use Zero to Jupyterhub (https://z2jh.jupyter.org/en/stable/) - then you can use the Neurodesk image like any other jupyterhub image. If you do not want to run a privileged container you need to deploy the cvmfs setup on Kubernetes as well: https://github.com/cvmfs-contrib/cvmfs-csi/
3.6 - Data Storage
Understanding and managing data storage in Neurodesk
Storage overview
How your data is stored in Neurodesk depends on where you are running it:
Local (Neurodesk App on your own machine): Storage is directly linked to your host computer through the /neurodesktop-storage directory. Your data persists for as long as you keep it — nothing is automatically deleted. The amount of available space depends on your local disk setup.
Play (Neurodesk App cloud-hosted): Each user is allocated a fixed amount of storage space. You can check how much of your allocation you are using from within the Play environment. Be aware that data on Play is deleted after 30 days of inactivity, so make sure to back up any important files using the cloud storage or data transfer methods described below.
HPC (high-performance computing): Storage depends entirely on your institution and how Neurodesk has been set up by your system administrators. Typically, Neurodesk will be configured to bind-mount your institution’s existing storage infrastructure (e.g. scratch, group, or project directories).
For all environments, we recommend keeping a copy of important data in an external location. The sections below describe several methods for transferring data in and out of Neurodesk.
Transferring files
Drag and Drop
Uploading files
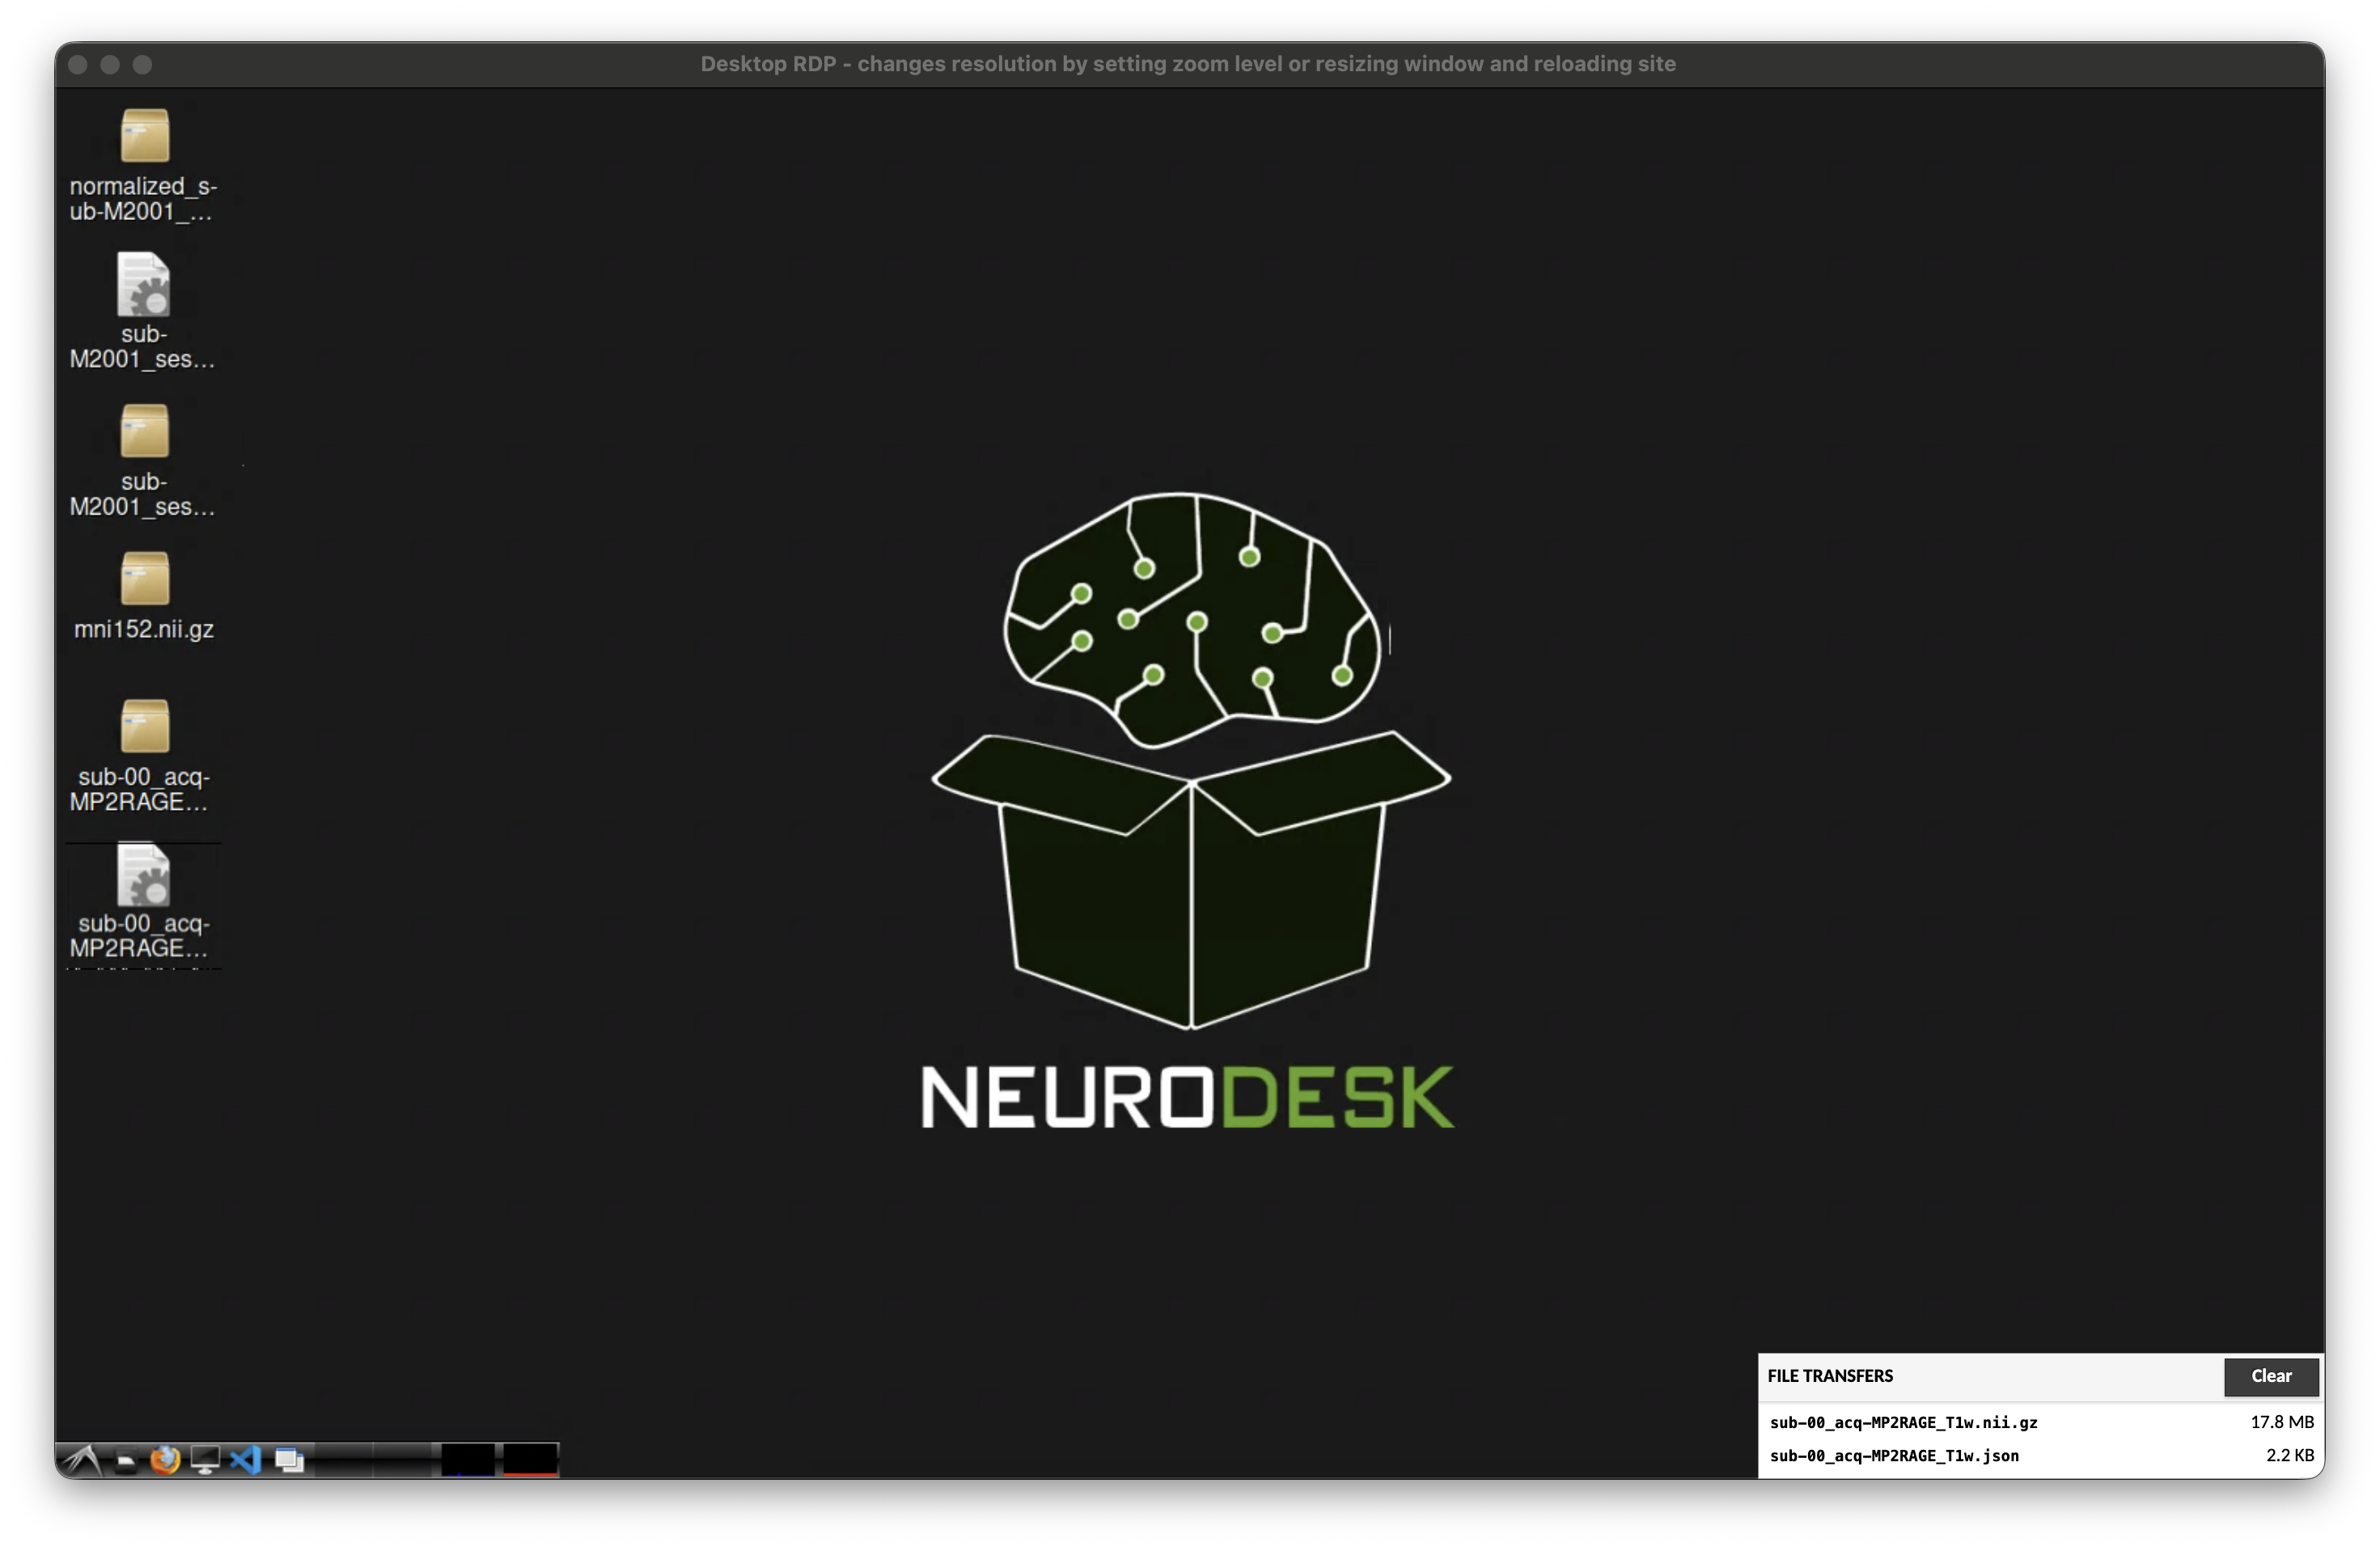
You can drag-and-drop files into the browser window to get files into the Neurodesktop desktop. This will then start a file upload:
Downloading files
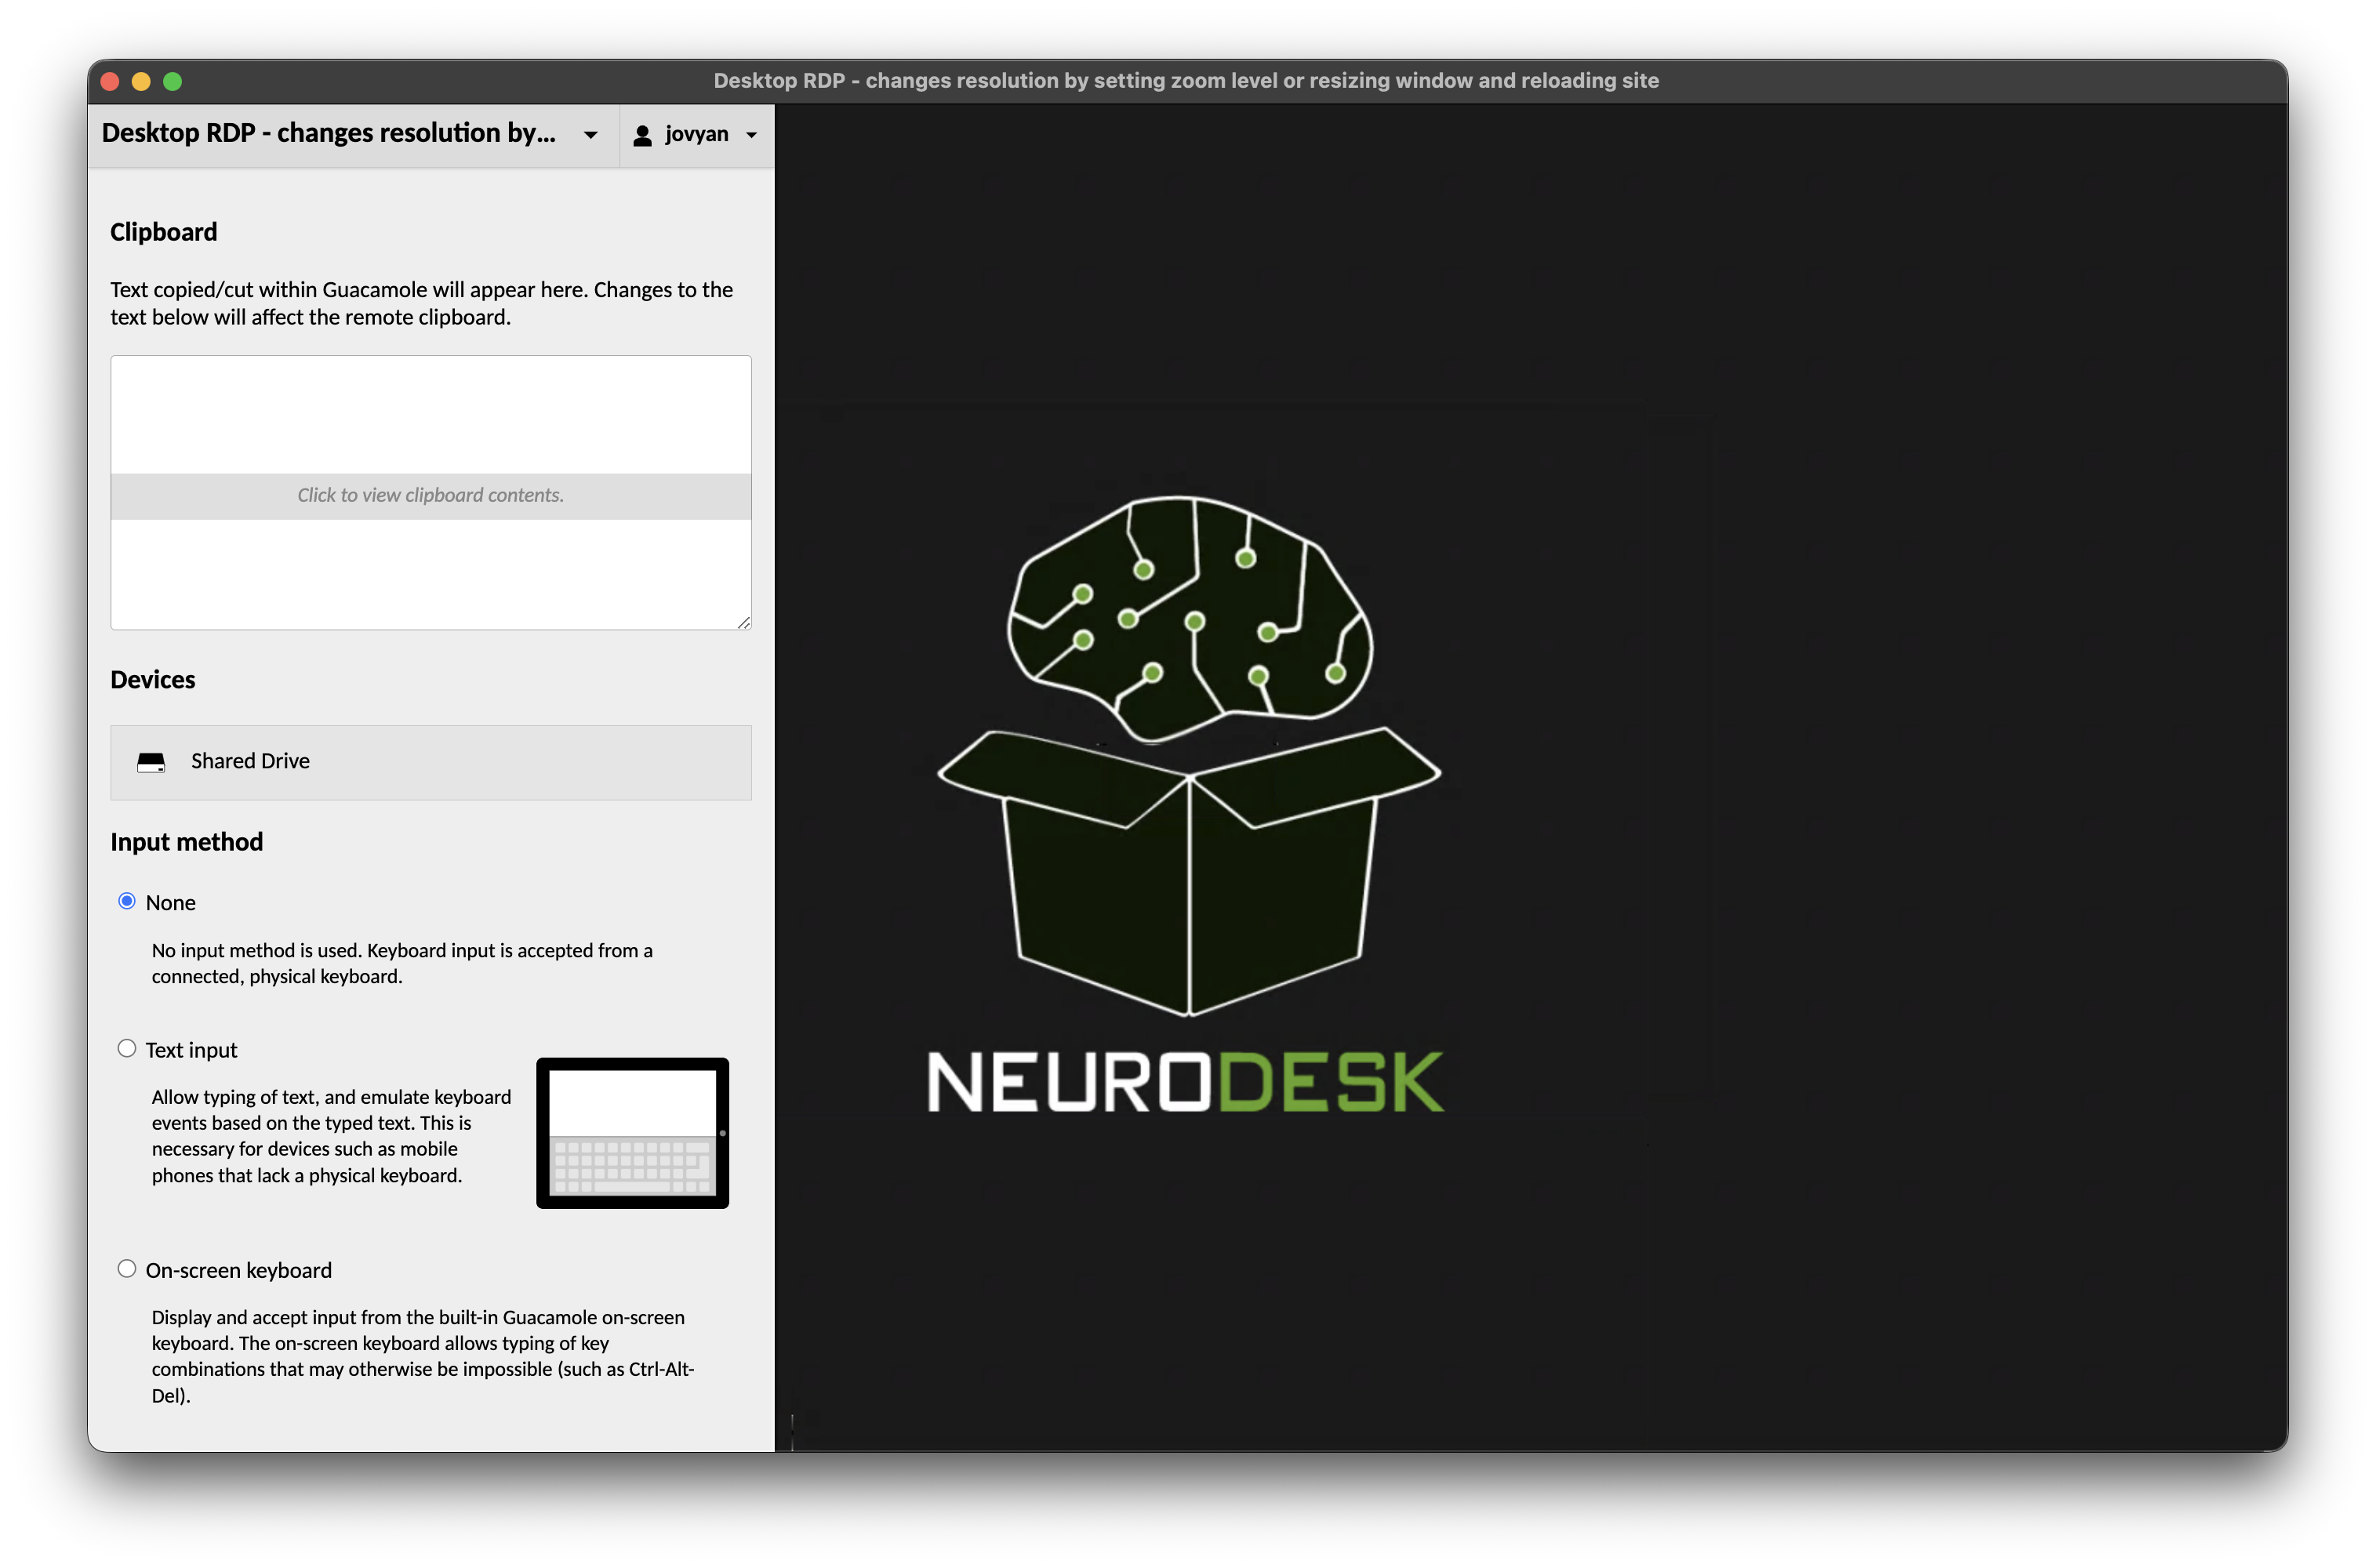
To download files from the desktop you will need to open the Guacamole settings by pressing Ctrl+Alt+Shift (Control+Command+Shift on Mac). This will open a menu on the side:
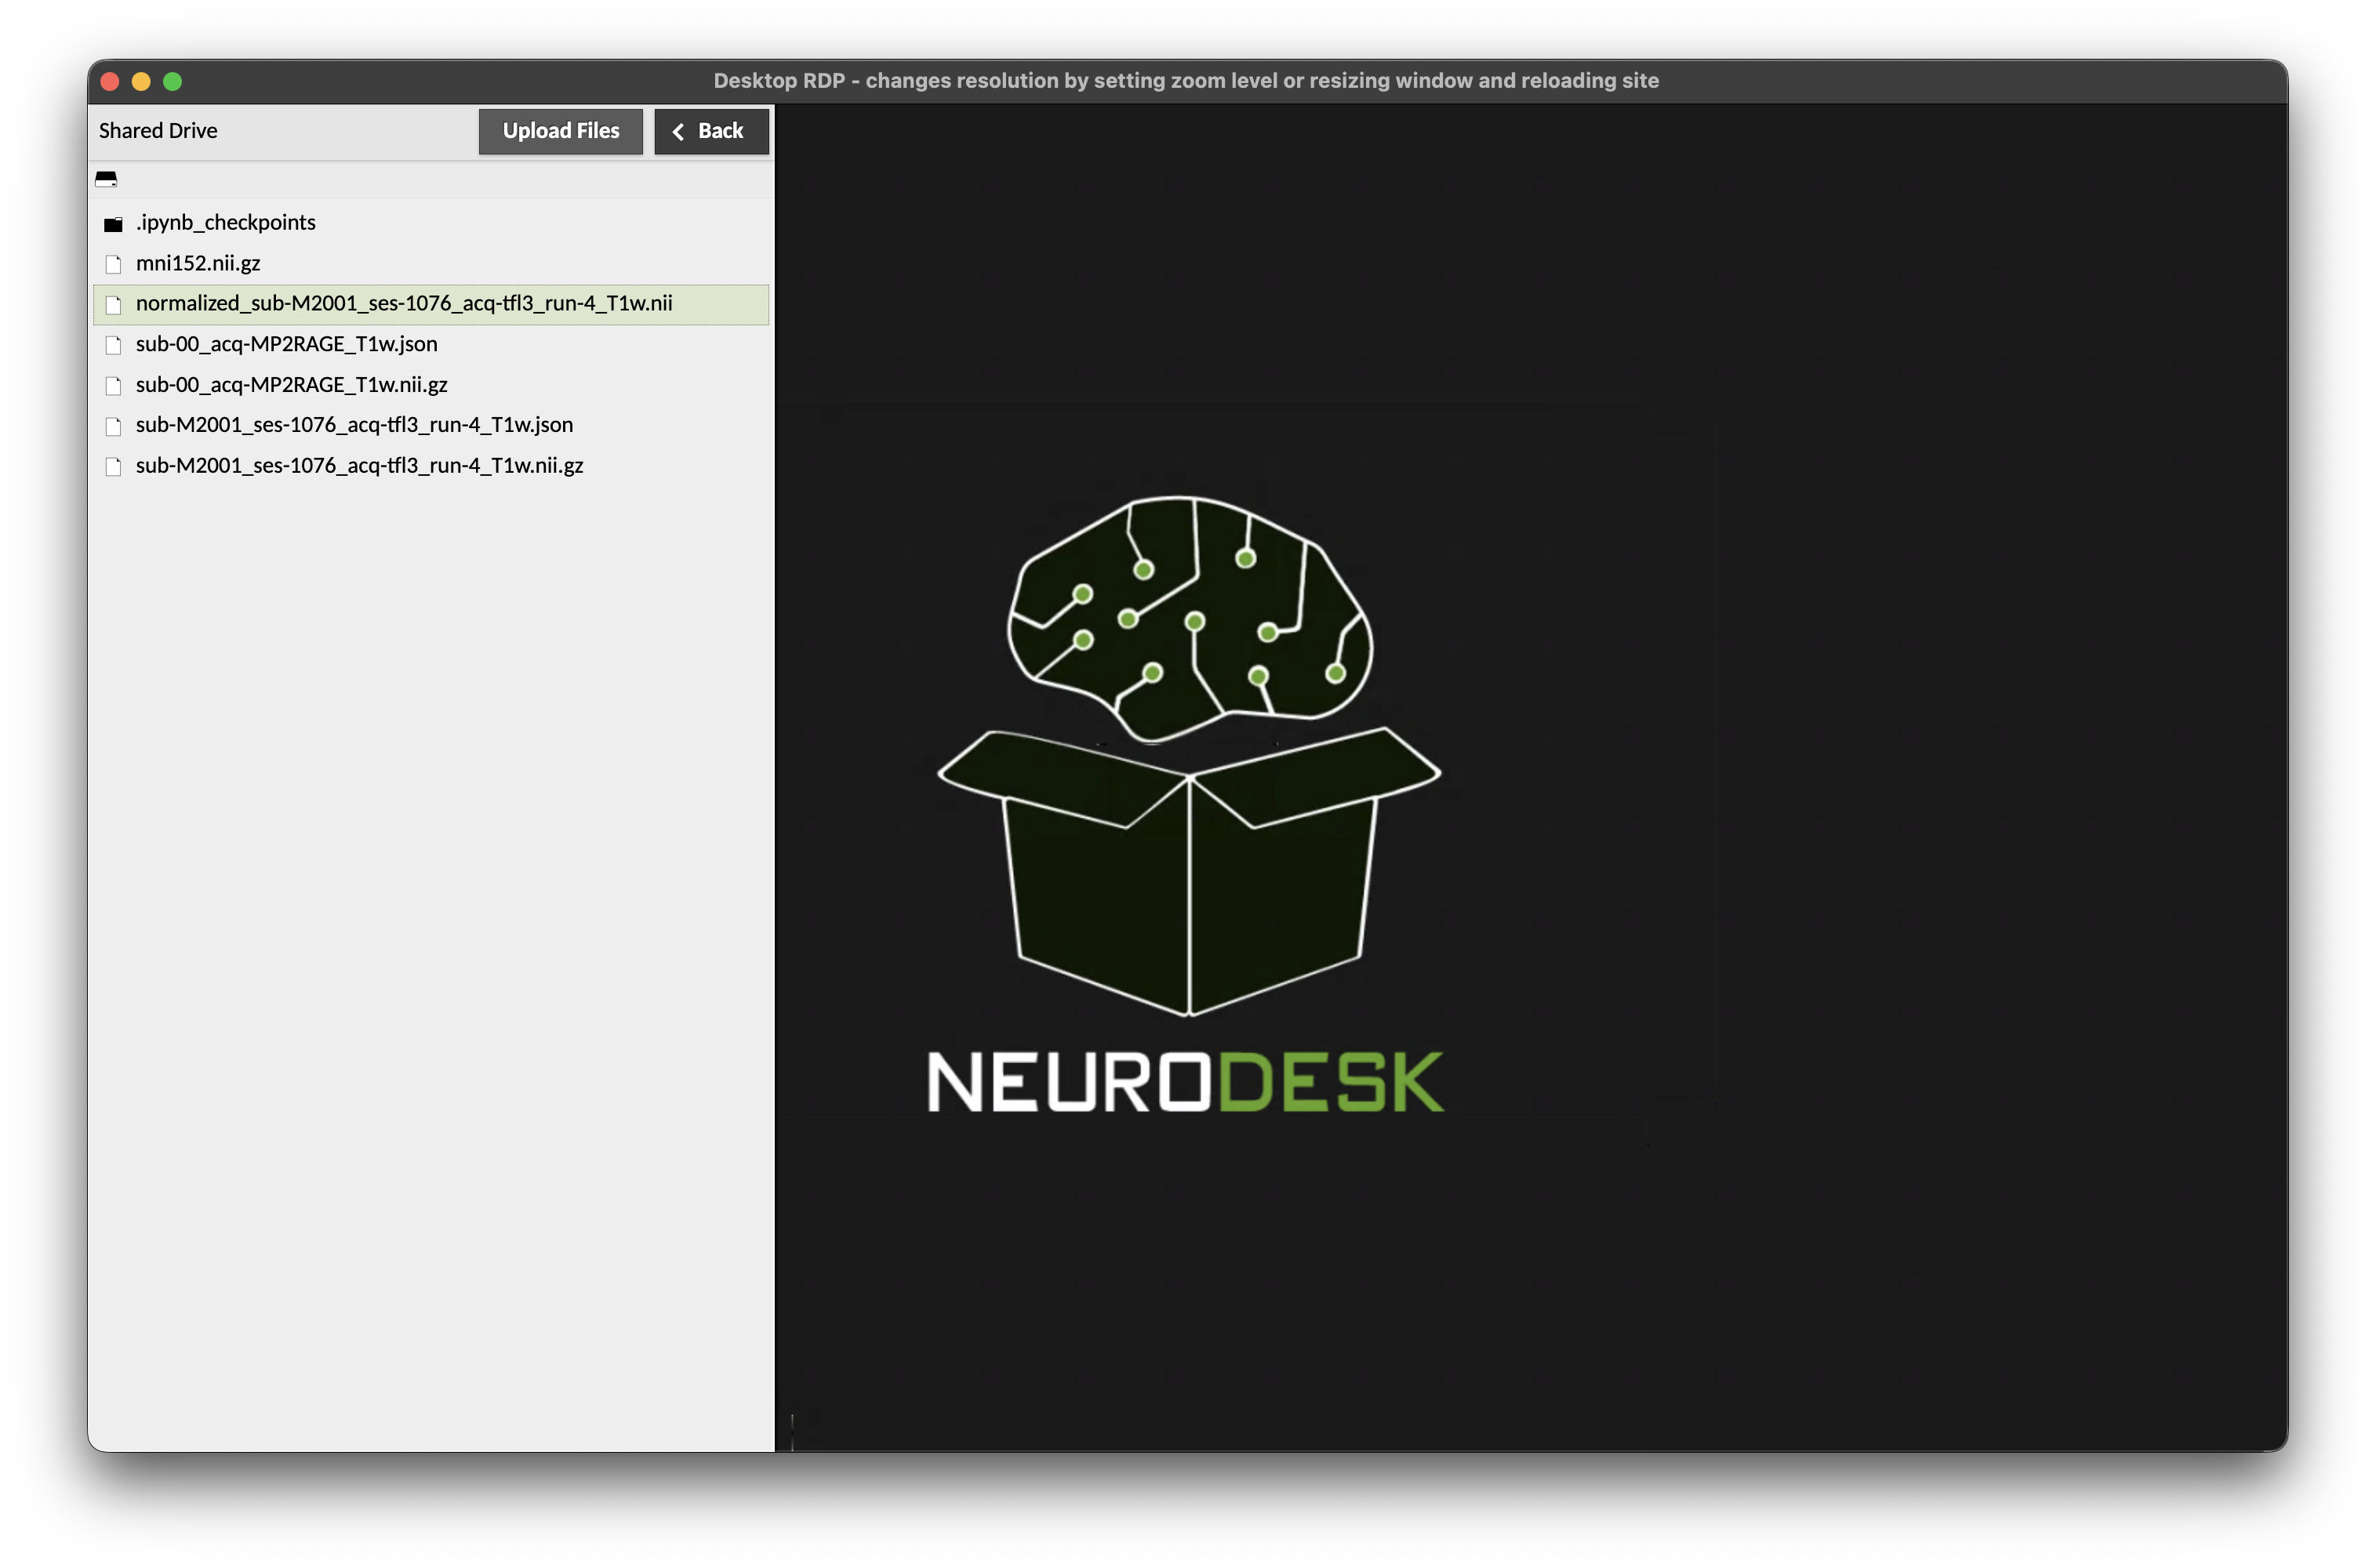
where you can click on “Shared Drive”:
A click (or double click on Mac) on the file will start the download.
You can browse into folders in the shared drive by clicking (double clicking on Mac) on them. To get back to the base of the shared drive, press on the drive icon in the top left of the side menu (just below the “Shared Drive” title).
To close the side menu, press Ctrl+Alt+Shift once more (Control+Command+Shift on Mac).
Note that it is only possible to upload or download one file at a time through this interface. If you have multiple files in a directory we recommend zipping the directory and then transferring one zip archive:
zip files.zip files/
Uploading files
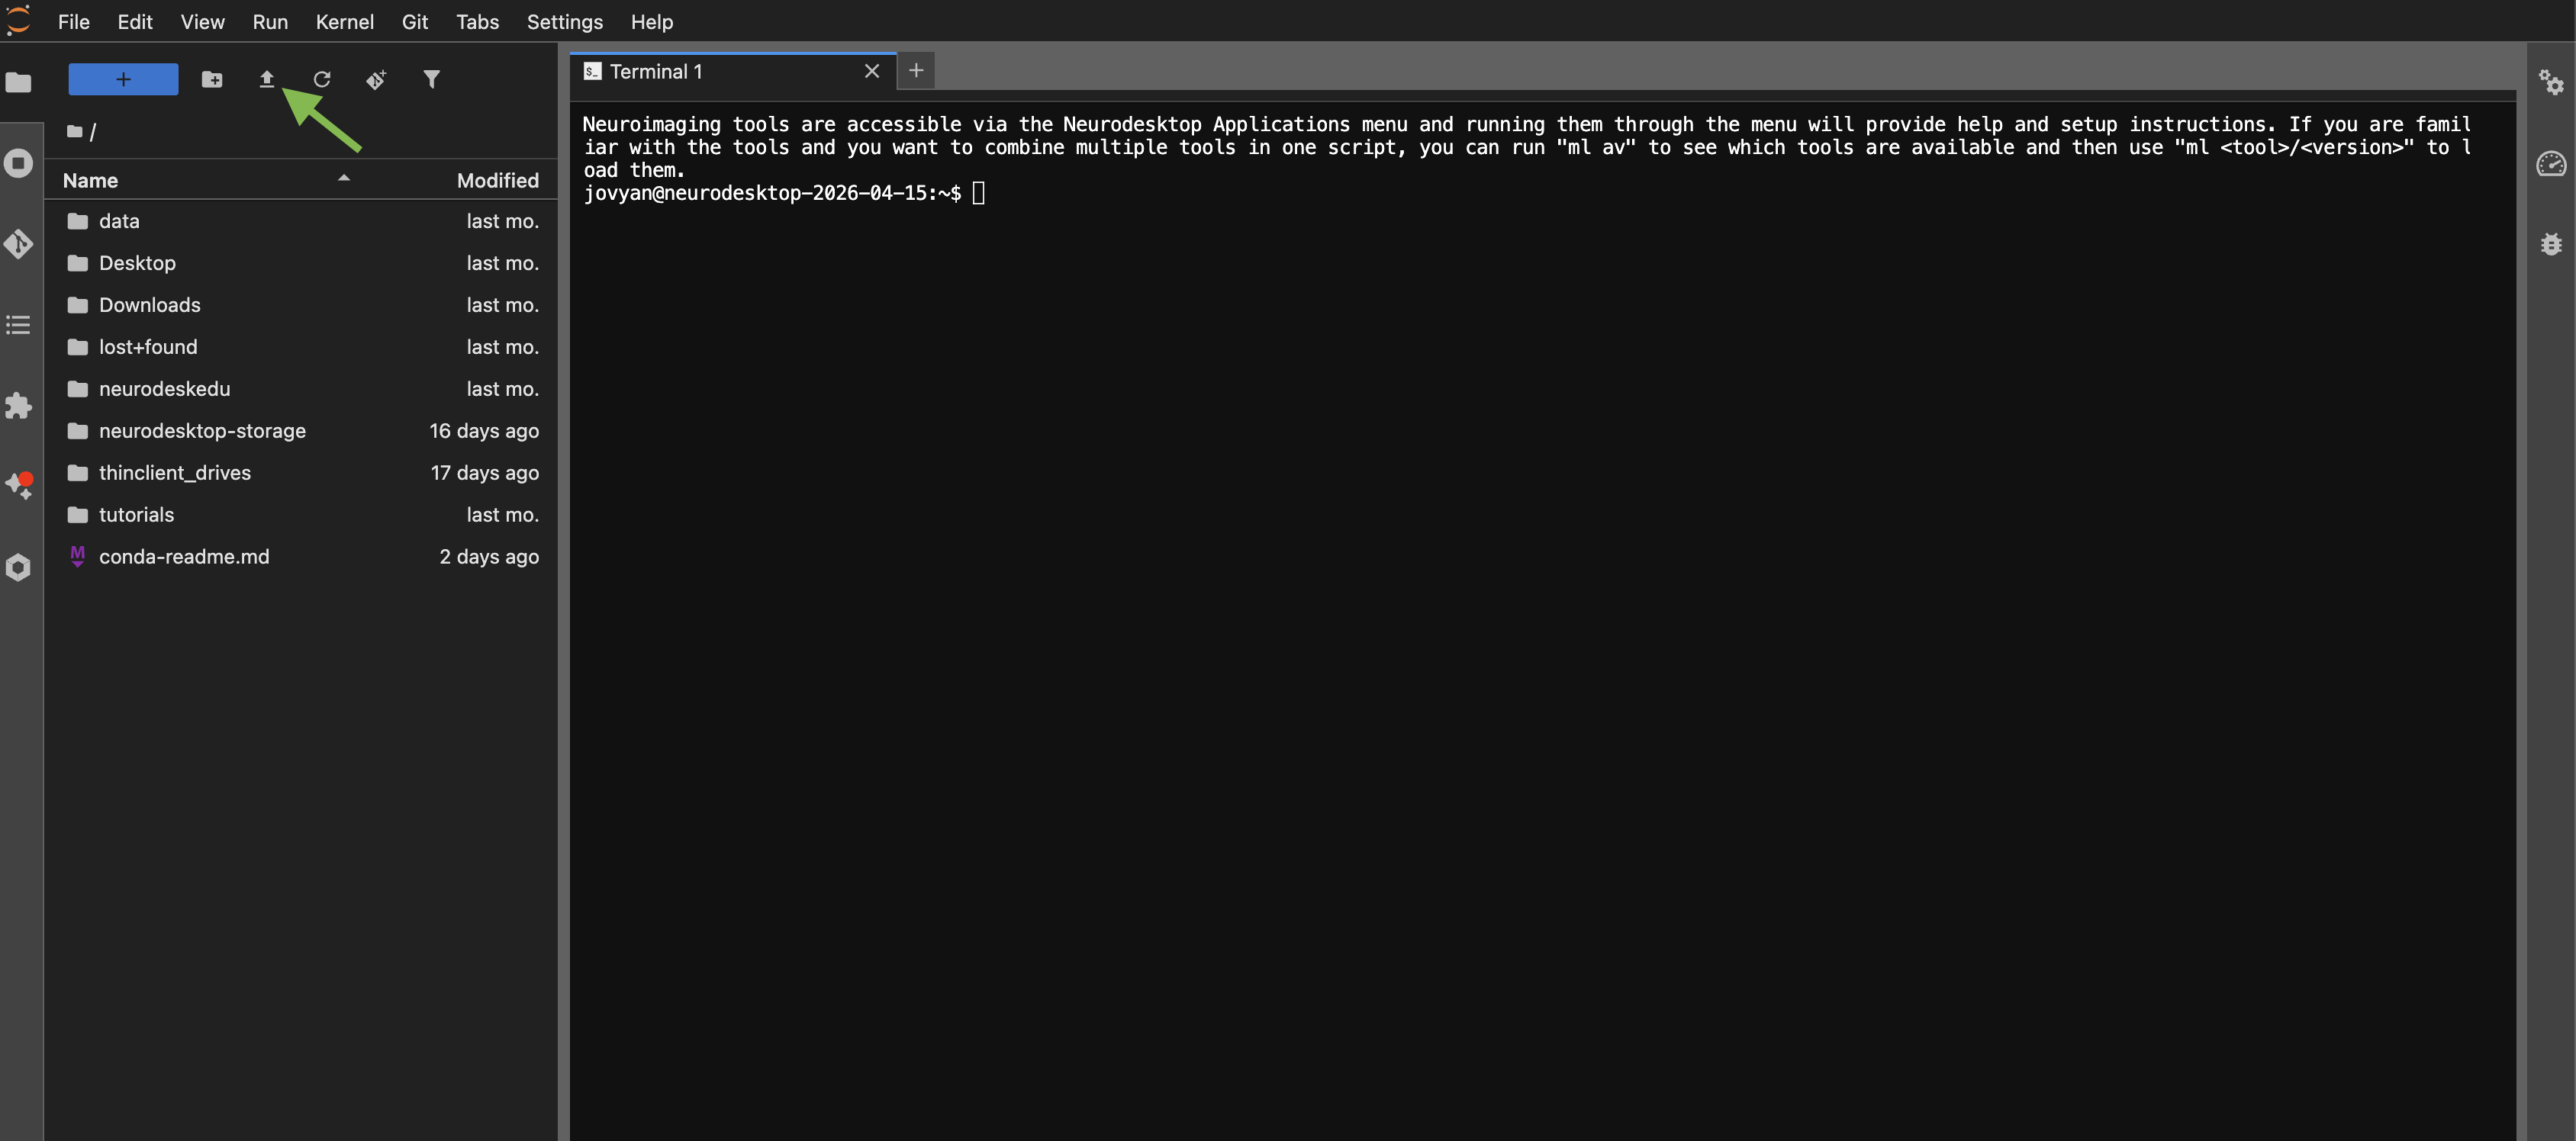
You can drag-and-drop files directly into the JupyterLab file browser panel on the left side. Alternatively, click the upload button (upward arrow icon) at the top of the file browser to select files from your computer.
Downloading files
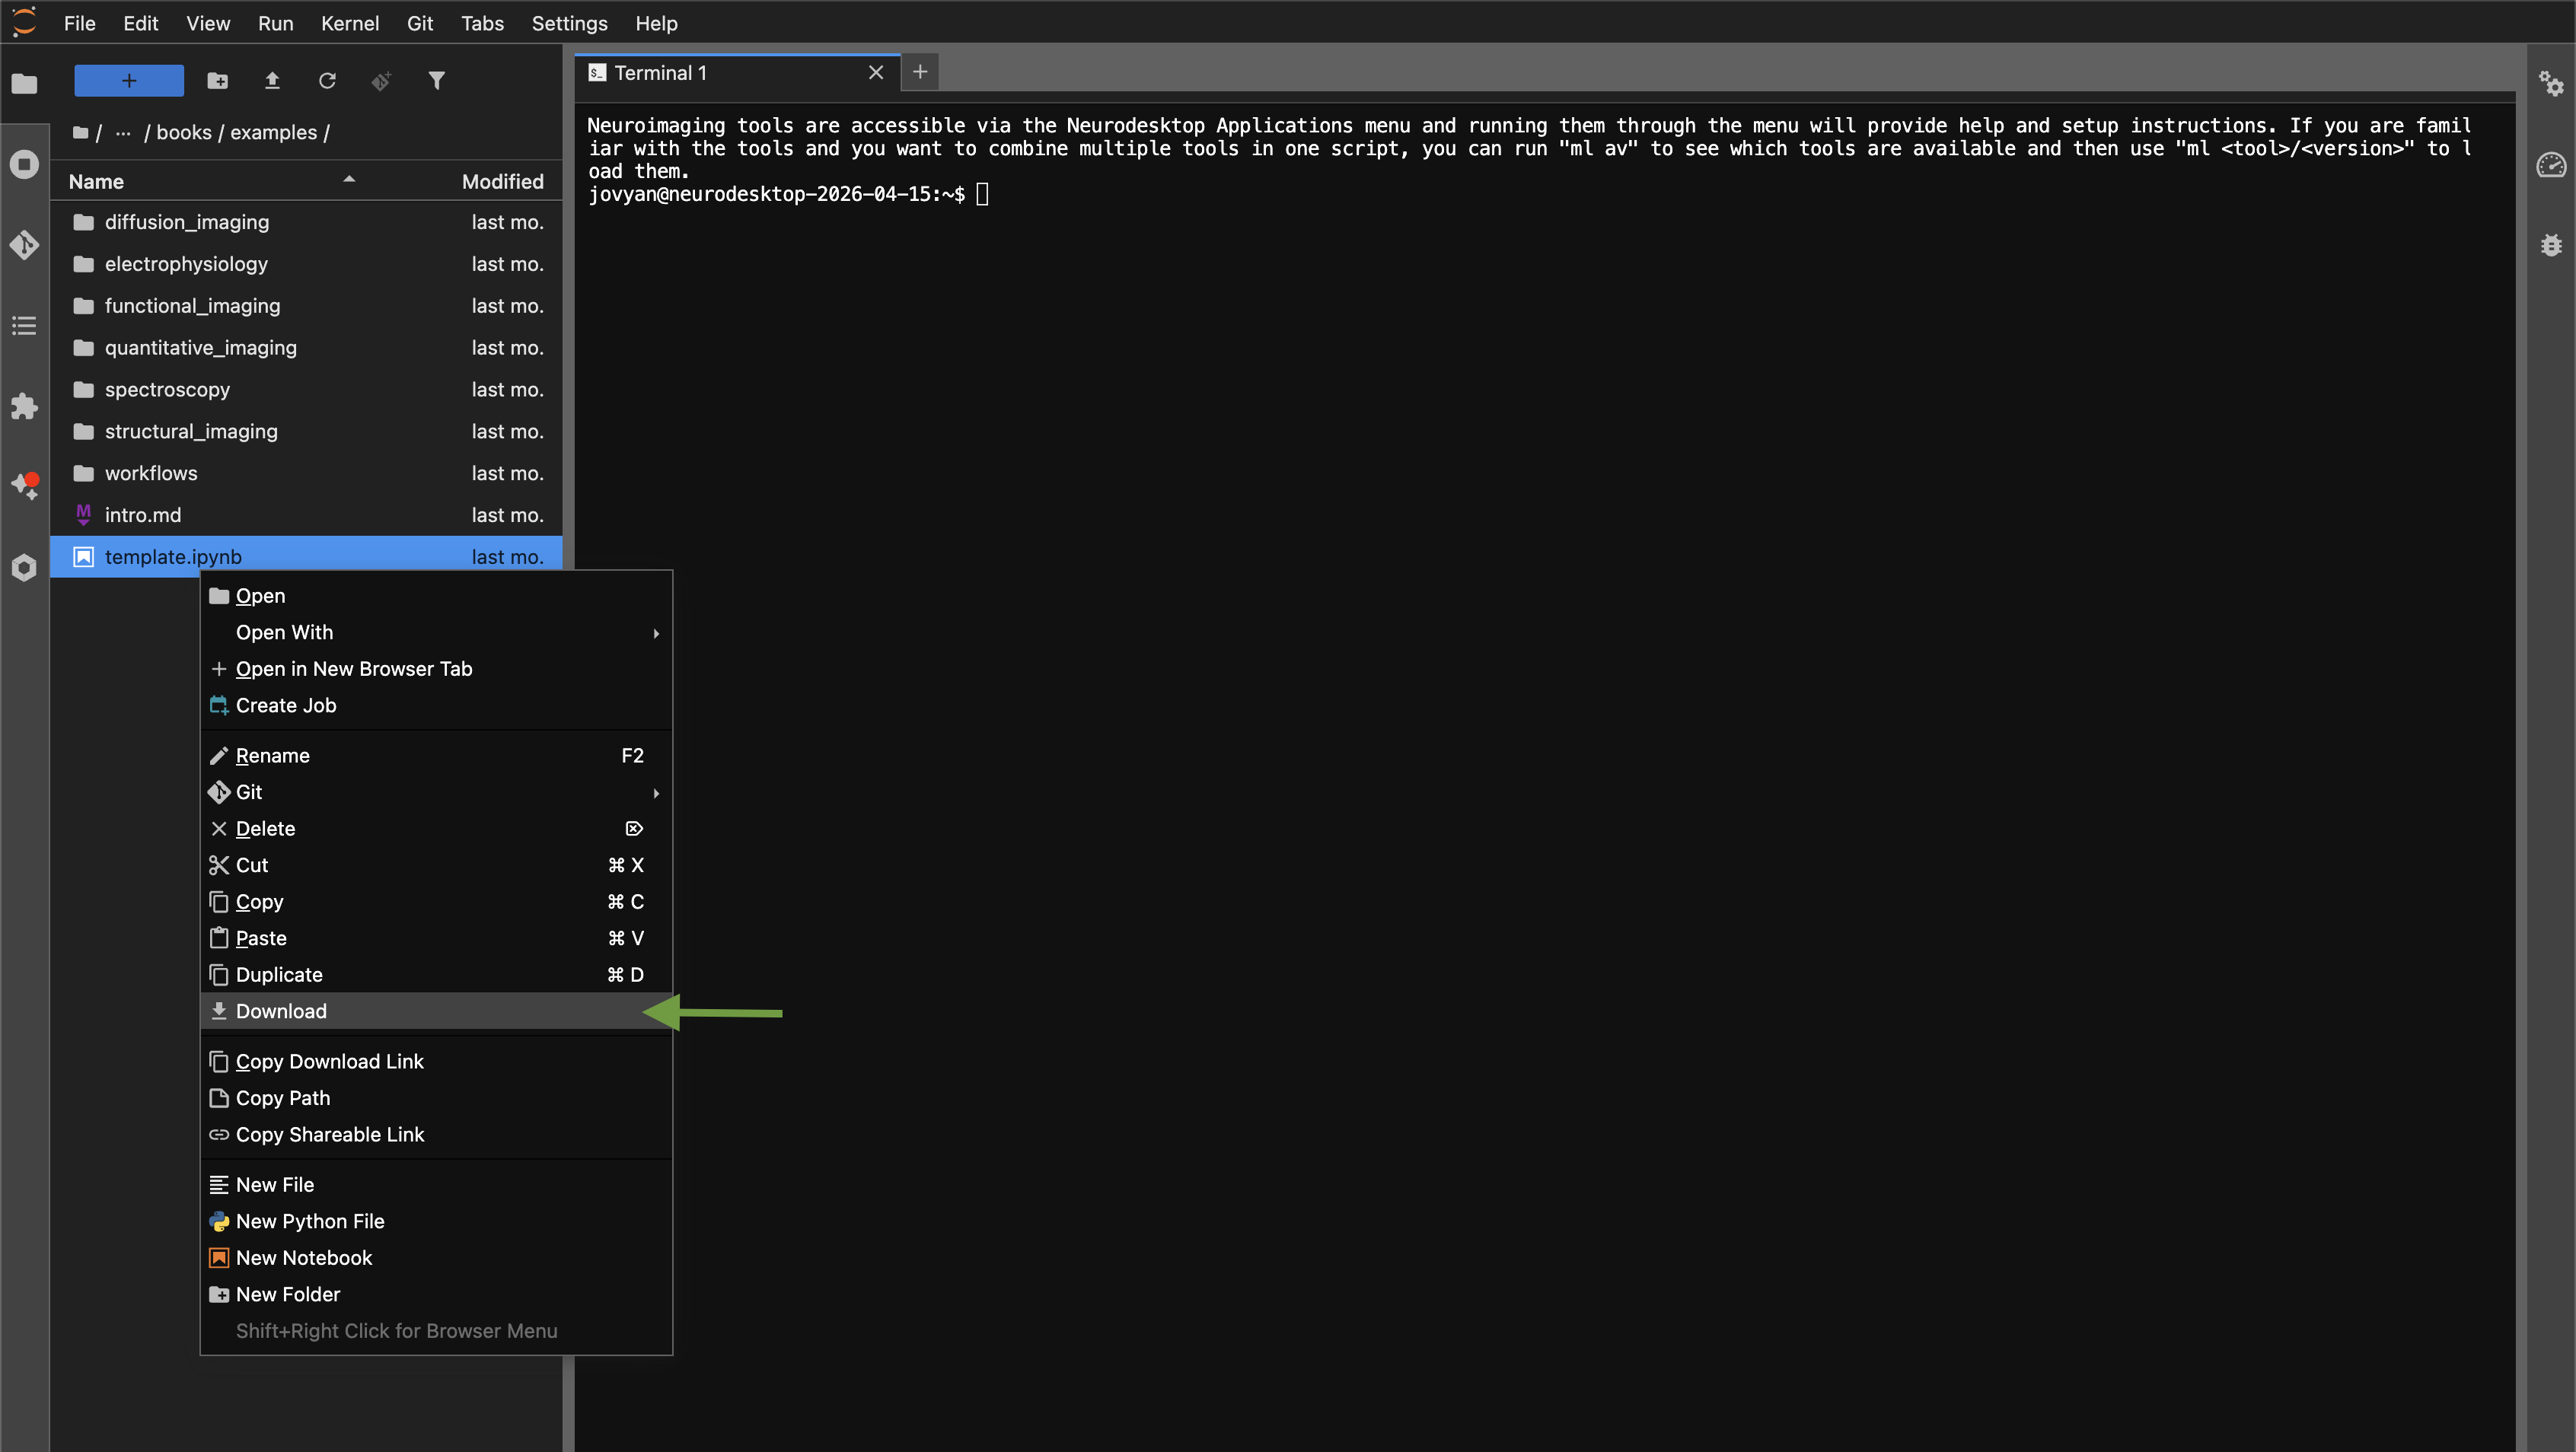
To download a file, right-click on it in the JupyterLab file browser and select “Download”.
Local storage
When running Neurodesktop locally, there are two storage locations to be aware of:
Home directory (/home/jovyan): This is the Linux filesystem inside the Docker container. Files saved here will persist across container restarts (thanks to a Docker volume), but will be lost if you remove the container or its volumes. Think of this as your working space, not your safe storage.
Neurodesktop storage (/neurodesktop-storage): This is a direct link to a folder on your host computer. Files saved here live on your actual filesystem, outside of Docker. They will persist regardless of what happens to the container.
Location
Path
Inside Neurodesk
/neurodesktop-storage
Host machine (macOS/Linux)
~/neurodesktop-storage
Host machine (Windows)
C:/neurodesktop-storage
Important: Always save data you want to keep to /neurodesktop-storage (the “Storage” folder on the desktop). Files saved elsewhere inside Neurodesktop may be lost when updating or recreating the container.
Mounting external storage on your host-computer
The -v C:/neurodesktop-storage:/neurodesktop-storage part of the docker command links the directory neurodesktop-storage on the C drive of your Windows computer to /neurodesktop-storage inside the Desktop environment. Everything you store in there will be available inside the desktop and on the host computer.
You can also mount additional directories by adding another -v parameter set (e.g. -v D:/moredata:/data), which will mount the directory moredata from your D drive to /data inside Neurodesktop.
Note: The mountpoint inside Neurodesktop needs to be named /data, otherwise the applications will not see the files without modifying the SINGULARITY_BINDPATH variable in your .bashrc.
If you are using the NeurodeskApp, you can set an additional storage location through the settings.
If you are starting Neurodesk through the command line, here is an example for Windows adding another storage directory:
Note for Windows users: Connecting network shares from Windows to Neurodesk can cause problems, so be careful when attempting this. Also, be aware that processing large amounts of files stored on a Windows filesystem inside Neurodesk will come with a performance penalty due to the filesystem translation in the background. One option to get around these problems is to directly access your storage infrastructure inside Neurodesk.
Cloud storage
Another way to get your data into Neurodesktop is to use a cloud storage provider like Dropbox, OneDrive, OwnCloud, Nextcloud or more general tools like Rclone or davfs2. Another good option is to use Globus for large amounts of data.
Nextcloud and Owncloud desktop clients
Under the menu item “Accessories” you can find “Nextcloud” and “ownCloud” desktop sync clients that you can configure with your cloud service accounts.
Mounting webdav storage using davfs2
Another option is to directly mount webdav storage. Here is an example how to mount OwnCloud Storage into Neurodesktop:
sudo mount -t davfs https://yourOwnCloudInstance.com/plus/remote.php/webdav/ /data/
It then asks you for a username and password, which you can generate in the settings: yourOwnCloudInstance/plus/settings/personal?sectionid=security
Rclone
Rclone is a command line tool that enables interaction with various cloud services. Here is an example of how to set up Rclone with an OwnCloud account:
Start the configuration in a terminal window: rclone config
Create a new remote: n
Provide a name for the remote: OwnCloud
For the “Storage” option choose: webdav
As “url” set: https://yourOwnCloudInstance.com/plus/remote.php/webdav/
As “vendor” set OwnCloud: 2
Set your OwnCloud username after generating an access token at yourOwnCloudInstance/plus/settings/personal?sectionid=security
Choose to type in your own password: y
Enter the Password / Token from the OwnCloud App passwords page and confirm it again
Upload data to OwnCloud: rclone copy --progress --transfers 8 . OwnCloud:/data-processed
Globus
We also provide the globus client, so you can transfer large amounts of data between globus endpoints and Neurodesktop. You can configure it by running the following commands in the Neurodesktop environment:
ml globus
# First run the setup:globusconnectpersonal -setup
#Follow the instructions in the terminal: #1) copy the URL into a browser and generate the Native App Authorization Code#2) then copy this code and paste it in the terminal#3) then name the endpoint, e.g. Neurodesktop# Then start the GUI:globusconnectpersonal -gui
# If the connection fails, reset the permissions on the key file:chmod 600 /home/jovyan/.globusonline/lta/relay-anonymous-key.pem
# If the connection still fails, start the client like this to get more informationglobusconnectpersonal -debug
Then add the directories you want to share with Globus by opening File → Preferences:
and then add the paths required and hit Save:
Then you can go to the Globus file manager and your Neurodesktop instance will be an endpoint for Globus. You can change the path to any location you specified in the Preferences:
Mount volume using SSHFS
It is theoretically possible to mount an SSH target inside Neurodesktop, but it’s not a very reliable way of mounting storage:
A better option is to use scp and copy data from an SSH endpoint:
scp /neurodesk/myfile user@remoteserver:/data/
An alternative is to mount the SSHFS target into a parent directory on your local machine or VM and then use the -v option in the docker run command to bind the parent directory of the SSHFS mount.
Important: The SSHFS mount must be a subdirectory inside a parent directory that is then bound to the Docker container. If you directly bind the mounted directory itself, your Neurodesktop container will lose access when the SSHFS mount disconnects and will not recover without a container restart.
Then add the following line to the docker run command when starting Neurodesktop (note the rshared flag):
-v /SSHFS_Mounts:/data:rshared \
Tip: If you use key pair authentication instead of a password for your SSHFS mount, you can use the reconnect flag to reconnect automatically if the connection drops:
If this doens’t work it might already be loaded. Just run singularity and check.
Load aria2 (Optional)
To speed up container downloads, you can optionally install or load aria2c:
module load aria2c
Clone and Set Up the Repository
Clone the repository into a directory with enough storage and ensure you are not using a symbolic link (to be sure run cd `pwd -P`). It’s recommended to perform this setup within a Python virtual environment (venv) or a Conda environment:
git clone https://github.com/neurodesk/neurocommand.git
cd neurocommand
pip3 install -r neurodesk/requirements.txt --user
bash build.sh --cli
bash containers.sh
exportSINGULARITY_BINDPATH=`pwd -P`# OR, depending on your installation:exportAPPTAINER_BINDPATH=`pwd -P`
Install Containers
If these steps are successful, the help will be displayed
Install all or only specific containers by following the instructions, e.g.:
Search and Install Specific Containers
To search for containers that have “itksnap” in the name:
bash containers.sh itksnap
Install a Specific Version
To install a specific version, (e.g., itksnap version 4.0.2 from 20240117):
To download all containers (be careful - there are a lot of containers!):
bash containers.sh --all
Add your containers to lmod
To add each container to the module search path, run the following:
module use $PWD/local/containers/modules/
It may be a good idea to add this to your .bashrc if it works. When adding to your .bashrc you will need to replace $PWD to point to the correct path, i.e. the output of this
echo"module use $PWD/local/containers/modules/"
It is very important to also set the SINGULARITY_BINDPATH or the APPTAINER_BINDPATH variable in your .bashrc. This variable must contain a comma-separated list of directories you want to access with the Neurodesk tools.
e.g.:
exportSINGULARITY_BINDPATH=/scratch/,/data/
# OR, depending on your installation:exportAPPTAINER_BINDPATH=/scratch/,/data/
#Note: User the correct line depending on your installation. Do not add a directory that does not exist, otherwise the containers will not start!
Run ml avail to see the installed containers at the top of the list (neurodesk containers will take preference over system modules with the same name), run:
module --ignore_cache avail
Every time you start a new shell you need to run module use PathToYourContainers or add this command to you .bashrc file.
**GPU support**
Some of our containers contain GPU-accelerated applications. Here is an example that runs the GPU accelerated program eddy in FSL:
```shell
module load fsl/6.0.5.1
export neurodesk_singularity_opts='--nv'
eddy_cuda9.1
```
**For Mate desktops**
Run `bash build.sh --init` (or `bash build.sh --lxde --edit`)
lxde/mate: Mate
installdir: Where all the neurocommand files will be stored (Default: ./local)
appmenu: The linux menu xml file. (Usually /etc/xdg/menus/\*\*\*\*-applications.menu)
appdir: Location for the .desktop files for this linux desktop (Usually /usr/share/applications)
deskdir: Location for the .directory files for this linux desktop (Typically /usr/share/desktop-directories)
**For desktop menus**
`sudo bash install.sh` to install
_Creates symlinks to menu files in installation dir_
`sudo bash uninstall.sh` to uninstall
_Removes symlinks_
Setup WSL2 using the following instructions (Ubuntu 18.04 recommended) https://docs.microsoft.com/en-us/windows/wsl/install-win10Proceed until a Ubuntu bash shell is available from the Windows Host Run the remaining commands in the Bash shell
sudo apt-get install lxde to install LXDE desktop in WSL
Reboot
sudo apt-get install xrdp to install XRDP in WSL
Open /etc/xrdp/xrdp.ini
Change port=3389 to port=3390 and save
Run echo startlxde > ~/.xsession
Running
sudo service xrdp start to start xrdp server
Open Microsoft Remote Desktop Connection in Windows host
Connect to localhost:3390
In the next login page, leave Session as Xorg. Enter your WSL username and password and click OK
This should open an LXDE Linux Desktop environment. Follow Linux guide from here on
4.3 - PyNeurodesk
Use Neurodesk containers from Python, notebooks, and shell scripts
PyNeurodesk is the Python interface to Neurodesk containers. It lets you search for containers, start a local container runtime, run commands from Python, and load Neurodesk tools into an interactive shell.
Use PyNeurodesk when you want to:
call Neurodesk tools from a Python script or notebook
avoid managing container paths by hand
load tools such as niimath into your terminal with nd load
connect to an existing Neurodesk container daemon
PyNeurodesk is installed from the Python package named `neurodesk`. After installation, both `import neurodesk` and `import pyneurodesk` work.
Requirements
Python 3.9 or newer
a machine that can run the Neurodesk container daemon
internet access for the first download of a container, Linux kernel, and emulator files
Live container execution depends on host virtualization support. On Linux systems this usually means KVM needs to be available. If you are on an HPC system, check with your system administrator before using PyNeurodesk on compute nodes.
Install PyNeurodesk
Create and activate a Python environment first if you do not want to install into your main Python environment.
Use search() to see matching Neurodesk container versions:
importneurodeskasndprint(nd.search("niimath"))
When you call nd.container("niimath"), PyNeurodesk resolves the container from Neurodesk release metadata or CVMFS and prepares the preferred version automatically.
Share a working directory
Use share_dir() when a container needs to read or write files from your host machine.
The shared folder is mounted inside the container under a path like /.share/<session-id>. Use writable=True when the tool needs to create or modify files.
Use PyNeurodesk from a shell
PyNeurodesk can add Neurodesk command wrappers to your current shell session.
The nd load command prepares the container and creates command wrappers for tools listed by the container metadata. These wrappers are stored in a temporary session directory and added to your PATH.
Run a one-off shell command
After activating your shell, you can run a command without adding wrappers permanently to the session:
nd exec niimath -- niimath -help
Connect to an existing daemon
If you already have a Neurodesk container daemon running, connect to it with a URL:
You can also set the daemon URL with an environment variable:
exportPYNEURODESK_BASE_URL=http://127.0.0.1:3456
Useful environment variables
PYNEURODESK_BASE_URL: connect to an existing daemon
PYNEURODESK_CACHE_DIR: choose where PyNeurodesk stores daemon state and shell sessions
PYNEURODESK_CCVM: use a specific ccvm daemon binary
PYNEURODESK_HTTP_TIMEOUT: set the HTTP timeout in seconds
PYNEURODESK_BOOT_TIMEOUT: set the VM boot timeout in seconds
PYNEURODESK_RELEASES_DIR: use local Neurodesk release metadata
PYNEURODESK_RELEASES_API: use a custom release metadata API endpoint
Troubleshooting
The first run is slow
This is expected. PyNeurodesk may need to download the container, Linux kernel, emulator, and image metadata. Try the same command again after the first run completes.
The container daemon cannot start
Check that virtualization is available on your machine. On Linux, confirm that KVM is available and that your user has permission to use it.
A command cannot see my data
Share the directory with nd.share_dir() in Python, or run the command from a directory that the active shell session can mount. If the tool needs to write outputs, make the share writable.
I want to run fulltest recipes
Install the optional fulltest dependencies:
python -m pip install "neurodesk[fulltest]"
Then use the pyneurodesk-fulltest command.
4.4 - Visual Studio Code
Guide connecting your VS Code environment to Neurodesktop
The following guide is for connecting to Neurodesktop using a VS Code installation running on your host machine.
Please see additional instructions below if Neurodesktop is running remotely (i.e. Cloud, HPC, VM)
Pre-requisites
Visual Studio Code (https://code.visualstudio.com) installed on your host. Standalone version should work fine
Install the following VS Code extension:
Dev Containers ms-vscode-remote.remote-containers from Microsoft
Connecting to Neurodesktop
Start Neurodesk through the Neurodeskapp or through a docker command.
Open VS Code and open the Remote Explorer. Then Attach to the running Neurodesktop container.
This may take about a minute if it is the first time you are connecting, as VS code has to install the VS Code server onto the container. Repeat connections should be faster.
First time connection
The first time connection will default to using neurodesktop root user. We want the default connection to be as the normal user to avoid permission issues.
To check which user is being used, open the terminal in the neurodesktop VS Code instance and check if the user is user or root
You can change to the correct user by running su jovyan.
Once installed create the keys and configure the servers used:
sudo mkdir -p /etc/cvmfs/keys/ardc.edu.au/
echo"-----BEGIN PUBLIC KEY-----
MIIBIjANBgkqhkiG9w0BAQEFAAOCAQ8AMIIBCgKCAQEAwUPEmxDp217SAtZxaBep
Bi2TQcLoh5AJ//HSIz68ypjOGFjwExGlHb95Frhu1SpcH5OASbV+jJ60oEBLi3sD
qA6rGYt9kVi90lWvEjQnhBkPb0uWcp1gNqQAUocybCzHvoiG3fUzAe259CrK09qR
pX8sZhgK3eHlfx4ycyMiIQeg66AHlgVCJ2fKa6fl1vnh6adJEPULmn6vZnevvUke
I6U1VcYTKm5dPMrOlY/fGimKlyWvivzVv1laa5TAR2Dt4CfdQncOz+rkXmWjLjkD
87WMiTgtKybsmMLb2yCGSgLSArlSWhbMA0MaZSzAwE9PJKCCMvTANo5644zc8jBe
NQIDAQAB
-----END PUBLIC KEY-----"| sudo tee /etc/cvmfs/keys/ardc.edu.au/neurodesk.ardc.edu.au.pub
echo"CVMFS_USE_GEOAPI=yes"| sudo tee /etc/cvmfs/config.d/neurodesk.ardc.edu.au.conf
echo'CVMFS_SERVER_URL="http://cvmfs-geoproximity.neurodesk.org/cvmfs/@fqrn@;http://cvmfs.neurodesk.org/cvmfs/@fqrn@;http://s1osggoc-cvmfs.openhtc.io:8080/cvmfs/@fqrn@;http://s1fnal-cvmfs.openhtc.io:8080/cvmfs/@fqrn@;http://s1sampa-cvmfs.openhtc.io:8080/cvmfs/@fqrn@;http://s1brisbane-cvmfs.openhtc.io/cvmfs/@fqrn@;http://s1nikhef-cvmfs.openhtc.io/cvmfs/@fqrn@;http://s1bnl-cvmfs.openhtc.io/cvmfs/@fqrn@;http://s1perth-cvmfs.openhtc.io/cvmfs/@fqrn@;http://cvmfs-stratum-one.ihep.ac.cn:8000/cvmfs/@fqrn@"'| sudo tee -a /etc/cvmfs/config.d/neurodesk.ardc.edu.au.conf
echo'CVMFS_KEYS_DIR="/etc/cvmfs/keys/ardc.edu.au/"'| sudo tee -a /etc/cvmfs/config.d/neurodesk.ardc.edu.au.conf
echo"CVMFS_HTTP_PROXY=DIRECT"| sudo tee /etc/cvmfs/default.local
echo"CVMFS_QUOTA_LIMIT=5000"| sudo tee -a /etc/cvmfs/default.local
sudo cvmfs_config setup
You can use the list above, but you can also pick a subset of servers that are close to you or fit your usecase better. To better understand what to choose, we use the following CVMFS server setup:
These CVMFS Stratum 1 servers are hosted by the Open Science Grid and every server has a Cloudflare CDN alias that is correctly geo-located through the Maxmind GEOAPI service in the CVMFS client:
Every location has a health check attached to it and doesn’t forward to it if the destination is not working.
Then we have 3 direct URLS without CDNs as well that are geolocation-steered:
cvmfs1.neurodesk.org:
South America -> sampacs01.if.usp.br
North America -> cvmfs-s1fnal.opensciencegrid.org
Default -> cvmfs-brisbane.neurodesk.org
Europe -> ec2-3-72-92-91.eu-central-1.compute.amazonaws.com
Asia -> cvmfs-perth.neurodesk.org
cvmfs2.neurodesk.org:
North America -> cvmfs-s1goc.opensciencegrid.org
Europe -> cvmfs01.nikhef.nl
Default -> cvmfs-s1goc.opensciencegrid.org
cvmfs3.neurodesk.org:
North America -> cvmfs-s1bnl.opensciencegrid.org
Asia -> cvmfs-brisbane.neurodesk.org
Default -> cvmfs-s1bnl.opensciencegrid.org
Oceania -> cvmfs-perth.neurodesk.org
This server is currently NOT working and is NOT YET mirroring our repository (we are waiting for RAL to come back online, then the others will mirror that):
You will need to run this for each new WSL session:
sudo cvmfs_config wsl2_start
Test if the connection works:
sudo cvmfs_config chksetup

ls /cvmfs/neurodesk.ardc.edu.au

sudo cvmfs_talk -i neurodesk.ardc.edu.au host info

cvmfs_config stat -v neurodesk.ardc.edu.au
For Ubuntu 22.04 users
If configuring CVMFS returns the following error:
Error: failed to load cvmfs library, tried: './libcvmfs_fuse3_stub.so''/usr/lib/libcvmfs_fuse3_stub.so''/usr/lib64/libcvmfs_fuse3_stub.so''./libcvmfs_fuse_stub.so''/usr/lib/libcvmfs_fuse_stub.so''/usr/lib64/libcvmfs_fuse_stub.so'./libcvmfs_fuse3_stub.so: cannot open shared object file: No such file or directory
/usr/lib/libcvmfs_fuse3_stub.so: cannot open shared object file: No such file or directory
/usr/lib64/libcvmfs_fuse3_stub.so: cannot open shared object file: No such file or directory
./libcvmfs_fuse_stub.so: cannot open shared object file: No such file or directory
libcrypto.so.1.1: cannot open shared object file: No such file or directory
/usr/lib64/libcvmfs_fuse_stub.so: cannot open shared object file: No such file or directory
Failed to read CernVM-FS configuration
Create a the new file /usr/share/module.sh with the content (NOTE: update the version, here 6.6, with your lmod version, e.g. 6.6 (Ubuntu 20.04/22.04), 8.6.19 (Ubuntu 24.04)):
# system-wide profile.modules ## Initialize modules for all sh-derivative shells ##----------------------------------------------------------------------#trap""123case"$0" in
-bash|bash|*/bash) . /usr/share/lmod/YOURLMODVERSION_HERE/init/bash ;; -ksh|ksh|*/ksh) . /usr/share/lmod/YOURLMODVERSION_HERE/init/ksh ;; -zsh|zsh|*/zsh) . /usr/share/lmod/YOURLMODVERSION_HERE/init/zsh ;; -sh|sh|*/sh) . /usr/share/lmod/YOURLMODVERSION_HERE/init/sh ;; *) . /usr/share/lmod/YOURLMODVERSION_HERE/init/sh ;;# default for scriptsesactrap - 123
Make the module system usable in the shell
Add the following lines to your ~/.bashrc file or to /etc/bash.bashrc for a global install:
if[ -f '/usr/share/module.sh'];thensource /usr/share/module.sh;fiif[ -d /cvmfs/neurodesk.ardc.edu.au/neurodesk-modules ];then# export MODULEPATH="/cvmfs/neurodesk.ardc.edu.au/neurodesk-modules" module use /cvmfs/neurodesk.ardc.edu.au/neurodesk-modules/*
elseexportMODULEPATH="/neurodesktop-storage/containers/modules" module use $MODULEPATHexportCVMFS_DISABLE=truefiif[ -f '/usr/share/module.sh'];thenecho'Run "ml av" to see which tools are available - use "ml <tool>" to use them in this shell.'if[ -v "$CVMFS_DISABLE"];thenif[ ! -d $MODULEPATH];thenecho'Neurodesk tools not yet downloaded. Choose tools to install from the Application menu.'fififi
Restart the current shell or run
source ~/.bashrc
Use of containers in the module system
exportSINGULARITY_BINDPATH='/cvmfs,/mnt,/home'module use /cvmfs/neurodesk.ardc.edu.au/neurodesk-modules/*
ml fsl
fslmaths
Troubleshooting and diagnostics
# Check serverssudo cvmfs_talk -i neurodesk.ardc.edu.au host probe
sudo cvmfs_talk -i neurodesk.ardc.edu.au host info
# Change settingssudo touch /var/log/cvmfs_debug.log.cachemgr
sudo chown cvmfs /var/log/cvmfs_debug.log.cachemgr
sudo touch /var/log/cvmfs_debug.log
sudo chown cvmfs /var/log/cvmfs_debug.log
sudo vi /etc/cvmfs/config.d/neurodesk.ardc.edu.au.conf
echo -e "\nCVMFS_DEBUGLOG=/var/log/cvmfs_debug.log"| sudo tee -a /etc/cvmfs/default.local
cat /etc/cvmfs/default.local
sudo cvmfs_config umount
sudo service autofs stop
sudo mount -t cvmfs neurodesk.ardc.edu.au /cvmfs/neurodesk.ardc.edu.au
# check if new settings are applied correctly:cvmfs_config showconfig neurodesk.ardc.edu.au
cat /var/log/cvmfs_debug.log
cat /var/log/cvmfs_debug.log.cachemgr
5.2 - DataLad
Use Neurodesktop containers with DataLad and ReproNim’s containerized workflows.
You can change which version of a container is used in two ways:
Option 1: change version in .datalad/config
vi .datalad/config
# now change the version of the container you like# all available containers can be seen via `ls images/neurodesk`datalad save -m 'downgraded version of romeo to x.x.x'datalad containers-run -n neurodesk-romeo
Option 2: change version using freeze_versions script
# all available containers can be seen via `ls images/neurodesk`scripts/freeze_versions neurodesk-romeo=3.2.4
datalad save -m 'downgraded version of romeo to 3.2.4'datalad containers-run -n neurodesk-romeo
Build and publish Neurocontainers as OpenRecon and FIRE packages
Build an OpenRecon/FIRE package
Choose a development environment
Development path
Complete these setup sections
Continue at
Local workstation
1. Set up a local computer; 2. Fork and set up Neurocontainers locally
4. Complete example
GitHub Codespaces
3. Set up Neurocontainers in GitHub Codespaces
4. Complete example
1. Set up on a local computer
You need Git, Docker, Python 3.13, and Visual Studio Code. A GitHub account is required when you are ready to fork repositories, use Codespaces, or submit changes.
This was tested with Python 3.10 to 3.13.
Windows
Use WSL 2 with a Linux distribution such as Ubuntu. Install Docker Desktop with its WSL 2 backend and enable integration for that distribution. Install the VS Code WSL extension, open the checkout from WSL with code ., and run every command in this guide in the WSL terminal.
Keep the checkout in the WSL filesystem, for example under ~/src, rather than under /mnt/c; Docker bind mounts perform better there. Do not run the Bash build scripts from Command Prompt or PowerShell.
Install Python 3.13 inside the WSL distribution. If the distribution does not provide Python 3.13, use the uv option described under Linux below.
macOS
Install Docker Desktop and start it. Install Git, Python, and 7-Zip with your preferred package manager. Example with Homebrew (https://brew.sh):
# To install homebrew in case you don't have it yet:/bin/bash -c "$(curl -fsSL https://raw.githubusercontent.com/Homebrew/install/HEAD/install.sh)"
brew install git python@3.13 p7zip
Linux
Install Git, Python 3.13 with venv support, 7-Zip, and Docker Engine using your distribution’s instructions. Configure Docker so your normal user can run it, then log out and back in if the group membership changed.
The Python command must report 3.13.x, and the last Docker command should print x86_64. If docker version cannot reach the server, start Docker Desktop or the Linux Docker service before continuing.
2. Fork and set up Neurocontainers locally
Fork neurodesk/neurocontainers into your GitHub account, then clone your fork. Replace YOUR_GITHUB_USERNAME below:
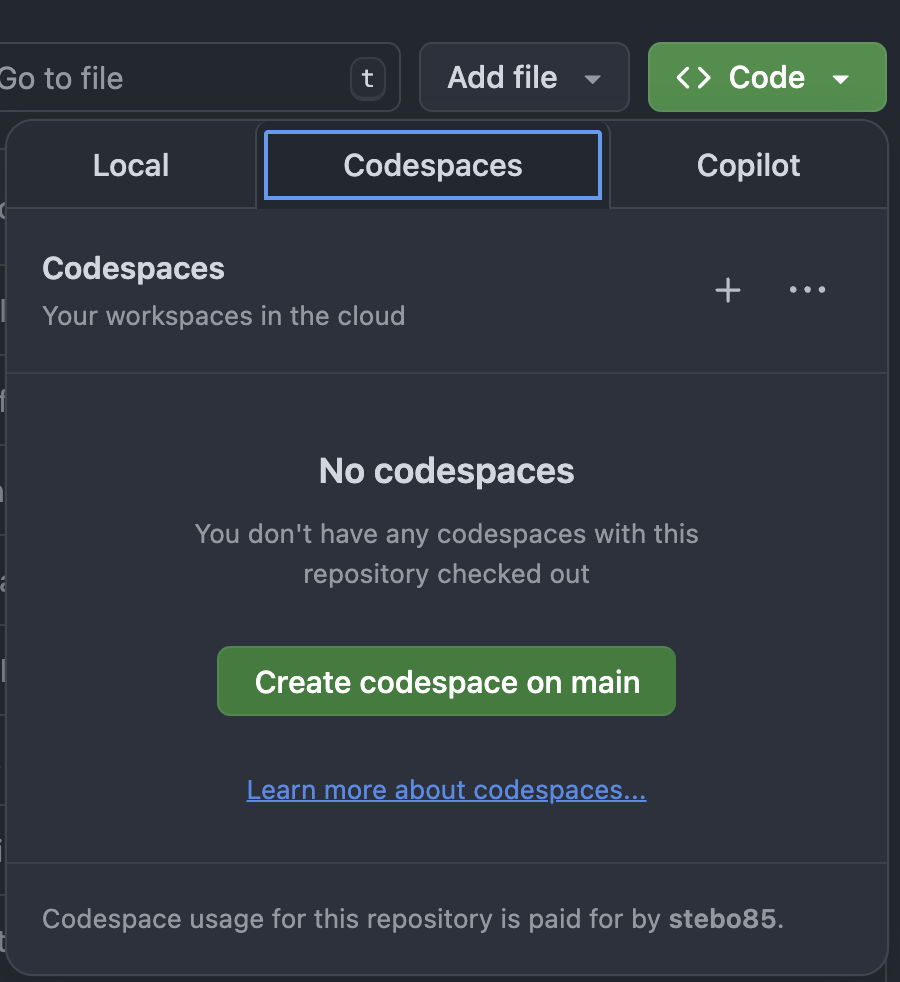
Make sure your fork’s main branch is up to date, then select Code > Codespaces > Create codespace on main. The repository’s development-container configuration installs Python 3.13, creates the env virtual environment, installs Neurocontainers, and connects the codespace to a Docker daemon.
When setup finishes, create a new branch, activate the environment, and verify both Neurocontainers and Docker:
git switch -c add-MYPROJECT-openrecon
source env/bin/activate
python --version # Must report Python 3.13.xpython -m builder --help
sf-build --help
docker info
docker run --rm hello-world
Continue with section 4. The openreconi2iexample recipe, fulltest.yaml, sf-login, and MRD server/client commands are the same as in a local Linux environment.
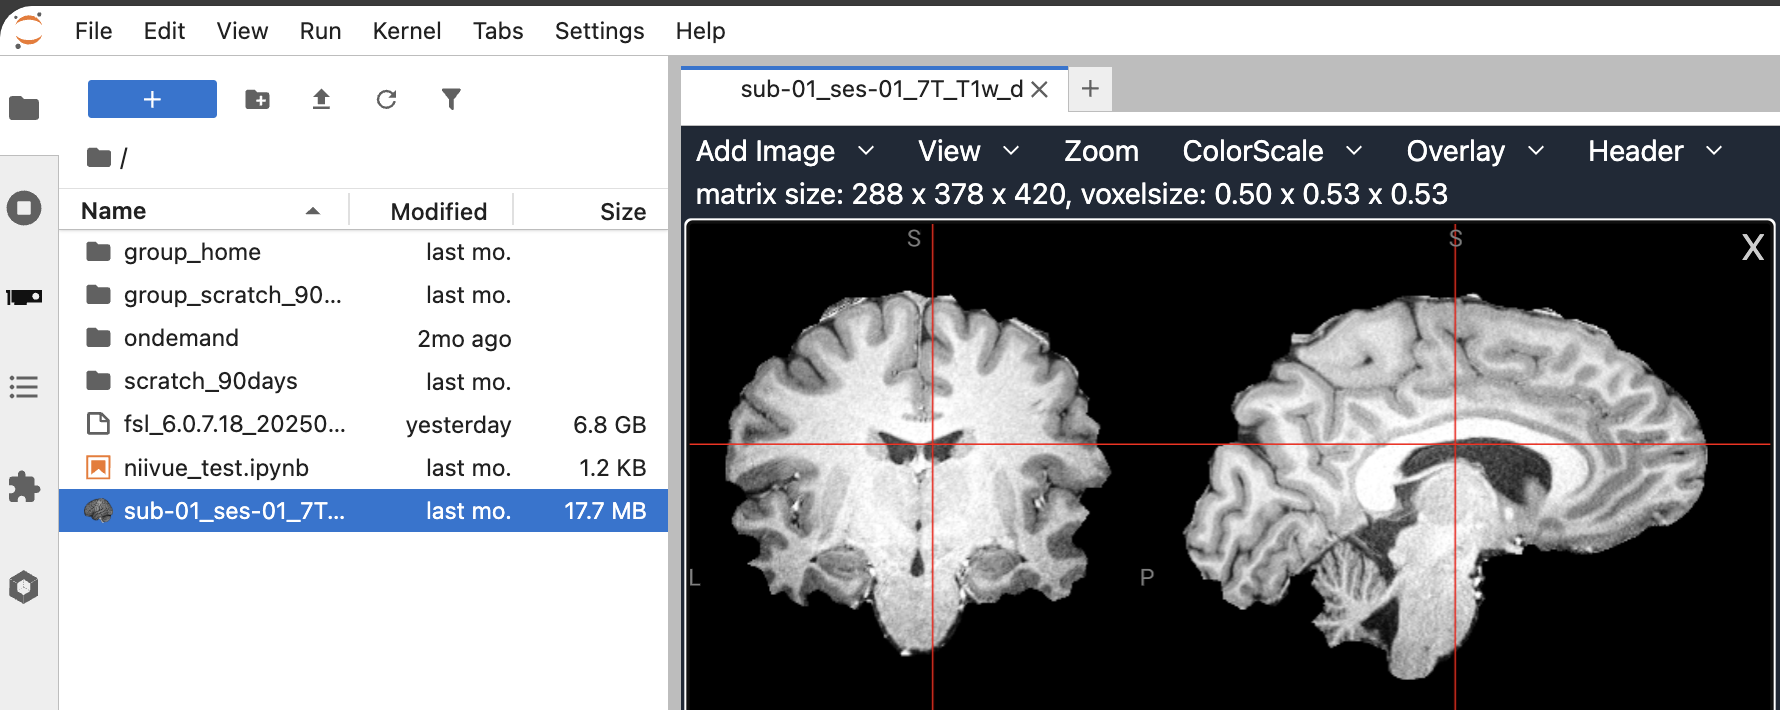
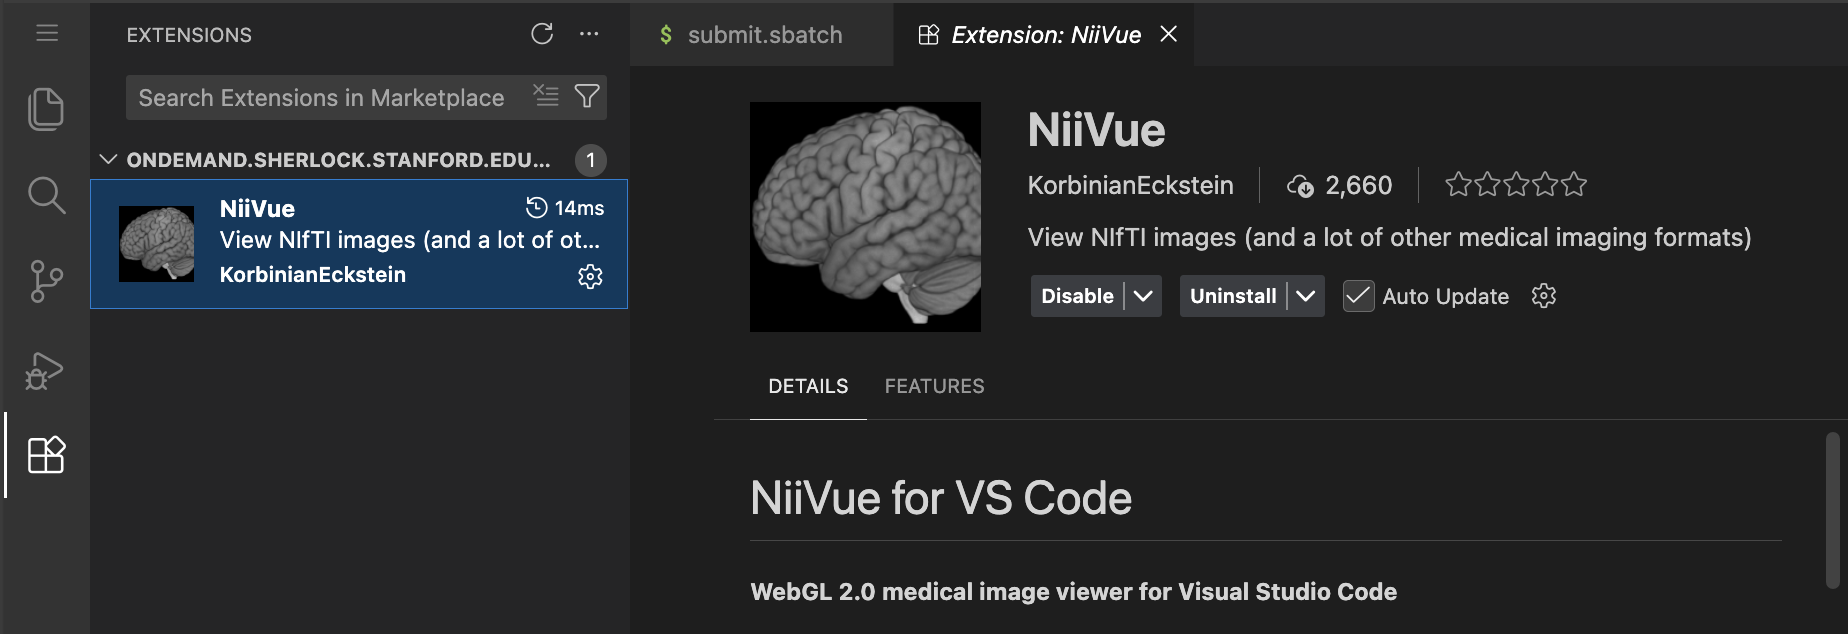
Use the preinstalled H5Web extension to inspect .h5 outputs and niivue for .nii.
Never upload identifiable DICOM data to the codespace or commit private test data.
4. Complete example: build and run openreconi2iexample
Run this example before creating your own recipe. All commands in this section start in the root of your neurocontainers checkout with its Python 3.13 environment active. For a local checkout, run:
cd /PATH/TO/neurocontainers
source .venv/bin/activate
python --version  # Must report Python 3.13.x
In GitHub Codespaces, the checkout is already under /workspaces and the configured environment is named env:
cd /workspaces/neurocontainers
source env/bin/activate
python --version  # Must report Python 3.13.x
Optional: Validate the example
Validate the recipe and scanner label, then run its focused Python tests:
The archive is approximately 9 MB and contains 160 .IMA DICOM files. The conversion will create a much larger local MRD file, so keep generated data under local-test. The following exclusion is local to your checkout and does not modify the repository’s shared .gitignore:
sf-login stages the recipe, builds openreconi2iexample:<version> for linux/amd64, mounts the recipe directory at /buildhostdirectory, and opens a shell in the new container:
The first build can take a while. On Apple Silicon or another ARM64 host, Docker runs this x86_64 image through emulation.
Inside the container, verify the installed example and server:
openreconi2iexample
python3 /opt/code/python-ismrmrd-server/main.py --help | head
The first command should print openreconi2iexample followed by the current recipe version.
Convert the bundled DICOM data to an ISMRMRD HDF5 file
The recipe directory is mounted at /buildhostdirectory, so both committed test assets are available inside the container. First extract the archive there using Python’s standard-library ZIP support:
The count should be 160. Now run the recipe-localdicom2mrd.py inside the container. It reads the DICOM tree recursively and writes image MRD data to the dataset group in an ISMRMRD HDF5 file:
The converter should report one series containing 160 images. Verify the resulting file /buildhostdirectory/local-test/input_data.h5 before starting the server by opening it in the H5Web hdf viewer inside VScode.
The generated HDF5 file remains on the host under recipes/openreconi2iexample/local-test/input_data.h5 after you exit the container.
Start the MRD server and run the client
Still inside the container, write the parameter payload that reproduces the scanner label’s default behavior:
The MRD client automatically sends this file as additional configuration because its basename matches -c openreconi2iexample. Start the server in the background, send the input, and stop the server afterward:
This explicit parameter payload sends original images, inverted images, and a simple foreground segmentation. For a straightforward single-series magnitude input, expect output groups image_99, image_100, and image_101. More complex inputs can be split into additional groups.
Open recipes/openreconi2iexample/local-test/openrecon_output.h5 with the VS Code H5Web extension to inspect the returned images.
Exit the container, run the deploy smoke test against the image, and prove that the expected local tag exists:
The checked-in recipes/openreconi2iexample/params.sh must name the same version you just built. Assert that it matches before starting the package build.
Build both scanner formats from the local Docker image:
cd recipes/openreconi2iexample
/bin/bash ../build.sh --local-cache
The OpenRecon zip is installable through the OpenRecon package mechanism; the FIRE directory contains its Ice tree and INSTALL_FIRE.txt.
Once this complete example works, return to your Neurocontainers checkout and adapt the recipe for your own application.
5. Create a new Neurocontainer recipe
Use a short lowercase name containing only letters and numbers, for example myrecon. Published OpenRecon recipe names must not contain underscores.
For a new image-to-image application, start from openreconi2iexample. For a new kspace-to-complex-image application, start from sodiumgridding.
Declare application files in the top-level files list and copy them into /opt/code/python-ismrmrd-server in a build directive. Keep the following identities synchronized:
name and version in build.yaml;
name and version in fulltest.yaml;
the package id and the config choice/default in OpenReconLabel.json; and
the Python module name passed to the MRD client with -c.
The OpenRecon 1.1.0 schema allows at most 14 parameters, including config. Every choice parameter must have a non-empty default that exactly matches one of its value IDs.
Keep VERSION_WILL_BE_REPLACED_BY_SCRIPT in the label’s version and version-derived regulatory fields. The packaging build replaces this placeholder with the version from params.sh before validating and assembling the package.
Keep OpenReconLabel.json in the Neurocontainers recipe. Current release automation copies it into OpenRecon and creates params.sh; contributors no longer need to maintain a second copy manually. If OpenReconREADME.md is present, the automation also copies it to the openrecon package repository as README.md.
6. Validate, build, and test the Neurocontainer
Run metadata validation and any focused tests first:
Build the scanner-compatible x86_64 image and open an interactive shell in it:
sf-login myrecon --recreate --architecture x86_64
On an Apple Silicon or ARM64 host, Docker emulates linux/amd64; the build can therefore be slower than a native x86_64 build. The recipe directory is mounted in the container at /buildhostdirectory.
Test the application through the MRD server
Start with a known MRD .h5 input whenever possible. To convert legacy DICOM inside the container:
Enhanced DICOM conversion is still pending upstream in python-ismrmrd-server PR 15. Until it is merged, examples of the additional converters are available as enhanceddicom2mrd.py and nifti2mrd.py. If your application needs them, declare and copy them in build.yaml.
Inside the container, start the server and send the test dataset through your configuration:
Confirm that the client reports the expected number and type of returned images. Inspect output.h5 with the vscode H5Web extension and inspect any NIfTI intermediates with a NIfTI-capable viewer (e.g. niivue). Test every OpenReconLabel.json option and important option combination.
Exit the container and run the builder’s deploy smoke test against the image you just built:
exitsf-test myrecon --architecture x86_64
sf-test checks the built image’s deployment contract. Your fulltest.yaml is exercised by the current pull-request candidate workflow; it should contain meaningful application/runtime assertions.
7. Build OpenRecon and FIRE packages
First build the Neurocontainer as described above. The local Docker image must be tagged myrecon:<version>, which is the tag produced by sf-build and sf-login.
Clone the packaging repository next to your Neurocontainers checkout:
The build checks the local Docker cache first, including myrecon:1.0.0, and falls back to baseDockerImage only when no matching local image exists. From the package recipe directory, request both artifacts:
cd recipes/myrecon
/bin/bash ../build.sh --local-cache
The packager runs a privileged nested Docker build for linux/amd64 and needs substantial temporary disk space. It also renders README.md to PDF. If mdpdf is unavailable, the build installs the required Node/NVM tooling; --ignore-mdpdf is useful only when the recipe already supplies docs.pdf or README.pdf.
The FIRE output is a directory containing an Ice tree and INSTALL_FIRE.txt. Keep the directory structure unchanged.
Codespaces notes
If you used the Codespaces setup in section 3, the commands above work without modification: from /workspaces/neurocontainers, cd .. moves to /workspaces, where you can clone the OpenRecon repository.
FIRE images can be large and Codespaces storage is small. Check df -h before building both packages, select a larger codespace if necessary, and stop or delete the codespace when you finish to avoid unnecessary usage.
8. Install and test the scanner package
Use the package produced in section 7 for local scanner testing. The same installation procedures apply to an artifact published later through the GitHub Actions flow in section 9.
Install an OpenRecon package
Make sure that no protocol is open, because an open protocol can prevent installation of a new package.
NumarisX VA70 and above (for example, XB10)
For software versions NumarisX VA70 and above, such as NumarisX XB10, use the Numaris/Edge routine for installing OpenRecon applications. A short summary of the installation steps is provided below.
Exit Kiosk mode of your MRAWP via the keyboard shortcut [Tab] + [Del] + [Num +].
Create a folder under C:\Temp\, e.g. C:\Temp\OR\Packages.
Copy the OpenRecon package to C:\Temp\OR\Packages.
Press the Windows key and open an elevated admin CMD shell.
Change directory to %MREDGEHOME%:
cd /d "%MREDGEHOME%"
Start the installation of the OpenRecon package:
syngo.MR.Digi.Utils.Console.exe store --install-package "C:\Temp\OR\Packages\OpenRecon_package.zip"
The installation will take a couple of minutes. Check the progress of the installation via:
syngo.MR.Digi.Utils.Console.exe store --list
XA60 and XA61
Copy the OpenRecon zip file into C:\Program Files\Siemens\Numaris\OperationalManagement\FileTransfer\incoming.
Wait for the file to disappear.
Check whether it is being installed by watching C:\ProgramData\Siemens\Numaris\log\syngo.MR.HostInfra.OpenRecon.Watcher.
It should first create a 0 KB text file with the container name and version.
The text file then fills to about 100-200 KB.
Once the log file is written, you can open a protocol and check whether the package is available.
Run the sequence with OpenRecon enabled and check for errors in the log viewer at C:\ProgramData\Siemens\Numaris\log\OpenRecon.utr.
Install a FIRE package
Unpack the generated FIRE zip and read its INSTALL_FIRE.txt before changing the scanner. The archive root contains an Ice folder laid out like %CustomerIceProgs%, normally under MriCustomer.
Copy or merge the package’s Ice folder into MriCustomer while preserving its paths. The bundle includes the FIRE workflow files, configuration, chroot image, startup settings, and shared directories required by the package. Stop or unmount an existing FIRE chroot before replacing its .img file.
FIRE installation is a scanner-administration operation. Follow your site’s scanner-version-specific procedure and change-control process in addition to the generated instructions.
9. Build and publish through GitHub Actions
Commit and open the Neurocontainers pull request
From your Neurocontainers branch, review what will be published, then commit and push it to your fork:
Open a pull request from your fork to neurodesk/neurocontainers:main. Include:
what the application does and which image/acquisition type it expects;
the local build and MRD test commands you ran;
the source and permission status of any public test data;
expected returned series and important parameter combinations; and
limitations that a scanner tester must know.
The current PR container candidate workflow accepts fork pull requests. It validates the changed recipe and OpenRecon metadata, builds every declared architecture/variant, creates Docker and SIF candidates, runs the deploy and fulltest.yaml checks and uploads an immutable candidate artifact.
What happens after merge
The current release sequence is:
Neurocontainers promotes the exact tested candidate rather than rebuilding it.
The image and release metadata are published.
For a default x86_64 recipe containing OpenReconLabel.json, sync_openrecon.py creates or updates an OpenRecon metadata pull request. If the metadata is unchanged, it can dispatch a rebuild instead.
After the OpenRecon pull request is reviewed and merged, its auto-build workflow runs the reusable build-apps workflow.
That workflow builds both OpenRecon and FIRE artifacts, uploads both zips, and opens an issue containing download and installation instructions.
You therefore normally submit only the Neurocontainers pull request. Do not open a hand-written OpenRecon packaging pull request unless a maintainer asks for a packaging-only change or the automatic synchronization fails.
10. Troubleshooting and scanner notes
Package behavior and metadata
Sent image values must fit within a 4096-value range
OpenRecon can send a maximum integer range of 4096 values back to the scanner.
If the returned images exceed that range, the values can wrap around instead of clipping. The symptom is that the sent images show repeating integer wraps and can look a bit like phase images.
Scale or clamp derived image data into the scanner-safe range before sending it from the MRD server.
Choice parameters need a non-empty default
Current Neurocontainers and OpenRecon packaging validators reject a choice parameter whose default is empty or does not match one of its value IDs. Older packages created without this check could install successfully but remain unselectable in the sequence tab.
For example, this can fail because "default": "" does not match any entry in values:
{"id":"metricsregion","label":{"en":"Metrics Region"},"type":"choice","values":[{"id":"wholebody","name":{"en":"wholebody"}},{"id":"abdomen","name":{"en":"abdomen"}},{"id":"pelvis","name":{"en":"pelvis"}},{"id":"thigh","name":{"en":"thigh"}},{"id":"leg","name":{"en":"leg"}}],"default":"","information":{"en":"Region passed to MuscleMap metrics"}}
Set the default to one of the available values IDs instead:
{"id":"metricsregion","label":{"en":"Metrics Region"},"type":"choice","values":[{"id":"wholebody","name":{"en":"wholebody"}},{"id":"abdomen","name":{"en":"abdomen"}},{"id":"pelvis","name":{"en":"pelvis"}},{"id":"thigh","name":{"en":"thigh"}},{"id":"leg","name":{"en":"leg"}}],"default":"wholebody","information":{"en":"Region passed to MuscleMap metrics"}}
Scanner runtime
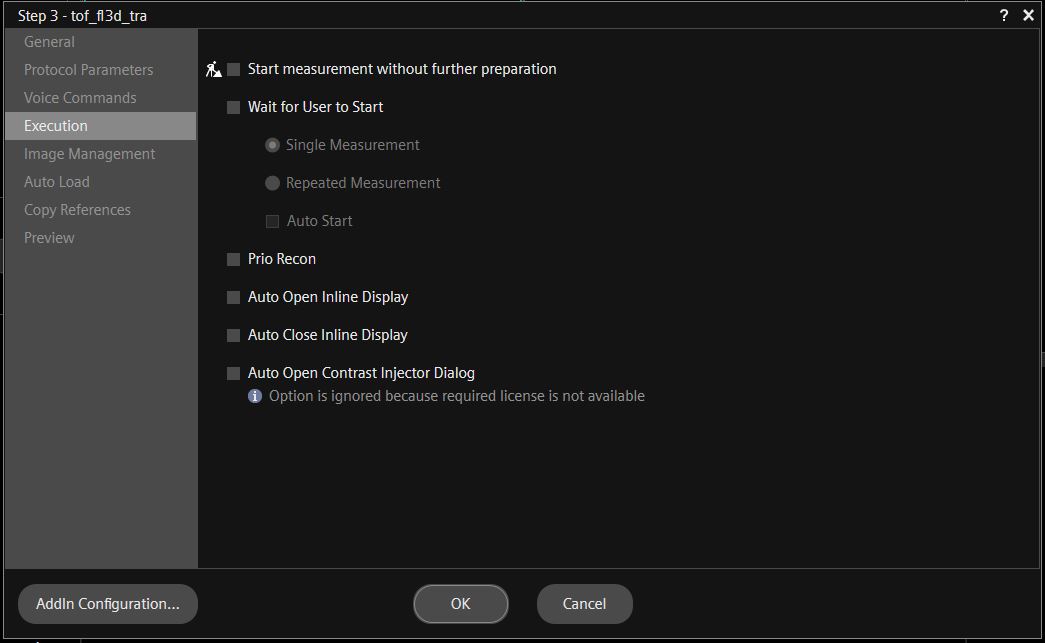
Do not use Prio Recon with OpenRecon
This option has to be disabled in an OpenRecon sequence:
Right-click Sequence in the Scan Queue, then select Edit Properties (Alt+Enter) and Execution.
CUDA version
Make sure that you install the correct CUDA version in the container and that it does not get overwritten by a pip install. The current OpenRecon package build rejects a CUDA toolkit or PyTorch CUDA version newer than 11.8.
Always double-check in the container with:
# Check that the PyTorch CUDA version is no newer than 11.8.python -c "import torch; print(torch.version.cuda)"
High-performance computing license side effects
For OpenRecon to work, the N_High_End_Computing license must be active on the scanner.
Activating this license takes memory away from the main ICE recon system, so normal recons might run out of memory sooner. If you need this memory back, you can temporarily disable this license and OpenRecon.
Turn the license off by commenting it out. Add # in front of the relevant lines in C:\Program Files\Siemens\Numaris\bin\Common\Licensing\license.dat.
Restart the whole system. Restarting the workspace is not enough.
Versioning and maintenance
Versioning of containers
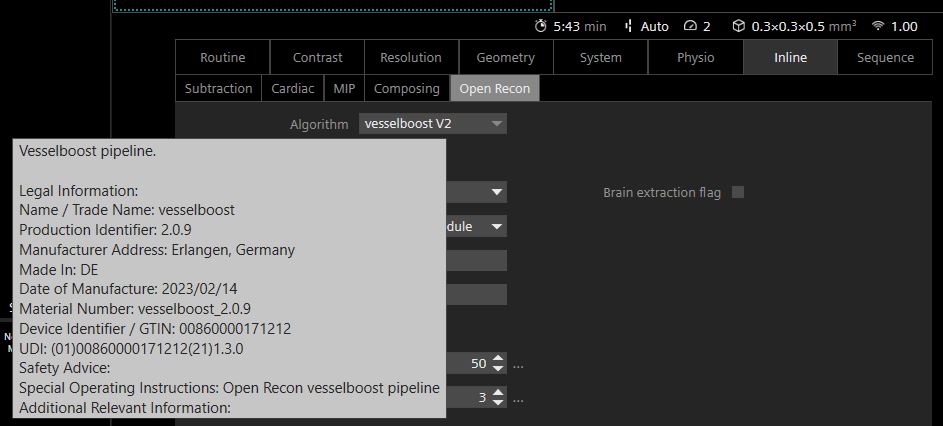
OpenRecon requires container versions. For example, on the scanner, version 1.2.3 only shows the major version in the selection box, but hovering over the name shows the full version:
OpenRecon will not install an update to a container with the same version.
Cleaning up packages on the scanner (on XA60/61)
After installing and testing different OpenRecon containers, old containers remain in the host registry and consume space on the host C: drive.
Download wip_OpenRecon_PackageRemover_Tool.exe from the Siemens MAGNETOM forum and follow the installation instructions.
At the end of a testing session, purge the old packages by running this in the powershell:
wip_OpenRecon_PackageRemover_Tool.exe --purge
Answer y for each package you want to purge.
Then run garbage collection to clean up the storage:
wip_OpenRecon_PackageRemover_Tool.exe --gc
This tool often breaks the OpenRecon watcher process, so installing new packages after cleanup may fail until the host is restarted. Reboot the host after cleanup before installing more OpenRecon packages.
For the deletion to work, and for the tool to see your OpenRecon package, the package needs to be labeled as Research. It will not touch OpenRecon tools labeled as Product.
Check that your OpenReconLabel.json file contains:
"content_qualification_type":"RESEARCH"
5.5 - Singularity/Apptainer
Neurodesk Singularity/Apptainer Containers
Our docker containers are converted to singularity/apptainer containers and stored on Object storage.
Then download the containers. One way is to use CURL:
curl -X GET https://neurocontainers.neurodesk.workers.dev/$container.simg -O
Singularity Containers and GPUs
Some of our containers contain GPU-accelerated applications. Here is an example that tests the GPU accelerated program eddy in FSL:
curl -X GET https://neurocontainers.neurodesk.workers.dev/fsl_6.0.5.1_20221016.simg -O
git clone https://github.com/neurolabusc/gpu_test.git
singularity shell --nv fsl_6.0.5.1_20221016.simg
cd gpu_test/etest/
bash runme_gpu.sh
Transparent Singularity
The singularity containers can be also be used in combination with our Transparent Singularity Tool, which wraps the executables inside a container to make them easily available for pipelines. More information can be found here:
When restarting WSL the cvmfs service has to be started manually:
sudo cvmfs_config wsl2_start
Initialize the neurodesk modules:
module use /cvmfs/neurodesk.ardc.edu.au/neurodesk-modules/*
Example usage of fsleyes:
ml fsl
fsleyes
List the available programs:
ml av
6 - Scientific Agents
How to use scientific coding agents in Neurodesk
Neurodesk integrates several agentic coding agents to help scientists to develop analysis code.
6.1 - Opencode
Use OpenCode in Neurodesk - the open source coding agent
start OpenCode on a terminal with opencode. Our Opencode wrapper script will walk you through setting it up depending on which models are available to you.
You can also configure your own model provider:
ctrl+p
and select switch model
then ctrl+a to connect a different provider
Self-host a model in Ollama
You can also self-host a model in Ollama on your computer (recommended hardware: Apple Silicon with at least 64GB RAM). For this install Ollama on your system and start the neurodesktop container with these additional docker parameters (the neurodesk app does this automatically):
Qwen3.6 supports a 256k context window, but Ollama may allocate a smaller runtime context depending on your available memory. For coding agents, set the Ollama context length in the Ollama app settings, or start Ollama with a larger context length:
OLLAMA_CONTEXT_LENGTH=64000 ollama serve
Then switch the model to Ollama:
ctrl+p
and select switch model
you can watch the model working and for errors:
tail -f ~/.ollama/logs/server.log
Use of models provided through llm.neurodesk.org
create an API key at https://llm.neurodesk.org and add it to your opencode config file .config/opencode/opencode.json:
Use Codex in Neurodesk - the coding agent from OpenAI
Start codex on a terminal with codex then authenticate with your OpenAI account. You need to use the Device Code option:
Then give it a task.
6.3 - Claude Claude
Use Claude Code in Neurodesk - the coding agent from Anthropic
start claude on a terminal and authenticate with an Anthropic subscription.
Note: claude outputs a long URL on the terminal and the jupyterhub terminal unfortunatley adds linebreaks in the URL which render it invalid. To fix this, copy the authentication URL into an editor and manually remove the linebreaks before pasting it into a browser.
accept that you trust the folder:
Then give it a task and approve the permission requests while it works away:
6.4 - Notebook Intelligence
Use the notebook intelligence plugin in Neurodesk - the notebook coding agent
Start Notebook Intelligence from the side panel:
Then connect Github Copilot (or Change the model provider)
Switch to agent, select all tools (via the settings button next to the Agent Selector) and give it a task:
You can also ask it to fill in code in specific cells:
For a more capable model you can also switch to Claude in the settings:
You can also self-host a model in Ollama on your computer. For this install Ollama on your system and start the neurodesktop container with these additional docker parameters:
Installation Examples for Neurodesk on various systems
Neurodesk offers several options to suit different needs and computing environments. Here we show examples of different Neurodesk installations that could be good starting point for you.
7.1 - Ubuntu 24.04
Local Installation Example for Ubuntu 24.04
On this page we show specific examples of the different ways of how Neurodesk can be installed on a local computer. We start from the highest level using the Neurodesk app, then go lower level via docker, neurocommand and down to the lowest level using neurocontainers. We also show on each level how containers can be streamed via CVMFS or downloaded locally.
Running Neurodesk on a Ubuntu 24.04 computer
On a linux machine you have mutliple options to use Neurodesk:
Highest abstraction level, and easiest option: Neurodeskapp - this provides you a full Linux desktop with everything configured you need. You do not need to think about Docker or Singularity containers and you can just get your work done. This is the recommended option.
High abstraction level: Running Neurodesktop via Docker manually - you still get the desktop with everything configured, but you now have to manage the docker container yourself. This is useful when the app doesn’t work well - for example in a remote SSH setup.
Middle abstraction level: Use the containers through wrapper scripts on the terminal through Neurocommand - this is great if you don’t need a full desktop environment and you want to use the neurodesk tools in your scripts. Neurocommand handles multiple containers for you and you just run your tools as you are used to without having to think about the fact that they are running in singularity/apptainer containers
Low abstraction level: Use the containers on the terminal directly - if you just want ot use the containers directly and you want to do everything yourself, that’s the best option for you :)
Highest abstraction level, and easiest option: Neurodeskapp
High abstraction level: Running Neurodesktop via Docker manually
If you run Ubuntu > 23.10 and you haven’t installed the Neurodeskapp before you need to create this apparmor profile under /etc/apparmor.d/neurodeskapp
echo -e "# This profile allows everything and only exists to give the\n# application a name instead of having the label \"unconfined\"\n\nabi <abi/4.0>,\ninclude <tunables/global>\n\nprofile neurodeskapp \"/opt/NeurodeskApp/neurodeskapp\" flags=(unconfined) {\n userns,\n\n # Site-specific additions and overrides. See local/README for details.\n include if exists <local/neurodeskapp>\n}"| sudo tee /etc/apparmor.d/neurodeskapp
you also need to create the ~/neurodesktop-storage folder if you haven’t used the app before:
mkdir -p ~/neurodesktop-storage
Make sure you have Docker installed and configured correctly (see Neurodeskapp for instructions), then run in a terminal:
Then open the jupyter link with the token displayed in your browser. Make sure it starts with 127.0.0.1:8888/lab&token=…
You can also add a flag to the docker command to activate the offline mode: -e CVMFS_DISABLE=true
when finished, make sure to delete the container - otherwise, you will get an error the next time you run the docker command:
docker rm neurodesktop
If you want to pass your GPU into the desktop, first install this on the host:
# Manually set the distribution to ubuntu22.04 (works with Ubuntu 24.04) - because it doens't exist yet for 24.04distribution="ubuntu22.04"# Add the NVIDIA container toolkit repo using the 22.04 versioncurl -s -L https://nvidia.github.io/libnvidia-container/$distribution/libnvidia-container.list |\
sed 's|^deb |deb [signed-by=/usr/share/keyrings/nvidia-container-toolkit.gpg] |'|\
sudo tee /etc/apt/sources.list.d/nvidia-container-toolkit.list > /dev/null
# Update package listssudo apt update
sudo apt install -y nvidia-container-toolkit
sudo nvidia-ctk runtime configure --runtime=docker
sudo systemctl restart docker
Then start the neurodesktop container with the GPU flag:
Make sure you have Python configured on your system with pip3:
sudo apt install python3-pip
Then install neurocommand:
cd ~
git clone https://github.com/neurodesk/neurocommand.git
cd neurocommand
python3 -m venv ./venv
./venv/bin/pip3 install -r neurodesk/requirements.txt
bash build.sh --cli
exportAPPTAINER_BINDPATH=`pwd -P`
now you can search and install containers:
# this searches for containers and you can install individual containers by running the install commands displayed bash containers.sh itksnap
# this installs all containers matching the pattern itksnapbash containers.sh --itksnap
then link the containers directory to the neurodesktop-storage:
cat >> ~/.bashrc << 'EOL'
if [ -f '/usr/share/module.sh' ]; then source /usr/share/module.sh; fi

if [ -d /cvmfs/neurodesk.ardc.edu.au/neurodesk-modules ]; then
  module use /cvmfs/neurodesk.ardc.edu.au/neurodesk-modules/*
else
  export MODULEPATH="~/neurodesktop-storage/containers/modules"
  module use $MODULEPATH
fi
EOL
make sure you have set the APPTAINER_BINDPATH to all directories that you want the containers to access
export APPTAINER_BINDPATH='/data,/scratch'
you can also add this to your ~/.bashrc
then restart the terminal you can load and run the software using:
ml itksnap
itksnap
If you need nvidia gpu support activate via exporting this environment variable:
exportneurodesk_singularity_opts='--nv'
If you get errors like this:
/opt/itksnap-4.0.2/lib/snap-4.0.2/ITK-SNAP: /lib/x86_64-linux-gnu/libc.so.6: version `GLIBC_2.38' not found (required by /.singularity.d/libs/libGLX.so.0)
/opt/itksnap-4.0.2/lib/snap-4.0.2/ITK-SNAP: /lib/x86_64-linux-gnu/libc.so.6: version `GLIBC_2.38' not found (required by /.singularity.d/libs/libEGL.so.1)
/opt/itksnap-4.0.2/lib/snap-4.0.2/ITK-SNAP: /lib/x86_64-linux-gnu/libc.so.6: version `GLIBC_2.38' not found (required by /.singularity.d/libs/libGLdispatch.so.0)
This means that the glibc versions inside the container and outside the container are not compatible. You can either disable the GPU flag –nv or use a newer version of the container.
Low abstraction level: Use the containers on the terminal directly
for this you only need apptainer or singularity installed. See above for installation instructions.
Then you can download a container and run it directly:
#find out which containers are available:curl -s https://raw.githubusercontent.com/neurodesk/neurocommand/main/cvmfs/log.txt
#select a container and download it:exportcontainer=itksnap_3.8.0_20201208
curl -X GET https://neurocontainers.neurodesk.workers.dev/$container.simg -O
singularity shell itksnap_3.8.0_20201208.simg
itksnap
Use Neurodesk on Bunya - the HPC at the University of Queensland
Neurodesk is installed at the University of Queensland’s supercomputer “Bunya”. To access neurodesk tools you need to be in an interactive job (so either start a virtual desktop via Open On-Demand: https://bunya-ondemand.rcc.uq.edu.au/pun/sys/dashboard) or run:
module use /sw/local/rocky8/noarch/neuro/software/neurocommand/local/containers/modules/
exportAPPTAINER_BINDPATH=/scratch,/QRISdata
Now you can list all modules (Neurodesk modules are the first ones in the list):
ml av
Or you can module load any tool you need:
ml qsmxt/6.4.1
If you want to use GUI applications (fsleyes, afni, suma, matlab, …) you need to overwrite the temporary directory to be /tmp (otherwise you get an error that it cannot connect to the DISPLAY):
exportTMPDIR=/tmp
For matlab you also need to create a network license file in your ~/Downloads/network.lic:
cat <<EOF > ~/Downloads/network.lic
SERVER uq-matlab.research.dc.uq.edu.au ANY 27000
USE_SERVER
EOF
NOTE: If you are using AFNI on Bunya then the default detach behavior will cause SIGBUS errors and a crash. To fix this run AFNI with:
afni -no_detach
NOTE: MRIQC has its $HOME variable hardcoded to be /home/mriqc. This leads to problems on Bunya. A workaround is to run this before mriqc:
Use Neurodesk on Greatlakes - the HPC at University of Michigan
Setup on a desktop
module load singularity
# now change to a directory with enough storage, e.g. /nfs/turbo/usernamegit clone https://github.com/neurodesk/neurocommand.git
cd neurocommand
pip3 install -r neurodesk/requirements.txt --user
bash build.sh --cli
bash containers.sh
export SINGULARITY_BINDPATH=`pwd -P`bash containers.sh itksnap
# now select a version of itksnap to install. For this copy and paste the installationecho "module load singularity">>~/.bashrc
echo "module use $PWD/local/containers/modules/">>~/.bashrc
echo "export SINGULARITY_BINDPATH=/nfs/,/scratch/">>~/.bashrc
Setup on with a jupyter notebook
Start new Jupyter notebook by entering “load singularity” in the Module Commands field:
Then run these commands:
!pip install jupyterlmod
# Restart the kernel by clicking Kernel -> Restart Kernelimport module
await module.load('niimath')
7.4 - Sherlock
Use Neurodesk on Sherlock - the HPC at Stanford University
Neurodesk runs on Stanfords supercomputer “Sherlock” and below are different ways of accessing it.
Using Neurodesk on Sherlock via ssh
Using Neurodesk containers
Setup your ~/.ssh/config
Host sherlock
    ControlMaster auto
    ForwardX11 yes
    ControlPath ~/.ssh/%l%r@%h:%p
    HostName login.sherlock.stanford.edu
    User <sunetid>
    ControlPersist yes
and then connect to sherlock
ssh sherlock
You can module use the neurodesk modules (if they have been installed before - see instructions for installing and updating at the end of this page below):
module use $GROUP_HOME/modules
exportAPPTAINER_BINDPATH=/scratch,/tmp
use sh_part to see which partitions and limits are available:
sh_part
Partition choices for Sherlock owners
Sherlock owners have exclusive access to their own nodes. To submit jobs to those nodes, use the owner’s partition:
#SBATCH -p <partition_name>
or on the command line:
sbatch -p <partition_name> submit.sbatch
The partition name is usually the PI’s SUNet ID.
Owners can also submit lower-priority jobs to other owners’ nodes with the shared owners partition:
sbatch -p owners submit.sbatch
Jobs submitted to -p owners can run on available owner nodes, but they are preemptible. For example, if ownerA’s job is running on ownerB’s node through the owners partition and ownerB submits a job to their own partition, ownerA’s job can be killed so ownerB gets immediate access to their node.
This is useful for less important background jobs that can tolerate interruption. Owners can also continue to use the general pool of nodes, for example with -p normal.
then submit:
sbatch submit.sbatch
or parallize across subjects:
for file in `ls sub*.nii`;doecho"submitting job for $file"; sbatch submit.sbatch $file;done
First you need to connect to Sherlock with SSH forwarding (e.g. from a Linux machine or from your local neurodesk or from a mac with https://www.xquartz.org/ installed, or from windows using Mobaxterm)
and then request an interactive job and start the software:
sh_dev
ml mrtrix3
mrview
This runs via x-forwarding and doesn’t work well, for a better experience see below how to start a full neurodesktop on Sherlock.
After the installation finished restart the jupyterlab session in Ondemand.
Neuroimaging Visualization in the File Browser and notebooks of Jupyter Lab
The pip install jupyterlab_niivue added an extension to jupyterlab that visualizes neuroimaging data directly via a double-click in the filebrowser in jupyterlab:
Using containers inside a jupyter notebook
The install of pip install jupyterlmod made the following possible inside a jupyter notebook:
The install of pip install jupyterlab_slurm added a plugin that allows monitoring slurm jobs.
Using Neurodesk via a full neurodesktop session
This is an ideal setup for visualizing results on Sherlock and for running GUI applications. You need to run these commands on your computer (e.g. MacOS/Linux/Windows WSL2):
After startup, open the printed URL http://127.0.0.1:<random_port>?token=<token> in your browser.
You can submit sbatch jobs from inside this full Neurodesktop session, but make sure that the sbatch job file is stored in a location that’s identical between Neurodesktop and the sherlock cluster, so for example /oak/… - important: Do not submit batch jobs from within the jovyan homedirectory /home/jovyan as this will not be accessible to slurm on the cluster under that path.
connecting with VScode
VScode server does not work on he login nodes due to resource restrictions. It might be possible to run it inside a compute job and inside a container. However, it is possible to run vscode server through ondemand:
A great extension to install is niivue for vscode which allows visualizing neuroimaging data in vscode:
and for AI coding:
claude code
gemini CLI companion
gemini code assist
and for checking on slurm jobs in vscode:
slurm–
and for matlab scripts:
MATLAB Extension: Download it in a terminal in vscode and then install it through the vscode extension manager:
you can execute a line from your scripts on the terminal via setting a keyboard shortcut to “Terminal: Run Selected Text in Active Terminal” - that makes testing scripts and debugging them quite quick
connecting with Cursor
Cursor does not work on the login nodes due to resource restrictions. It might be possible to run it inside a compute job and inside a container, but I didn’t get that to work yet.
using coding agents on sherlock
Copilot CLI — an extension of GitHub Copilot that answers natural-language prompts and generates shell commands and code snippets interactively in the CLI. Integrates with developer workflow and git metadata, good at scaffolding repo-level changes. Use this for drafting Slurm scripts, shell-based data-movement commands, Makefiles, container entrypoints, and succinct code edits from the terminal. Caution: always validate generated shell commands before running on Oak.
ml copilot-cli
copilot
Gemini CLI — a CLI assistant that can generate code from Google’s Gemini family of models (via Google Cloud/Vertex AI or client tooling). Provides strong multilingual reasoning and contextual code completion. Use this for translating research intent into cloud and hybrid workflows, generating code for TPU/GPU workloads, and producing infrastructure-as-code snippets that tie to GCP resources. Caution: always confirm data residency and compliance requirements for sensitive data.
ml gemini-cli
gemini
Claude Code (Claude family) — a coding-specialized variant in the Anthropic Claude model family aimed at code generation, refactoring, and reasoning tasks. Provides conversational reasoning about code, multi-step planning for algorithmic tasks, and safer-response tuning relative to generic models. Caution: check private endpoints/dedicated instances before sending sensitive datasets.
ml claude-code
claude
Codex — an OpenAI model family good at producing short code snippets, language translations, and API glue, historically the basis for many coding assistants. Use this for scaffold code, translating pseudocode to working scripts, and generating wrappers for system calls and schedulers. Caution: watch out for API hallucinations and insecure shell usage suggestions; verification in GPT-4 (which often supersedes Codex in capability and safety) advised.
ml codex
codex
Crush CLI — an all-around CLI assistant from the Charmbracelet Go-based “ecosystem” intended to improve interactive developer workflows and scripting. Use it for interactive shells or task runners, pipeline composition for local data preprocessing, productivity (nicer prompts, piping primitives, nicer output formatting), or small automation tasks such as repo tooling and glue scripts.
ml crush
crush
For best neurodesk integration make sure to download Neurodesk’s AGENT.md file and place it in working directory:
NOTE: If you are using AFNI then the default detach behavior will cause SIGBUS errors and a crash. To fix this run AFNI with:
afni -no_detach
Data transfer
Transfer files to and from Onedrive
First install rclone on your computer and set it up for onedrive. Then copy the config file ~/.config/rclone/rclone.conf to sherlock. Then run rclone on sherlock:
ml system
ml rclone
rclone ls
rclone copy
setting up rclone for onedrive (needs to be done on a computer with a browser, so not sherlock):
rclone config
# select n for new remote# enter a name, e.g. onedrive# select one drive from the list, depending on the rclone version this could be 38# hit enter for default client_id# hit enter for default client_secret# select region 1 Microsoft Global# hit enter for default tenant# enter n to skip advanced config# enter y to open a webbrowser and authenticate with onedrive# enter 1 for config type OneDrive Personal or Business# hit enter for default config_driveid# enter y to accept# enter y again to confirm# then quit config q# now test:rclone ls onedrive:
# if it's not showing the files from your onedrive, change the config_driveid in ~/.config/rclone/rclone.confvi ~/.config/rclone/rclone.conf
mounting sherlock files on your computer through sshfs
ensure you got brew installed, if not install via:
# this will transfer a file from your computer to your scratch space
scp foo <sunetid>@dtn.sherlock.stanford.edu:

# this will transfer a directory from sherlock to your computer:
scp -r <sunetid>@dtn.sherlock.stanford.edu:/scratch/groups/<your_group_here>/<your_directory_here> .
Transfer files via rsync
# this will transfer a files from your computer to your scratch space
rsync -avP foo <sunetid>@dtn.sherlock.stanford.edu:

# or to oak:
rsync -avP foo <sunetid>@dtn.sherlock.stanford.edu:/oak/stanford/groups/<your_group_here>/


# this will transfer a directory from sherlock to your computer:
rsync -avP <sunetid>@dtn.sherlock.stanford.edu:/scratch/groups/<your_group_here>/<your_directory_here> .
Managing Neurodesk on Sherlock
Installing Neurodesk for a lab
This is already done and doesn’t need to be run again!
Check that you have write permissions and can download and install new containers and then run:
ssh sherlock
sh_dev
cd$GROUP_HOME/neurodesk
git pull
bash build.sh
bash containers.sh
# to search for a container:bash containers.sh freesurfer
# then install the choosen version by copy and pasting the specific command install command displayed
Updating Neurodesktop image
make sure to set the new version before submitting:
ssh sherlock
sbatch -p normal -c 4 --mem=32G --time=04:00:00 --job-name=neurodesktop-update --wrap 'set -e; VERSION="2026-08-11"; : "${GROUP_HOME:?GROUP_HOME is not set}" "${SCRATCH:?SCRATCH is not set}"; cd "${GROUP_HOME}/neurodesk"; export APPTAINER_TMPDIR="${SCRATCH}/apptainer_temp"; mkdir -p "${APPTAINER_TMPDIR}"; image="${GROUP_HOME}/neurodesk/neurodesktop_${VERSION}.sif"; tmp="${GROUP_HOME}/neurodesk/.neurodesktop_${VERSION}.${SLURM_JOB_ID:-$$}.sif"; link="${GROUP_HOME}/neurodesk/neurodesktop_latest.sif"; link_tmp="${link}.${SLURM_JOB_ID:-$$}.tmp"; trap "rm -f \"${tmp}\" \"${link_tmp}\"" EXIT; rm -f "${tmp}" "${link_tmp}"; apptainer pull "${tmp}" "docker://ghcr.io/neurodesk/neurodesktop:${VERSION}"; test -s "${tmp}"; mv -f "${tmp}" "${image}"; ln -s "${image}" "${link_tmp}"; mv -f "${link_tmp}" "${link}"'
7.5 - XNAT at the Lucas Centre Stanford
Transfer imaging data to the Lucas Centre XNAT and process it interactively with Neurodesk
The Stanford Lucas Centre XNAT is available at xnat-lucas.neurodesk.org. This guide explains how to transfer scanner data and additional files to XNAT, then start Neurodesk for interactive processing.
Before you transfer data
You will need:
your XNAT username (which is your stanford useraccount),
the project name you want to create, and
a subject identifier that is appropriate for your study.
Always, use a de-identified subject identifier - The XNAT deployment is not approved for PHI data.
Transfer DICOM images from a scanner
DICOM images are sent from each scanner to RSL60 using the scanner’s network transfer function.
Before starting the transfer, set the DICOM Patient ID to this exact format:
subject@username/project
For example:
sub-001@jsmith/my-project
The three parts control where the images are stored and who has access to them.
Part
Purpose
subject
The subject identifier created in XNAT
username
The XNAT user assigned as the project owner
project
The XNAT project created for the upload
Check the Patient ID carefully before sending the images. The `@` and `/` characters are required, and the username must be the intended owner's XNAT username.
Once the Patient ID is set:
Select RSL60 as the network transfer destination on the scanner.
Send the DICOM study.
Open the Lucas Centre XNAT and check that the project, subject, and imaging session appear as expected.
The transfer creates the XNAT project, assigns username as its owner, and uploads the images under subject.
Transfer additional files
Files that are not part of the DICOM transfer, such as physiological recordings or raw Siemens TWIX meas.dat files, must be uploaded through the public Samba share on RSL60.
In the share, create the following directory structure under xnat-upload:
xnat-upload/
└── owner/
    └── project/
        └── subject/
Replace:
owner with the project owner’s XNAT username,
project with the XNAT project name, and
subject with the XNAT subject identifier.
Copy the additional files into the subject directory. After the files have been processed, they are moved from xnat-upload/ to xnat-upload-done/. This move is expected and indicates that the upload service has picked them up.
Keep your original files until you have confirmed that the upload completed successfully in XNAT. The files will be deleted automatically after 28days from RSL60.
Download data from XNAT or transfer it to Oak
There are several tools for downloading data through the XNAT REST API. The XNAT Web Services Client Tools documentation describes options including PyXNAT, XNATpy, the XNAT Data Client (XDC), and YAXIL.
These tools can also be run on a Stanford system that has Oak mounted such as sherlock. Set an approved Oak project directory as the download destination to transfer data directly from XNAT to Oak instead of downloading it through your local computer.
Here is an example how to transfer XNAT data to Oak on Sherlock:
curl -LsSf https://astral.sh/uv/install.sh | sh
$HOME/.local/bin/uv tool install xnat      # puts the `xnat` CLI on PATH
On the XNAT web UI (https://xnat-lucas.neurodesk.org/): log in → username menu (top right) → Manage Alias Tokens → Create Alias Token -> View. Fill in alias as login below and secret as password:
The target directory must already exist for batch. –subject is an fnmatch pattern (–subject ‘sub-0*’ grabs a range), but a typo silently matches nothing instead of erroring. Watch for the Found match: … lines in the output.
Run processing with XNAT Container Service
XNAT Container Service can run predefined processing pipelines directly from XNAT without starting an interactive Neurodesk session. Select the processing scope that matches the input required by the pipeline:
Scope
Start from
Use for
Session level
The session’s Actions menu
Pipelines that process the whole imaging session or combine multiple scans
Series level
The Run menu for an individual scan
Pipelines that process one selected scan or series
The available containers depend on the data and the pipelines currently enabled by the Lucas Centre administrators.
Run a container on a session
Open the subject’s imaging session in XNAT.
In the Actions menu, select Run Containers.
Select the required pipeline. Session-level options may include fMRIPrep, ASLPrep, QSMxT, whole-session dcm2niix, DICOM to BIDS, and MRIQC. More containers can be added when needed.
Review the pipeline settings, provide any required inputs, and submit the job.
Run a container on a series
Open the subject’s imaging session and scroll to the Scans table.
Find the scan or series you want to process.
Open its menu in the Run column on the right.
Select the required pipeline. Series-level options may include Spinal Cord Toolbox, MuscleMap, and dcm2niix. More containers can be added when needed.
Review the pipeline settings, provide any required inputs, and submit the job.
Start Neurodesk for interactive processing
Neurodesk can be launched from an XNAT project, with access limited to the project data permitted by your XNAT account.
In the project actions, select Launch JupyterHub. Select the required resources.
Wait for your Neurodesk environment to start. The browser will redirect to the interactive JupyterLab environment.
Use the file browser or a terminal to locate the mounted XNAT project data, then start the required Neurodesk application or analysis workflow.
Save scripts and working files in your personal workspace. XNAT project data is mounted according to your project permissions and may be read-only.
Upload processed data back to XNAT
You can send files produced in your Neurodesk session back to XNAT:
Open the JupyterLab Launcher and select XNAT Upload.
Before connecting for the first time, create an alias token in XNAT. Open your XNAT user account, select Manage Alias Tokens, and click Create Alias Token.
Click View beside the new token to display its token name and secret.
Return to XNAT Upload, enter the token name in Alias Token, enter its secret in Secret, and click Connect to XNAT.
Select the destination project and enter the subject and session IDs. Configure the modality, scan ID, scan type, and resource label as required. Leave Scan ID empty when uploading at session level.
Select the processed files in the file browser, or add their paths manually.
Click Upload. The selected files will be stored in the configured XNAT project, subject, session, and optional scan location.
An alias token and its secret authenticate actions as your XNAT account. Treat them like a password: do not share them or include them in screenshots, and remove tokens that are no longer needed.
When you have finished, save your work and close the session. Your personal workspace is persistent, while inactive compute sessions may be stopped automatically.