This is the multi-page printable view of this section. Click here to print.
App
1 - Neurodesk App
Step 1: Download and install
Download the Neurodesk App for your operating system, then follow the install instructions below.
Download:
Install:
Double-click the downloaded .dmg file and drag NeurodeskApp into your Applications folder. To open: right-click NeurodeskApp.app and select “Open”.
Alternatively, install with Homebrew:
brew install neurodesk/homebrew-neurodesk/neurodeskappDownload:
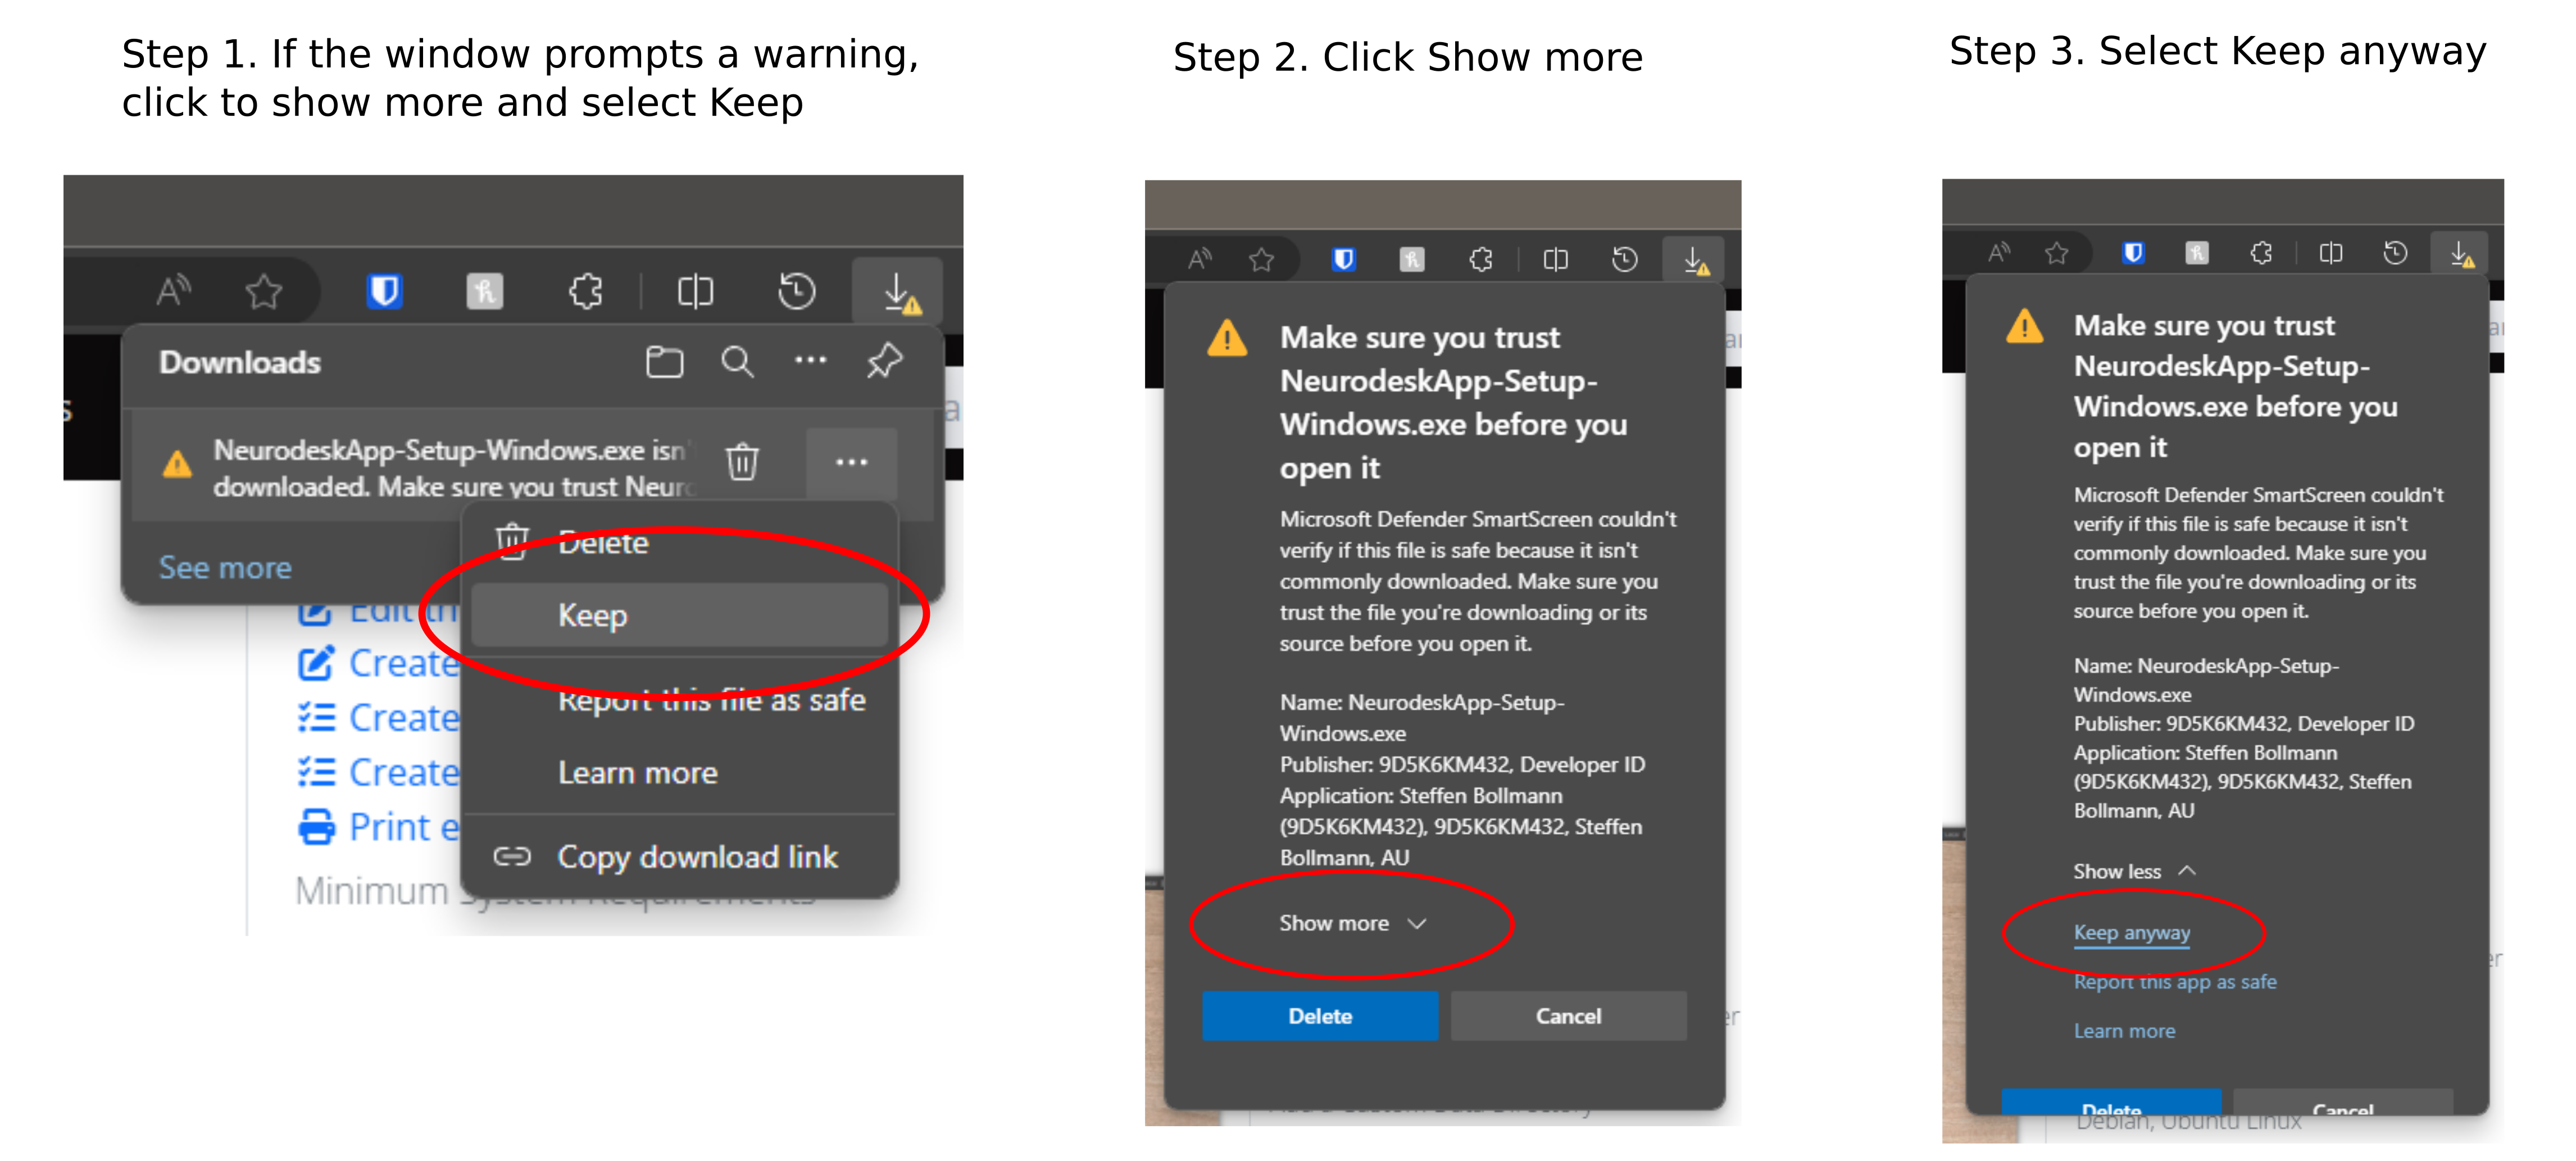
On Microsoft Edge, follow these steps to download the executable file:
Install:
Double-click the downloaded .exe file. Windows will show an “Unknown publisher” warning because the installer is not code-signed. This is expected — the installer is an official release from the neurodesk-app GitHub repository. Click “Yes” to proceed, then accept the license agreement and click “Finish”.
Download:
| Distribution | x64 | arm64 |
|---|---|---|
| Debian / Ubuntu | .deb (x64) | .deb (arm64) |
| Fedora / RHEL / SUSE | .rpm (x64) | .rpm (arm64) |
| Arch-based | AUR package |
Install:
Replace <arch> in the following command with the downloaded executable file suited for your system architecture (x64 or arm64)
# Debian / Ubuntu
sudo apt install -f ./NeurodeskApp-Setup-Debian-<arch>.deb

# Fedora / RHEL / SUSE
sudo rpm -i NeurodeskApp-Setup-Fedora-<arch>.rpm

# Arch-based
yay neurodesk
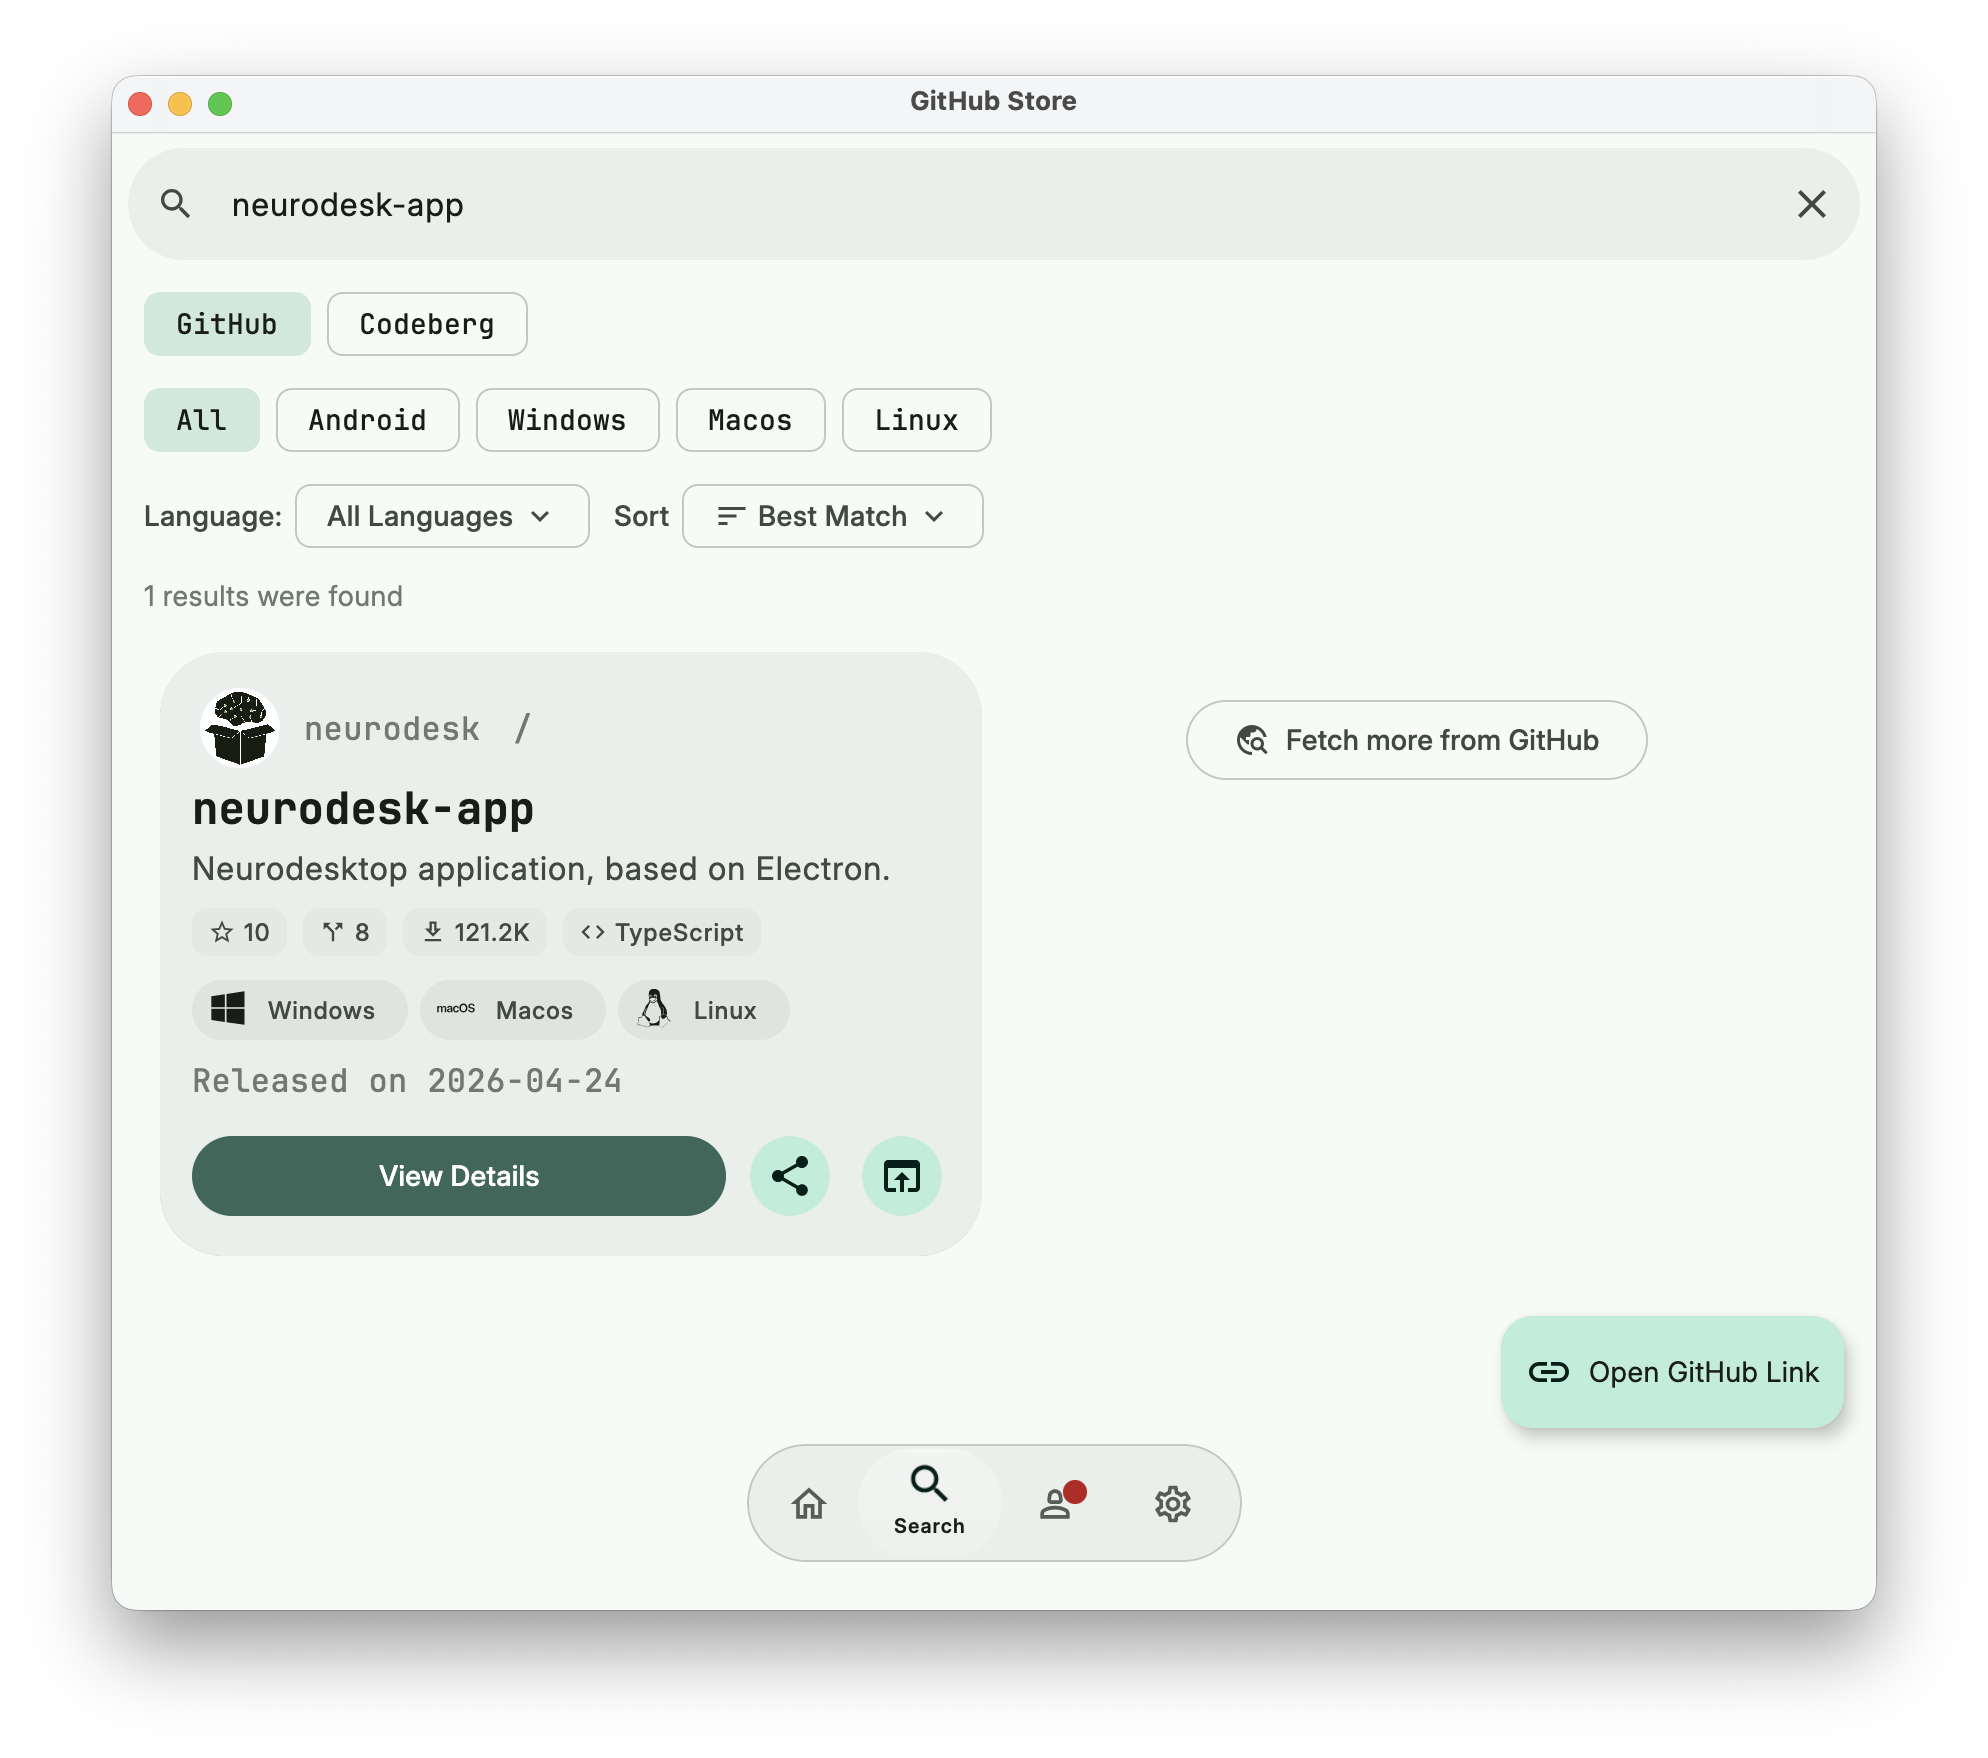
Already have GitHub Store installed?
Search for Neurodesk-app to install directly – works on all operating systems.
Minimum system requirements
- At least 8 GB free disk space for the Neurodesktop base image
- A container engine (see Step 2 below)
Step 2: Set up a container engine
The Neurodesk App needs a container engine to run neuroimaging tools. Which engine you use depends on whether you have admin (root) privileges on your system.
Requires: Admin/root access on your machine.
If you already have Docker installed, skip to Step 3. Otherwise, install Docker:
Verify your installation:
docker --version
docker run hello-world
Apple Silicon users: Enable Rosetta support in Docker Desktop settings for best performance.
Requires: Admin/root access on your machine.
Podman is a drop-in replacement for Docker. Install it using your system’s package manager or from podman.io.
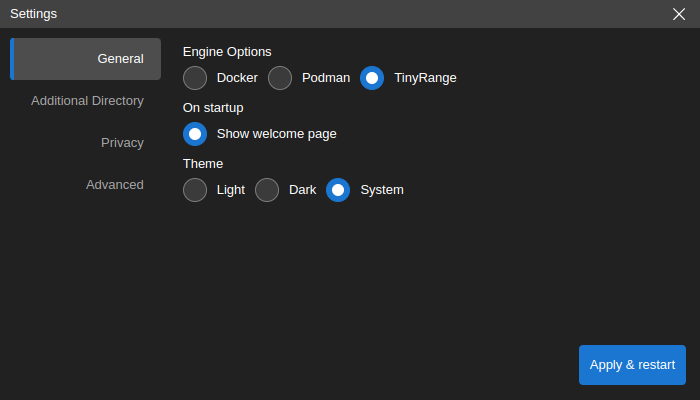
Use this if you do NOT have admin/root access.
TinyRange is included with the Neurodesk App – no separate install is needed on Windows and Linux.
macOS only: You also need to install QEMU:
brew install qemuVerify with:
qemu-system-aarch64 --versionStep 3: Launch the app
Open the Neurodesk App from your operating system’s application menu, or run neurodeskapp from the command line.
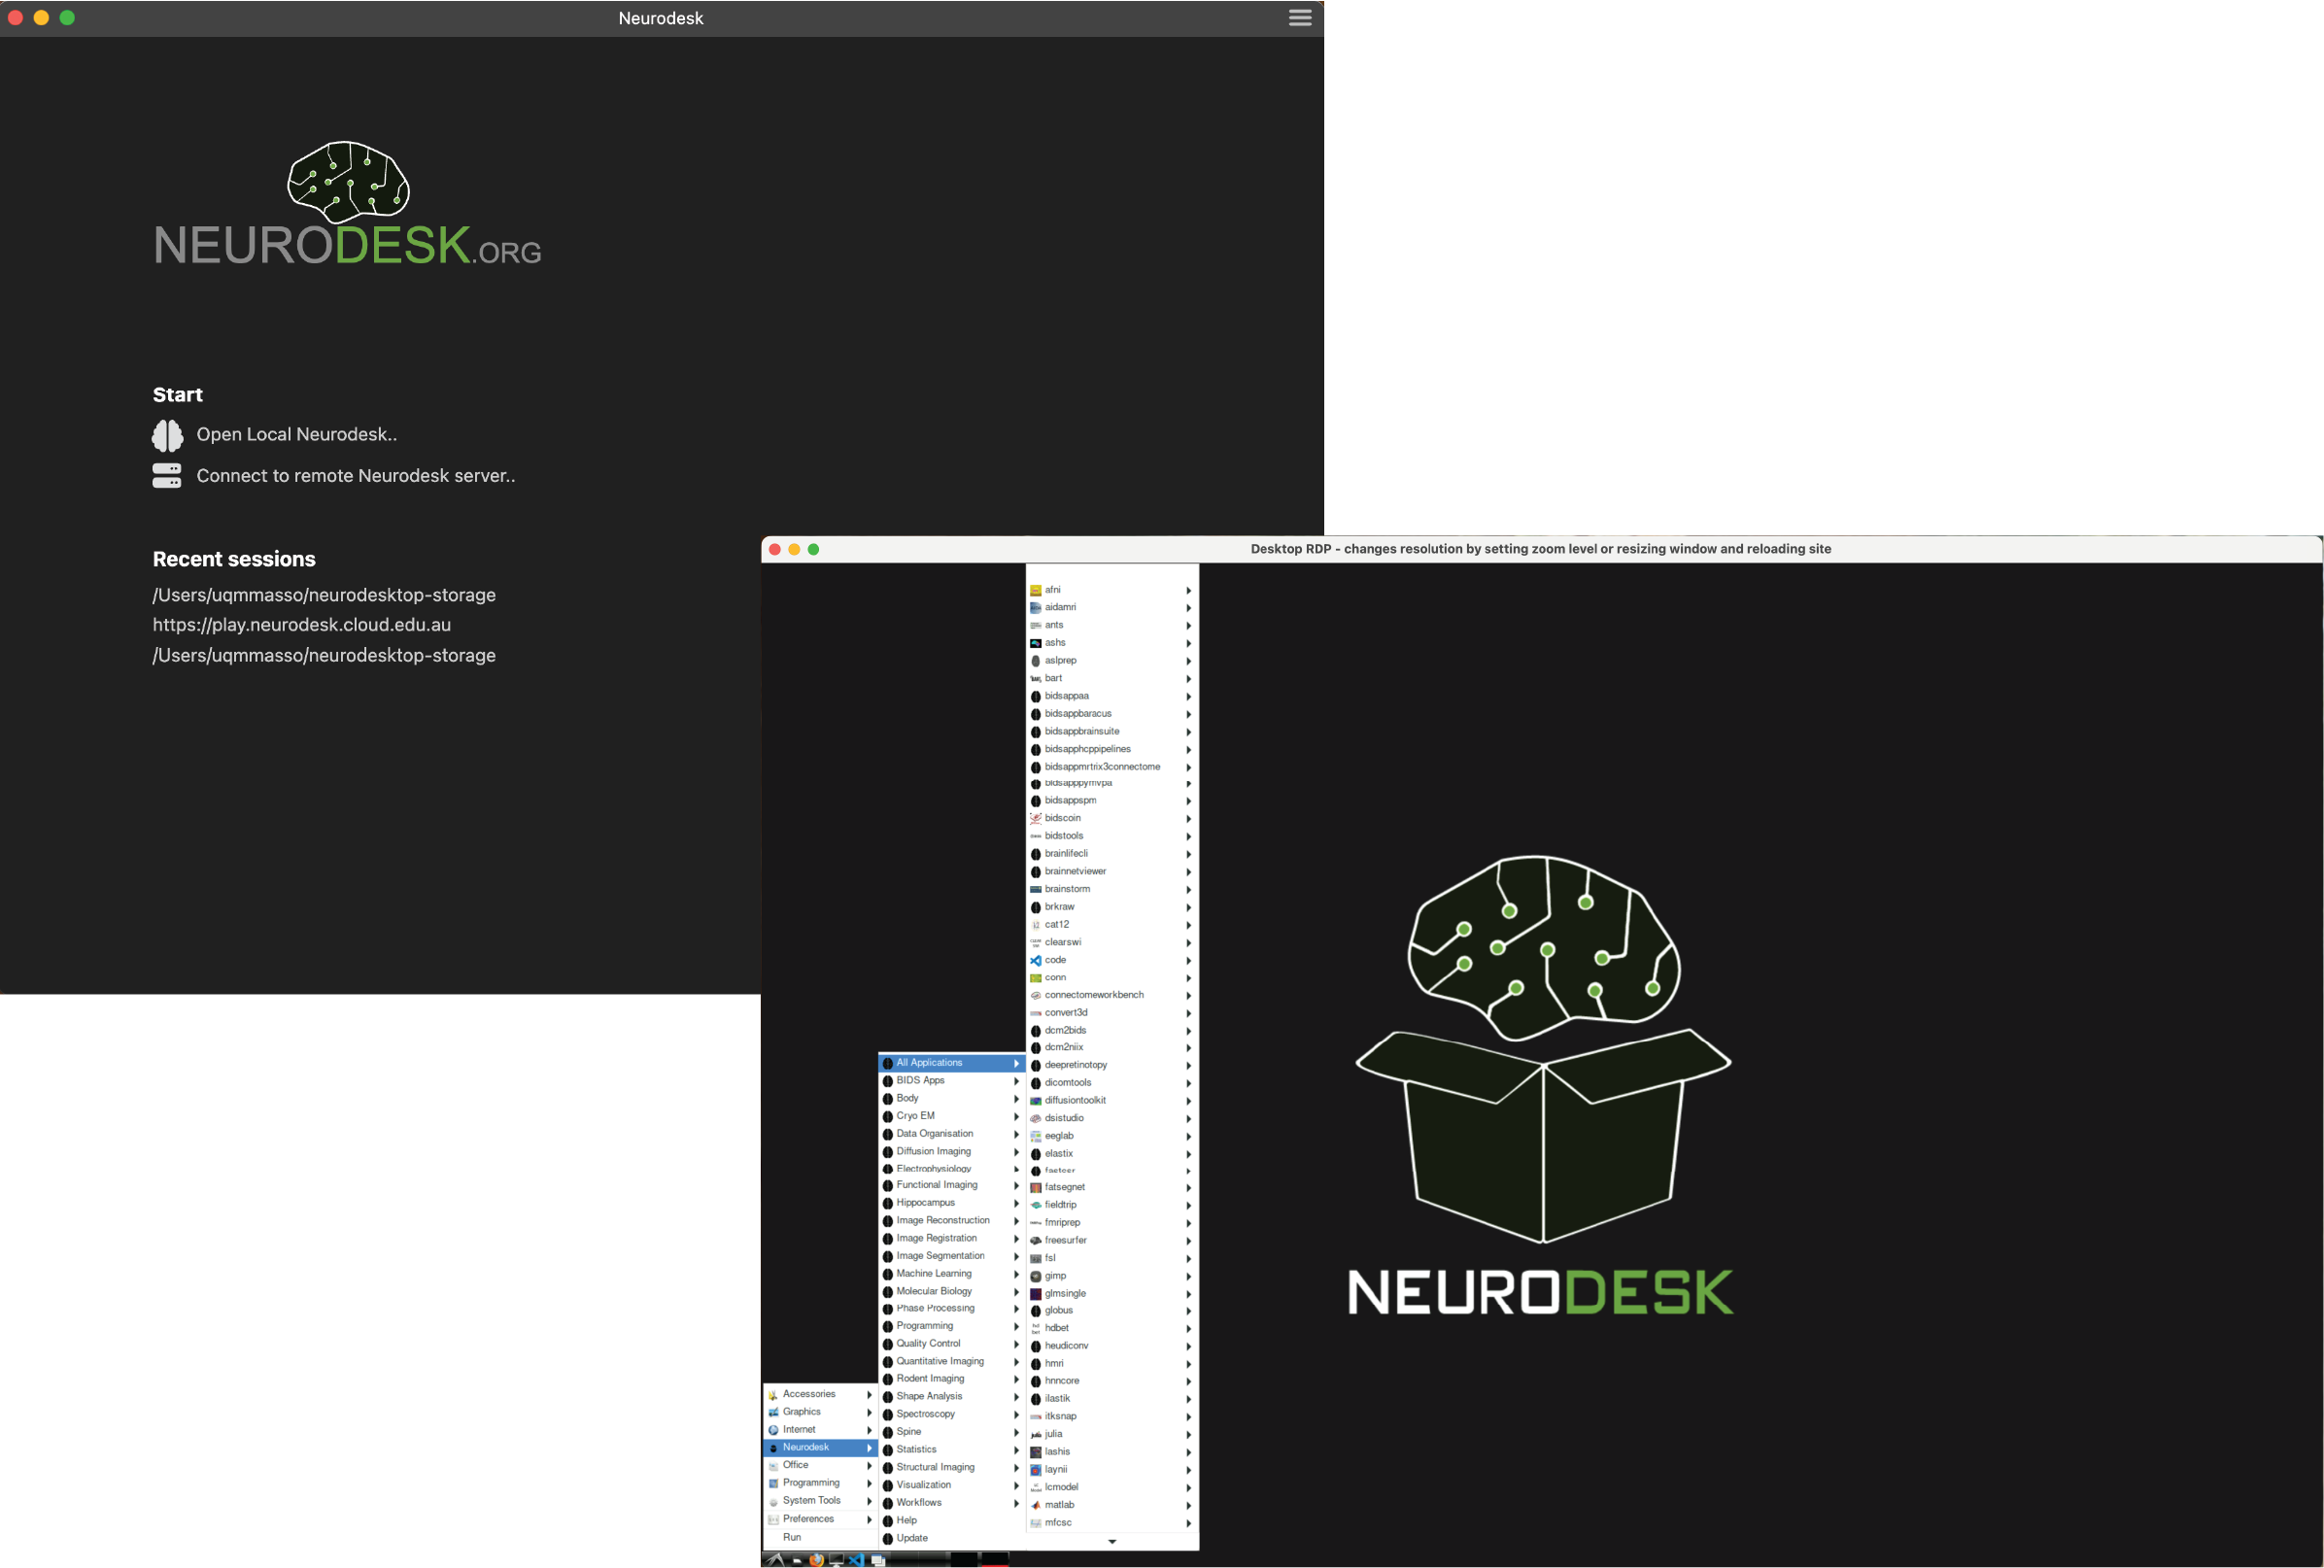
On the Welcome Page you have two options:
- Open Local Neurodesk – starts a Neurodesk session on your machine.
- Connect to remote Neurodesk server – connects to an existing Neurodesk server running elsewhere.
Local sessions
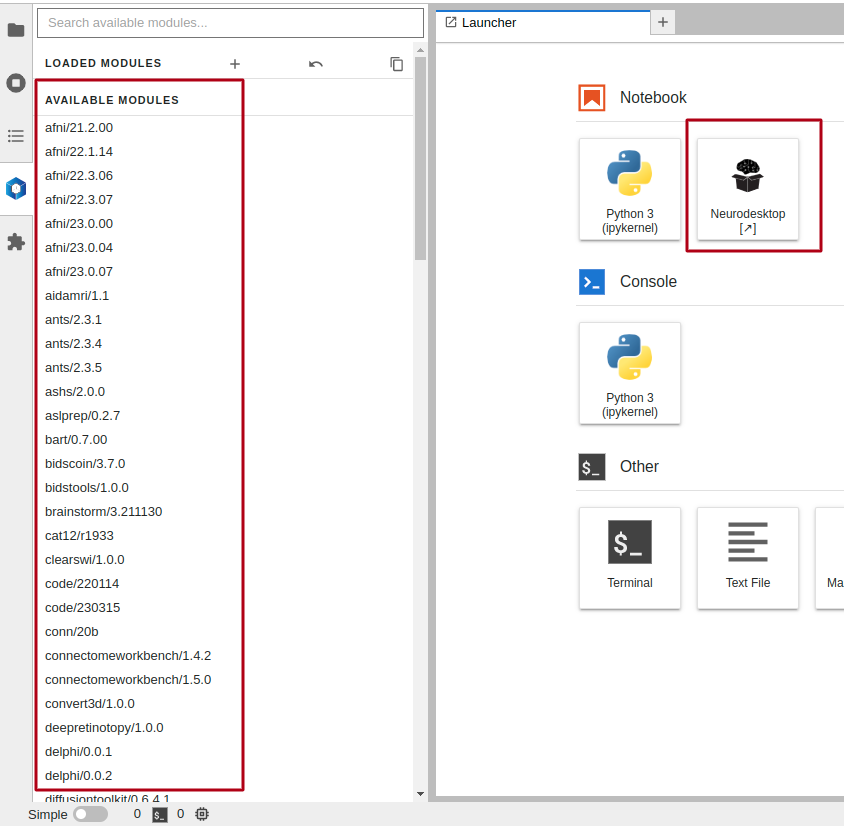
Click “Open Local Neurodesk” to launch a local session. This opens a JupyterLab interface with two ways to use Neurodesk:
- Click the NeurodeskApp icon to launch the full desktop interface in a new window.
- Use the command line in JupyterLab and load tools via the module system in the left sidebar.
Remote sessions
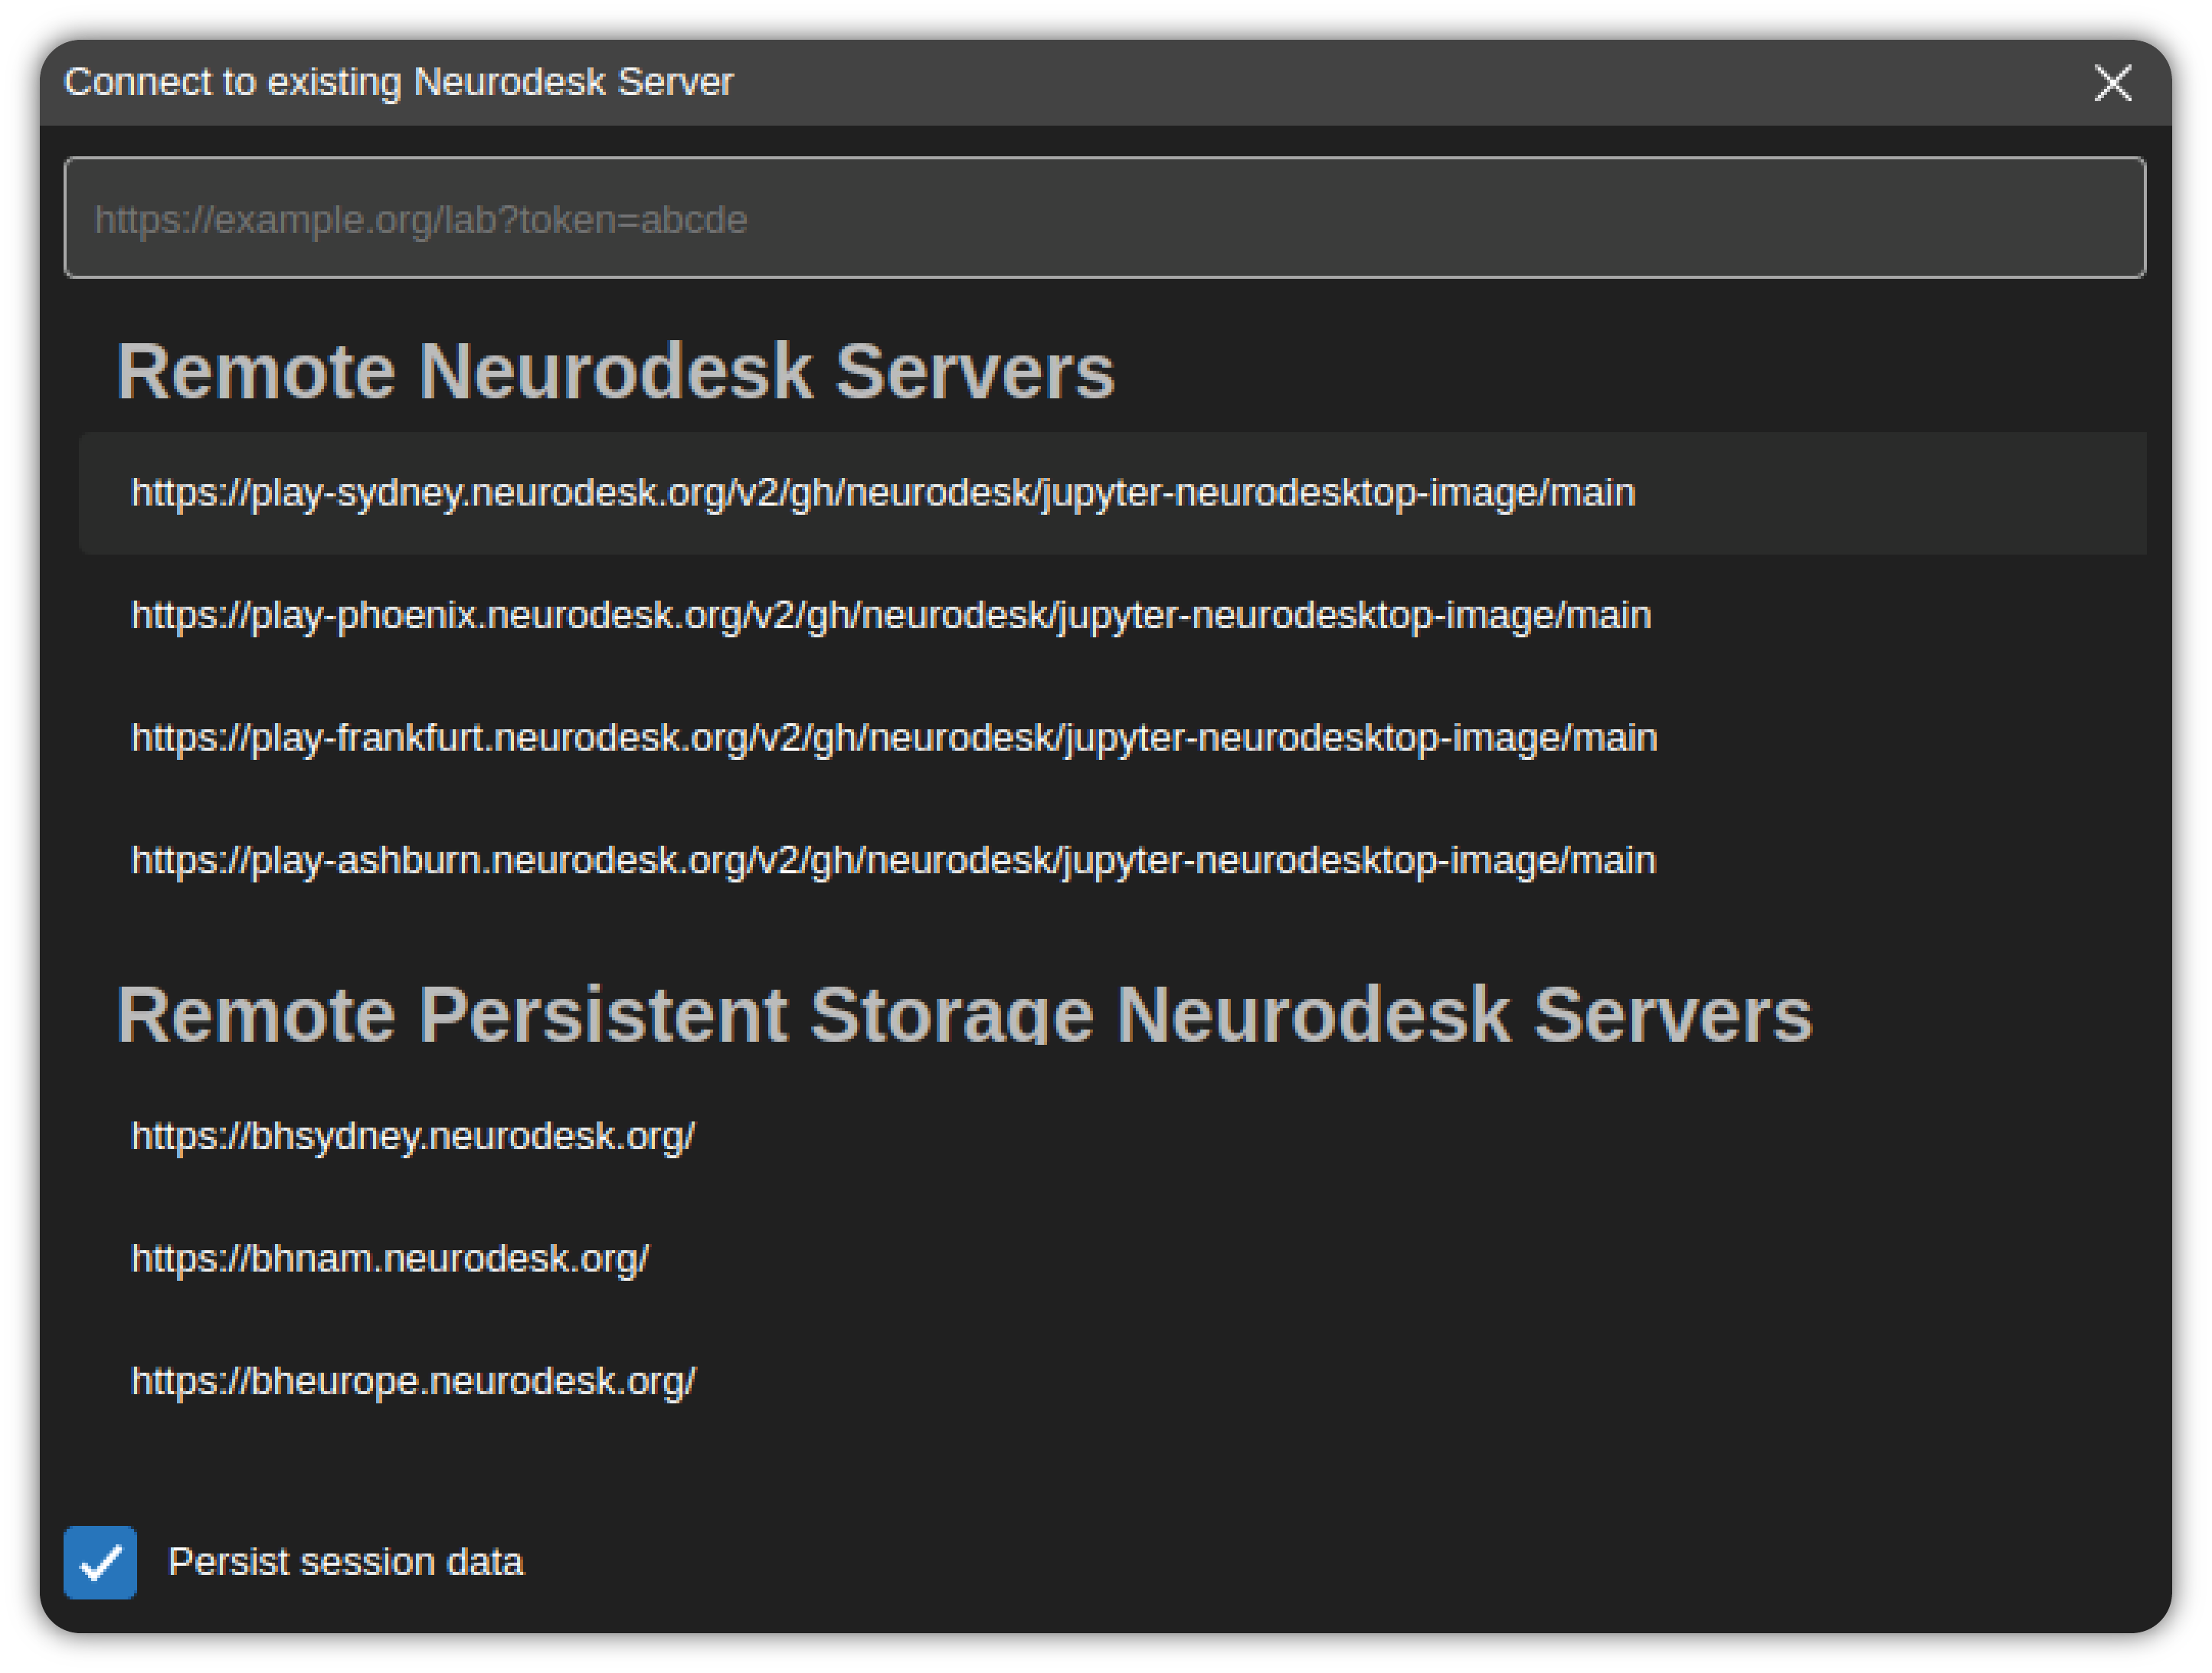
Click “Connect to remote Neurodesk server” to connect to a server running elsewhere.
Select the provided servers in the list or Enter the URL of the server and press Enter to connect.
Data storage
For a full overview of how data storage works in Neurodesk (default paths, cloud storage, transferring files), see Data Storage.
Adding a custom data directory
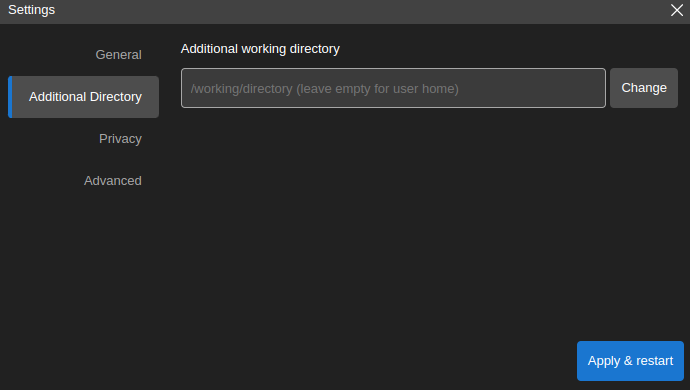
In Settings, select “Additional Directory” in the sidebar, click “Change” to choose a local directory, then click “Apply & restart”. The directory will appear at /home/jovyan/data inside the app.
macOS with Podman: To mount an external drive, run these commands once:
podman machine reset -f
podman machine init --rootful --now -v /Volumes:/Volumes -v $HOME:$HOME podman-machine-default
Warning: podman machine reset -f will delete all existing Podman machines, containers, and their data. Back up any important data stored inside Podman containers before running this command.
Then set the path in the Neurodesk App settings.
If you use conda environments to install packages or kernels, see the conda tutorial.
2 - Troubleshooting
Docker permission denied
If you see /var/run/docker.sock: connect: permission denied:
Add your user to the
dockergroup (creates the group first if it doesn’t exist):getent group docker >/dev/null || sudo groupadd docker sudo usermod -aG docker $USER newgrp dockerSet the socket permissions so only
rootand members of thedockergroup can access it:sudo chown root:docker /var/run/docker.sock sudo chmod 660 /var/run/docker.sockThis sets the socket to
rw-rw----, removing access for all other users. You must be in thedockergroup (step 1) for this to work.Log out and back in (or reboot) for the group change to take full effect. The
newgrpcommand above applies it to the current shell only.
AppArmor sandbox error (Ubuntu 24.04)
If you see FATAL:setuid_sandbox_host.cc(158)] The SUID sandbox helper binary was found, but is not configured correctly, create the file /etc/apparmor.d/neurodeskapp with this content:
# This profile allows everything and only exists to give the
# application a name instead of having the label "unconfined"

abi <abi/4.0>,
include <tunables/global>

profile neurodeskapp "/opt/NeurodeskApp/neurodeskapp" flags=(unconfined) {
  userns,

  # Site-specific additions and overrides. See local/README for details.
  include if exists <local/neurodeskapp>
}
Then restart your computer and launch the app again.
Running with Podman on restricted Linux systems
This is an advanced guide for getting the Neurodesk App working with Podman (instead of Docker) on locked-down Linux machines – for example, hosts that use Active Directory (AD) accounts, an NFS-mounted home or data directory, and where image pulls through the App tend to time out. On a standard desktop with Docker or rootful Podman you should not need any of this.
The steps below were validated with Podman 3.4.4 on Ubuntu 22. Replace every <placeholder> with your own values.
1. Install the Podman shim script
Some environments need a wrapper around podman to fix an NFS volume-mount bug and to sanitize the UID/GID that the App passes to the container.
Create the directory if it doesn’t already exist:
mkdir -p ~/.local/binThen create a file named ~/.local/bin/podman with the following content. This shim will be found on PATH before the real podman binary:
#!/bin/bash

CURRENT_UID=$(id -u)
CURRENT_GID=$(id -g)

NEW_ARGS=()
for arg in "$@"; do
    # 1. Fix the NFS volume-mount bug by appending the overlay override option (:O)
    if [[ "$arg" == *"/nfs/<mount>"* ]]; then
        arg="${arg//\/nfs\/<mount>:\/data/\/nfs\/<mount>:\/data:O}"
    fi

    # 2. Sanitize the network IDs
    if [[ "$arg" == *"NB_UID=${CURRENT_UID}"* ]]; then
        arg="${arg//NB_UID=${CURRENT_UID}/NB_UID=1000}"
    fi
    if [[ "$arg" == *"NB_GID=${CURRENT_GID}"* ]]; then
        arg="${arg//NB_GID=${CURRENT_GID}/NB_GID=100}"
    fi
    NEW_ARGS+=("$arg")
done

exec /usr/bin/podman "${NEW_ARGS[@]}"
Then make it executable:
chmod +x ~/.local/bin/podmanReplace <mount> with your NFS mount point. If you are not using an NFS mount, you can omit the overlay (:O) fix entirely.
The UID/GID sanitizing is only needed for non-person AD accounts that are not assigned a UID/GID. If your organization uses AD with a normal person account that has an assigned UID and GID, you most likely do not need this and can skip the shim.
If you do need the UID workaround, add your account to /etc/subuid and /etc/subgid (this is why the shim above uses 1000):
# /etc/subuid
<USERNAME>:1000:65536

# /etc/subgid
<USERNAME>:100000:65536
2. Download the image over the CLI
Because pulls through the App can time out, pull and re-tag the image from a terminal first (run this as the user who will launch the App):
podman pull ghcr.io/neurodesk/neurodesktop/neurodesktop:<version>
podman tag ghcr.io/neurodesk/neurodesktop/neurodesktop:<version> docker.io/vnmd/neurodesktop:<version>
Then stop any lingering Podman processes (e.g. a hung pull) and Neurodesk containers, and migrate Podman. The App creates containers named neurodeskapp or neurodeskapp-<port>:
# Stop any running Neurodesk containers
podman stop neurodeskapp 2>/dev/null
podman rm -f neurodeskapp 2>/dev/null
# Force-kill any hung podman or neurodeskapp processes
pkill -9 -u <USERNAME> -f "podman|neurodeskapp"
podman system migrate
3. Point the launcher at the shim
Edit the application shortcut so it uses your ~/.local/bin PATH:
sudo nano /usr/share/applications/neurodeskapp.desktopSet the Exec line to:
Exec=bash -c "PATH=\"$HOME/.local/bin:$PATH\" /opt/NeurodeskApp/neurodeskapp" %UType this line out by hand rather than copy-pasting – invisible characters and whitespace from a copy can break the launcher.
Then launch the App from the application menu (the shortcut), not from the CLI.
4. Recovering from a broken volume or incompatible storage
If a session fails to start, delete the broken home volume and try again:
# Stop any running Neurodesk containers
podman stop neurodeskapp 2>/dev/null
podman rm -f neurodeskapp 2>/dev/null
# Force-kill any hung processes
pkill -9 -u $USER -f "podman|neurodeskapp"

# Delete the broken home volume
podman volume rm neurodesk-home
If Podman’s storage database is incompatible (for example after a Podman upgrade), reset it:
podman system reset -fWarning: podman machine reset -f will delete all existing Podman machines, containers, and their data. Back up any important data stored inside Podman containers before running this command.
Then set the path in the Neurodesk App settings.
If that still doesn’t work, remove the stale storage config:
sudo rm -f /home/$USER/.config/containers/storage.confThen re-pull and re-tag the image (step 2 above), run podman system migrate, and launch again via the shortcut.
3 - Uninstalling
Find NeurodeskApp.app in Finder (in /Applications or ~/Applications) and move it to Trash (CMD + Delete). Then remove application data:
rm -rf ~/Library/neurodeskapp
rm -rf ~/Library/Application\ Support/neurodeskapp
Go to Start Menu > Settings > Apps and uninstall Neurodesk App.
To remove application cache, delete C:\Users\<username>\AppData\Roaming\neurodeskapp. The AppData directory is hidden – enable hidden items in Windows Explorer under View > Show > Hidden Items.
# Debian / Ubuntu
sudo apt-get purge neurodeskapp
sudo rm /usr/bin/neurodeskapp
rm -rf ~/.config/neurodeskapp

# Fedora / RHEL / SUSE
sudo rpm -e neurodeskapp
sudo rm /usr/bin/neurodeskapp
rm -rf ~/.config/neurodeskapp

# Arch-based
sudo pacman -Rs neurodeskapp-bin    # -Rs removes all orphaned deps
rm -rf ~/.config/neurodeskapp