---
title: "Statistical Parametric Mapping (SPM)"
linkTitle: "SPM"
weight: 1
tags: ["SPM", "functional imaging"]
author: Steffen Bollmann
aliases:
- /tutorials/functional_imaging/spm
description: >
A tutorial for running a functional MRI analysis in SPM.
---
# Statistical Parametric Mapping (SPM)
A tutorial for running a functional MRI analysis in SPM.
> _This tutorial was created by Steffen Bollmann._
>
> Email: s.bollmannn@uq.edu.au
>
> Github: @stebo85
>
> Twitter: @sbollmann_MRI
>
[Getting Set Up with Neurodesk](https://neurodesk.org/getting-started/)
This tutorial is based on the excellent tutorial from Andy's Brain book: https://andysbrainbook.readthedocs.io/en/latest/SPM/SPM_Overview.html
Our version here is a shortened and adjusted version for using on the Neurodesk platform.
## Download data
First, let's download the data. We will use this open dataset: https://openneuro.org/datasets/ds000102/versions/00001/download
Open a terminal and use datalad to install the dataset:
```
cd neurodesktop-storage
datalad install https://github.com/OpenNeuroDatasets/ds000102.git
```
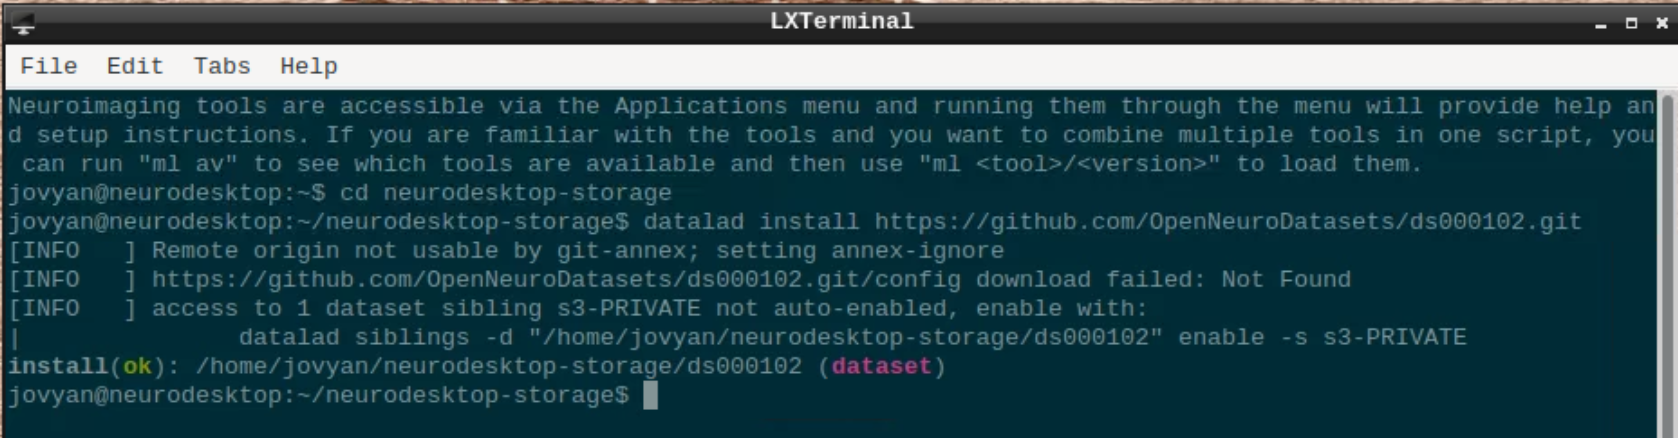 We will use subject 08 as an example here, so we use datalad to download sub-08 and since SPM doesn't support compressed files, we need to unpack them:
```
cd ds000102
datalad get sub-08/
gunzip sub-08/anat/sub-08_T1w.nii.gz -f
gunzip sub-08/func/sub-08_task-flanker_run-1_bold.nii.gz -f
gunzip sub-08/func/sub-08_task-flanker_run-2_bold.nii.gz -f
chmod a+rw sub-08/ -R
```
The task used is described here: https://andysbrainbook.readthedocs.io/en/latest/SPM/SPM_Short_Course/SPM_02_Flanker.html
## Starting SPM and visualizing the data
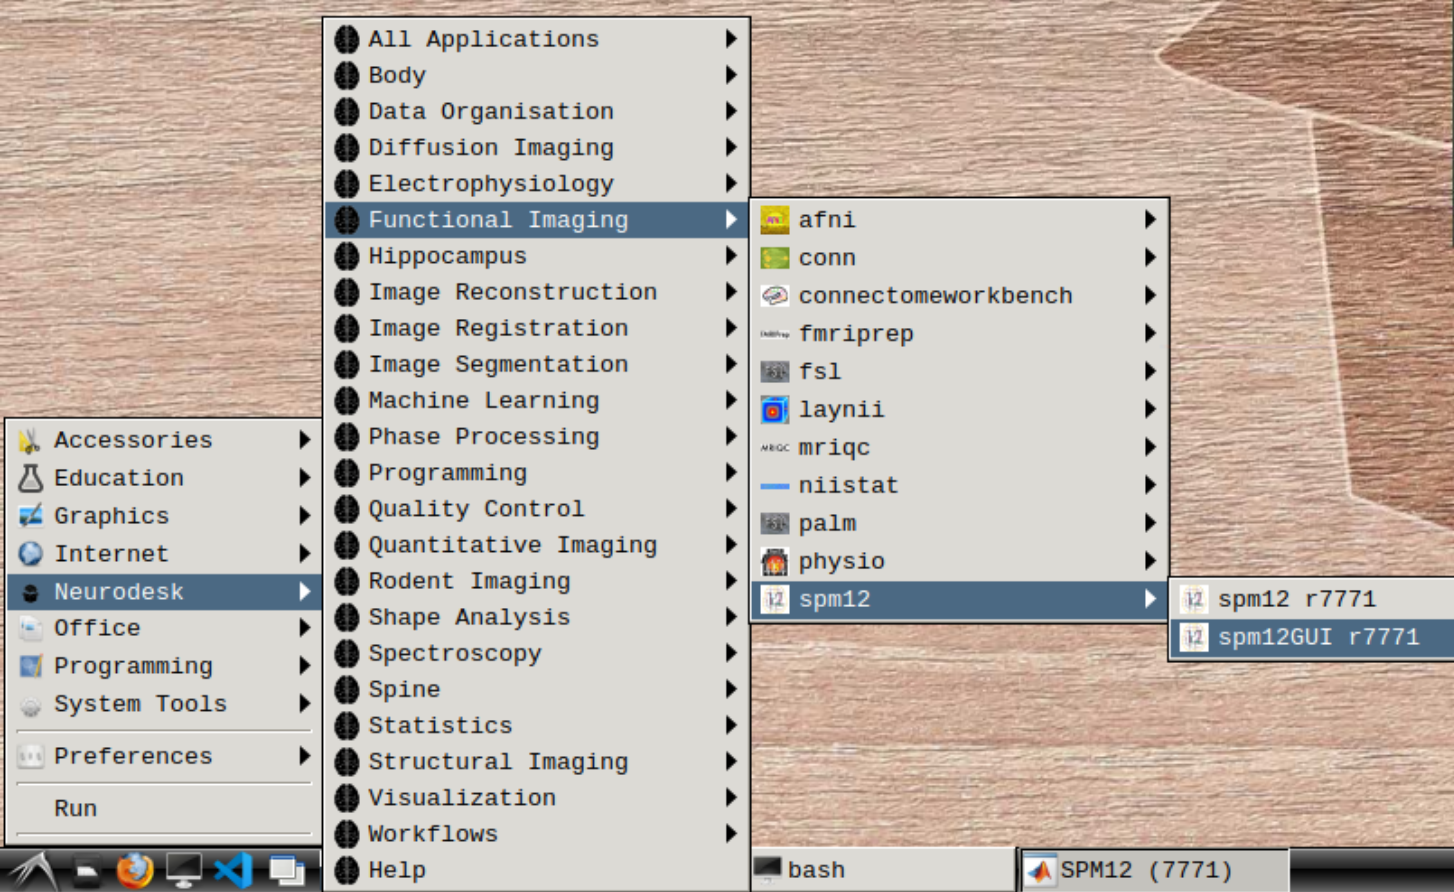
Start spm12GUI from the Application Menu:
We will use subject 08 as an example here, so we use datalad to download sub-08 and since SPM doesn't support compressed files, we need to unpack them:
```
cd ds000102
datalad get sub-08/
gunzip sub-08/anat/sub-08_T1w.nii.gz -f
gunzip sub-08/func/sub-08_task-flanker_run-1_bold.nii.gz -f
gunzip sub-08/func/sub-08_task-flanker_run-2_bold.nii.gz -f
chmod a+rw sub-08/ -R
```
The task used is described here: https://andysbrainbook.readthedocs.io/en/latest/SPM/SPM_Short_Course/SPM_02_Flanker.html
## Starting SPM and visualizing the data
Start spm12GUI from the Application Menu:
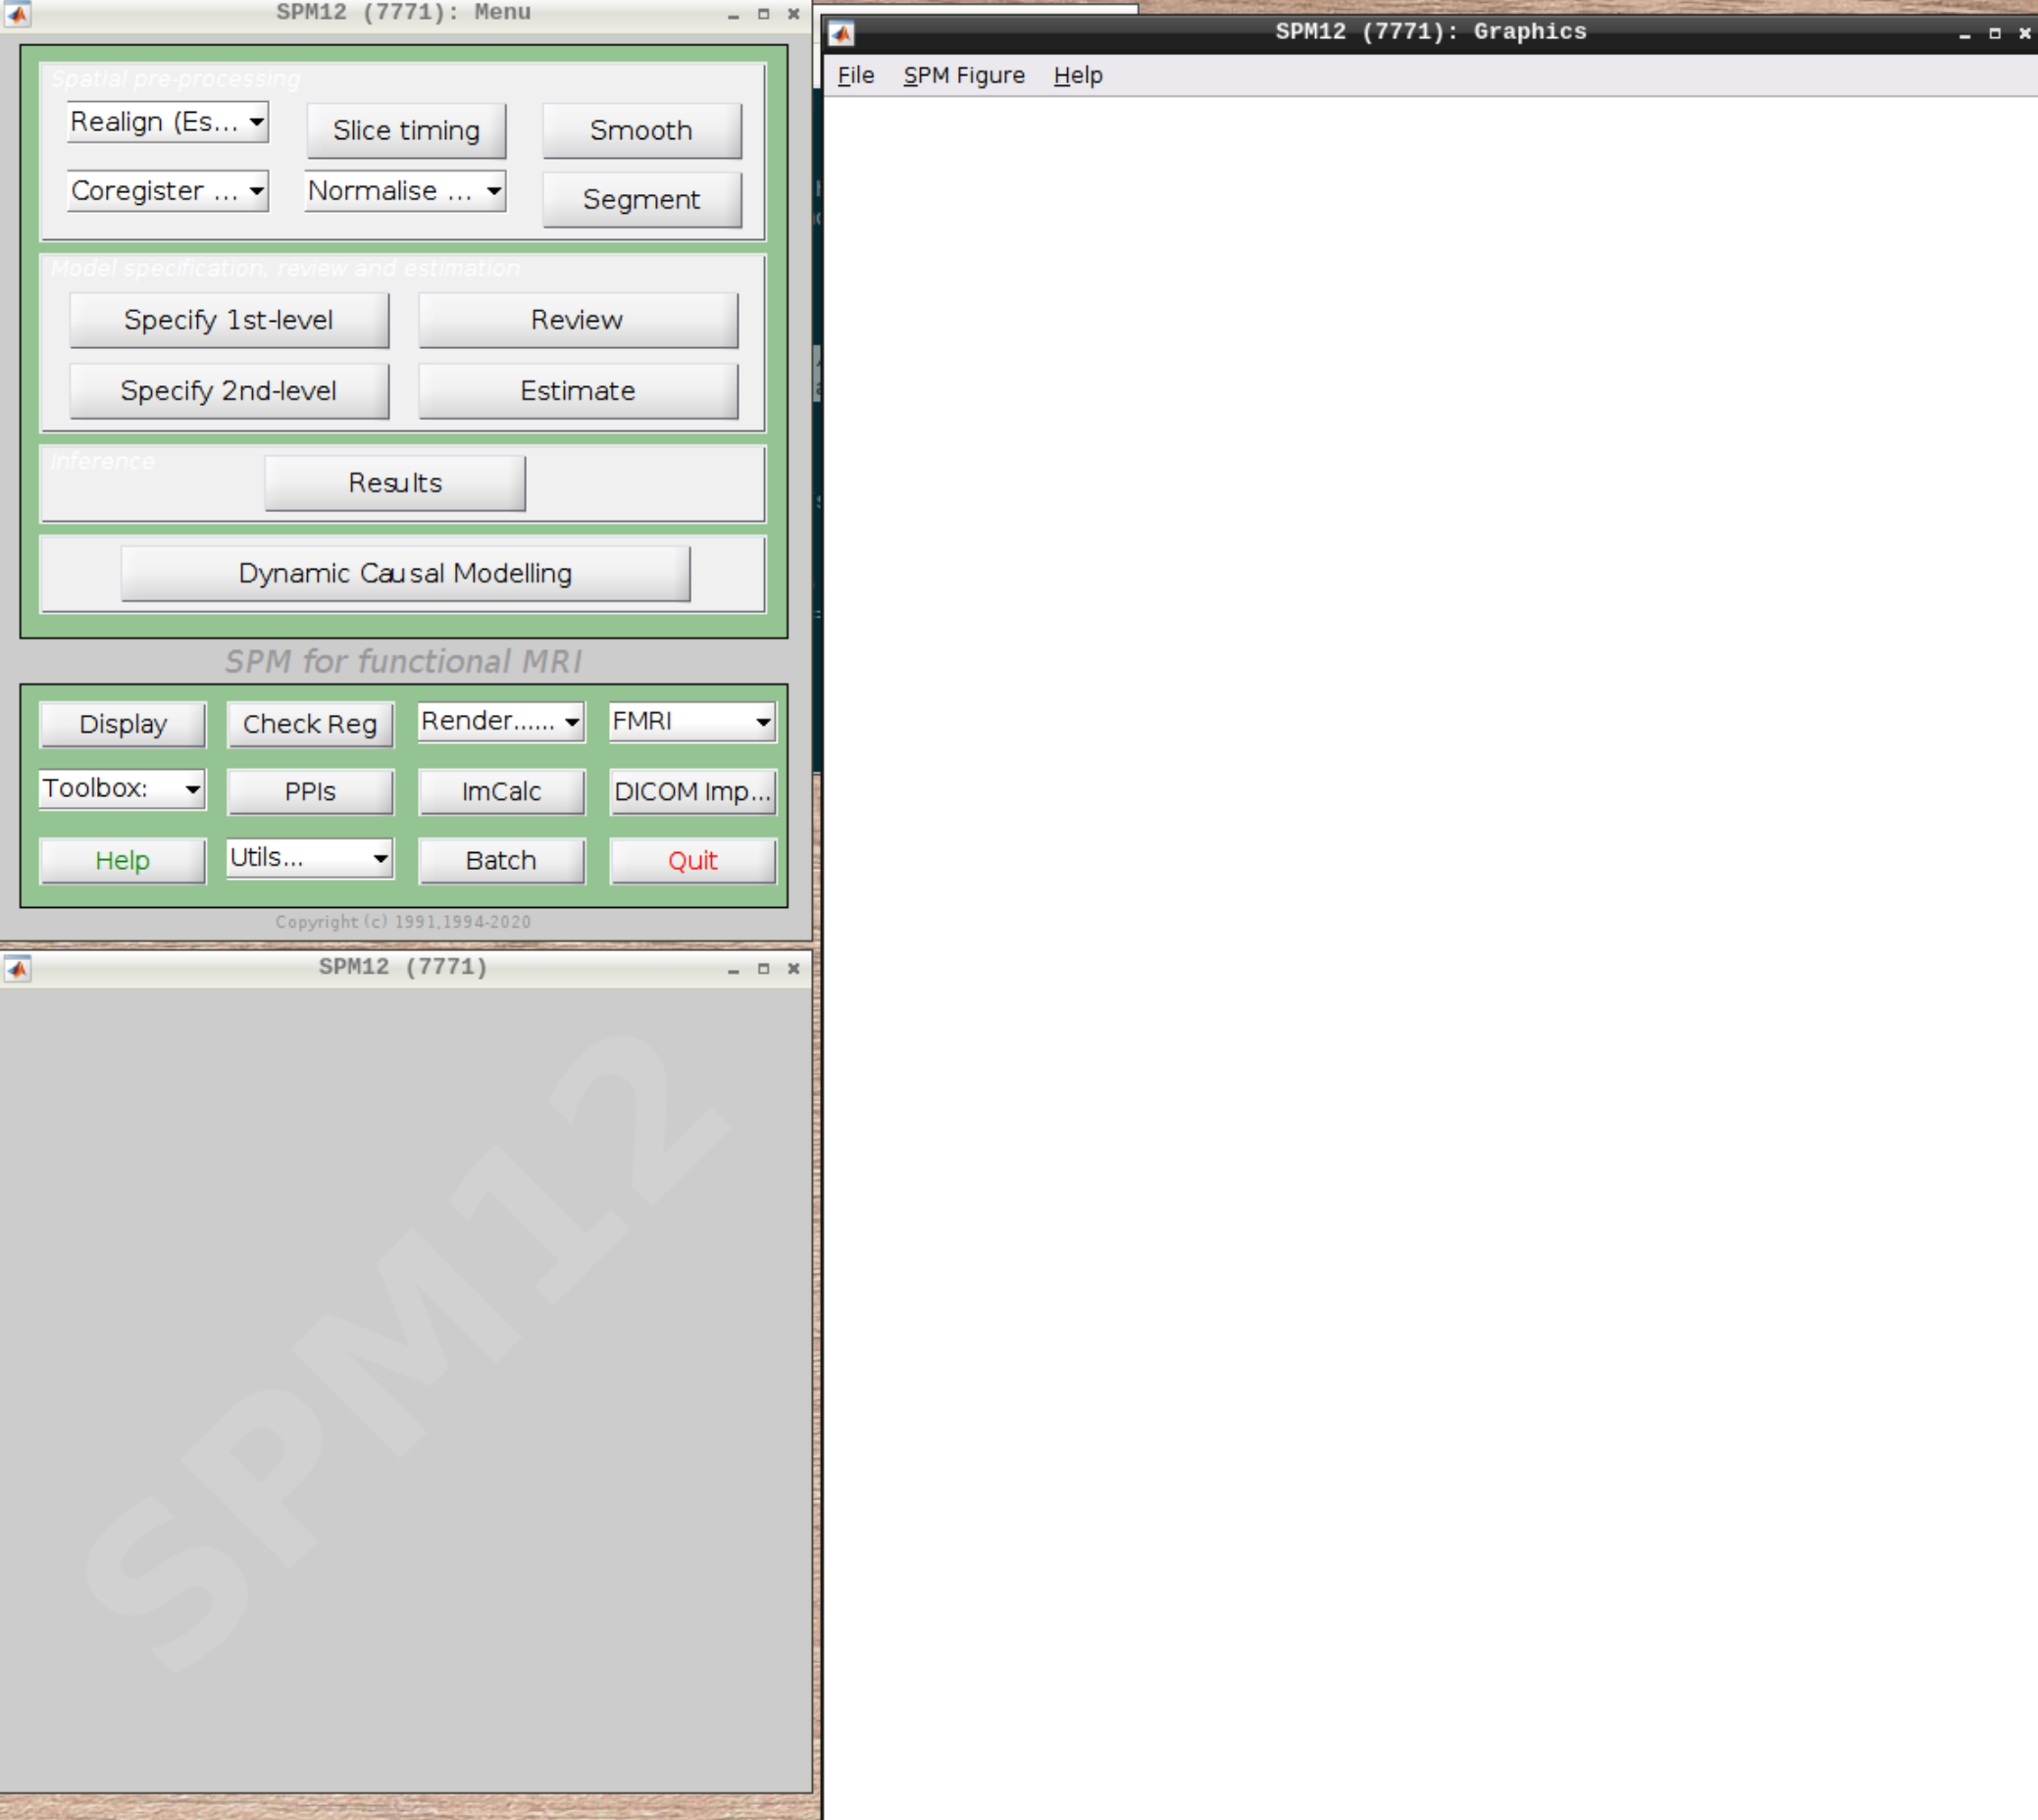
 When the SPM menu loaded, click on fMRI and the full SPM interface should open up:
 For convenience let's change our default directory to our example subject. Click on `Utils` and select `CD`:
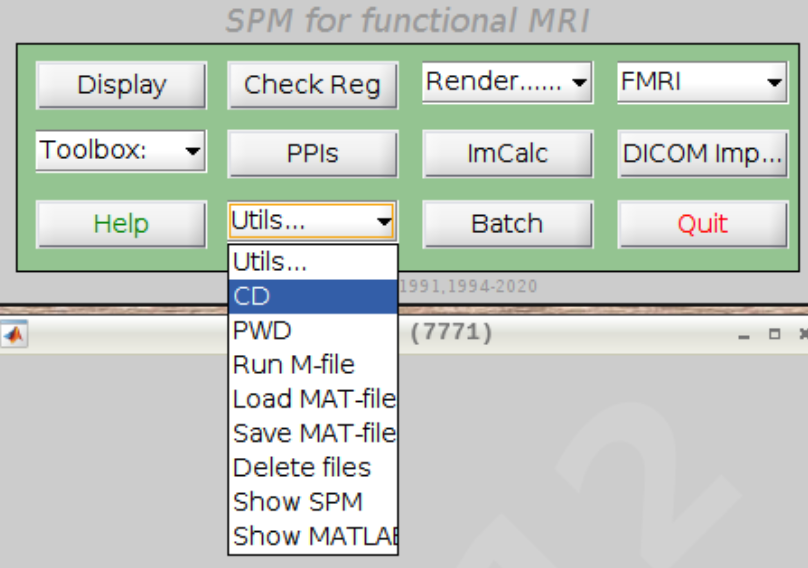 Then navigate to sub-08 and select the directory in the right browser window:
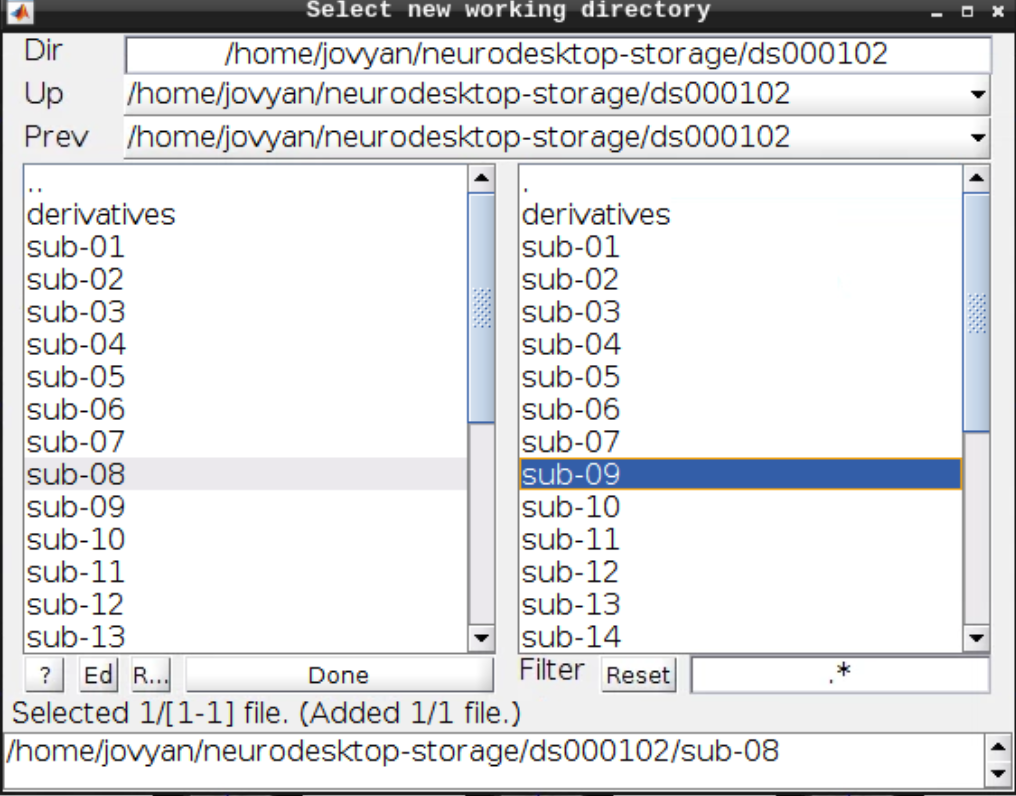 Now let's visualize the anatomical T1 scan of subject 08 by clicking on Display and navigating and selecting the anatomical scan:
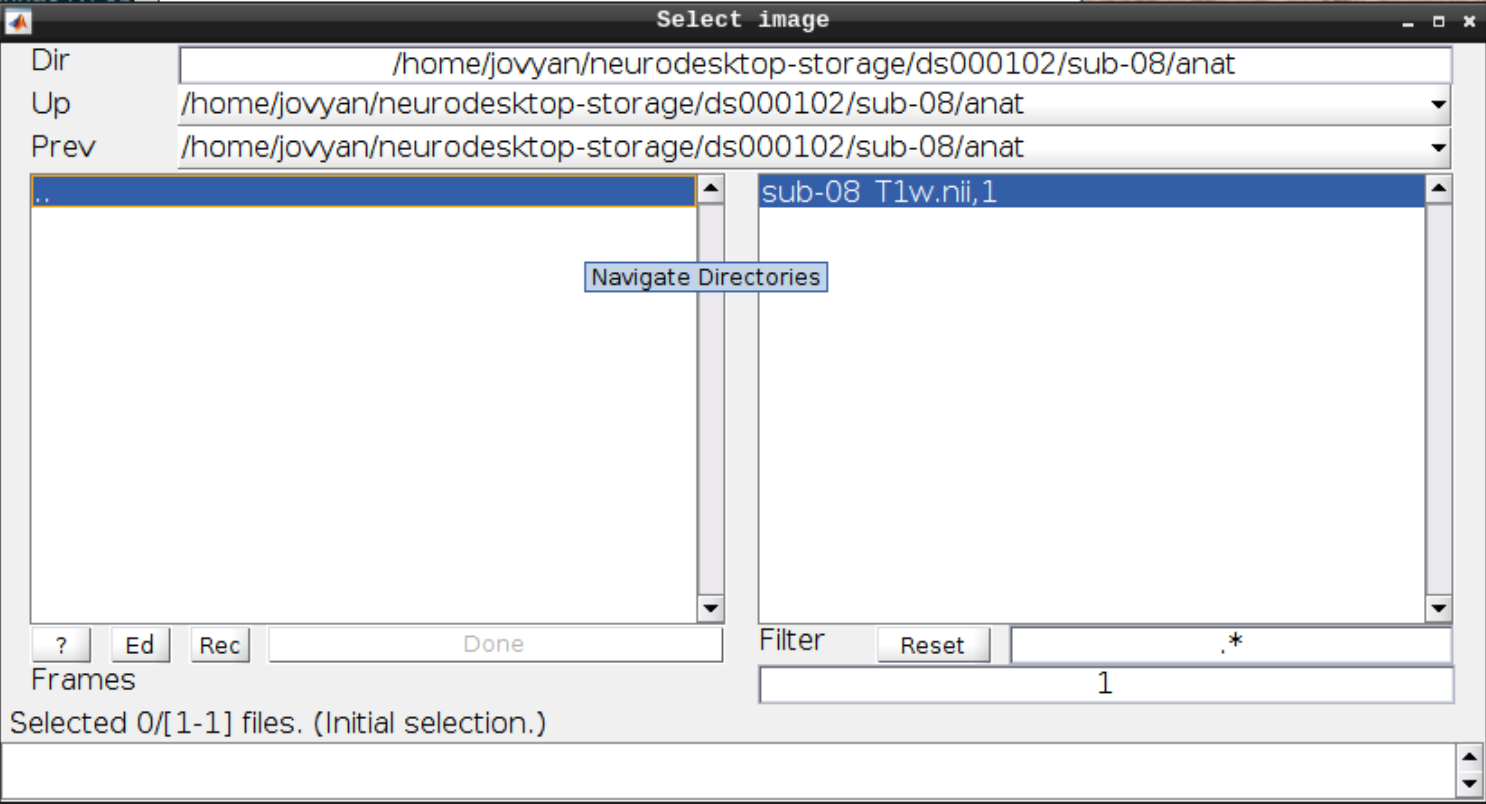
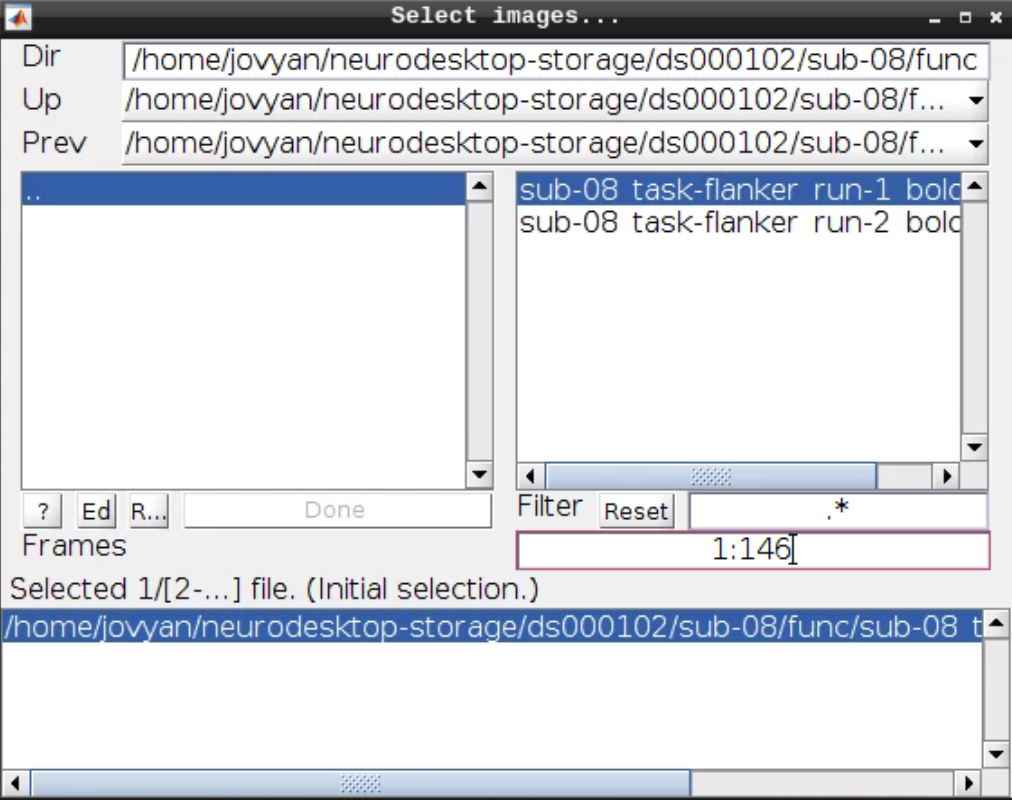
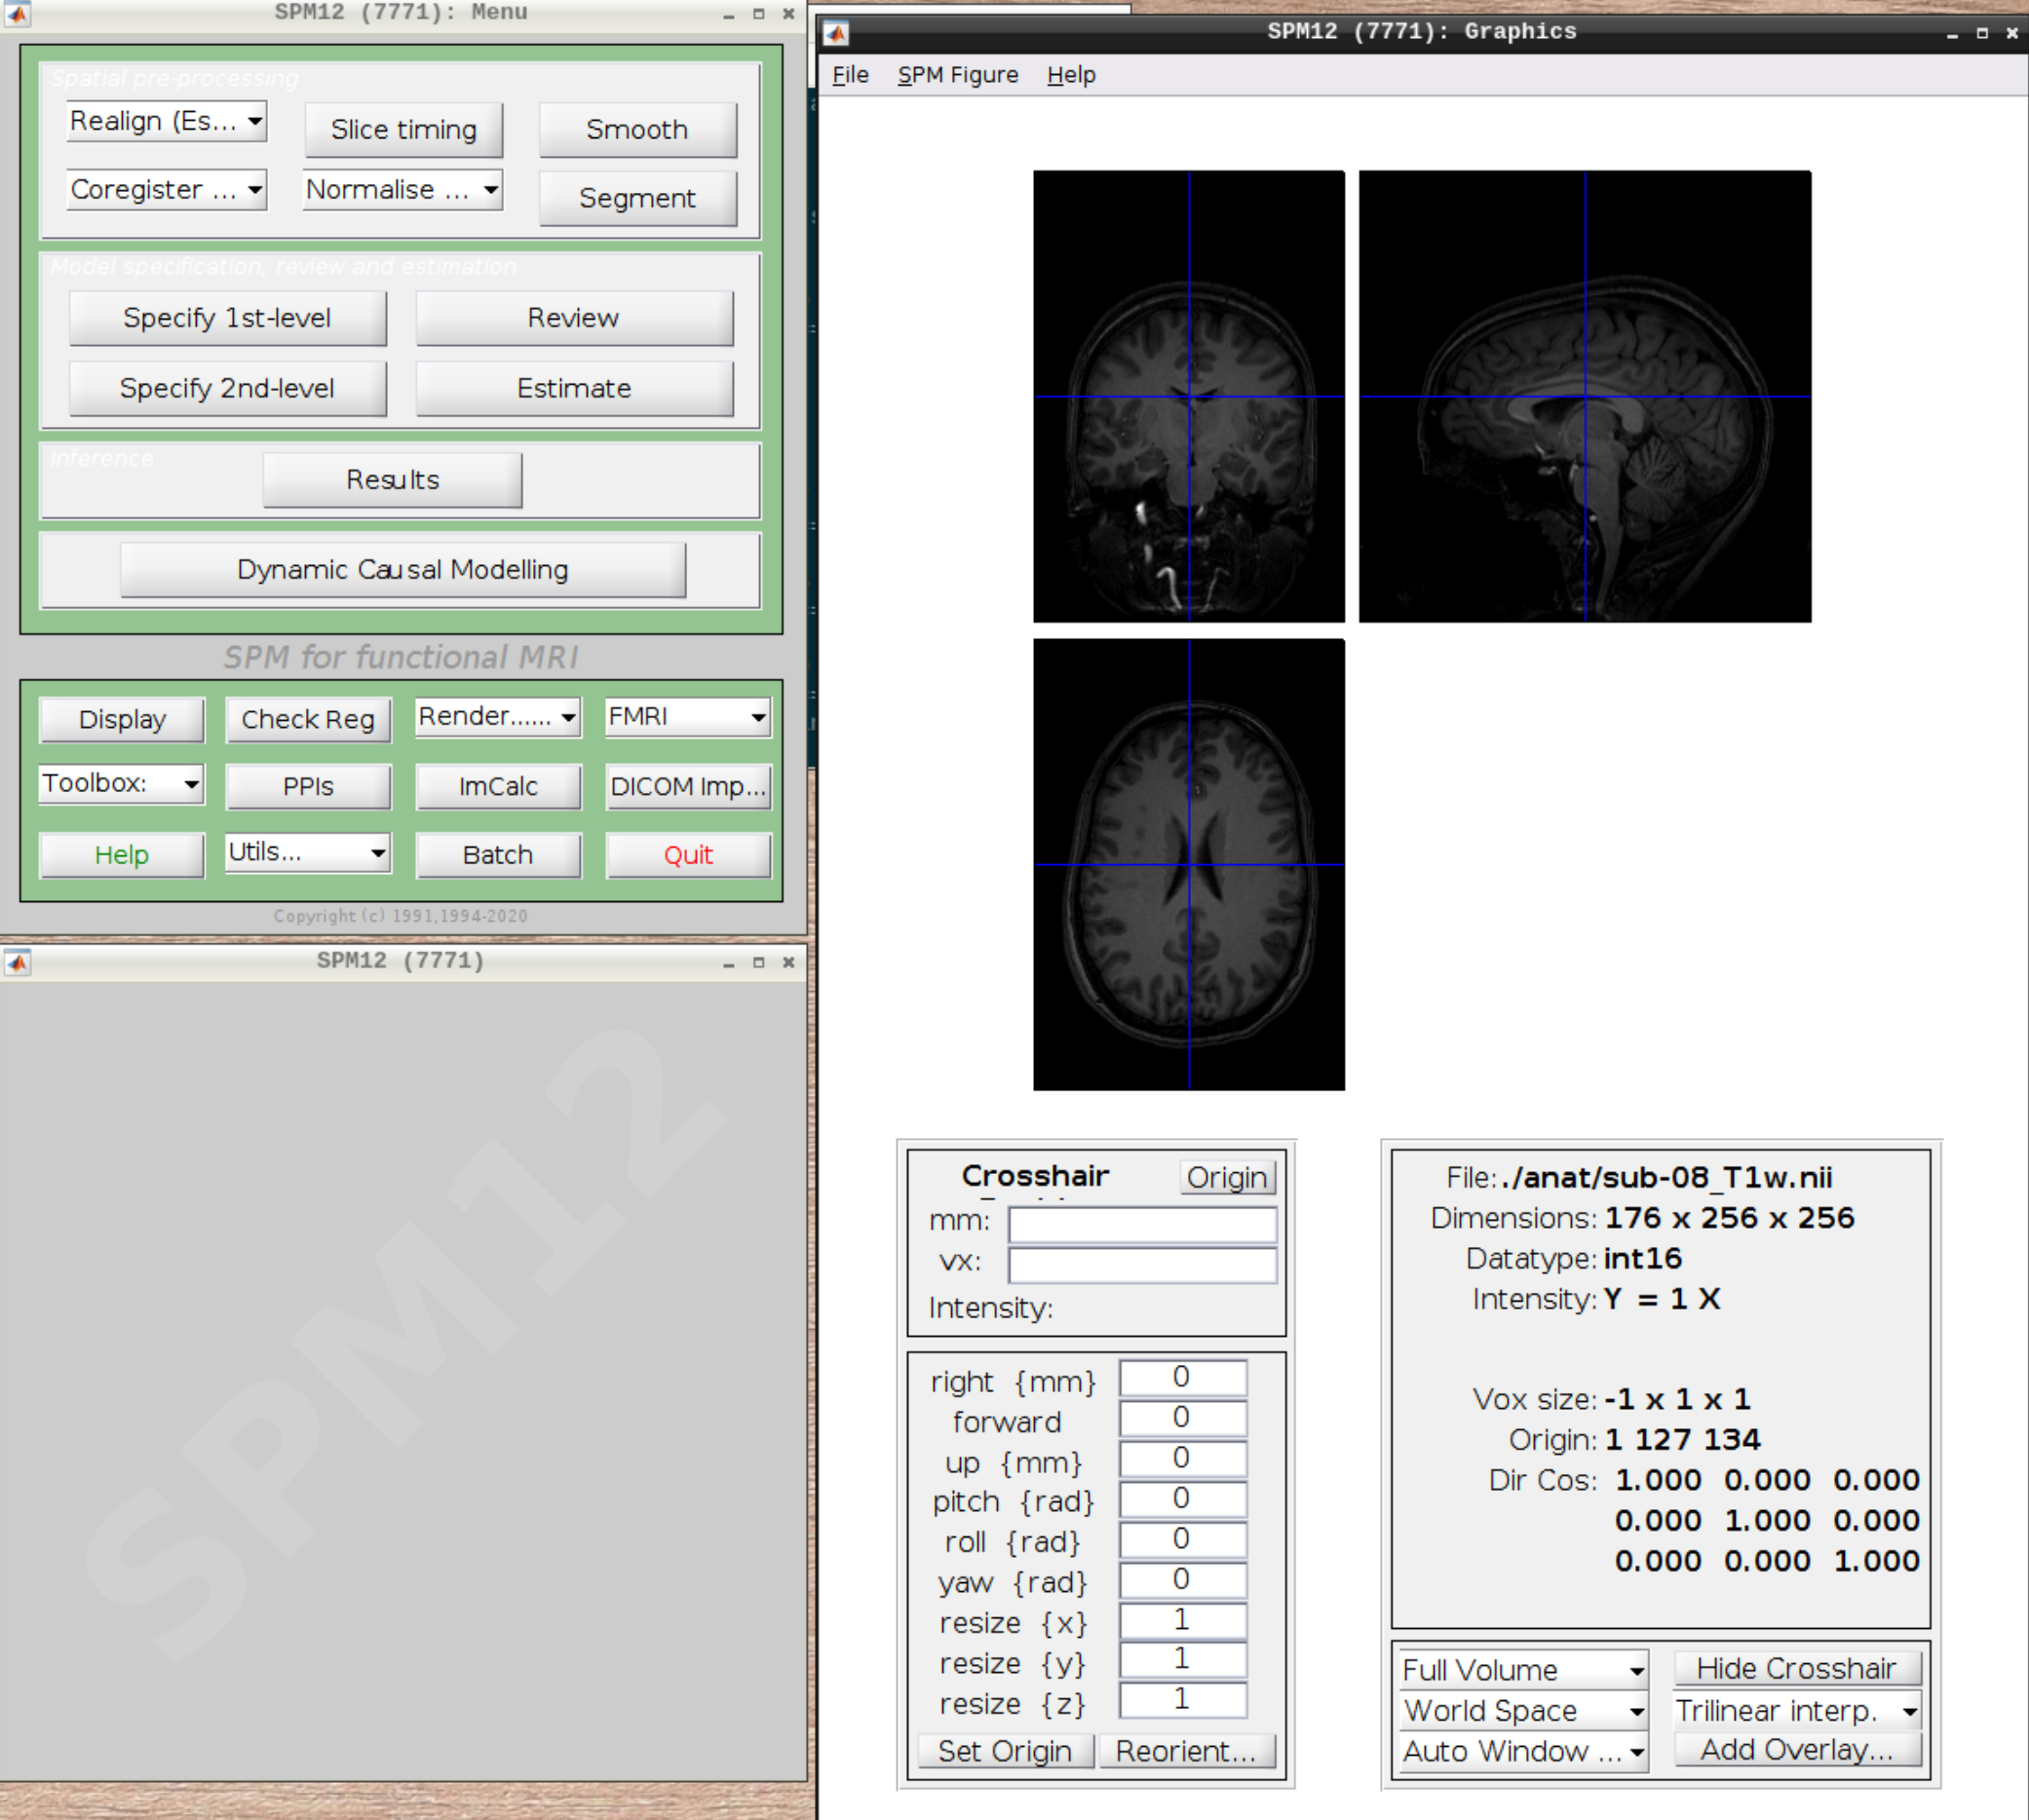 Now let's look at the functional scans. Use CheckReg and open run-01. Then right click and `Browse ...`. Then set frames to 1:146 and right click `Select All`
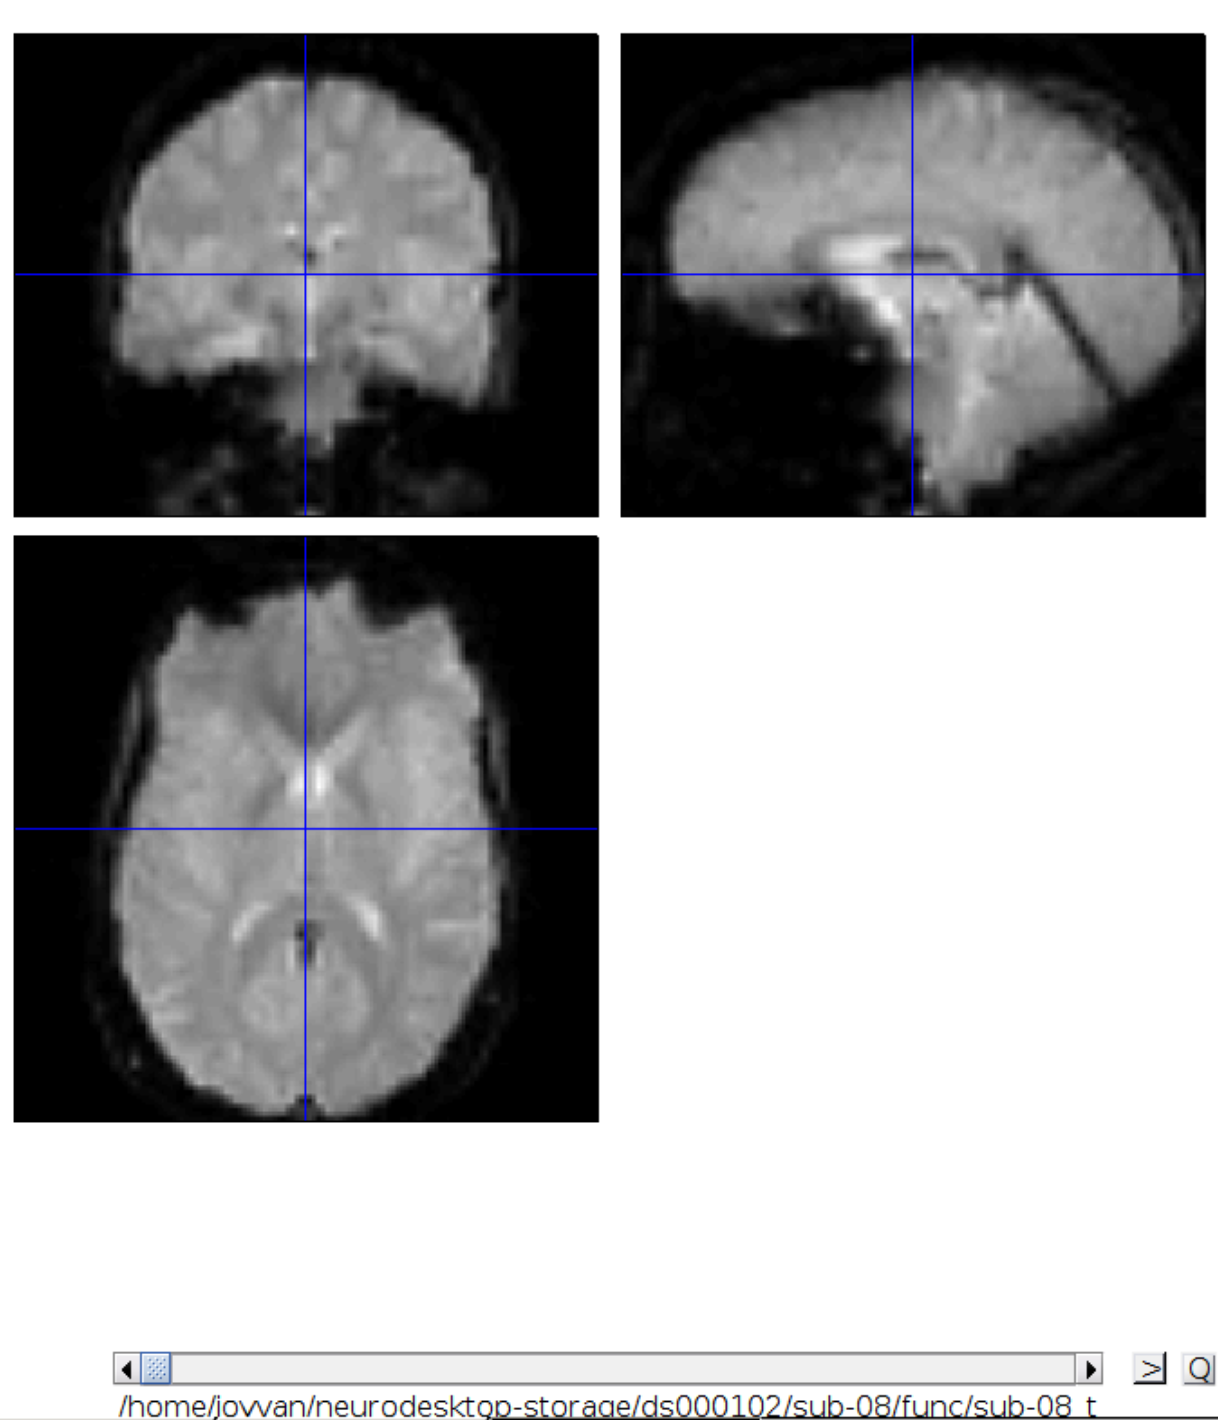
 Now we get a slider viewer and we can investigate all functional scans:
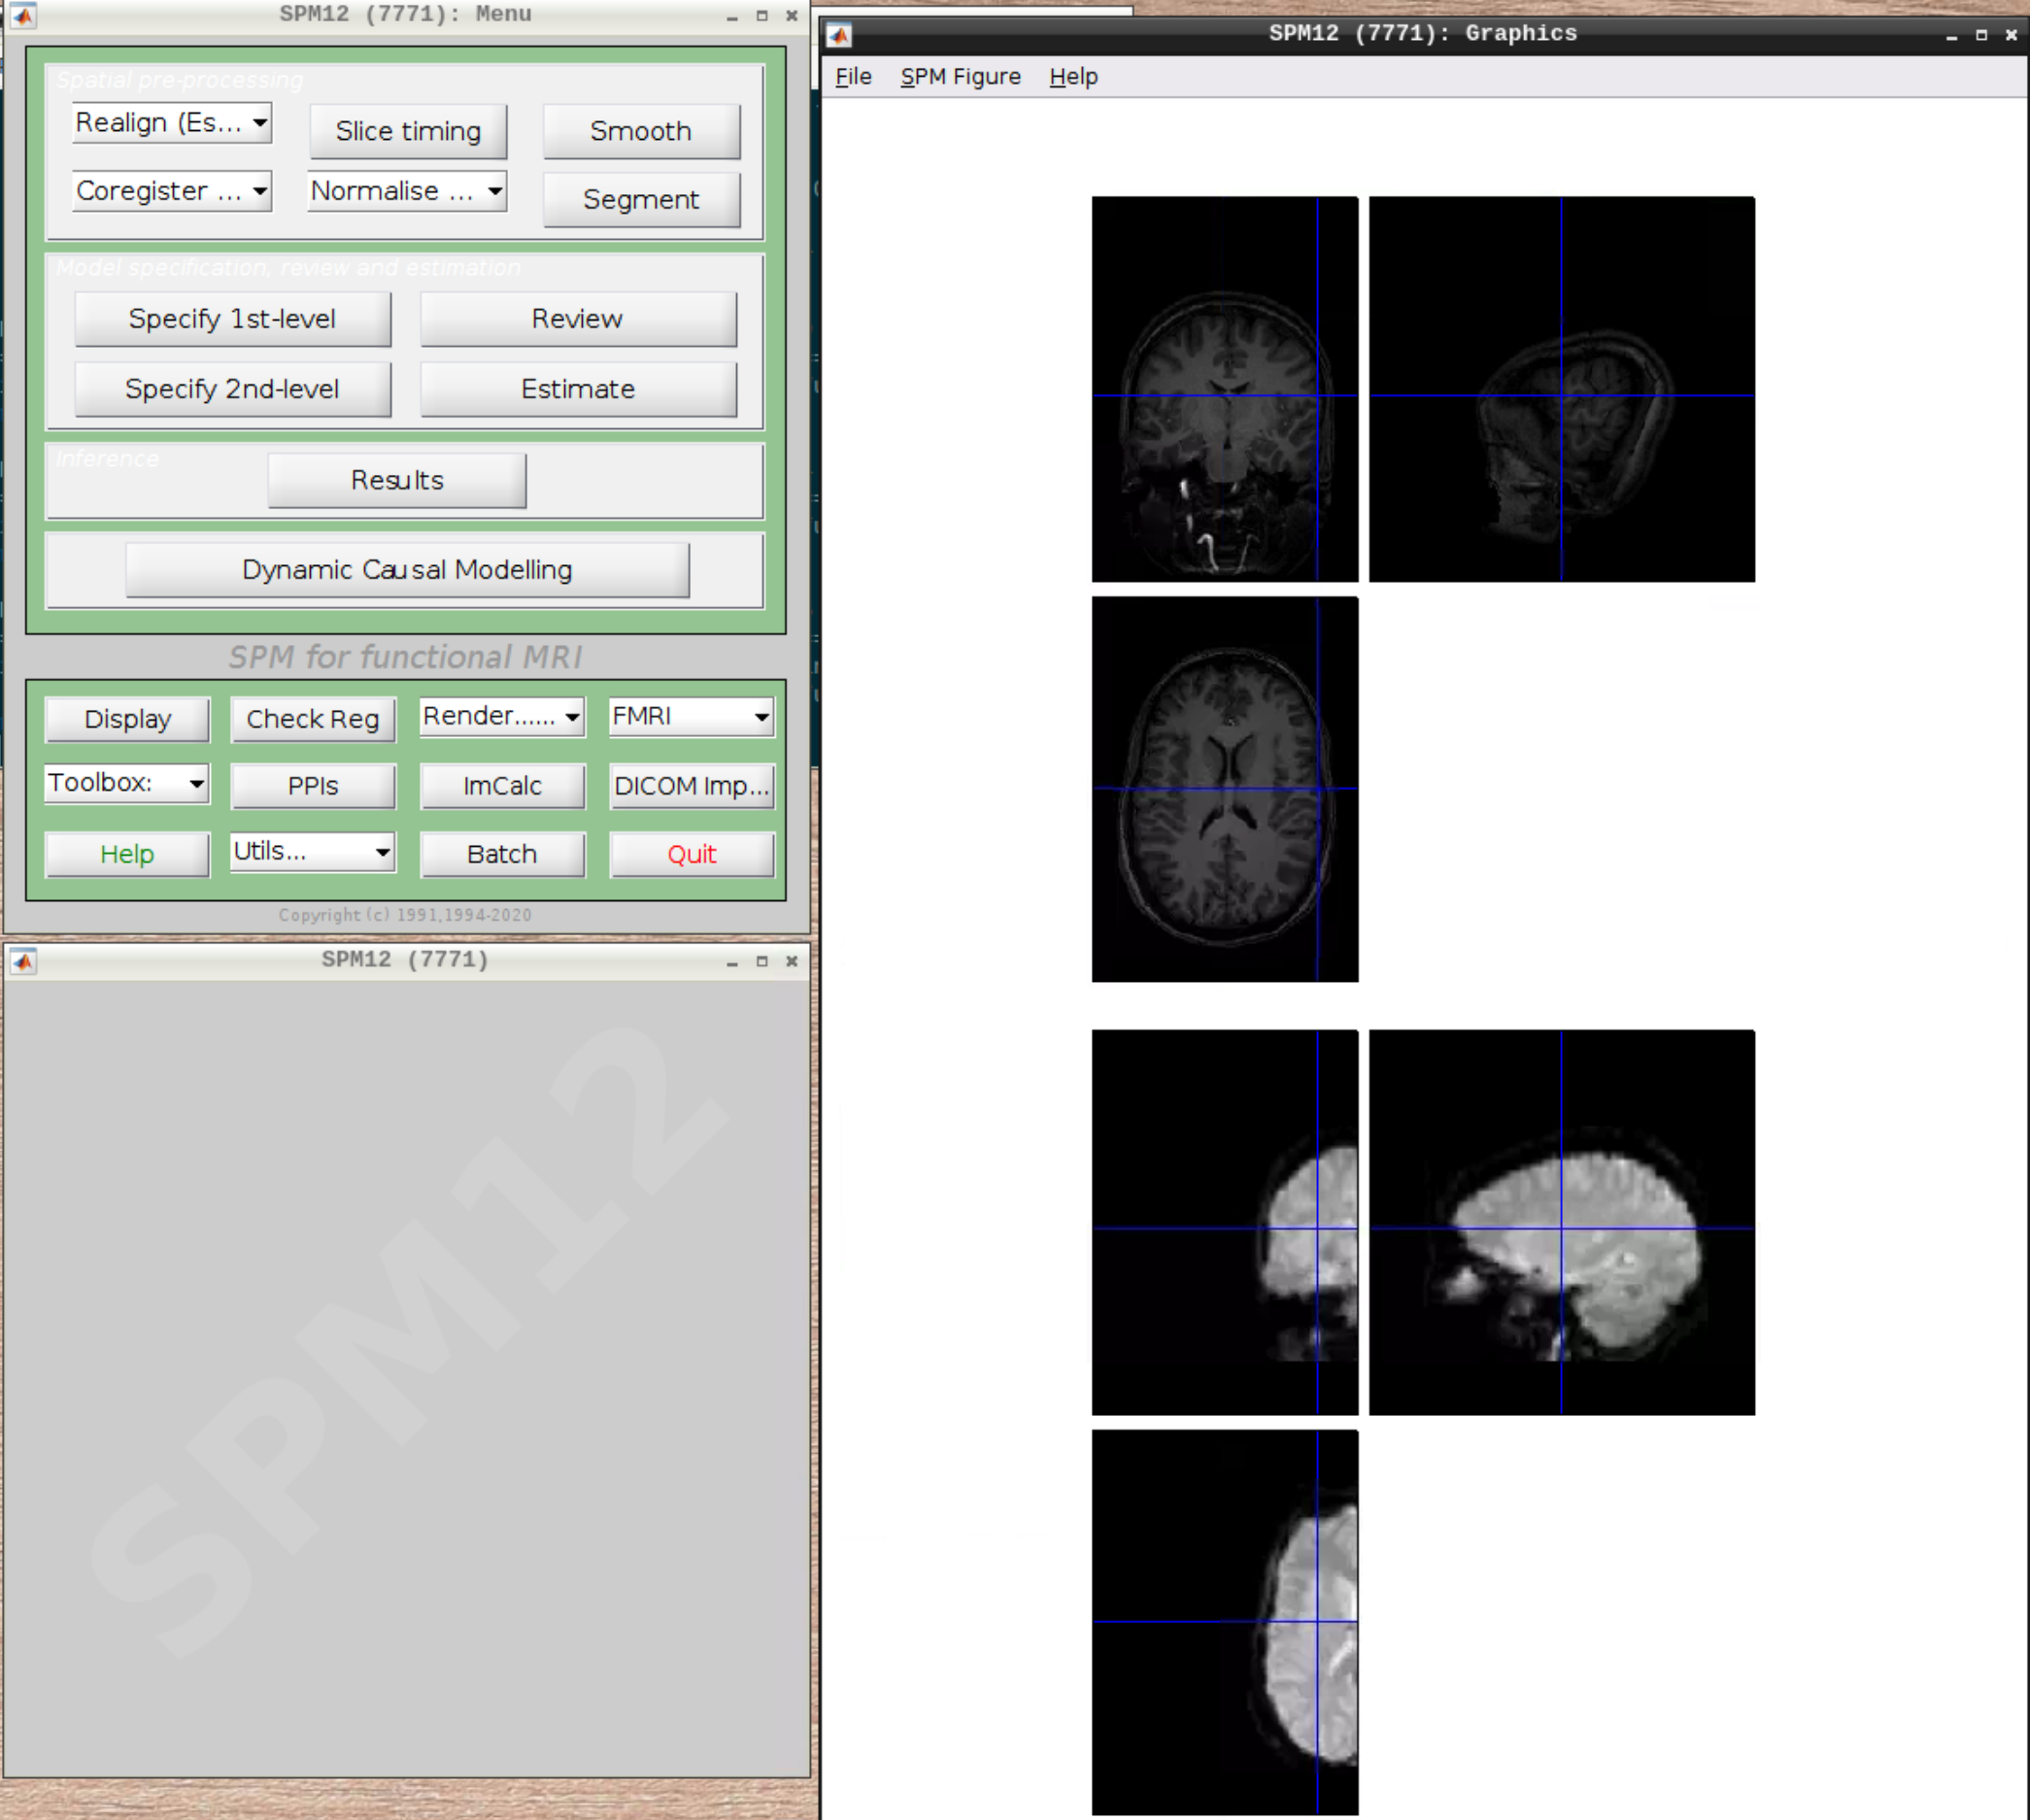
 Let's check the alignment between the anatomical and the functional scans - use CheckReg and open the anatomical and the functional scan. They shouldn't align yet, because we haven't done any preprocessing yet:
 ## Preprocessing the data
### Realignment
Select `Realign (Est & Reslice)` from the SPM Menu (the third option):
## Preprocessing the data
### Realignment
Select `Realign (Est & Reslice)` from the SPM Menu (the third option):
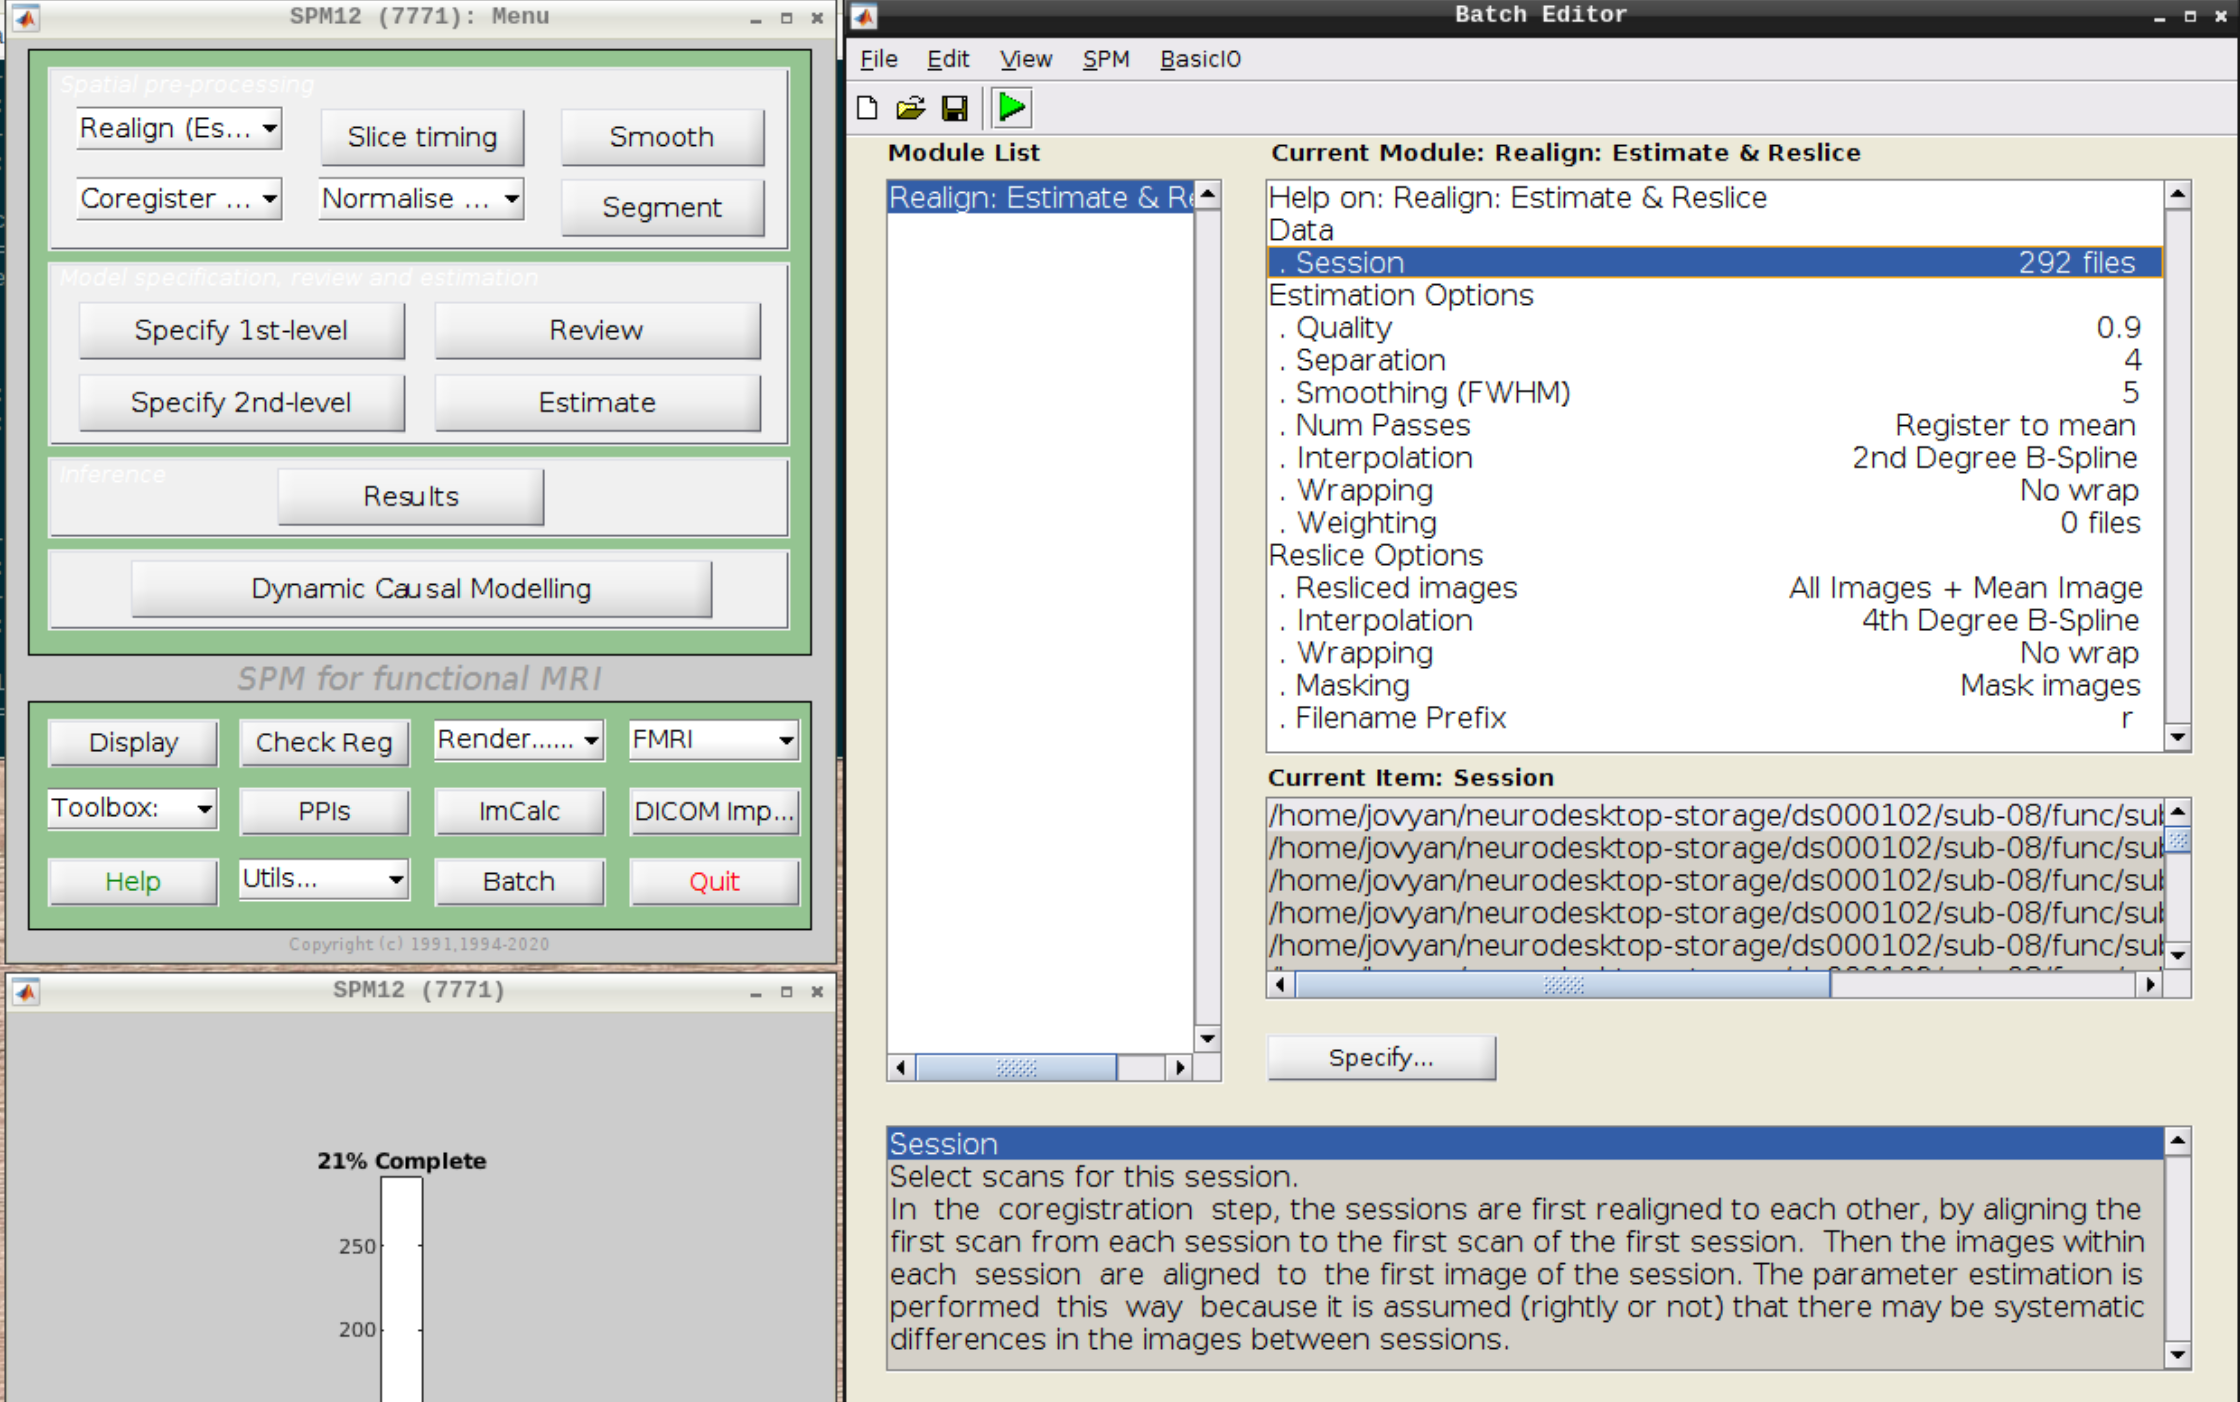
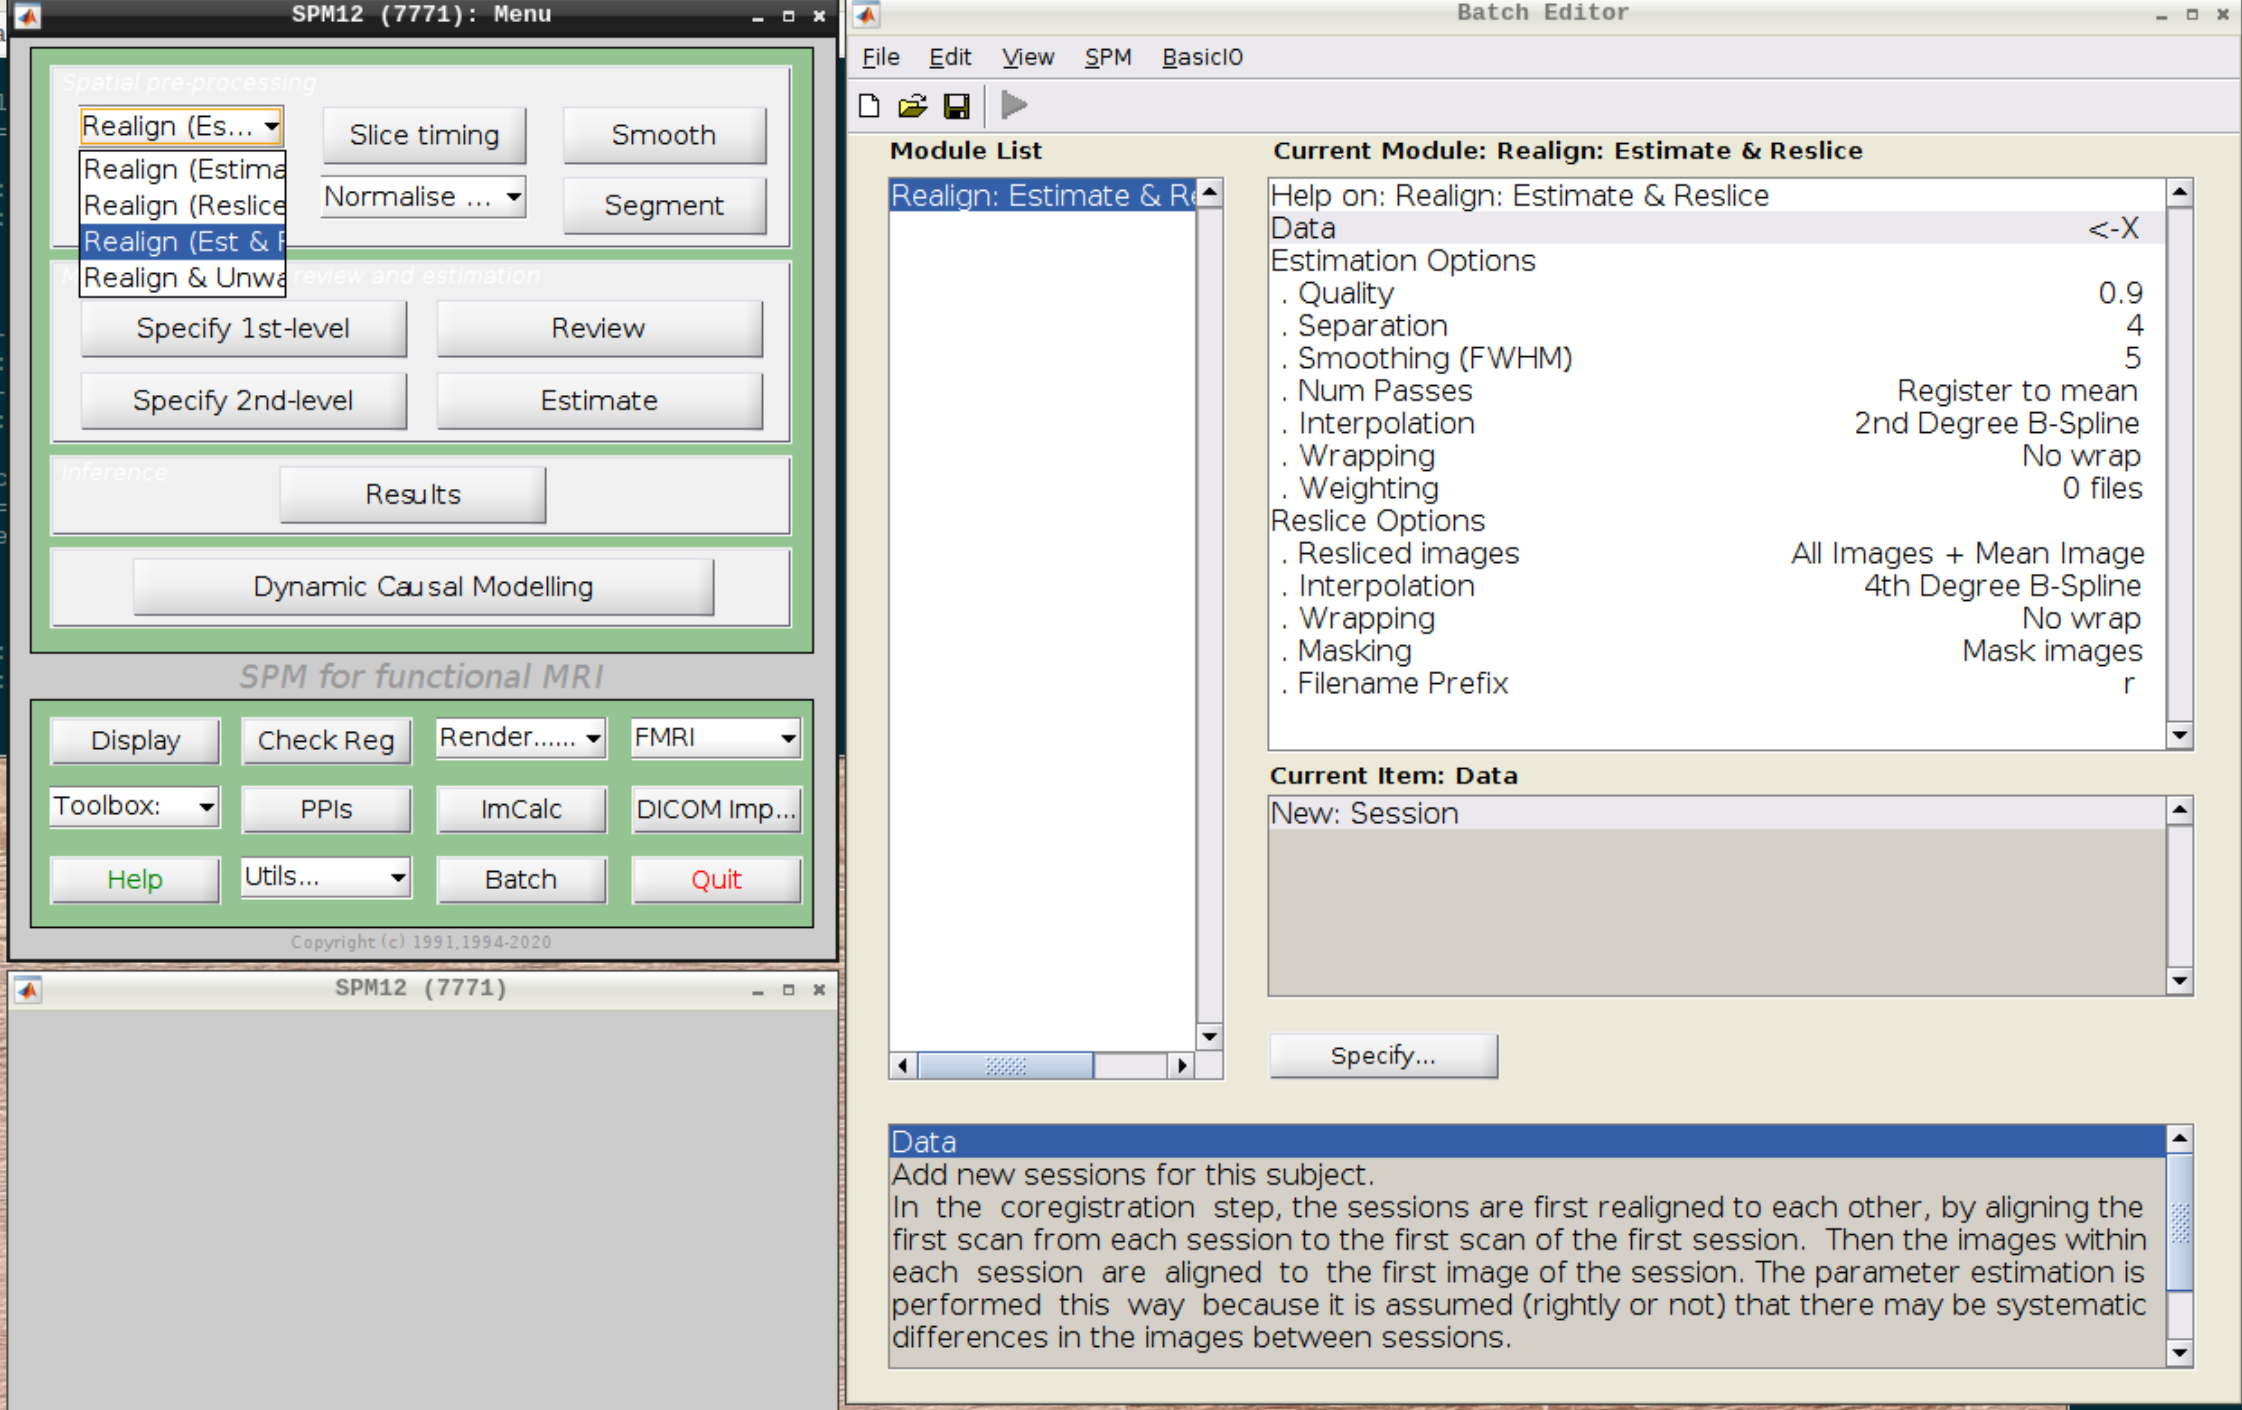 Then select the functional run (important: Select frames from 1:146 again!) and leave everything else as Defaults. Then hit run:
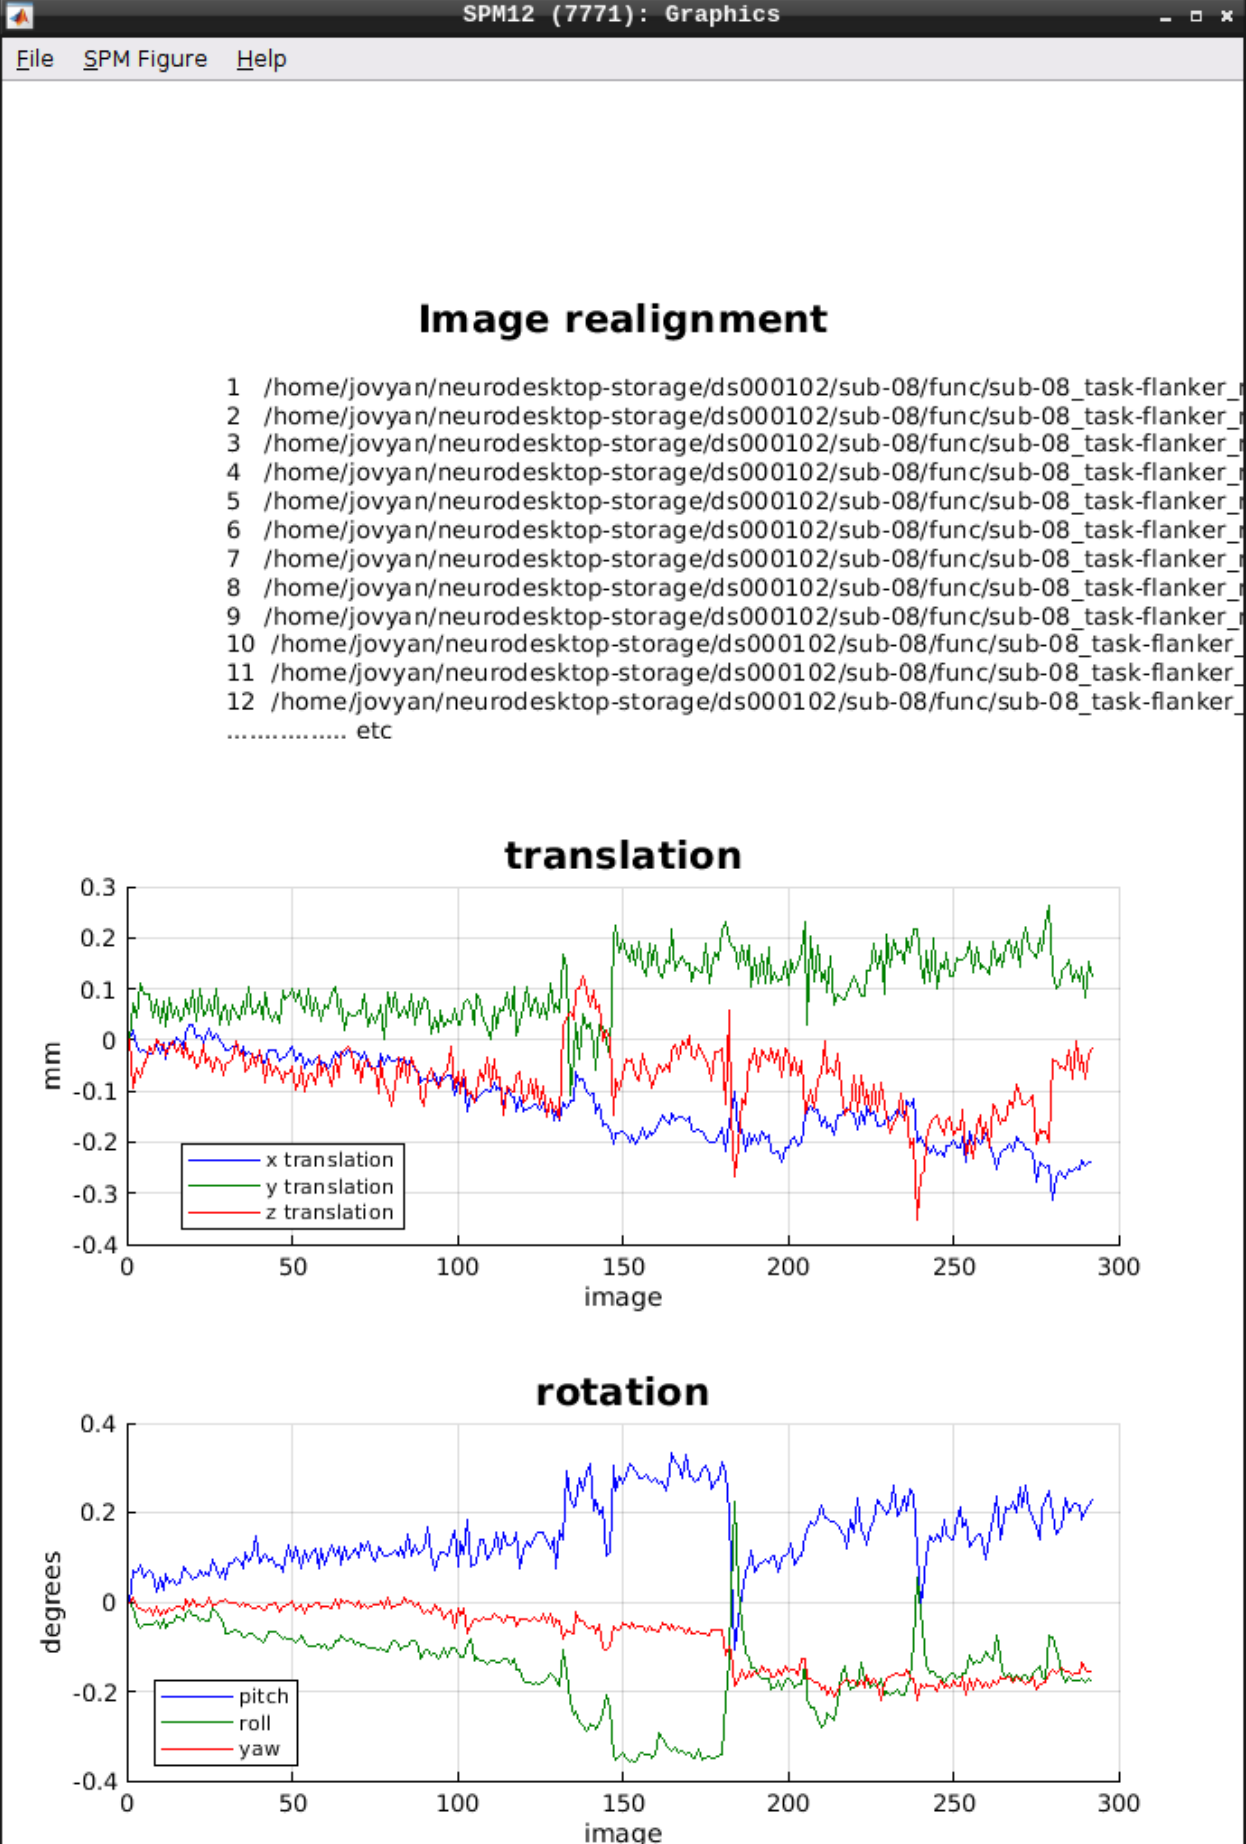
 As an output we should see the realignment parameters:
 ### Slice timing correction
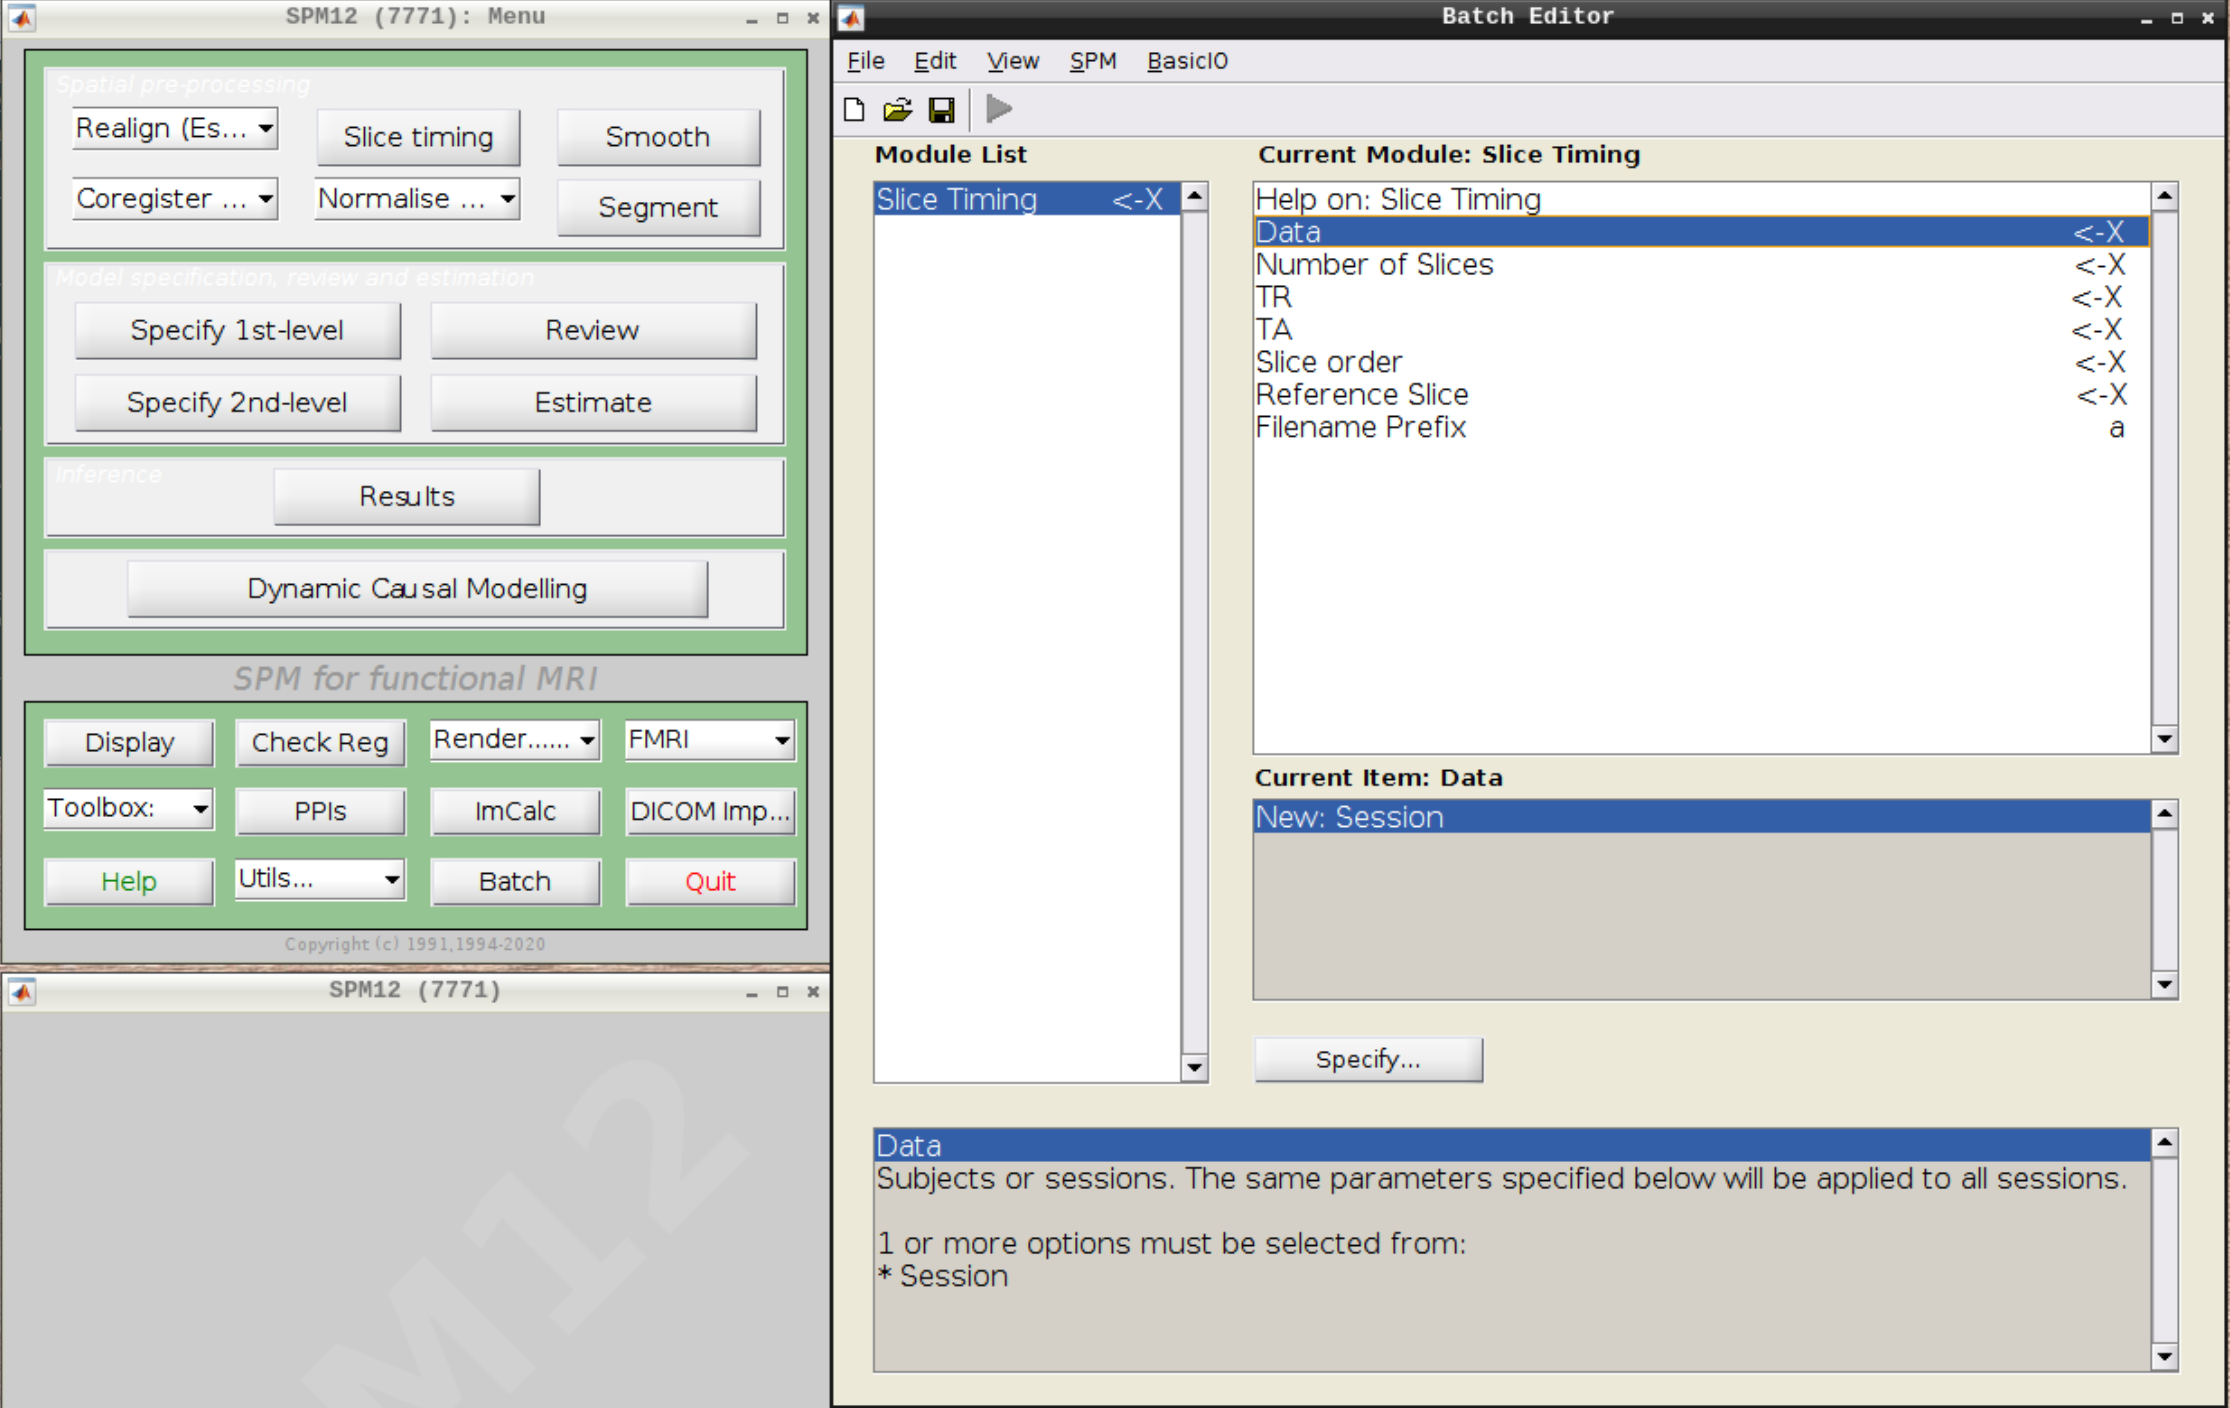
Click on `Slice timing` in the SPM menu to bring up the Slice Timing section in the batch editor:
### Slice timing correction
Click on `Slice timing` in the SPM menu to bring up the Slice Timing section in the batch editor:
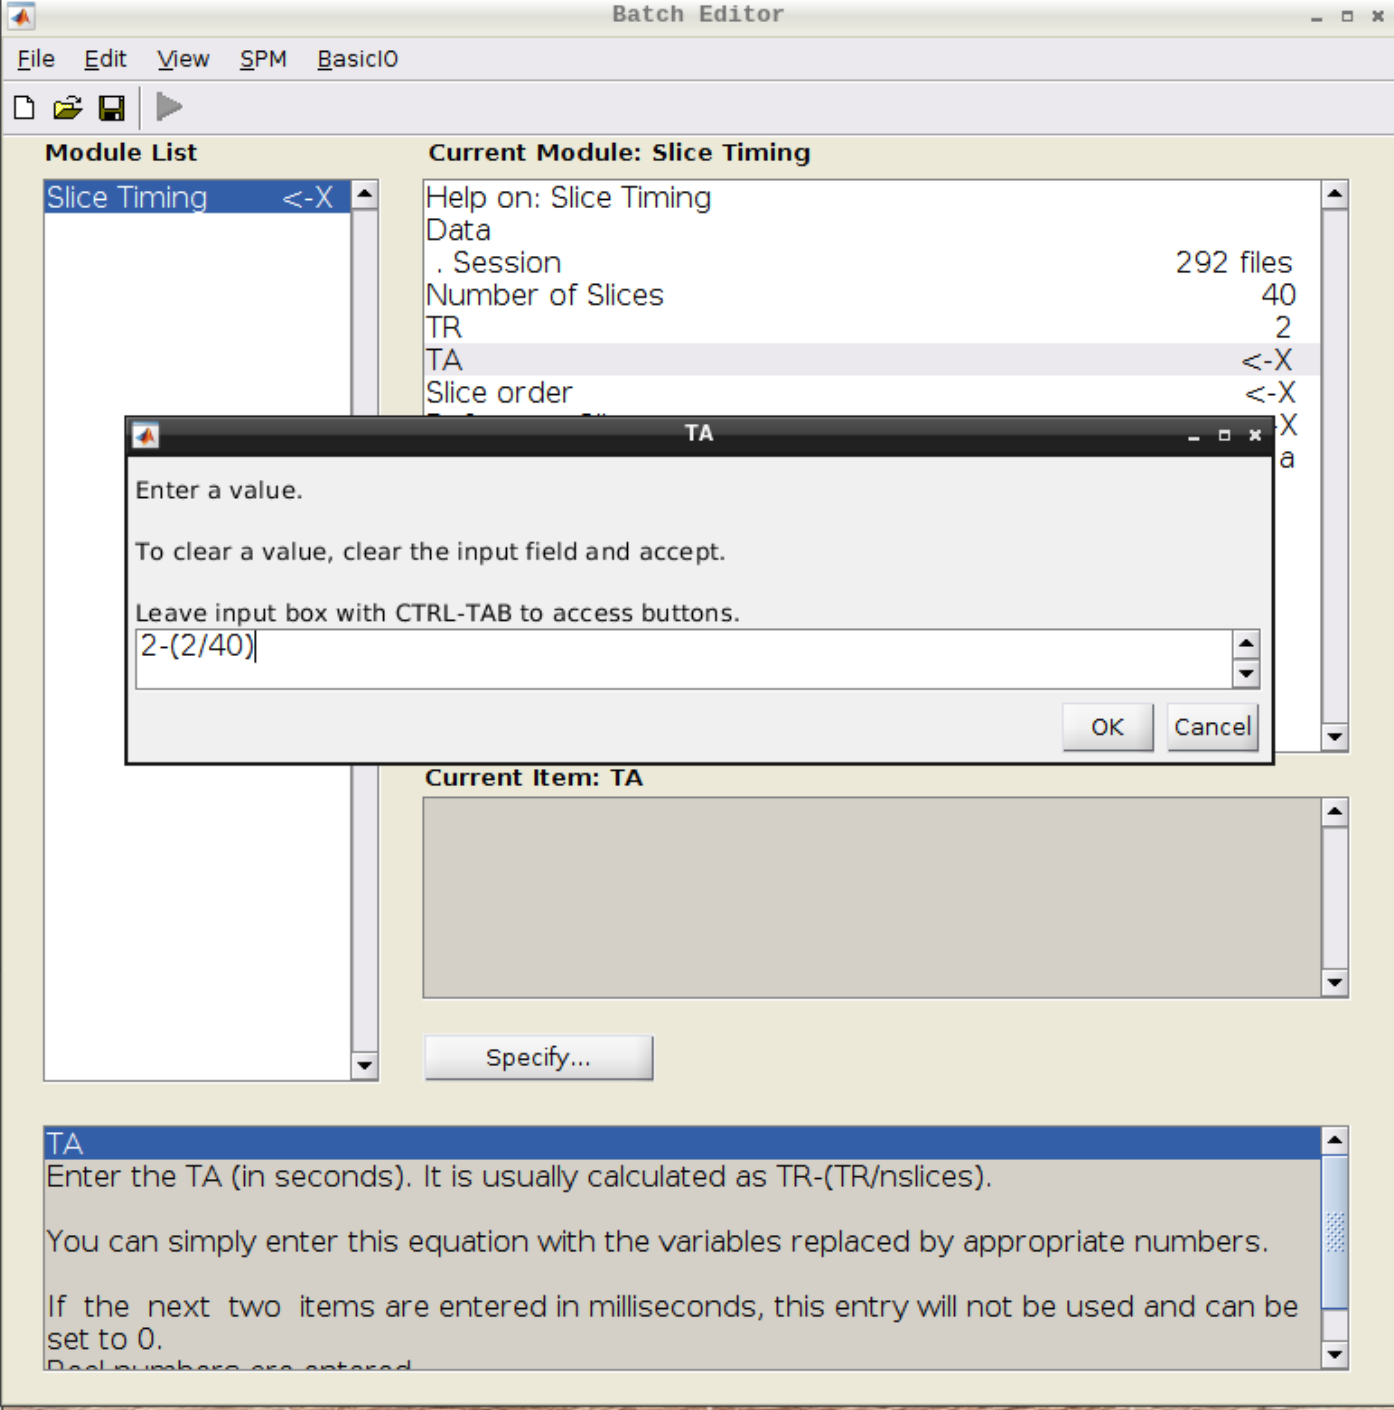
 Select the realigned images (use filter `rsub` and Frames 1:146) and then enter the parameters:
- Number of Slices = 40
- TR = 2
- TA = 1.95
- Slice order = [1:2:40 2:2:40]
- Reference Slice = 1
Select the realigned images (use filter `rsub` and Frames 1:146) and then enter the parameters:
- Number of Slices = 40
- TR = 2
- TA = 1.95
- Slice order = [1:2:40 2:2:40]
- Reference Slice = 1
 ### Coregistration
Now, we coregister the functional scans and the anatomical scan.
Click on `Coregister (Estimate & Reslice)` (the third option) in the SPM menu to bring up the batch editor:
### Coregistration
Now, we coregister the functional scans and the anatomical scan.
Click on `Coregister (Estimate & Reslice)` (the third option) in the SPM menu to bring up the batch editor:
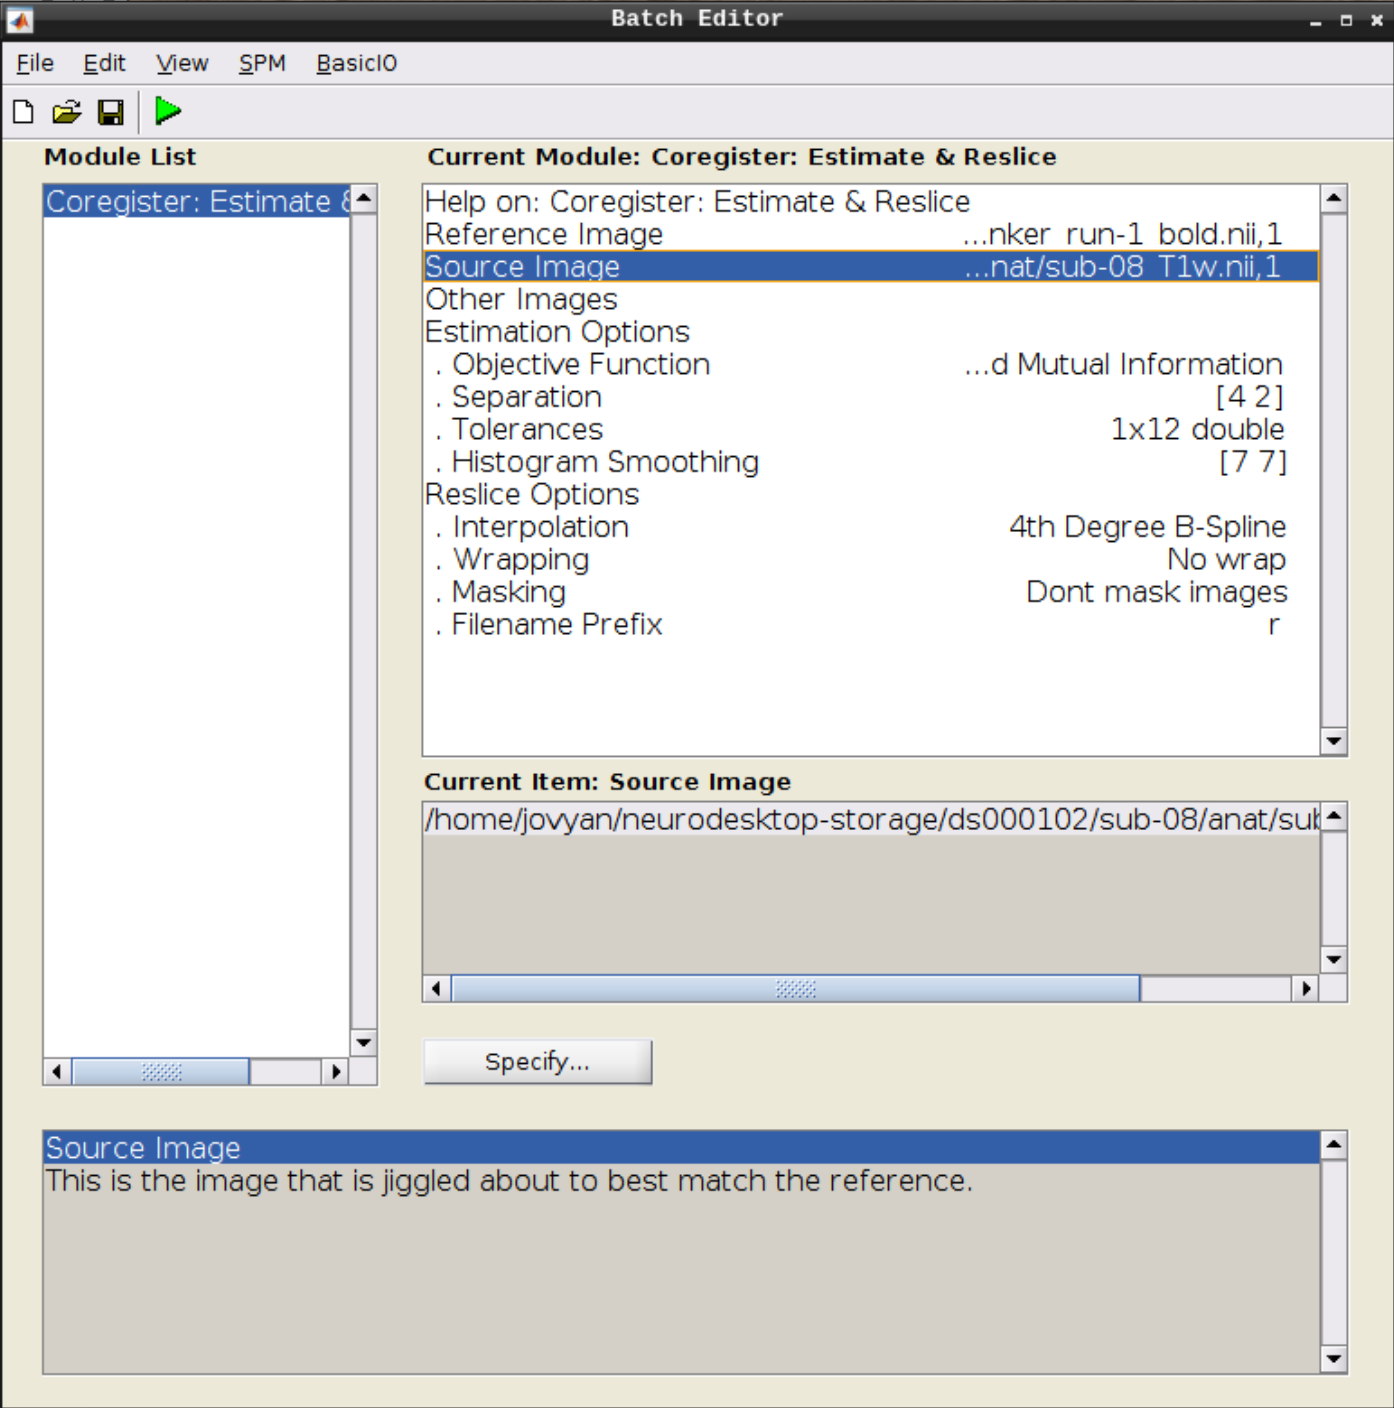
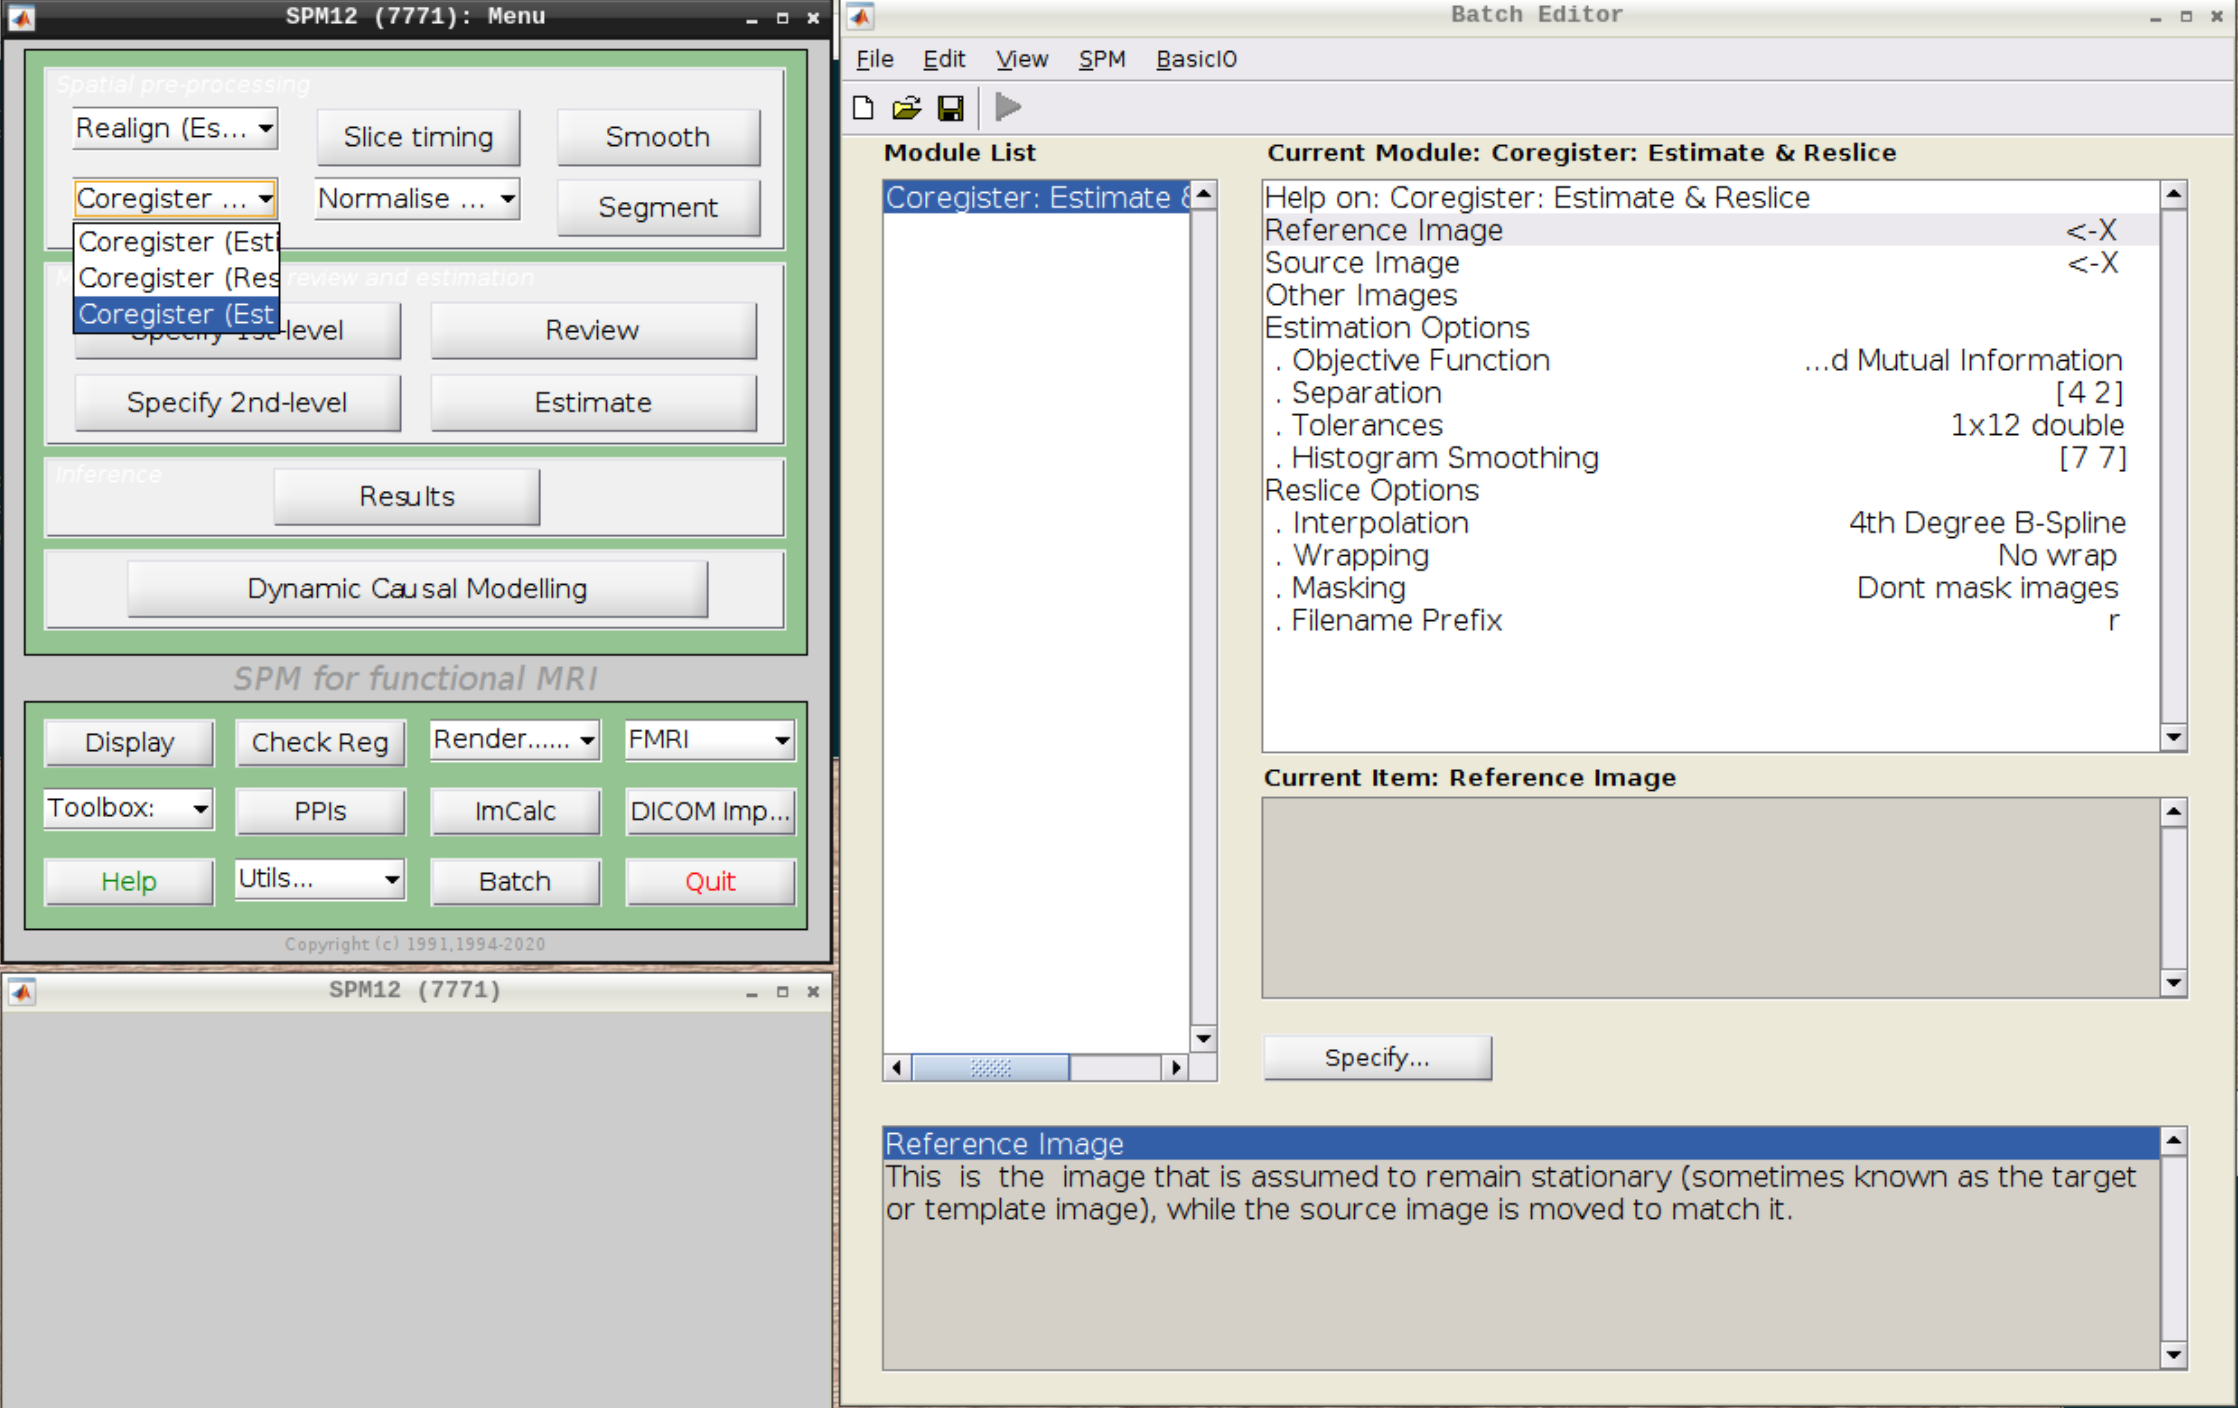 Use the Mean image as the reference and the T1 scan as the source image and hit Play:
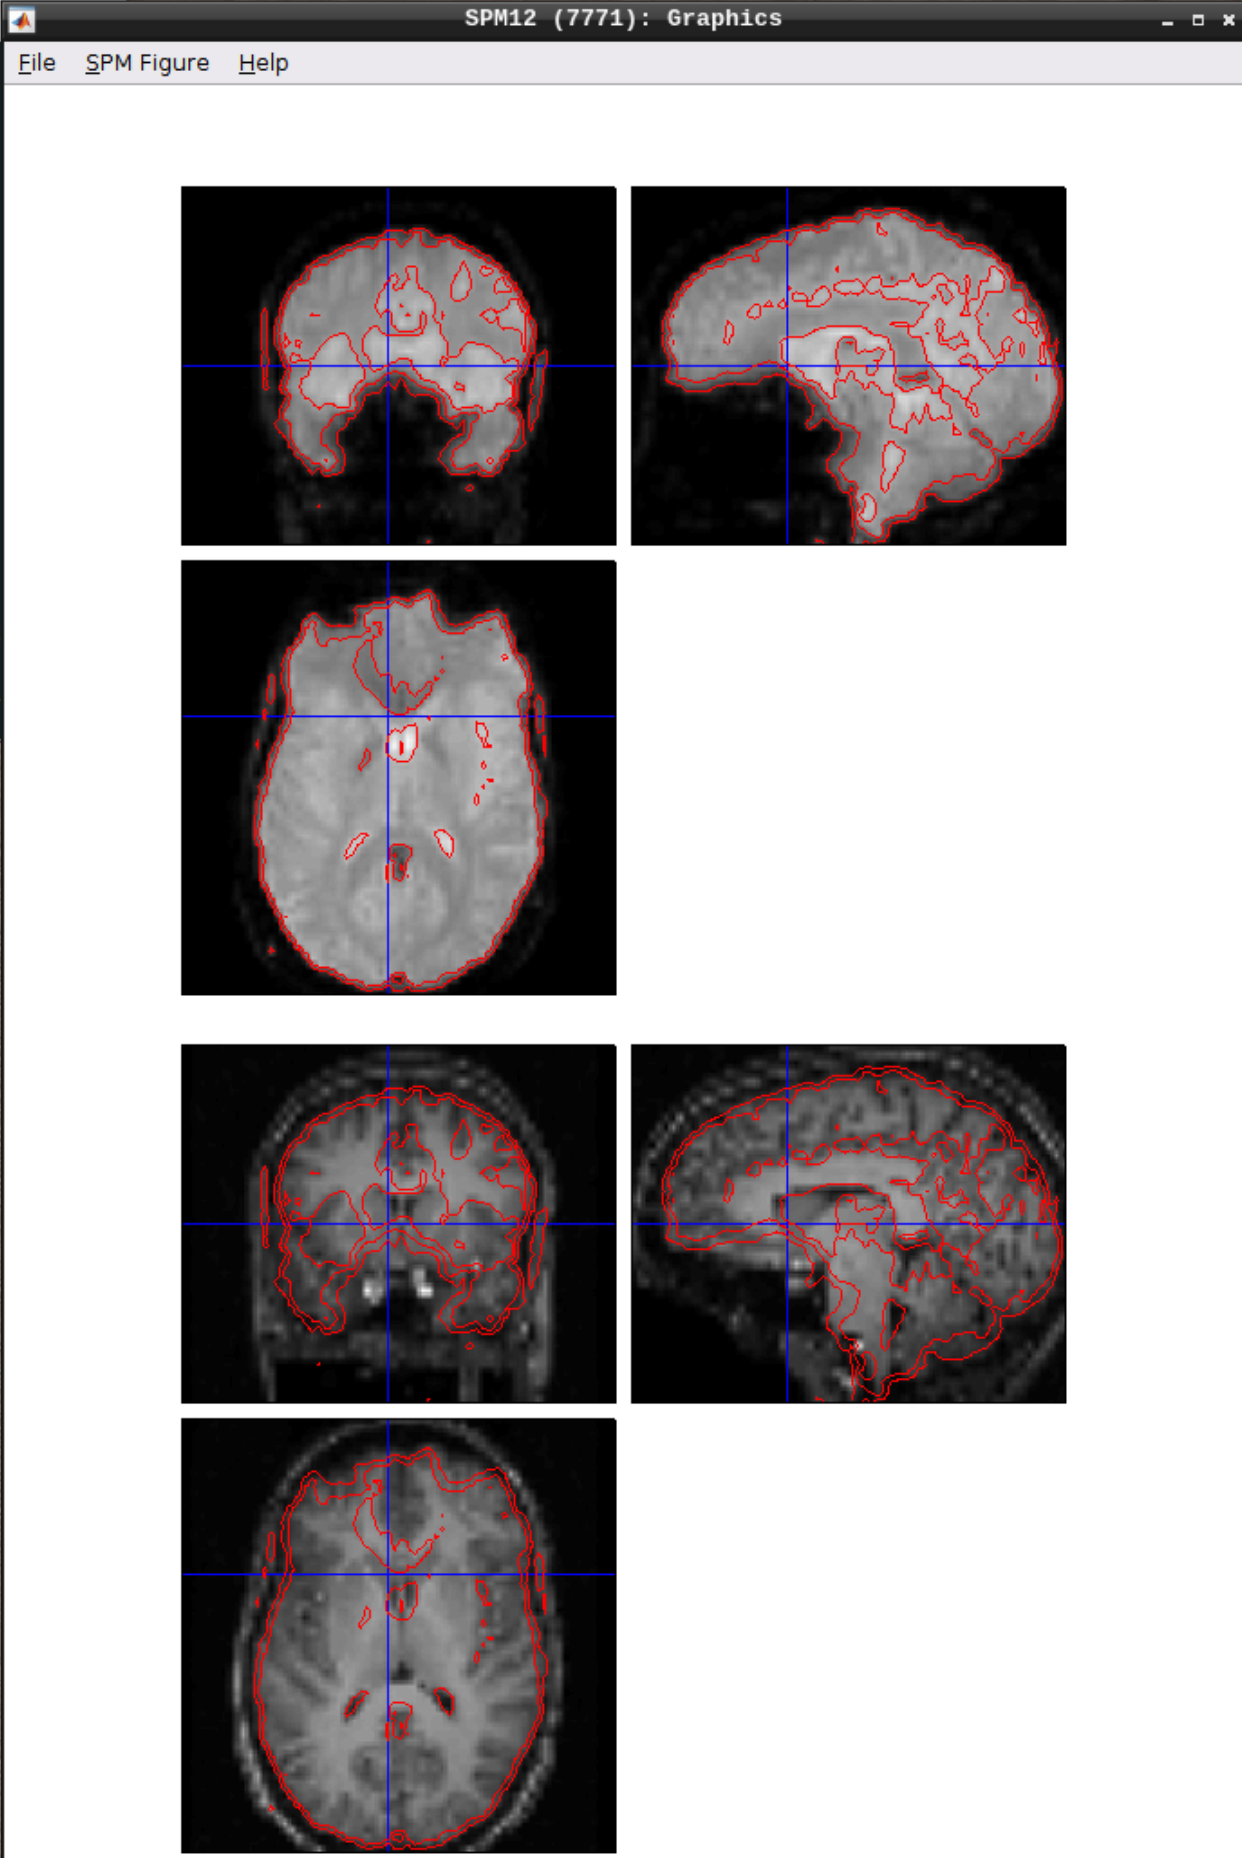
 Let's use CheckReg again and overlay a Contour (Right Click -> Contour -> Display onto -> all) to check the coregistration between the images:
 ### Segmentation
Click the `Segmentation` button in the SPM menu:
### Segmentation
Click the `Segmentation` button in the SPM menu:
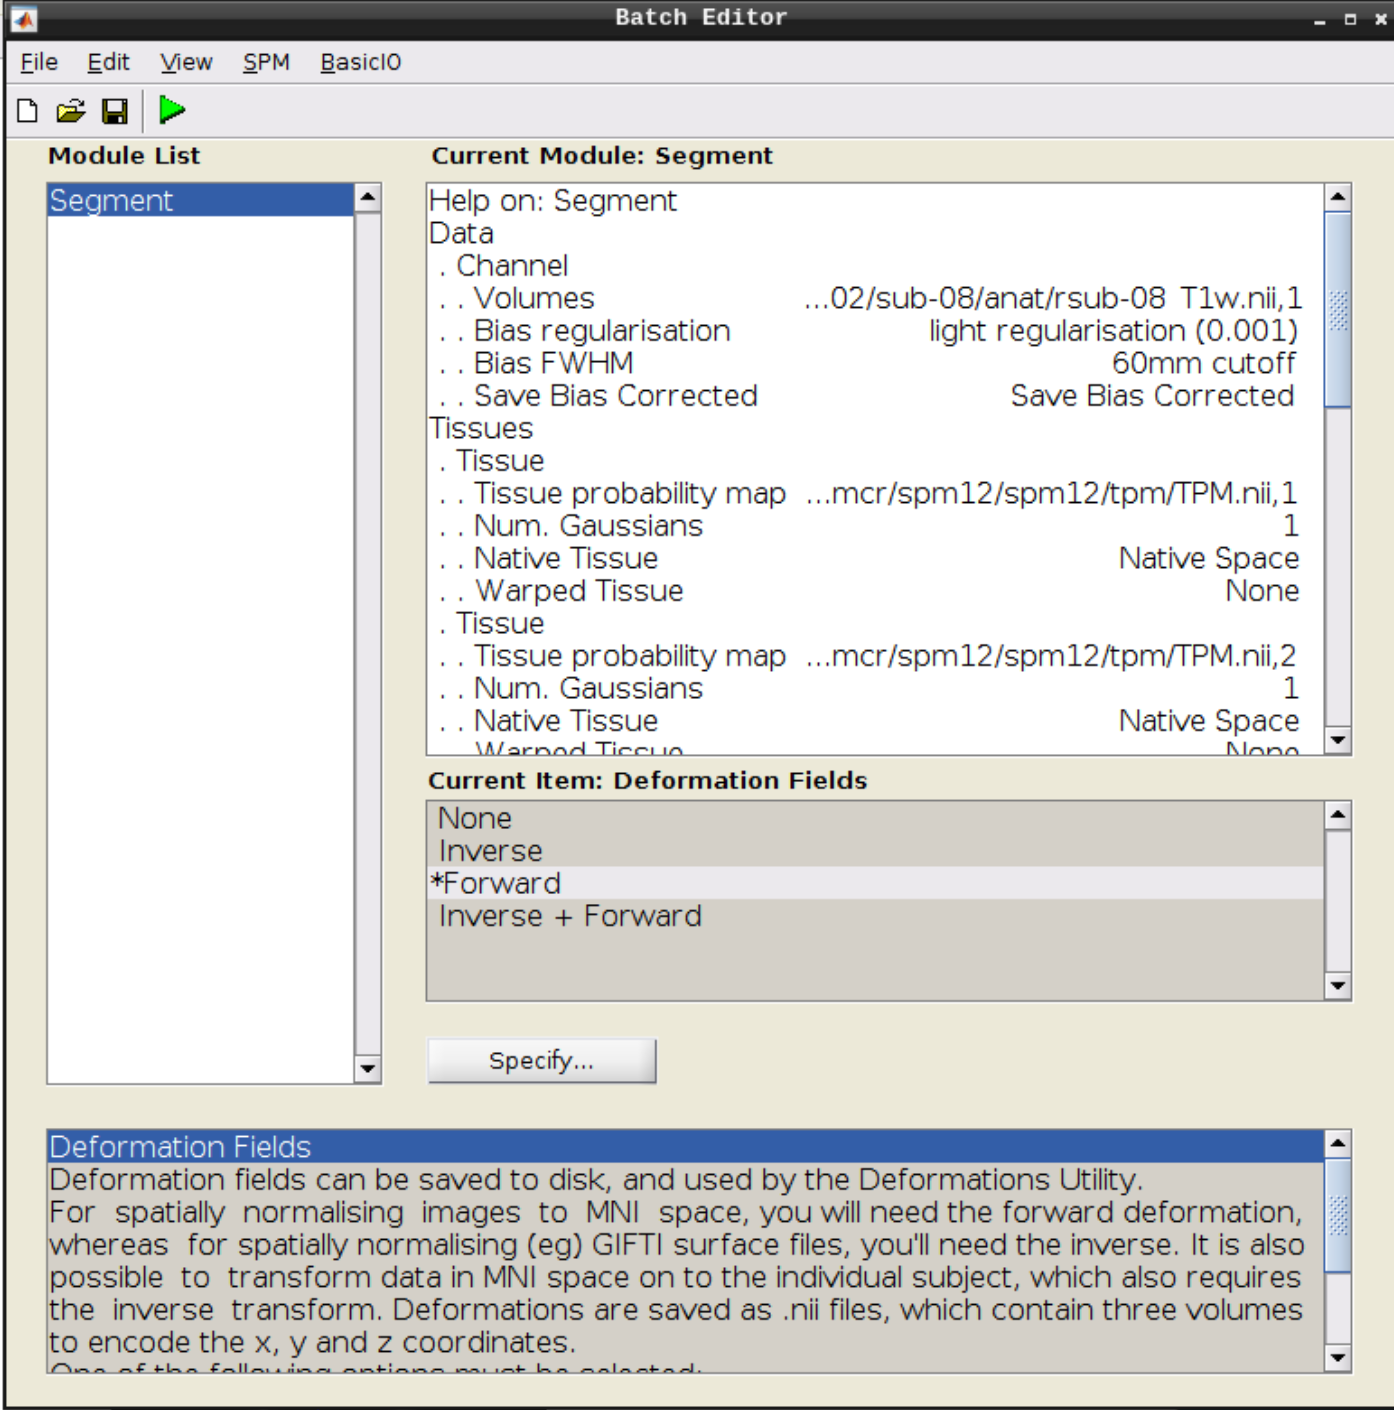 Then change the following settings:
- Volumes = our coregistered anatomical scan rsub-08-T1w.nii
- Save Bias Corrected = Save Bias Correced
- Deformation Fields = Forward
and hit Play again.
### Apply normalization
Select `Normalize (Write)` from the SPM menu:
Then change the following settings:
- Volumes = our coregistered anatomical scan rsub-08-T1w.nii
- Save Bias Corrected = Save Bias Correced
- Deformation Fields = Forward
and hit Play again.
### Apply normalization
Select `Normalize (Write)` from the SPM menu:
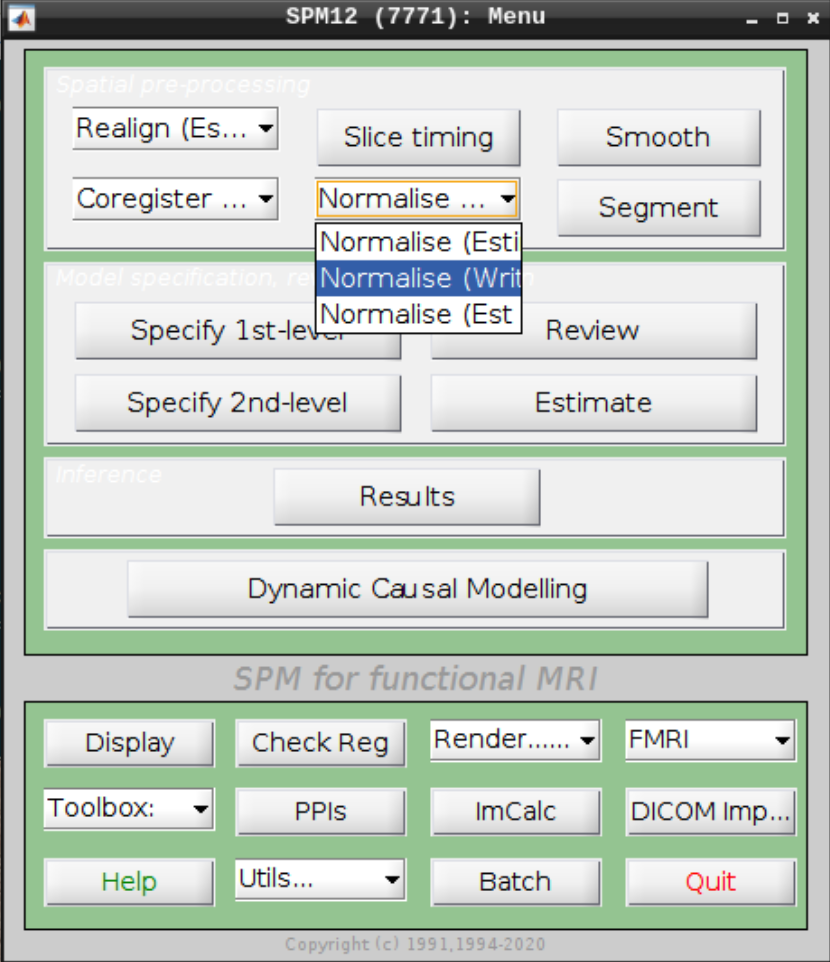 For the Deformation Field select the y_rsub-08 file we created in the last step and for the Images to Write select the arsub-08 functional images (Filter ^ar and Frames 1:146):
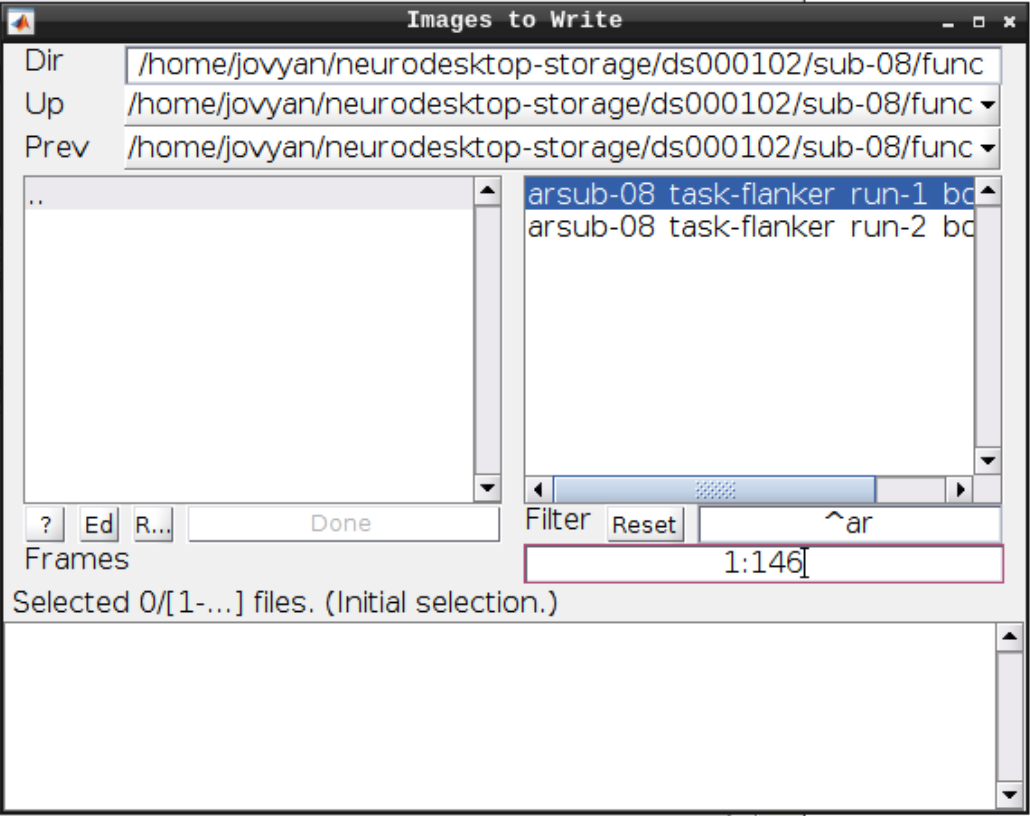 Hit Play again.
### Checking the normalization
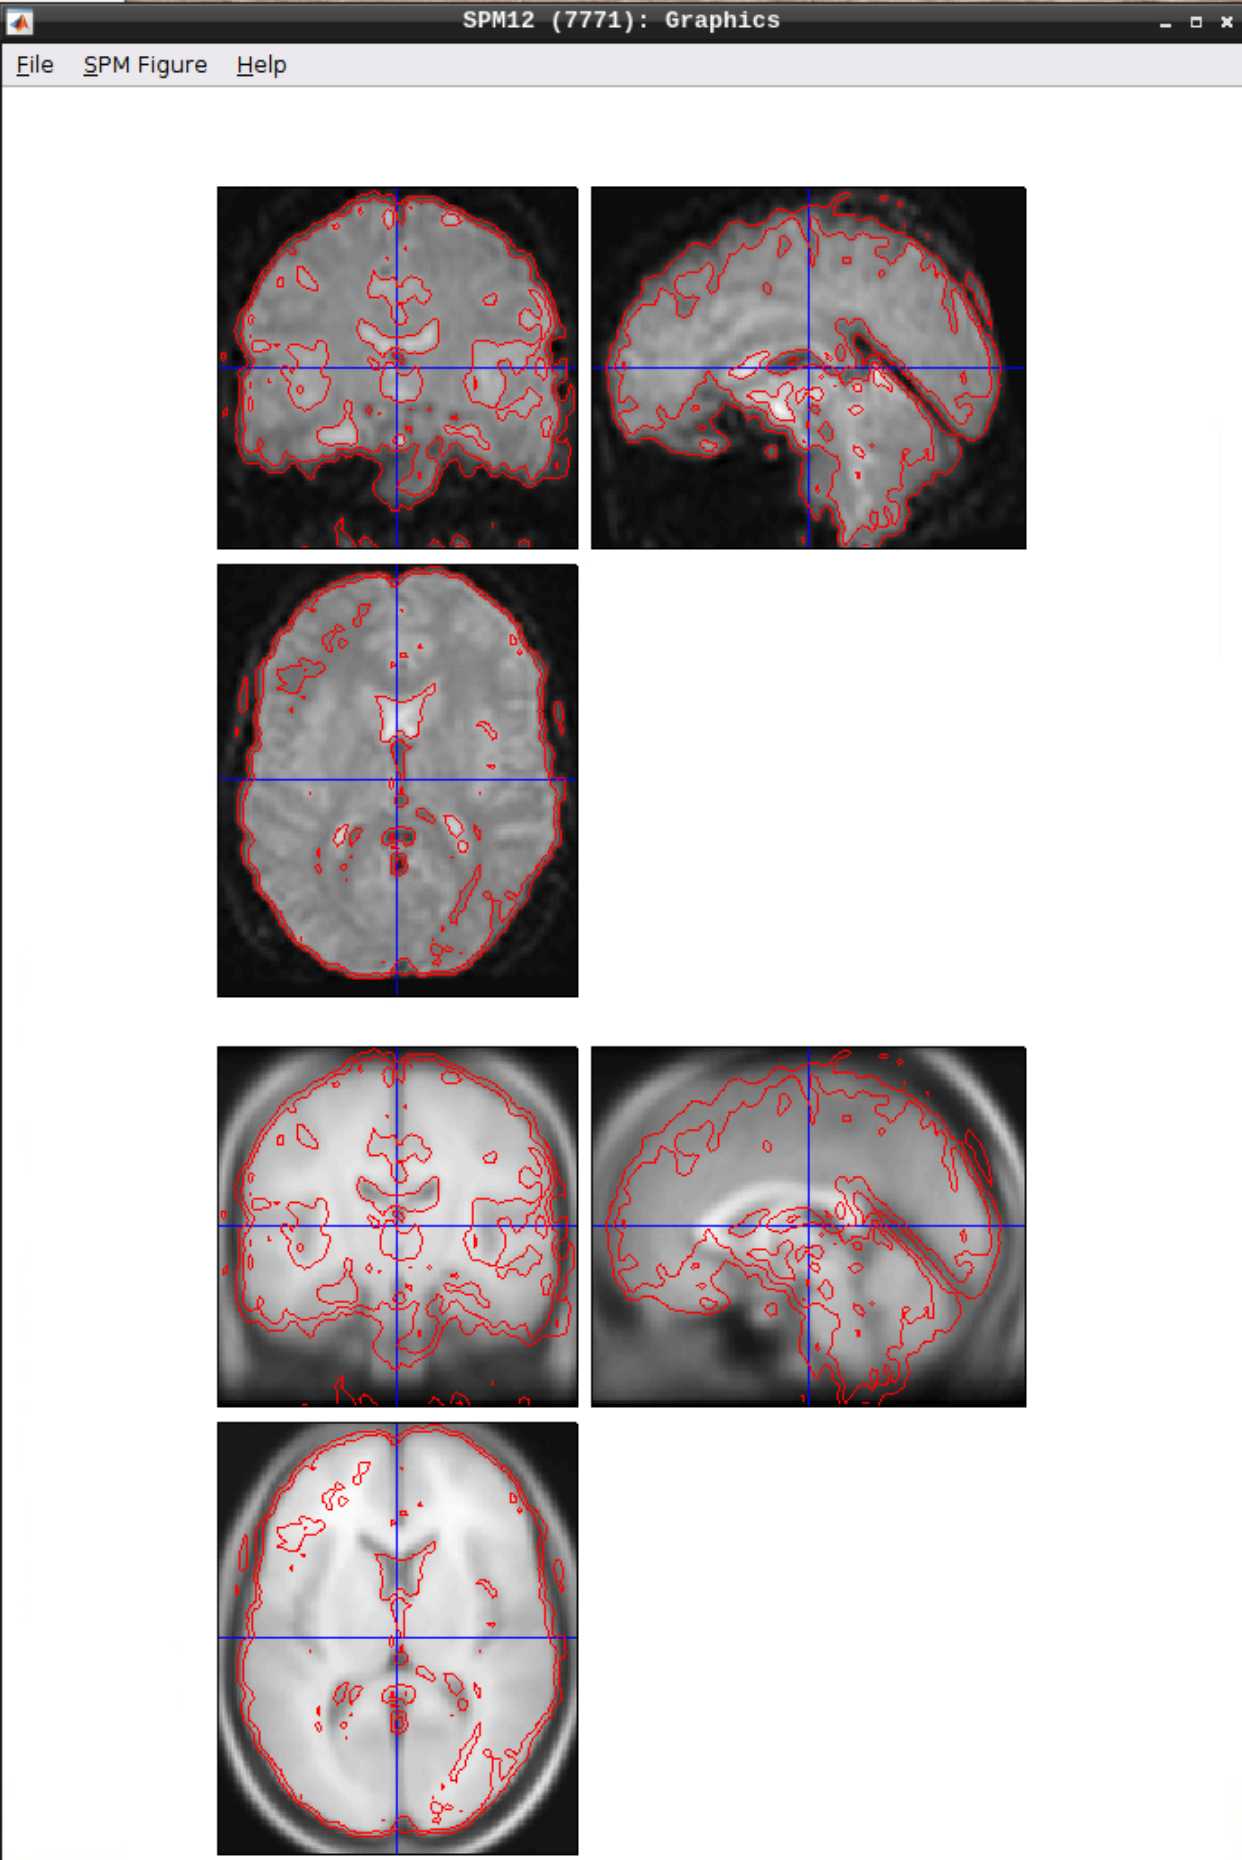
Use CheckReg to make sure that the functional scans (starting with w to indicate that they were warped: warsub-08) align with the template (found in /opt/spm12/spm12_mcr/spm12/spm12/canonical/avg305T1.nii):
Hit Play again.
### Checking the normalization
Use CheckReg to make sure that the functional scans (starting with w to indicate that they were warped: warsub-08) align with the template (found in /opt/spm12/spm12_mcr/spm12/spm12/canonical/avg305T1.nii):
 ### Smoothing
Click the `Smooth` button in the SPM menu and select the warped functional scans:
### Smoothing
Click the `Smooth` button in the SPM menu and select the warped functional scans:
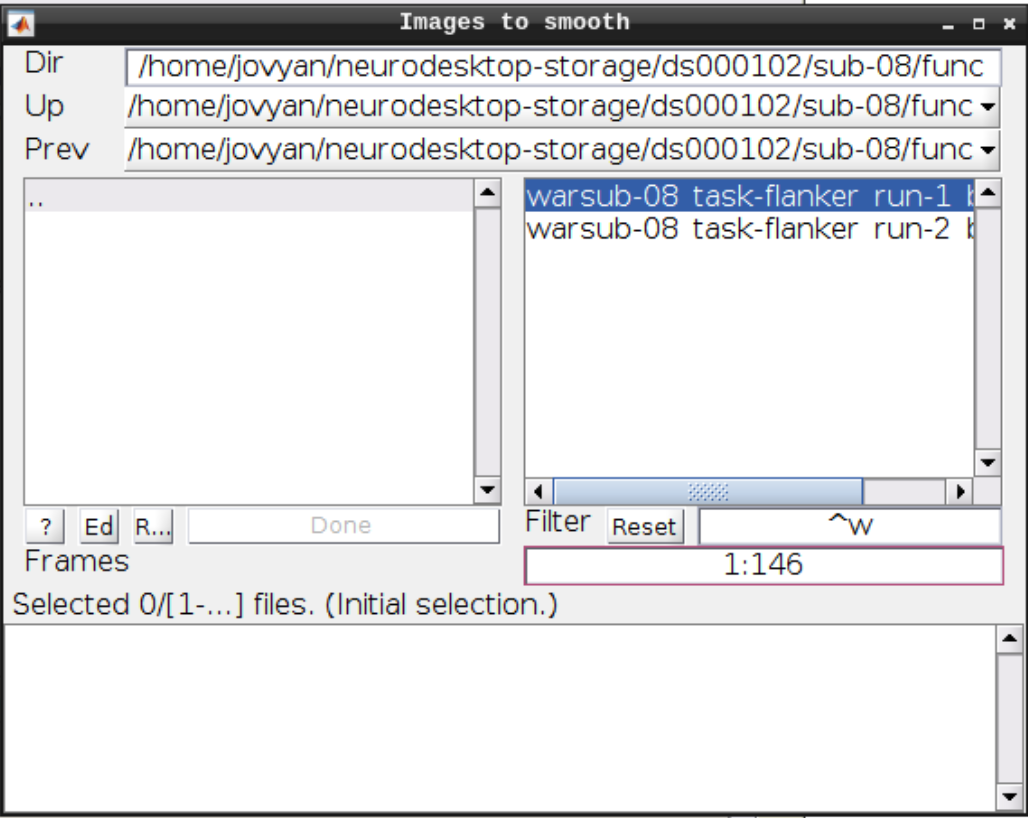 Then click Play.
You can check the smoothing by using CheckReg again:
Then click Play.
You can check the smoothing by using CheckReg again:
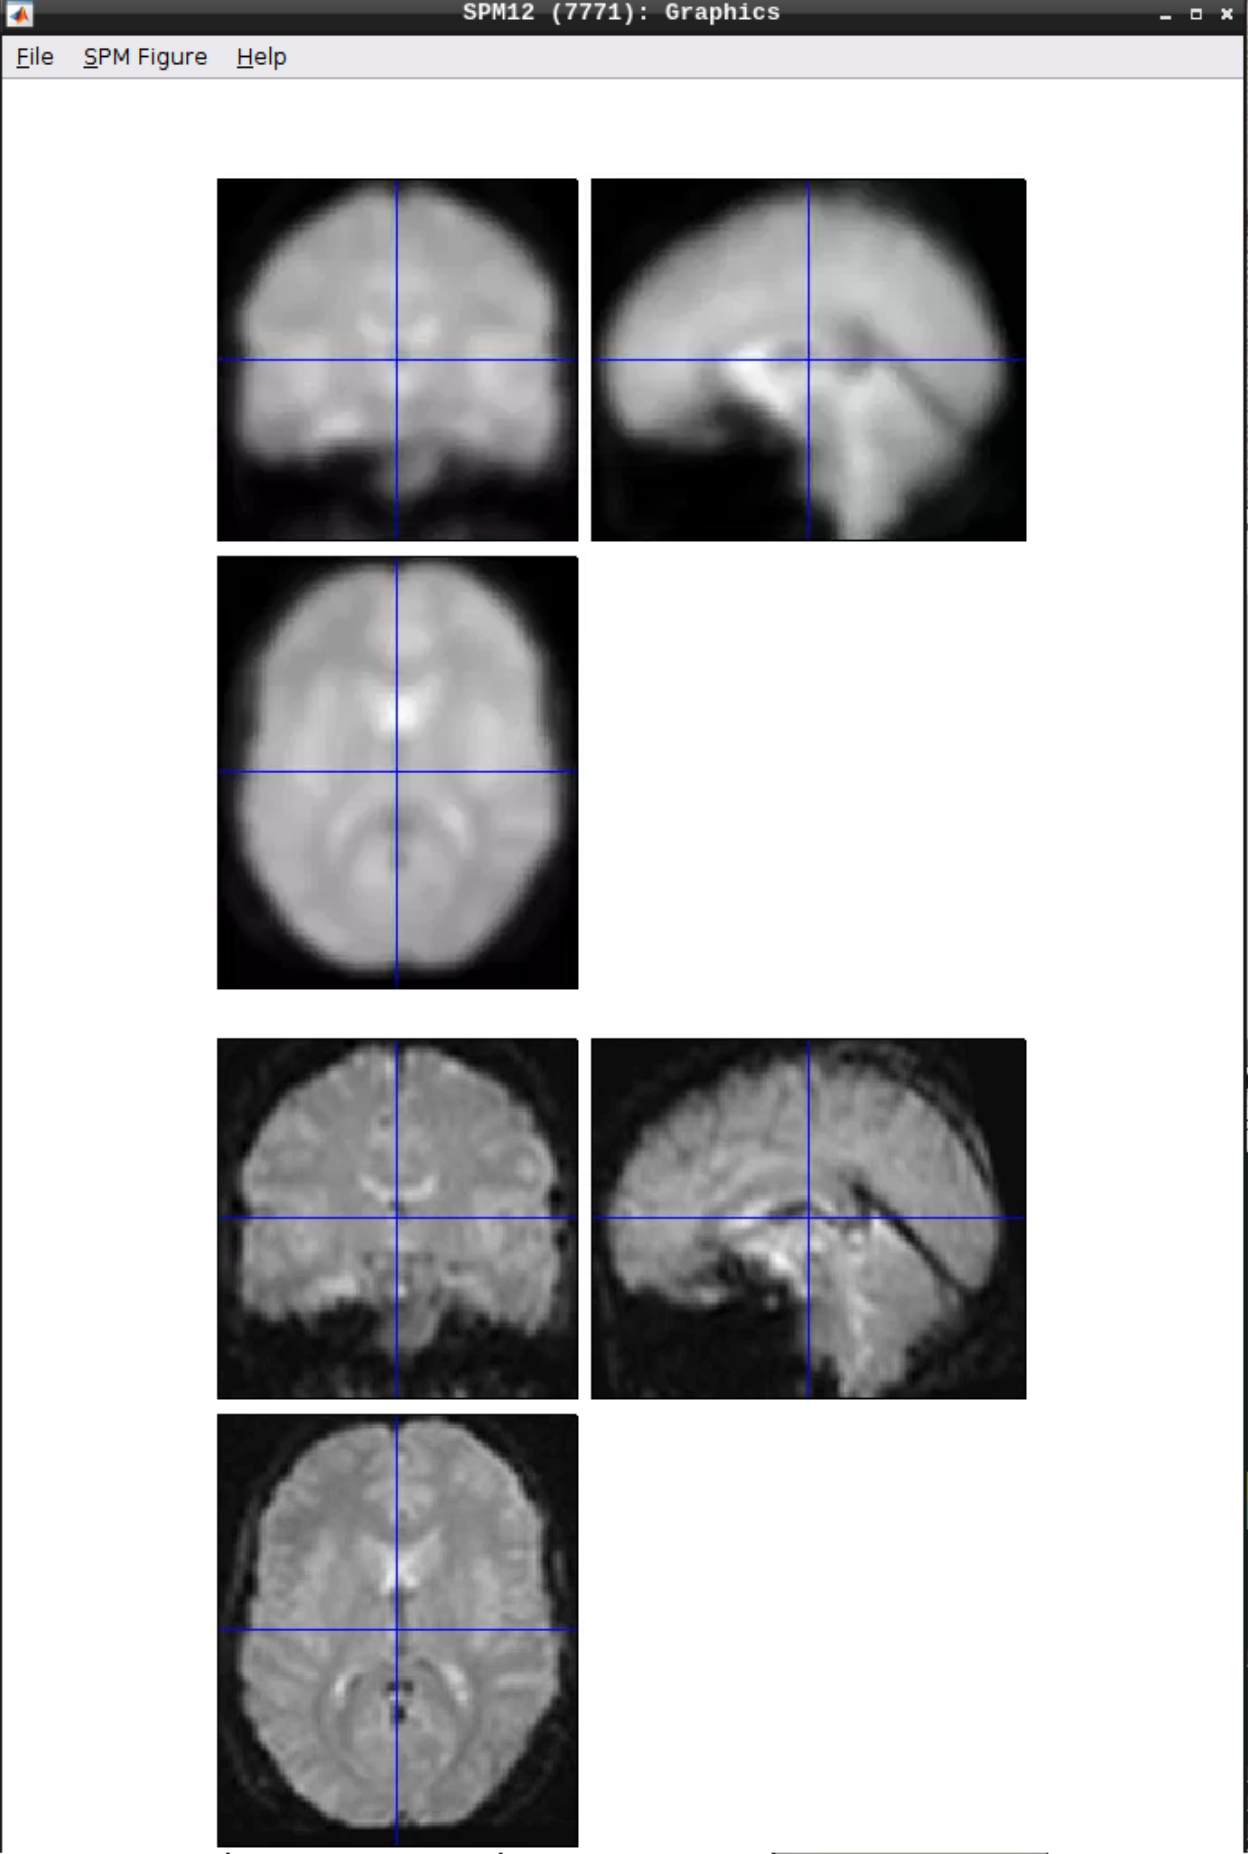 ## Analyzing the data
Click on `Specify 1st-level` - then set the following options:
- Directory: Select the sub-08 top level directory
- Units for design: Seconds
- Interscan interval: 2
- Data & Design: Click twice on New Subject/Session
- Select the smoothed, warped data from run 1 and run 2 for the two sessions respectively
- Create two Conditions per run and set the following:
- For Run 1:
- Name: Inc
- Onsets (you can copy from here and paste with CTRL-V): 0 10 20 52 88 130 144 174 236 248 260 274
- Durations: 2 (SPM will assume that it's the same for each event)
- Name: Con
- Onsets: 32 42 64 76 102 116 154 164 184 196 208 222
- Durations: 2
- For Run 2:
- Name: Inc
- Onsets: 0 10 52 64 88 150 164 174 184 196 232 260
- Durations: 2
- Name: Con
- Onsets: 20 30 40 76 102 116 130 140 208 220 246 274
- Durations: 2
When done, click the green Play button.
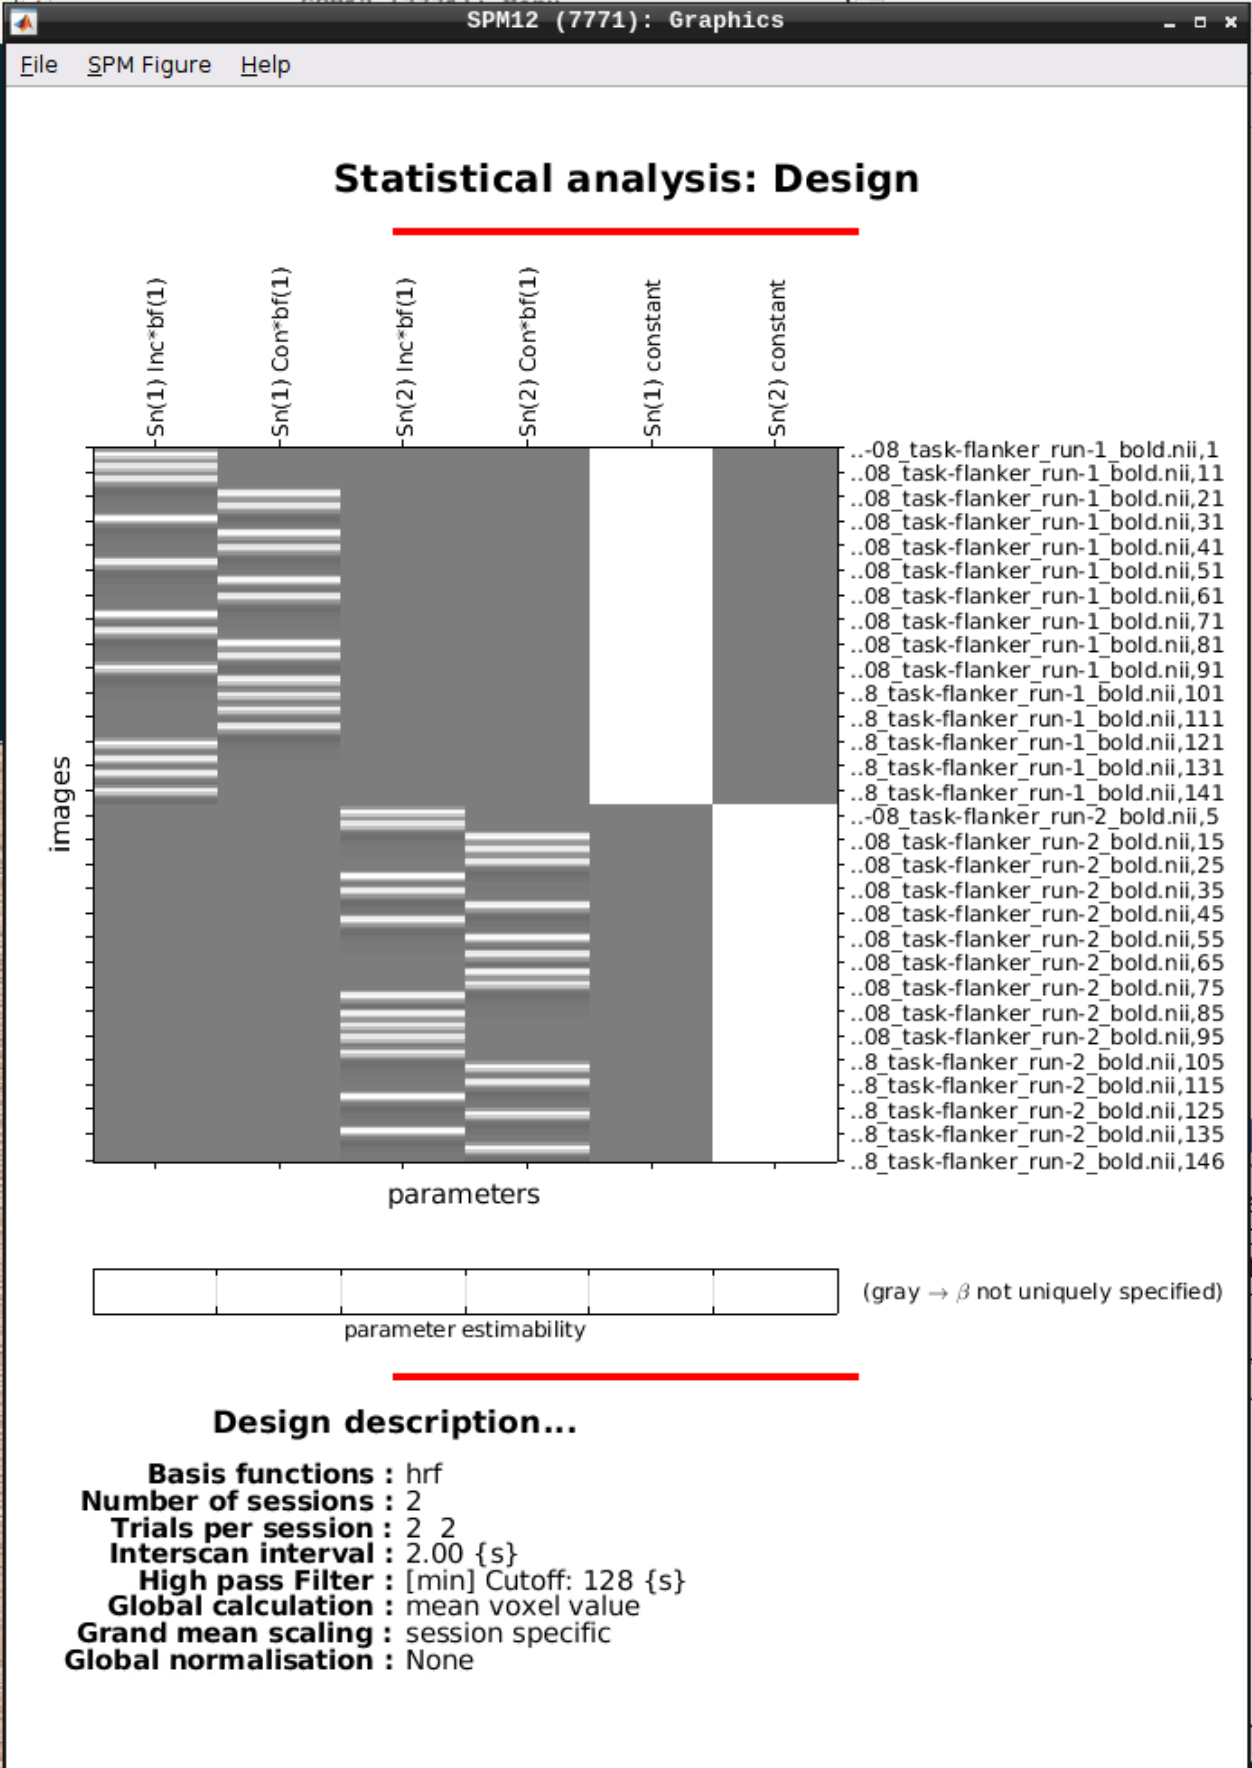
We can Review the design by clicking on `Review` in the SPM menu and selecting the SPM.mat file in the model directory we specified earlier and it should look like this:
## Analyzing the data
Click on `Specify 1st-level` - then set the following options:
- Directory: Select the sub-08 top level directory
- Units for design: Seconds
- Interscan interval: 2
- Data & Design: Click twice on New Subject/Session
- Select the smoothed, warped data from run 1 and run 2 for the two sessions respectively
- Create two Conditions per run and set the following:
- For Run 1:
- Name: Inc
- Onsets (you can copy from here and paste with CTRL-V): 0 10 20 52 88 130 144 174 236 248 260 274
- Durations: 2 (SPM will assume that it's the same for each event)
- Name: Con
- Onsets: 32 42 64 76 102 116 154 164 184 196 208 222
- Durations: 2
- For Run 2:
- Name: Inc
- Onsets: 0 10 52 64 88 150 164 174 184 196 232 260
- Durations: 2
- Name: Con
- Onsets: 20 30 40 76 102 116 130 140 208 220 246 274
- Durations: 2
When done, click the green Play button.
We can Review the design by clicking on `Review` in the SPM menu and selecting the SPM.mat file in the model directory we specified earlier and it should look like this:
 ### Estimating the model
Click on `Estimate` in the SPM menu and select the SPM.mat file, then hit the green Play button.
### Inference
Now open the `Results` section and select the SPM.mat file again. Then we can test our hypotheses:
Define a new contrast as:
- Name: Incongruent-Congruent
- Contrast weights vector: 0.5 -0.5 0.5 -0.5
### Estimating the model
Click on `Estimate` in the SPM menu and select the SPM.mat file, then hit the green Play button.
### Inference
Now open the `Results` section and select the SPM.mat file again. Then we can test our hypotheses:
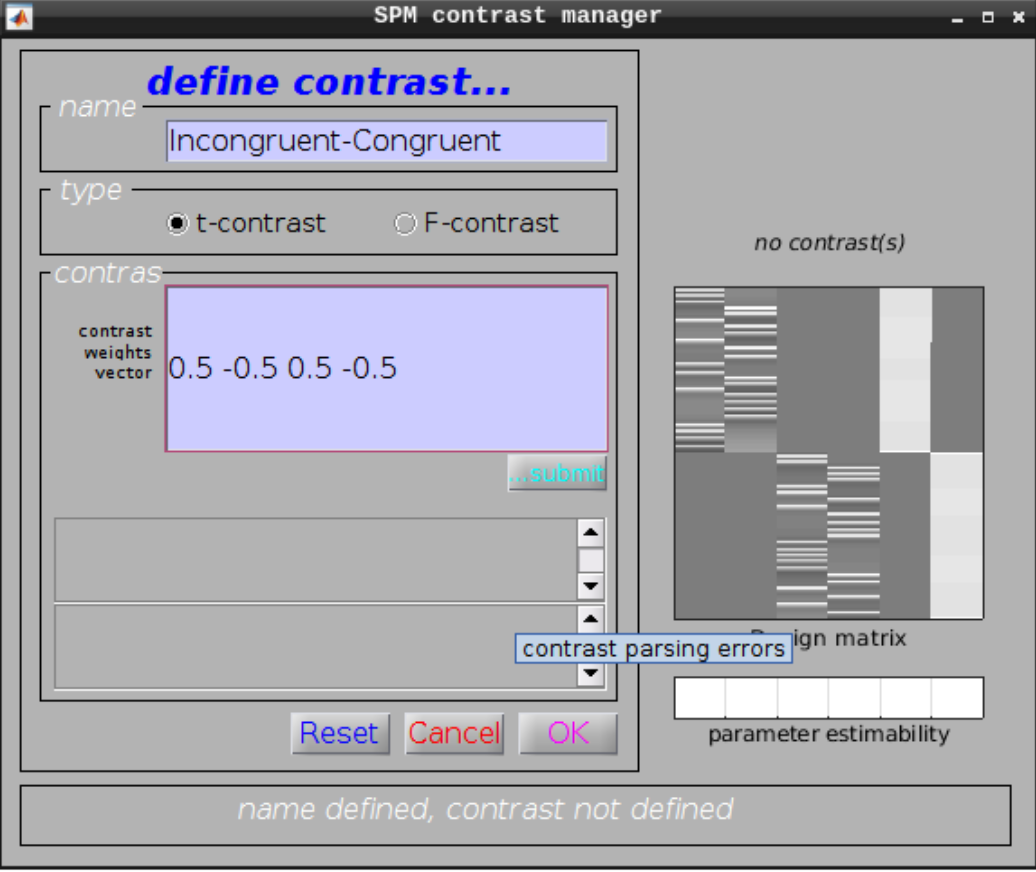
Define a new contrast as:
- Name: Incongruent-Congruent
- Contrast weights vector: 0.5 -0.5 0.5 -0.5
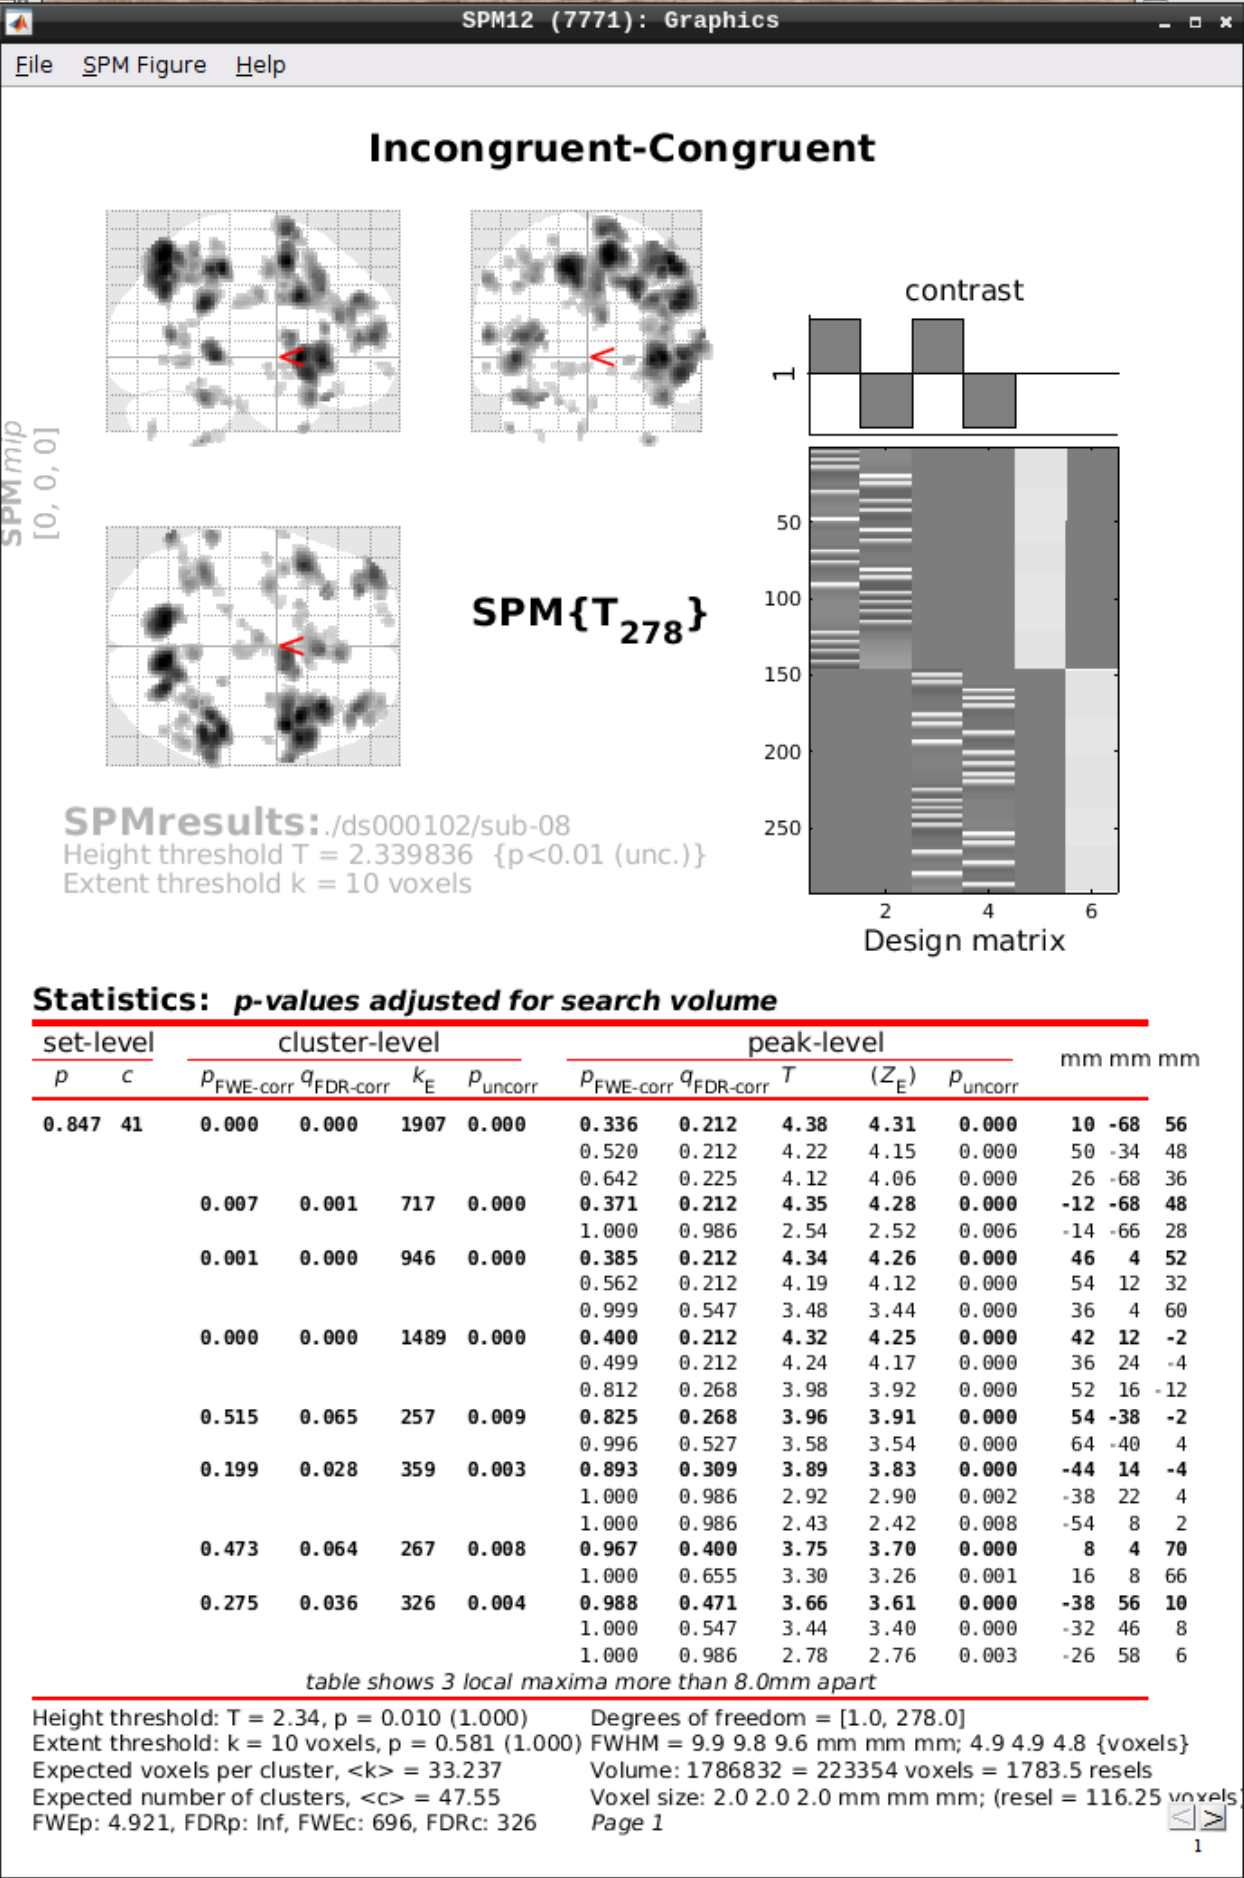
 Then we can view the results. Set the following options:
- masking: none”
- p value adjustment to control: Click on “none”, and set the uncorrected p-value to 0.01.
- extent threshold {voxels}: 10
Then we can view the results. Set the following options:
- masking: none”
- p value adjustment to control: Click on “none”, and set the uncorrected p-value to 0.01.
- extent threshold {voxels}: 10