

XNAT at the Lucas Centre Stanford
The Stanford Lucas Centre XNAT is available at xnat-lucas.neurodesk.org. This guide explains how to transfer scanner data and additional files to XNAT, then start Neurodesk for interactive processing.
Before you transfer data
Section titled “Before you transfer data”You will need:
- your XNAT username (which is your Stanford user account),
- the project name you want to create, and
- a subject identifier that is appropriate for your study.
Always use a de-identified subject identifier. The XNAT deployment is not approved for PHI data.
Transfer DICOM images from a scanner
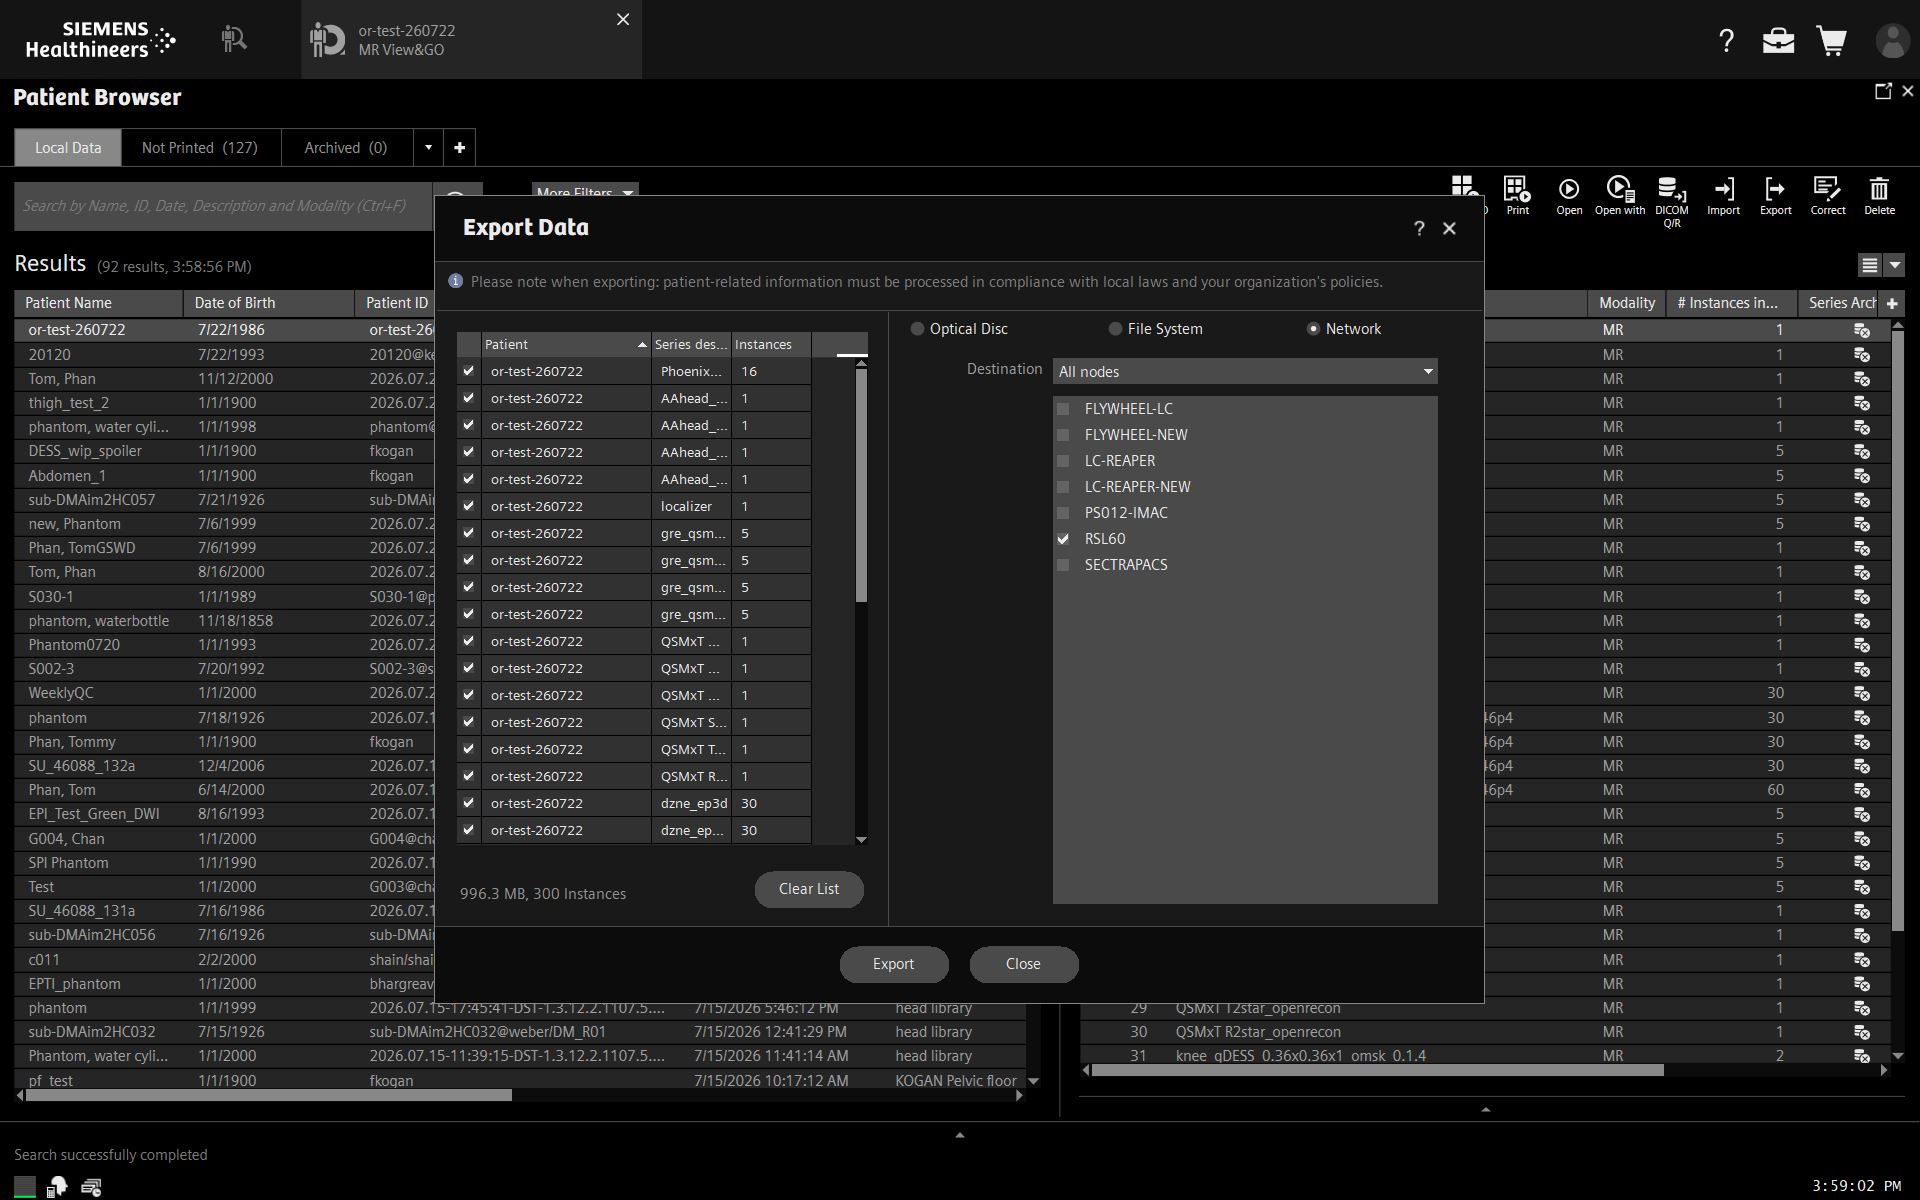
Section titled “Transfer DICOM images from a scanner”DICOM images are sent from each scanner to RSL60 using the scanner’s network transfer function.
Before starting the transfer, set the DICOM Patient ID to this exact format:
subject@username/projectFor example:
sub-001@jsmith/my-projectThe three parts control where the images are stored and who has access to them.
| Part | Purpose |
|---|---|
subject | The subject identifier created in XNAT |
username | The XNAT user assigned as the project owner |
project | The XNAT project created for the upload |
Once the Patient ID is set:
- Select RSL60 as the network transfer destination on the scanner.
- Send the DICOM study.
- Open the Lucas Centre XNAT and check that the project, subject, and imaging session appear as expected.
The transfer creates the XNAT project, assigns username as its owner, and uploads the images under subject.
Transfer additional files
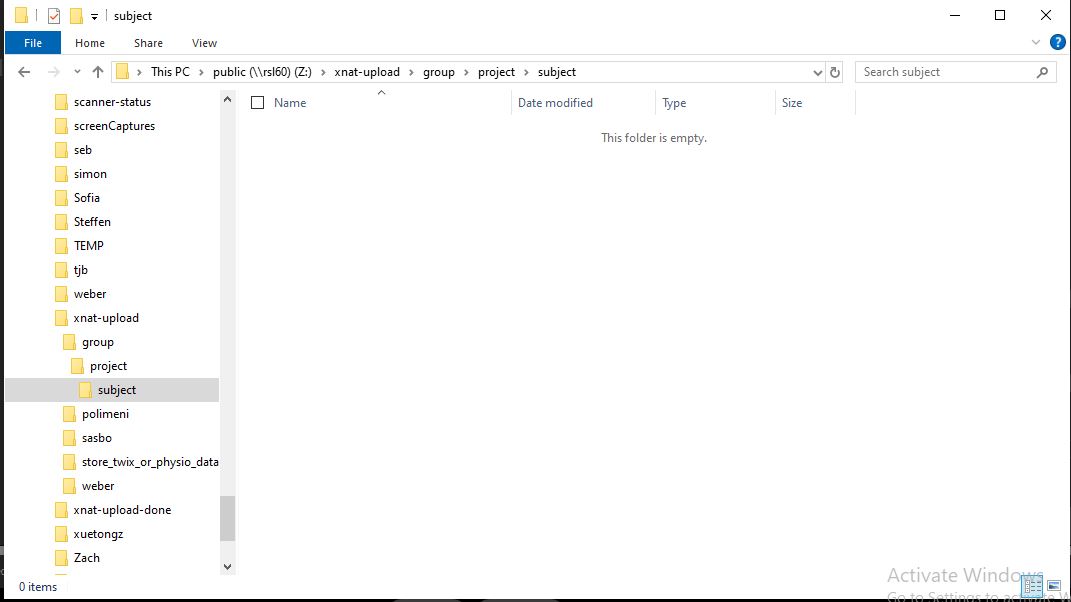
Section titled “Transfer additional files”Files that are not part of the DICOM transfer, such as physiological recordings or raw Siemens TWIX meas.dat files, must be uploaded through the public Samba share on RSL60.
In the share, create the following directory structure under xnat-upload:
xnat-upload/└── owner/ └── project/ └── subject/Replace:
ownerwith the project owner’s XNAT username,projectwith the XNAT project name, andsubjectwith the XNAT subject identifier.
Copy the additional files into the subject directory. After the files have been processed, they are moved from xnat-upload/ to xnat-upload-done/. This move is expected and indicates that the upload service has picked them up.
Keep your original files until you have confirmed that the upload completed successfully in XNAT. The files will be deleted automatically from RSL60 after 28 days.
Download data from XNAT or transfer it to Oak
Section titled “Download data from XNAT or transfer it to Oak”There are several tools for downloading data through the XNAT REST API. The XNAT Web Services Client Tools documentation describes options including PyXNAT, XNATpy, the XNAT Data Client (XDC), and YAXIL.
These tools can also be run on a Stanford system that has Oak mounted, such as Sherlock. Set an approved Oak project directory as the download destination to transfer data directly from XNAT to Oak instead of downloading it through your local computer.
Here is an example of how to transfer XNAT data to Oak on Sherlock:
curl -LsSf https://astral.sh/uv/install.sh | sh$HOME/.local/bin/uv tool install xnat # puts the `xnat` CLI on PATHOn the XNAT web UI, log in, then go to the username menu (top right) → Manage Alias Tokens → Create Alias Token → View. Fill in the alias as the login below, and the secret as the password:
cat > $HOME/.netrc <<'EOF'machine xnat-lucas.neurodesk.orglogin 3f2a...password 9c81...EOFchmod 600 $HOME/.netrcSet the XNAT host:
export XNAT_HOST=https://xnat-lucas.neurodesk.orgList projects:
xnat list projectsList subjects:
xnat list subjects --project REPLACE_THIS_WITH_YOUR_PROJECT_NAMEDownload a whole project:
xnat download project REPLACE_THIS_WITH_YOUR_PROJECT_NAME $OAK/REPLACE_THIS_WITH_YOUR_TARGET_DIRECTORYDownload one subject:
xnat download batch --project REPLACE_THIS_WITH_YOUR_PROJECT_NAME --subject SUBJ01 --level SUBJECT $OAK/REPLACE_THIS_WITH_YOUR_TARGET_DIRECTORYThe target directory must already exist for batch. --subject is an fnmatch pattern (--subject 'sub-0*' grabs a range), but a typo silently matches nothing instead of erroring. Watch for the Found match: ... lines in the output.
Run processing with XNAT Container Service
Section titled “Run processing with XNAT Container Service”XNAT Container Service can run predefined processing pipelines directly from XNAT without starting an interactive Neurodesk session. Select the processing scope that matches the input required by the pipeline:
| Scope | Start from | Use for |
|---|---|---|
| Session level | The session’s Actions menu | Pipelines that process the whole imaging session or combine multiple scans |
| Series level | The Run menu for an individual scan | Pipelines that process one selected scan or series |
The available containers depend on the data and the pipelines currently enabled by the Lucas Centre administrators.
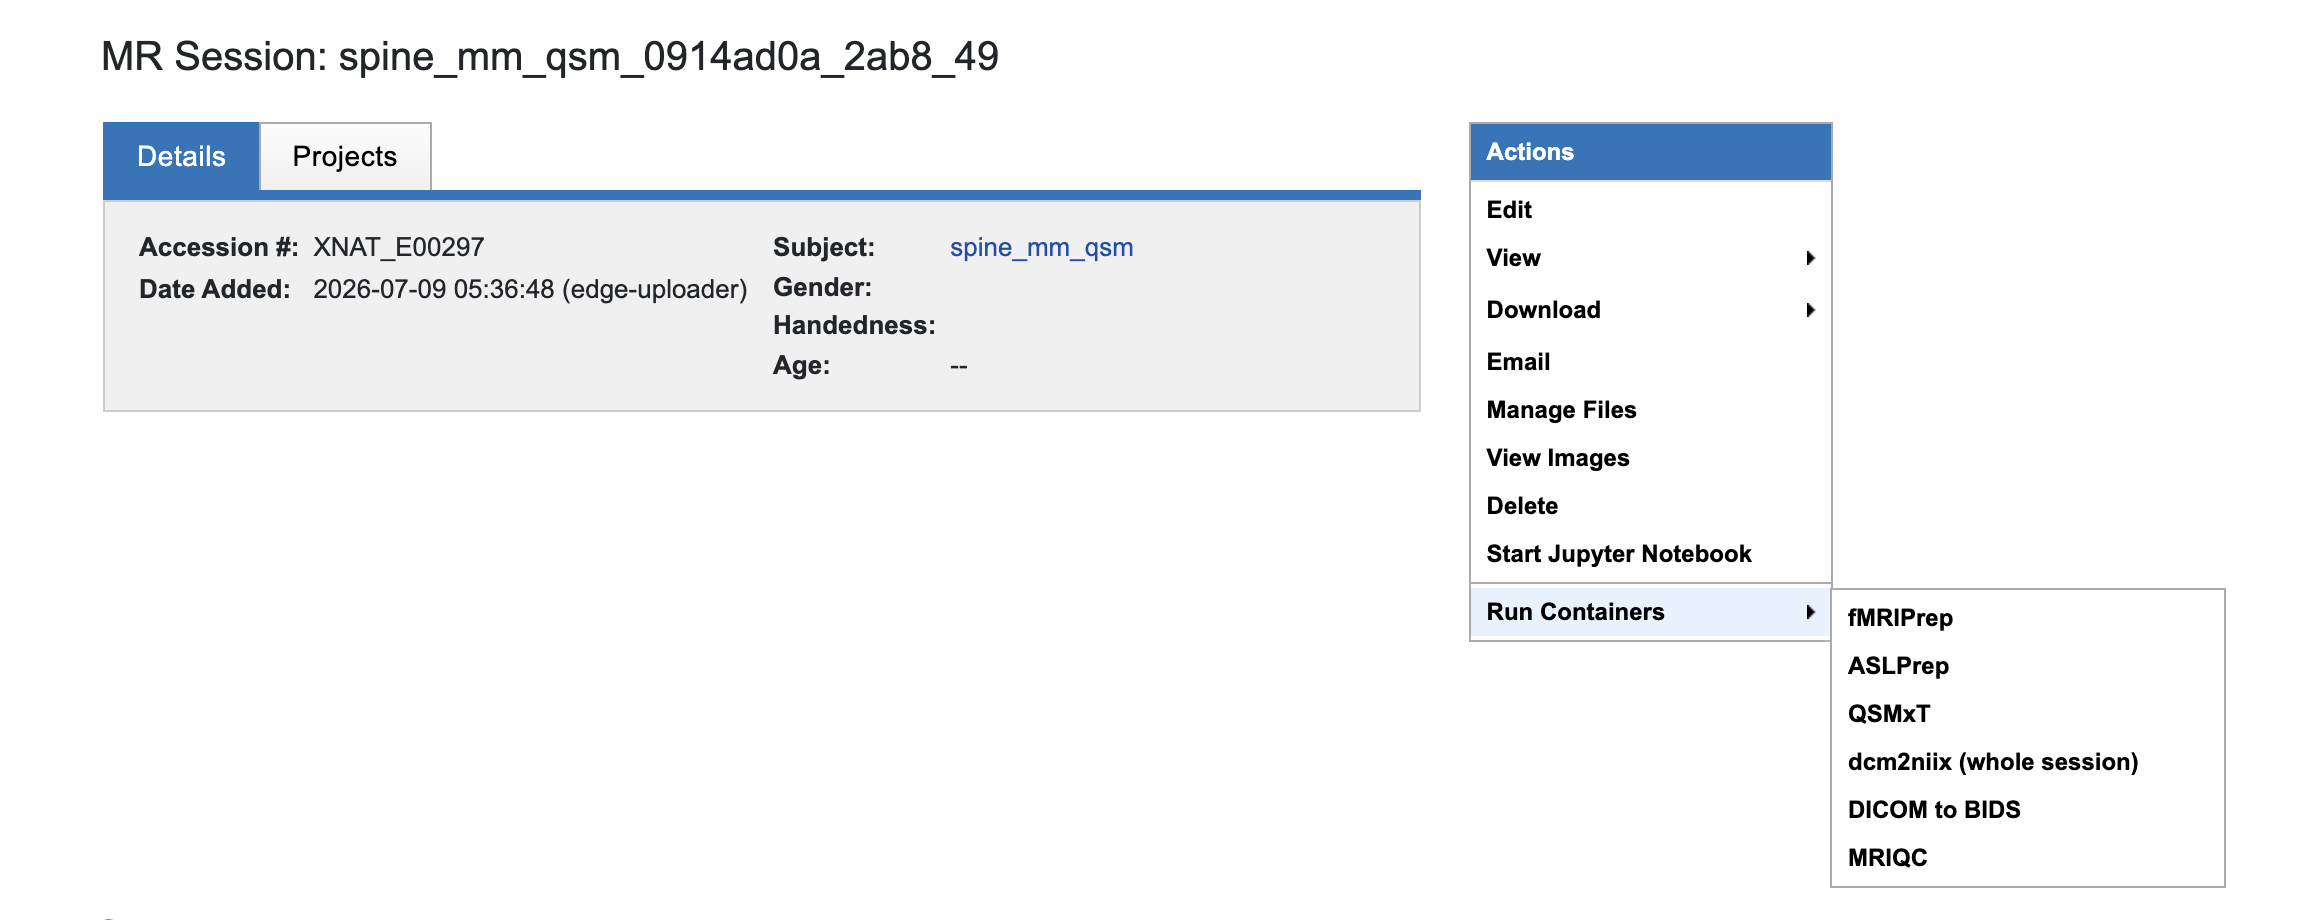
Run a container on a session
Section titled “Run a container on a session”- Open the subject’s imaging session in XNAT.
- In the Actions menu, select Run Containers.
- Select the required pipeline. Session-level options may include fMRIPrep, ASLPrep, QSMxT, whole-session dcm2niix, DICOM to BIDS, and MRIQC. More containers can be added when needed.
- Review the pipeline settings, provide any required inputs, and submit the job.
Run a container on a series
Section titled “Run a container on a series”- Open the subject’s imaging session and scroll to the Scans table.
- Find the scan or series you want to process.
- Open its menu in the Run column on the right.
- Select the required pipeline. Series-level options may include Spinal Cord Toolbox, MuscleMap, and dcm2niix. More containers can be added when needed.
- Review the pipeline settings, provide any required inputs, and submit the job.

Start Neurodesk for interactive processing
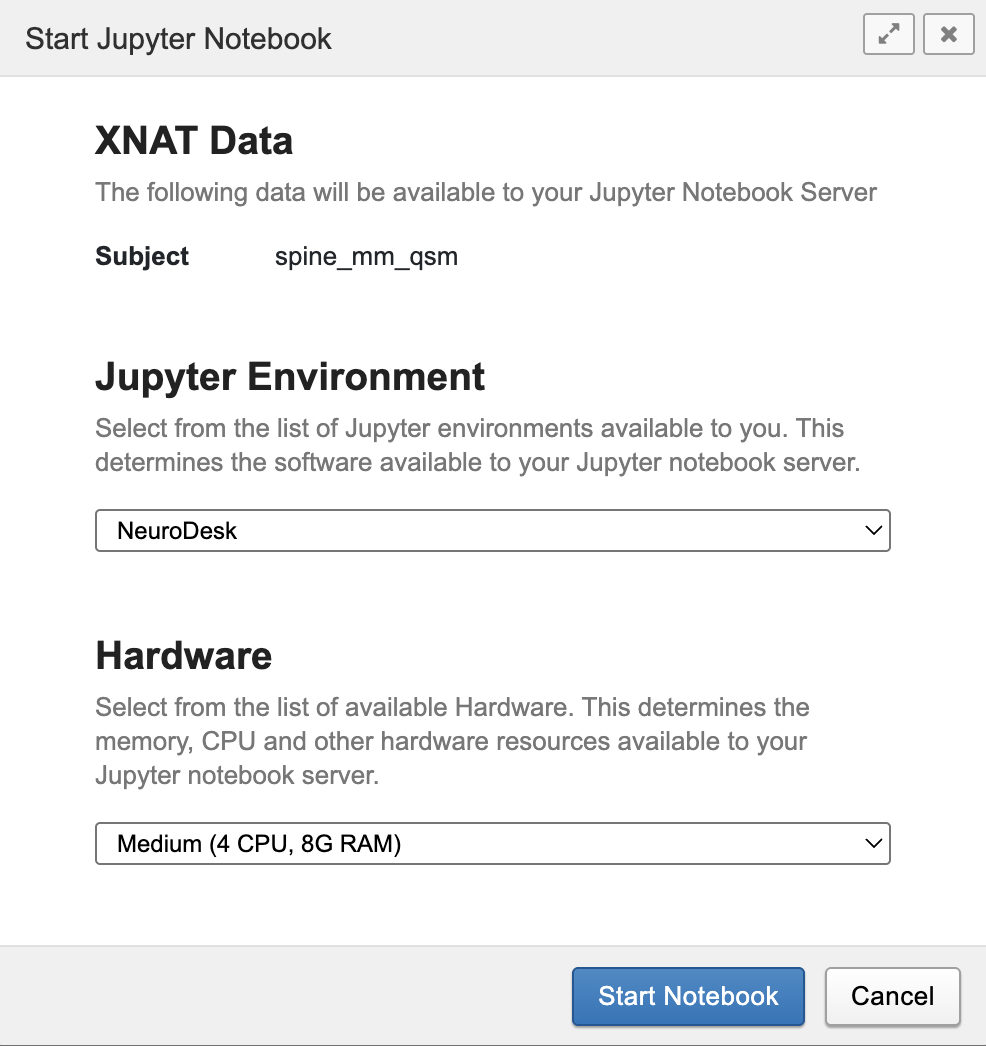
Section titled “Start Neurodesk for interactive processing”Neurodesk can be launched from an XNAT project, with access limited to the project data permitted by your XNAT account.
- Go to xnat-lucas.neurodesk.org and sign in.
- Open the project you want to process.
- In the project actions, select Launch JupyterHub. Select the required resources.
- Wait for your Neurodesk environment to start. The browser will redirect to the interactive JupyterLab environment.
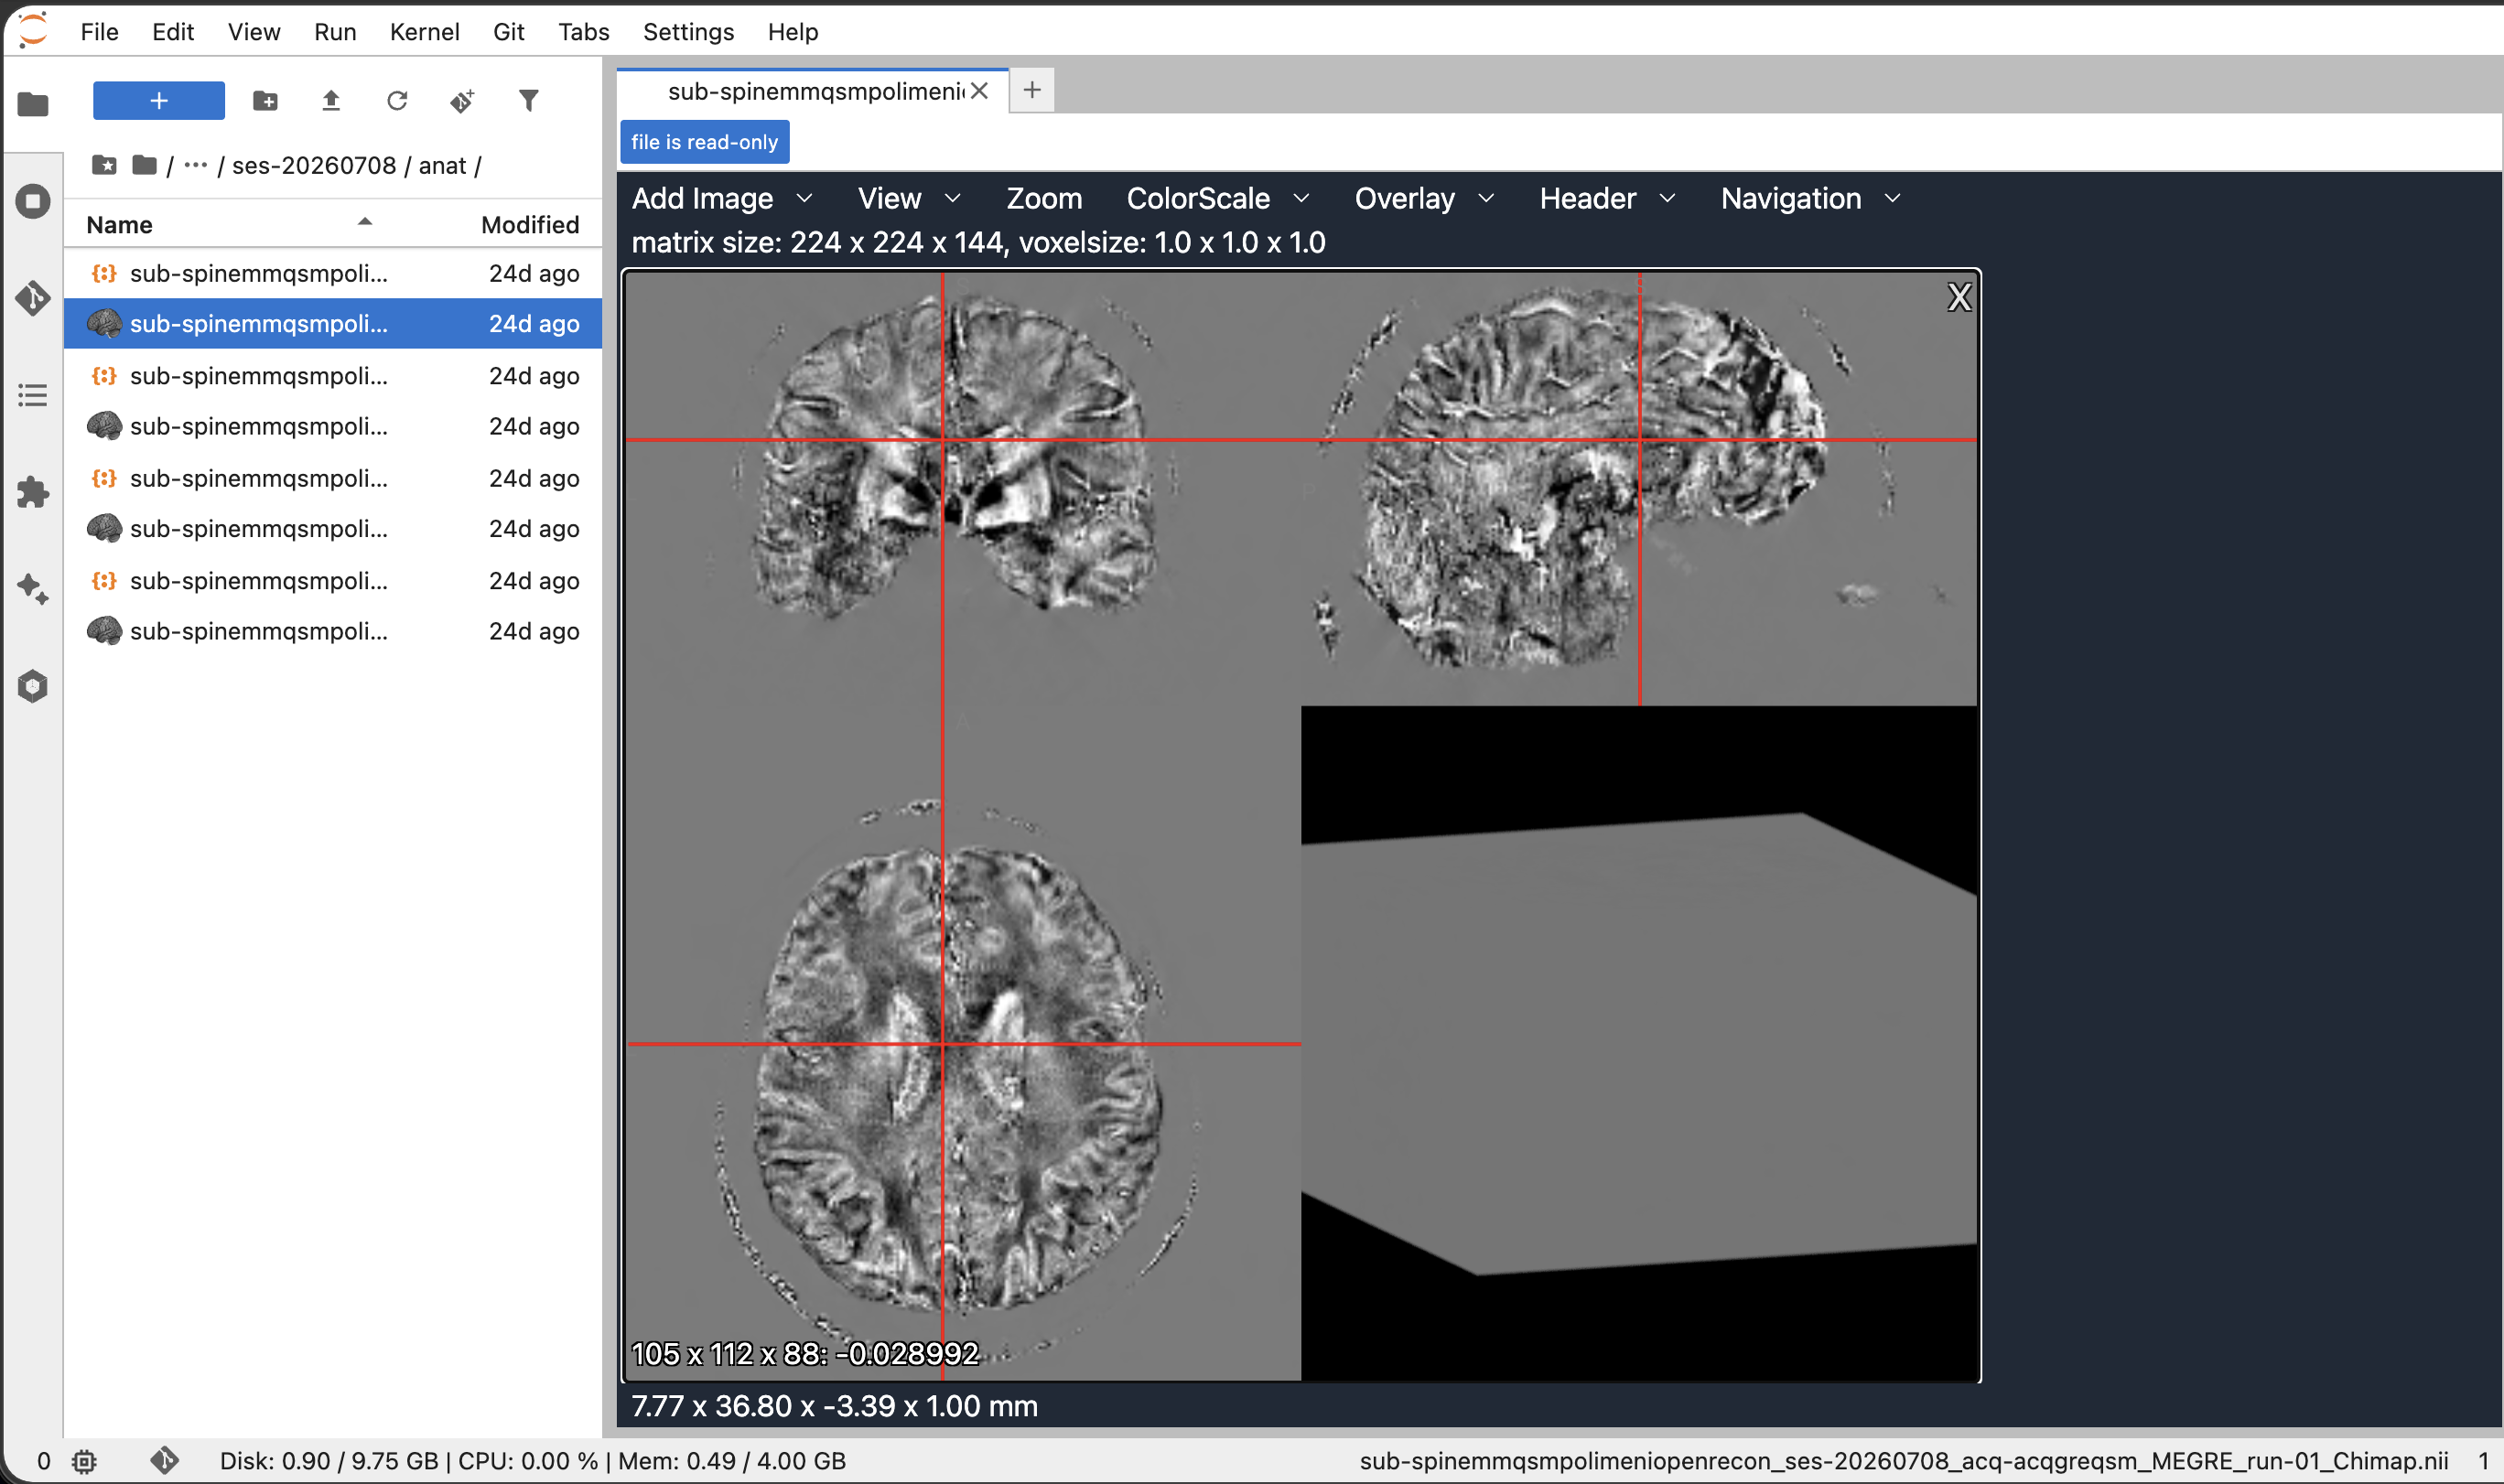
- Use the file browser or a terminal to locate the mounted XNAT project data, then start the required Neurodesk application or analysis workflow.
- Save scripts and working files in your personal workspace. XNAT project data is mounted according to your project permissions and may be read-only.
Upload processed data back to XNAT
Section titled “Upload processed data back to XNAT”You can send files produced in your Neurodesk session back to XNAT:
-
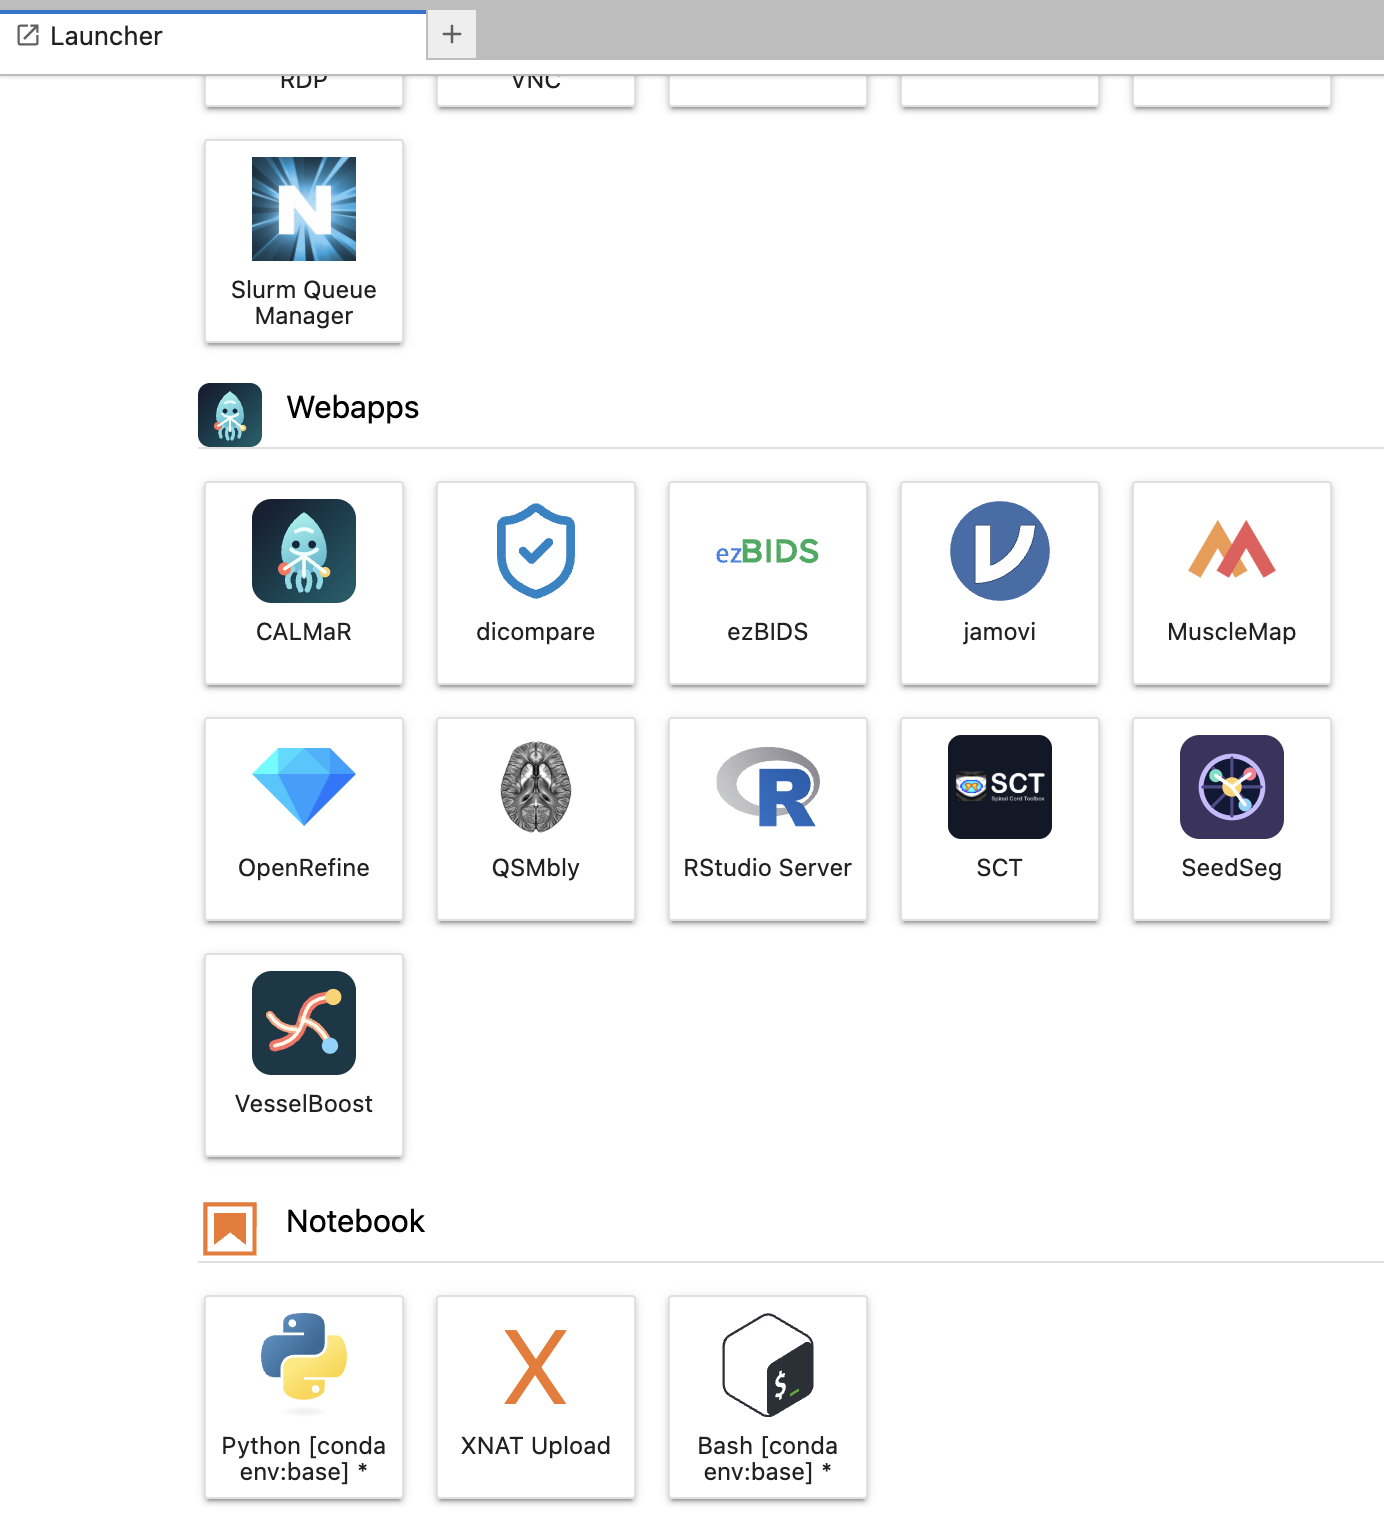
Open the JupyterLab Launcher and select XNAT Upload.
-
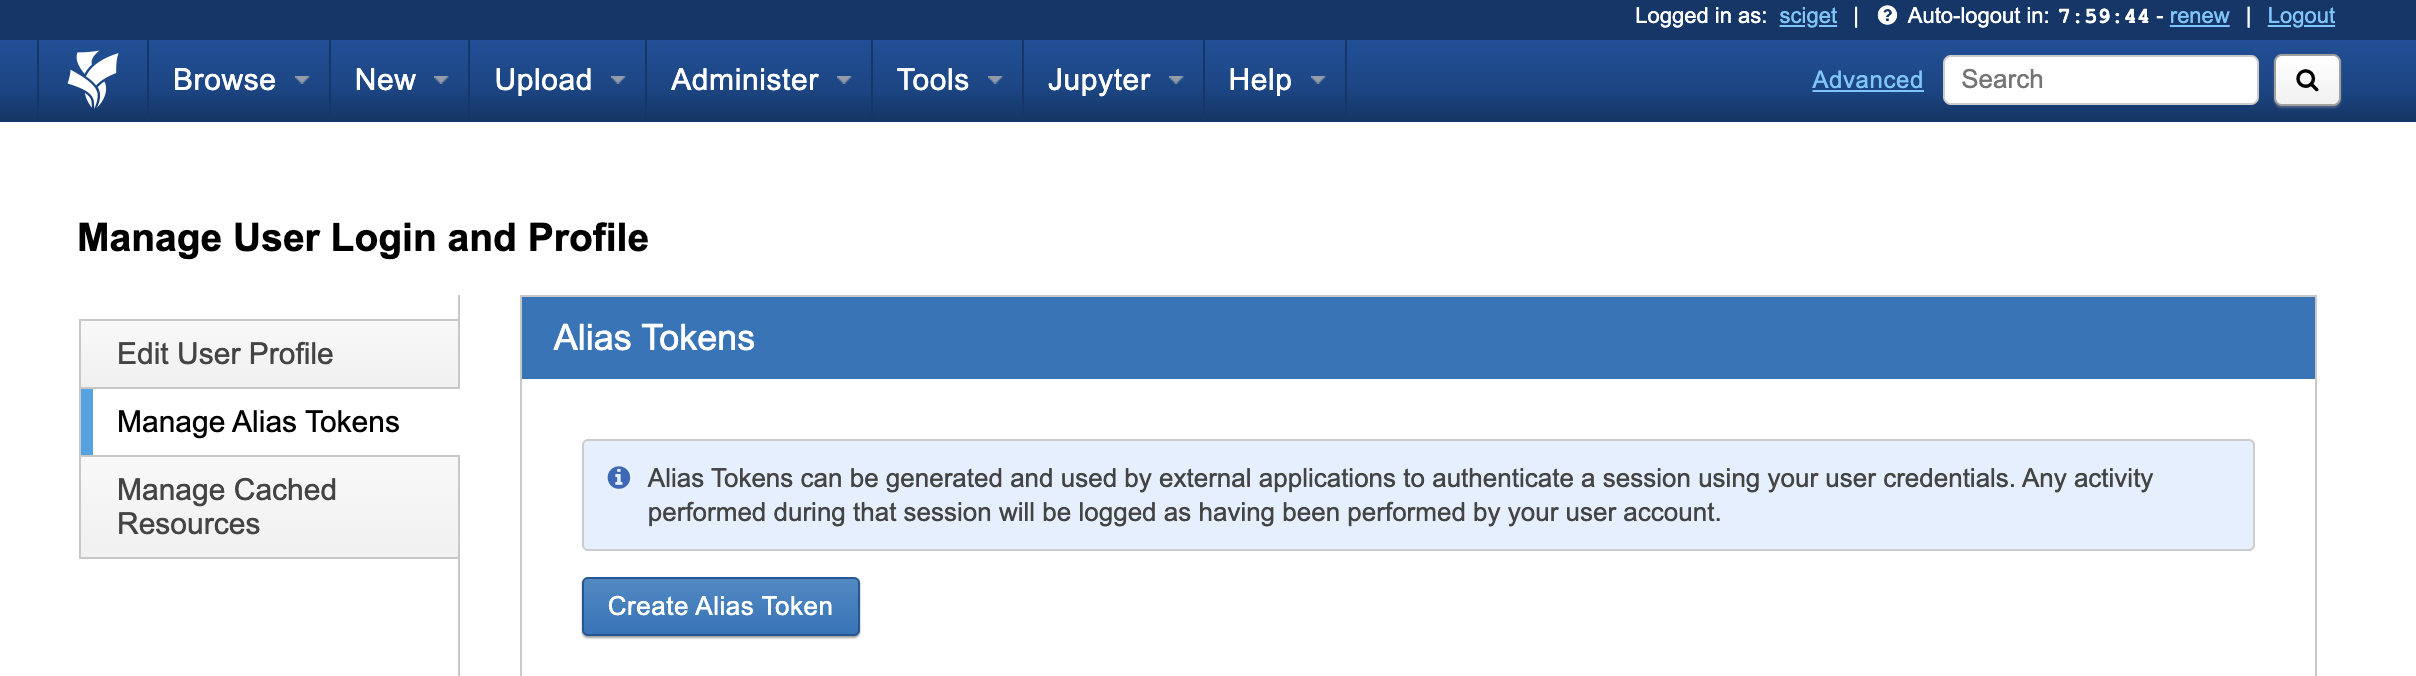
Before connecting for the first time, create an alias token in XNAT. Open your XNAT user account, select Manage Alias Tokens, and click Create Alias Token.
-
Click View beside the new token to display its token name and secret.
-
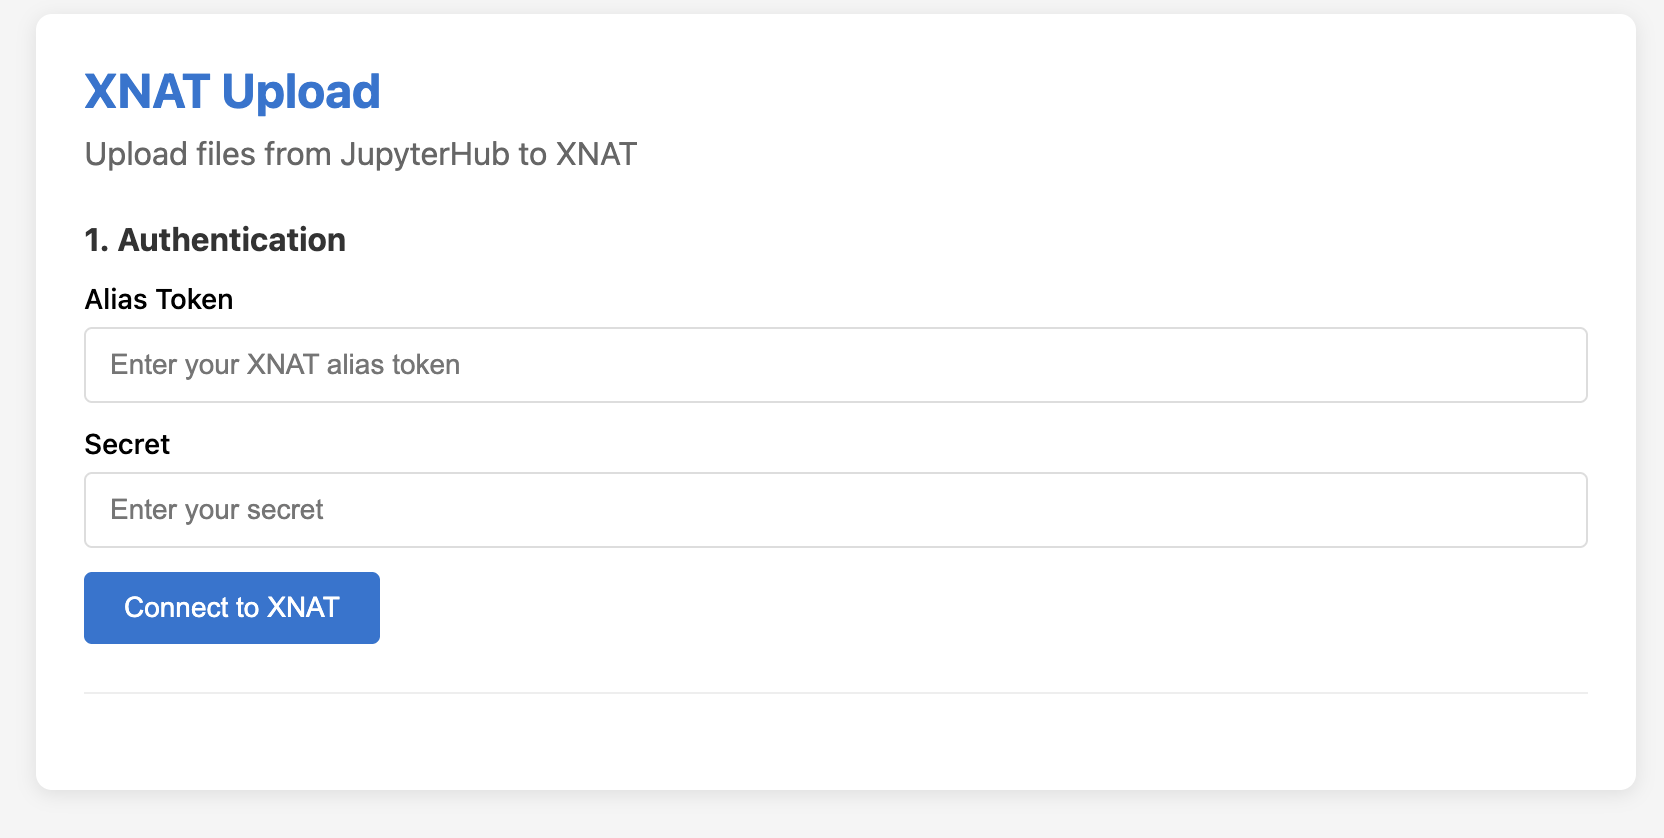
Return to XNAT Upload, enter the token name in Alias Token, enter its secret in Secret, and click Connect to XNAT.
-
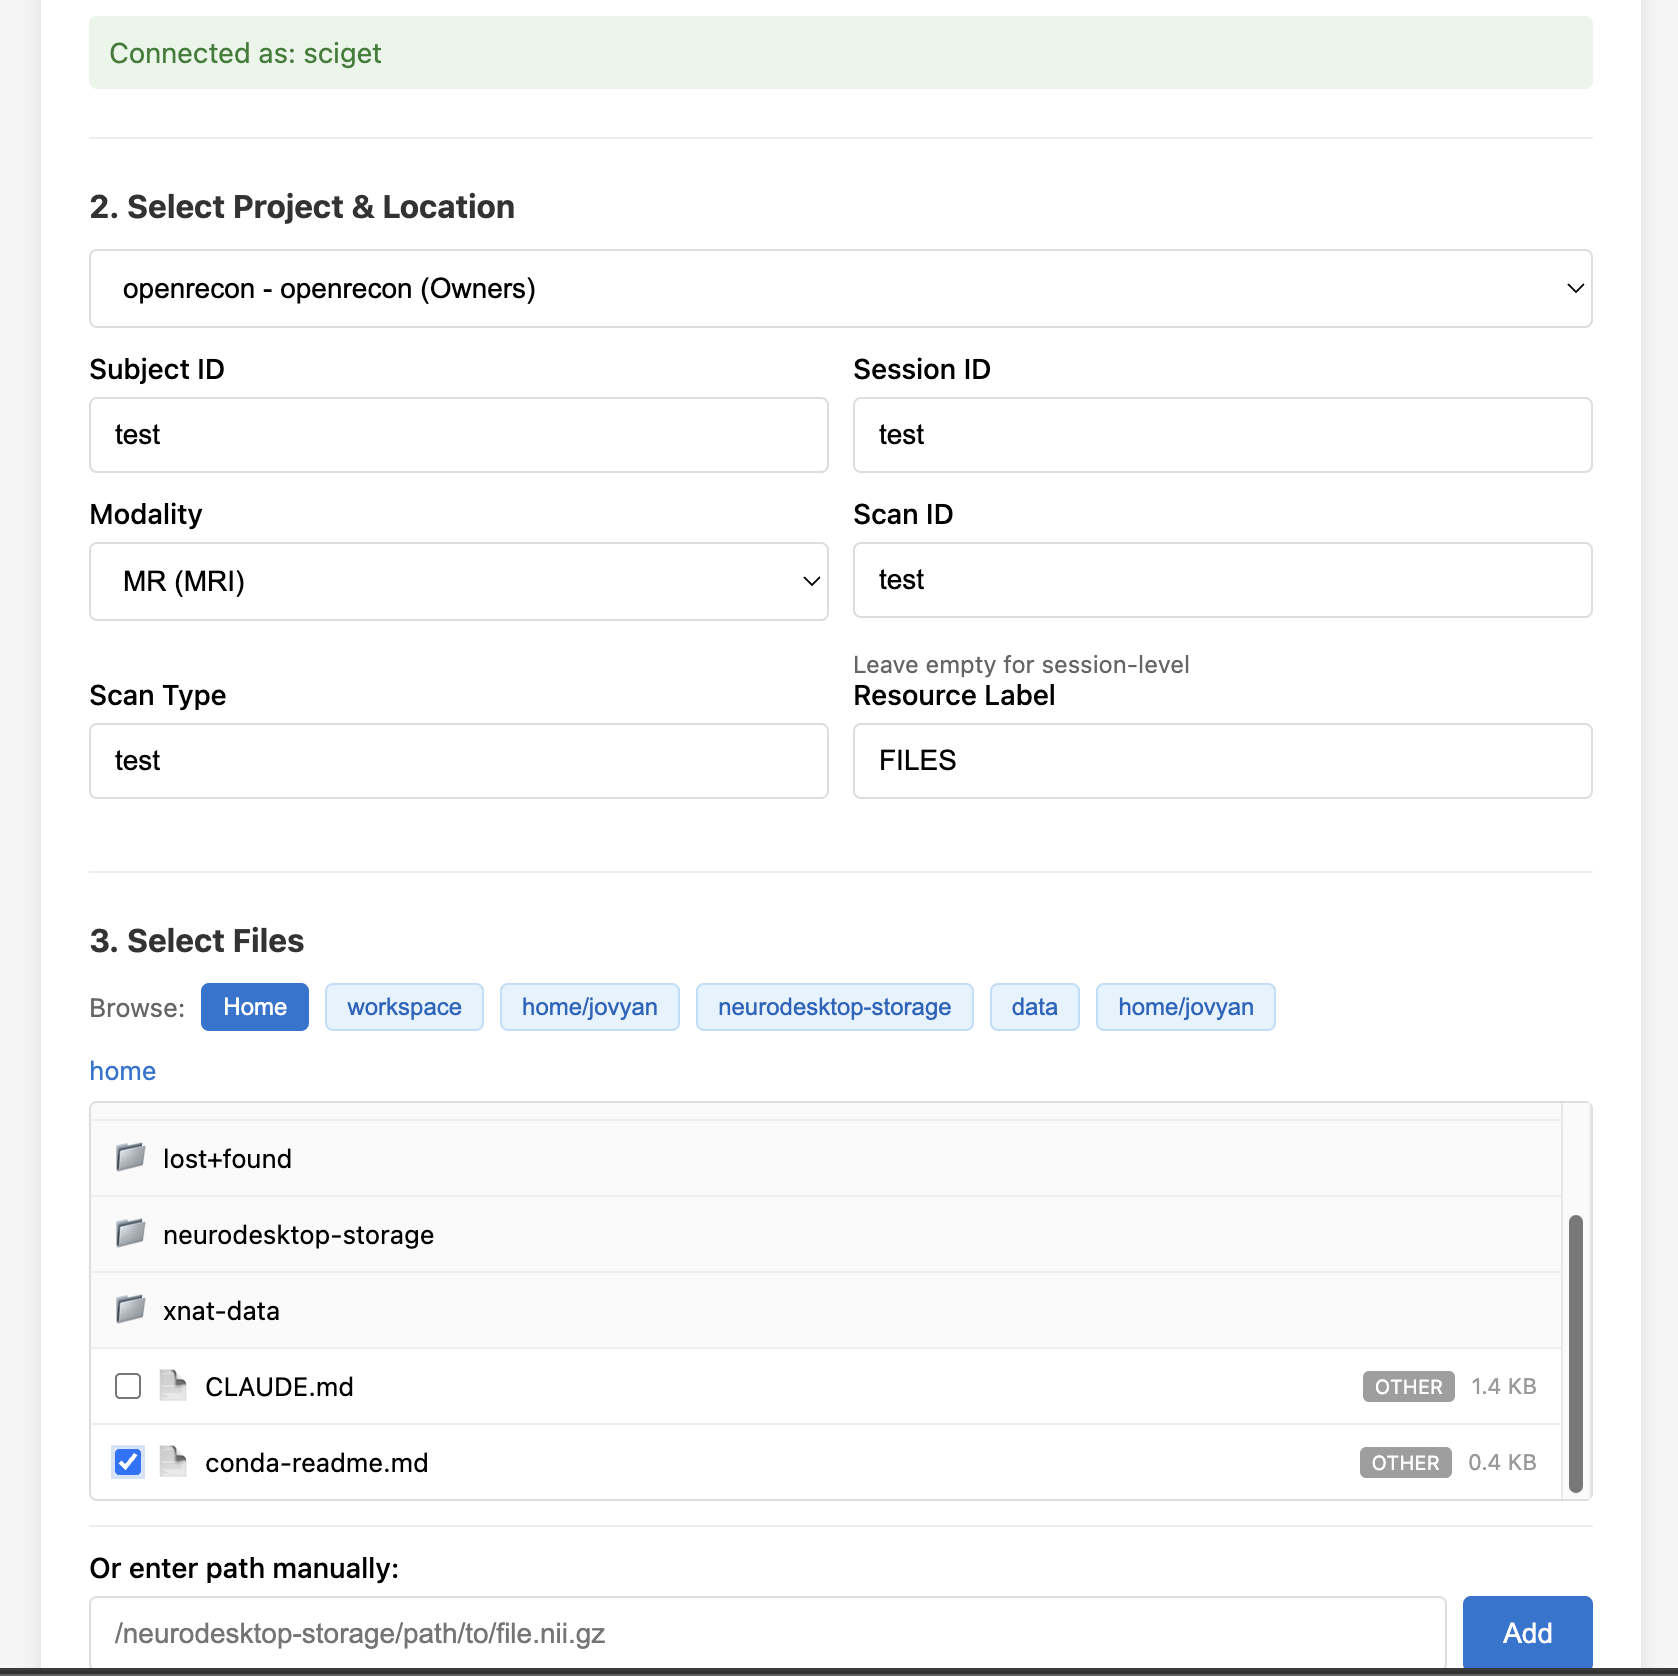
Select the destination project and enter the subject and session IDs. Configure the modality, scan ID, scan type, and resource label as required. Leave Scan ID empty when uploading at session level.
-
Select the processed files in the file browser, or add their paths manually.
-
Click Upload. The selected files will be stored in the configured XNAT project, subject, session, and optional scan location.
When you have finished, save your work and close the session. Your personal workspace is persistent, while inactive compute sessions may be stopped automatically.